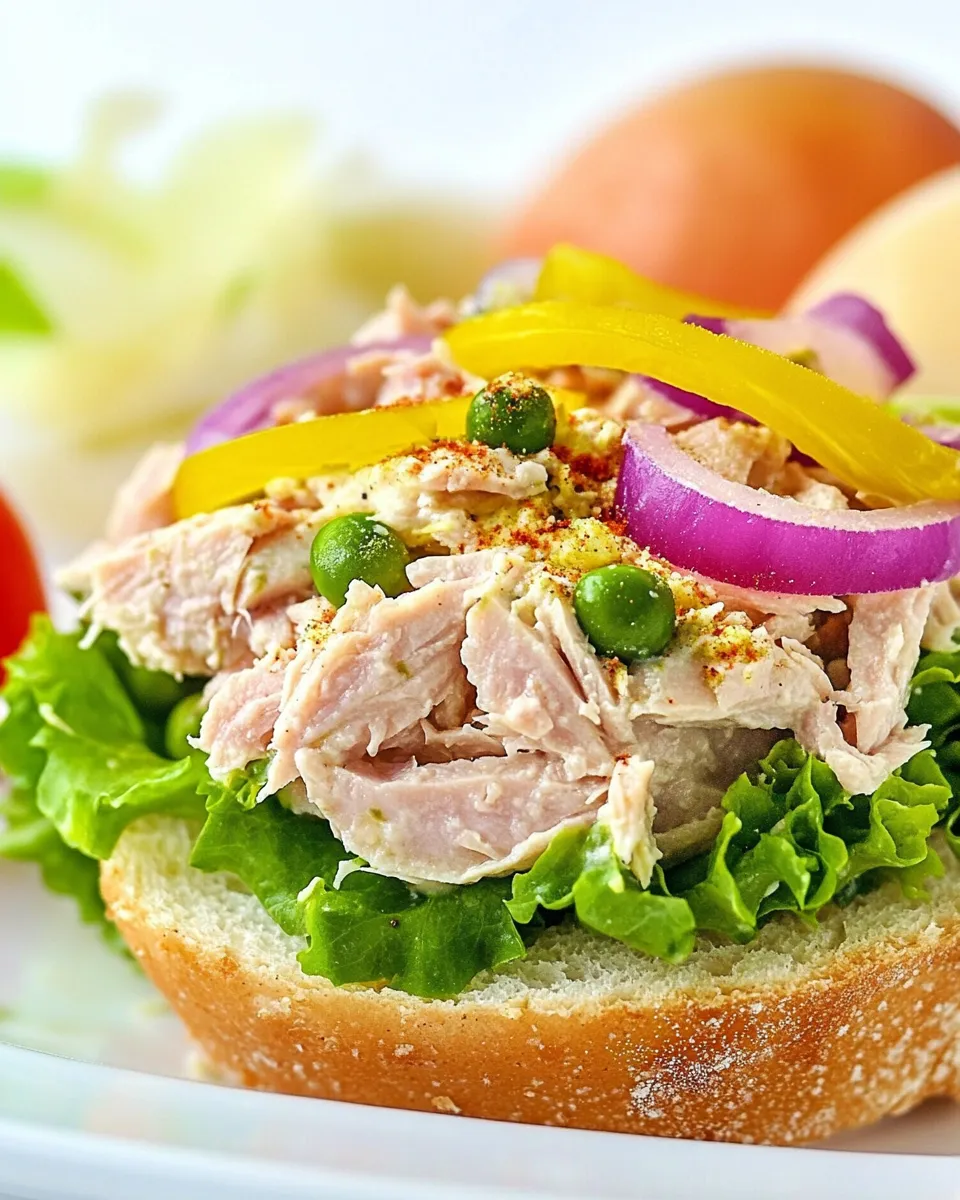
Subway Tuna Salad
Bright, briny, and perfectly creamy, this Subway Tuna Salad brings the nostalgic sandwich-shop vibes to your kitchen with simple ingredients and straightforward steps. It’s built around canned water-packed tuna, a touch of mayonnaise, crisp vegetables, and classic sandwich fixings—all layered into a hearty 26-inch sub bun for a satisfyingly big meal. Whether you’re packing lunches for the week or feeding a crowd, this version is easy to scale and even easier to love.
Why you’ll love this version

This rendition focuses on balance: the tuna provides a meaty, flaky base while the mayonnaise binds everything into a spreadable, luscious texture. Fresh, crunchy vegetables add contrast—cool cucumbers, crisp lettuce, and bright bell peppers. Tangy pickles and slices of jalapeño deliver zip, and creamy white American-style cheese melts slightly against the warm bread, creating pockets of gooey richness. It’s the kind of sandwich that’s familiar, dependable, and comforting without being heavy.
Ingredients
- 25-ounce cans water-packed tuna
- 2 tablespoons mayonnaise
- 26-inch sub sandwich buns
- 1 cup shredded lettuce
- 6 slices tomatoes
- 1/4 cup sliced cucumbers
- 1/4 cup sliced green bell peppers
- 1/4 cup sliced red onions
- 1/4 cup sliced black olives
- 10 slices dill pickles
- 10 slices jalapeños
- 2 slices white American cheese
- 2 tablespoons mayonnaise
Notes on ingredients
This recipe uses water-packed tuna for a clean flavor that won’t be overly oily, and mayonnaise to provide a silky binder. The specified sub bun is large enough to hold generous fillings and multiple layers, so be sure you have space in your refrigerator for a 26-inch bun or consider using two shorter loaves if needed. The listed vegetables are sliced and measured so the final sandwich texture is balanced: crisp, soft, and juicy in turns.
Prep Work
Set aside 10–15 minutes for basic prep. Drain the canned tuna thoroughly so the salad is not watery. Slice the tomatoes, cucumbers, bell peppers, and red onions evenly so every bite is consistent. If you prefer milder peppers, remove the jalapeño seeds before slicing. Lay out the bun and ingredients so you can assemble quickly once the tuna mixture is ready.
Rewritten and clarified directions
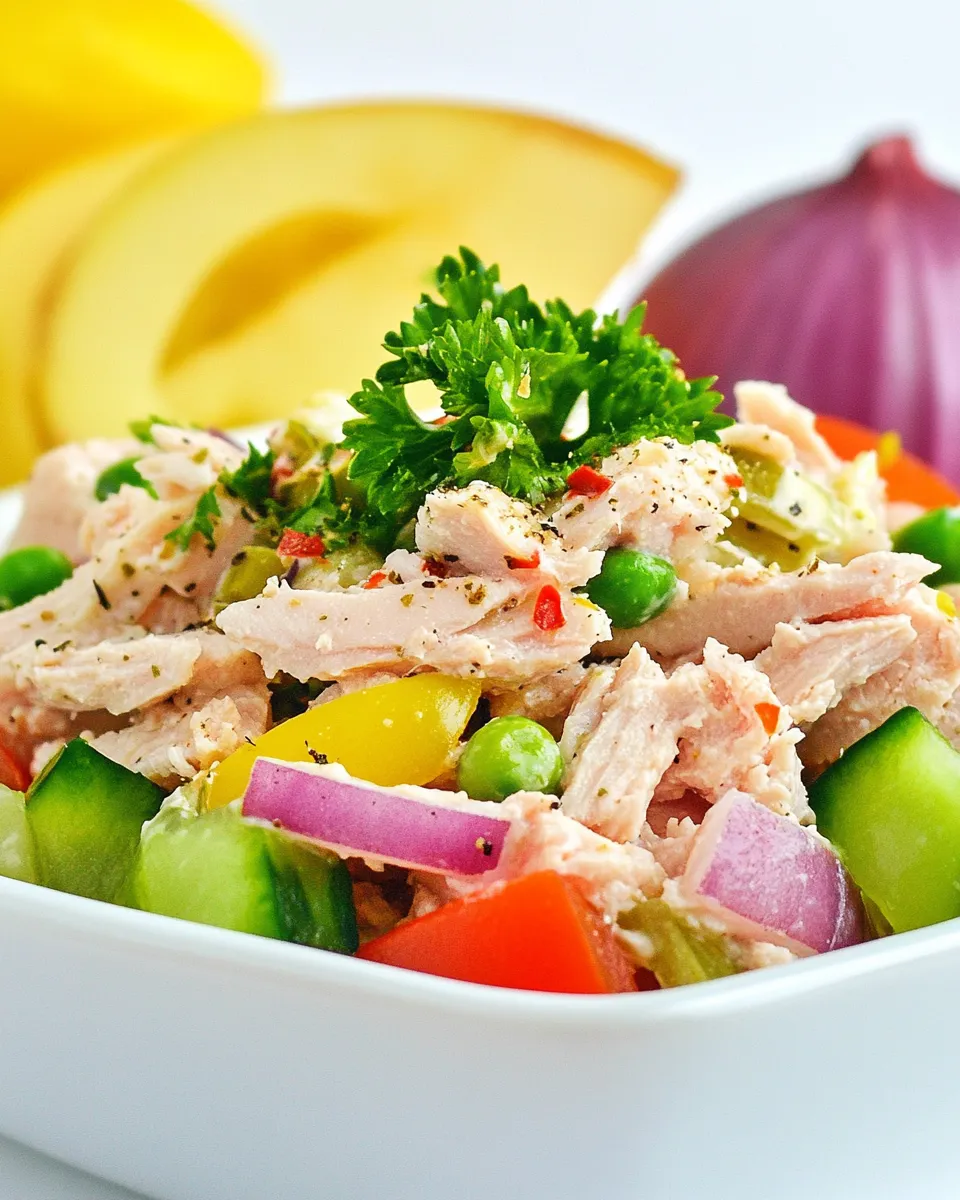
- Open and drain the 25-ounce cans of water-packed tuna. Transfer the drained tuna to a medium mixing bowl and use a fork to flake it into small, even pieces.
- Add 2 tablespoons mayonnaise to the flaked tuna. Mix gently until the mayonnaise is evenly distributed and the tuna holds together in slightly moist clumps. Taste and adjust texture—if you prefer a creamier spread, stir in a touch more mayonnaise, but keep to the amounts listed if you want to match the original balance.
- Prepare the vegetables: slice 6 tomato slices, 1/4 cup cucumbers, 1/4 cup green bell peppers, 1/4 cup red onions, and 1/4 cup black olives. Shred 1 cup of lettuce and place it in a bowl or on a clean surface for assembly. Lay out 10 slices of dill pickles and 10 slices of jalapeños on a small plate so they are ready when you build the sandwich.
- Lightly warm the 26-inch sub sandwich bun if you prefer a softer interior. You can place it in a 300°F (150°C) oven for 5–7 minutes or microwave whole for 15–20 seconds. Warming is optional but helps the cheese soften slightly.
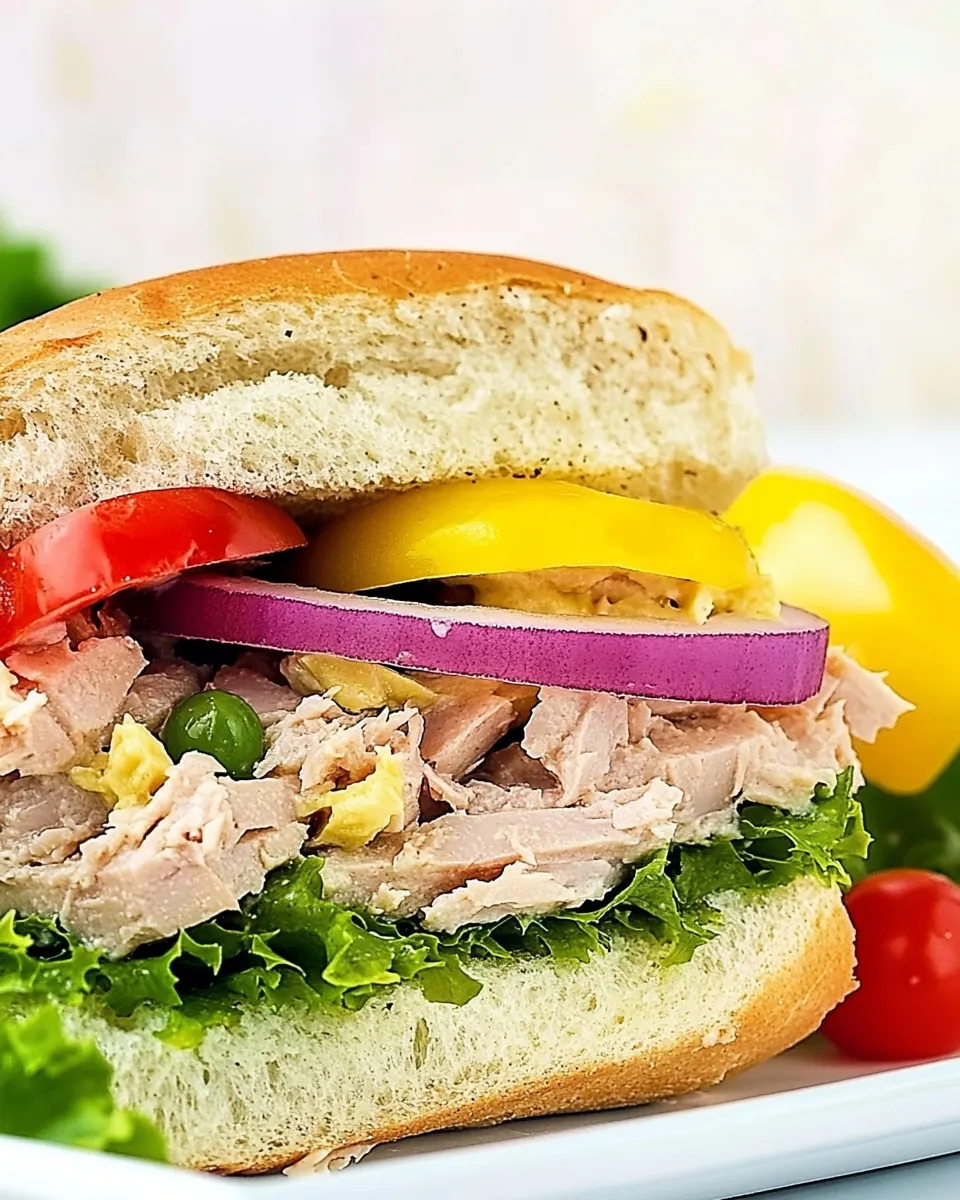
- Split the 26-inch sub bun open along the top or the side, depending on how you prefer to create a pocket for fillings. Spread 2 tablespoons mayonnaise evenly across the inner surfaces of the bun to add moisture and prevent dryness.
- Evenly distribute the tuna mixture along the length of the bun, aiming for a uniform layer so each portion of sandwich has tuna. Press gently with the back of a spatula to compact the layer slightly without flattening it completely.
- Place 2 slices of white American cheese on top of the tuna in the areas where you want the extra creaminess. If the bun was warmed, the cheese will soften against the tuna and create small melted pockets.
- Layer the shredded lettuce over the cheese and tuna for crunch and freshness. Add the 6 tomato slices evenly along the sandwich so each serving gets a tomato slice. Scatter the 1/4 cup sliced cucumbers, 1/4 cup sliced green bell peppers, 1/4 cup sliced red onions, and 1/4 cup sliced black olives across the length of the bun in an even pattern.
- Add the 10 slices dill pickles and 10 slices jalapeños over the vegetables, spacing them out so every portion of the sub includes both tangy and spicy elements.
- Close the bun and press gently to bring the layers together. If you like, wrap the assembled 26-inch sub in foil and let it rest for 2–3 minutes so flavors marry and the cheese settles. For serving, slice into portions as needed and serve immediately.
Assembly tips and serving suggestions
Slice the sandwich into equal portions—every 3–4 inches makes nice, shareable pieces. For a crowd, pre-slice and wrap individual portions to make grab-and-go service simpler. If you want the vegetables to stay crisp longer, store them separately and add them to the sandwich just before serving. For a melty finish, briefly press the assembled sandwich on a grill or in a sandwich press at low heat to warm the cheese without steaming the lettuce too much.
Make-ahead and storage
You can prepare the tuna mixture up to 48 hours in advance and keep it refrigerated in an airtight container. Store sliced vegetables separately in sealed containers to preserve crispness. Assemble the sandwich no more than a few hours before serving if you want the bun to stay crisp; otherwise, wrapping the whole sandwich in foil will help keep it moist but may soften the bread over time.
Variations to try
- Herb boost: Fold in a tablespoon each of chopped fresh parsley and chives to the tuna mixture for bright herbal notes.
- Spicy twist: Stir a teaspoon of hot sauce into the mayonnaise before combining with the tuna for a uniform kick.
- Light swap: Use a lighter mayonnaise or an equal mix of plain Greek-style yogurt and mayonnaise to reduce richness while retaining creaminess.
- Crunch upgrade: Add a handful of finely chopped celery or a quarter cup of toasted sunflower seeds to the tuna for extra texture.
Nutrition and portioning
This sandwich is generous and filling. Because the sub is 26 inches long, it’s meant to be shared or sliced into multiple servings. Each portion contains protein from the tuna and balanced carbs from the sub bun, while vegetables pump up the fiber and freshness. If you are tracking sodium, note that pickles, olives, and canned tuna can contribute significant amounts—consider rinsing the tuna and choosing low-sodium pickles and olives if you need to reduce salt.
Common questions
Can I use canned tuna in oil? Yes, but if you prefer a lighter flavor and less oil, stick with water-packed tuna and drain well before mixing. Oil-packed tuna will add richness and may change the texture slightly.
How long will the tuna mixture last? Store the prepared mixture in an airtight container in the refrigerator for up to 48 hours. For best texture, add sliced vegetables at assembly time.
Can I make smaller sandwiches instead of one 26-inch sub? Absolutely. Divide the ingredients proportionally to populate smaller rolls or buns.
Final thoughts
This Subway Tuna Salad is a crowd-pleasing classic brought to life with clear, simple steps and fresh finishing touches. It leans on pantry staples and everyday vegetables to deliver a sandwich that’s both comforting and lively. Follow the step-by-step directions for a consistent result each time, and don’t be afraid to tweak the mix-ins to fit your preferences. Whether you’re serving a family dinner or prepping for a picnic, this sandwich spreads joy by the inch.
Enjoy building and sharing this satisfying 26-inch sub packed with flaky tuna, creamy mayonnaise, melty cheese, and crunchy vegetables—every bite balanced and full of flavor.

Subway Tuna Salad
Ingredients
- 2 5 oz cans water-packed tuna drained
- 2 tbsp mayonnaise
- 2 6-inch sub sandwich buns
- 1 cup shredded lettuce
- 6 slices tomato
- 1/4 cup sliced cucumber
- 1/4 cup sliced green bell pepper
- 1/4 cup sliced red onion
- 1/4 cup sliced black olives
- 10 slices dill pickles
- 10 slices jalapeños pickled
- 2 slices white American cheese cut into triangles
- 2 tbsp mayonnaise optional extra for serving
Instructions
- Open and drain the two 5-ounce cans of water-packed tuna, then transfer the tuna to a small bowl and flake it with a fork.
- Stir in 2 tablespoons mayonnaise until the tuna is evenly combined and creamy.
- Slice each 6-inch sub bun in half lengthwise and set both top and bottom pieces aside.
- Place about two small scoops of tuna salad on the top half of each bun.
- On the bottom half of each bun, layer shredded lettuce, tomato slices, sliced cucumber, green bell pepper, red onion, and black olives.
- Add pickles and jalapeño slices over the vegetables on each sandwich.
- Cut each slice of white American cheese into triangles and place two triangles on top of the vegetables for each sandwich.
- If desired, add a squirt or the remaining 2 tablespoons mayonnaise, close the buns, and serve immediately.
Equipment
- Can opener
- Bowls
- Fork
- Knife
- Cutting Board
Notes
- Drain the tuna well to avoid a watery salad.
- Adjust mayonnaise to preferred creaminess.
- Slice cheese triangles for even coverage.
- Assemble just before serving to keep bread from getting soggy.