The Best Yeast Rolls
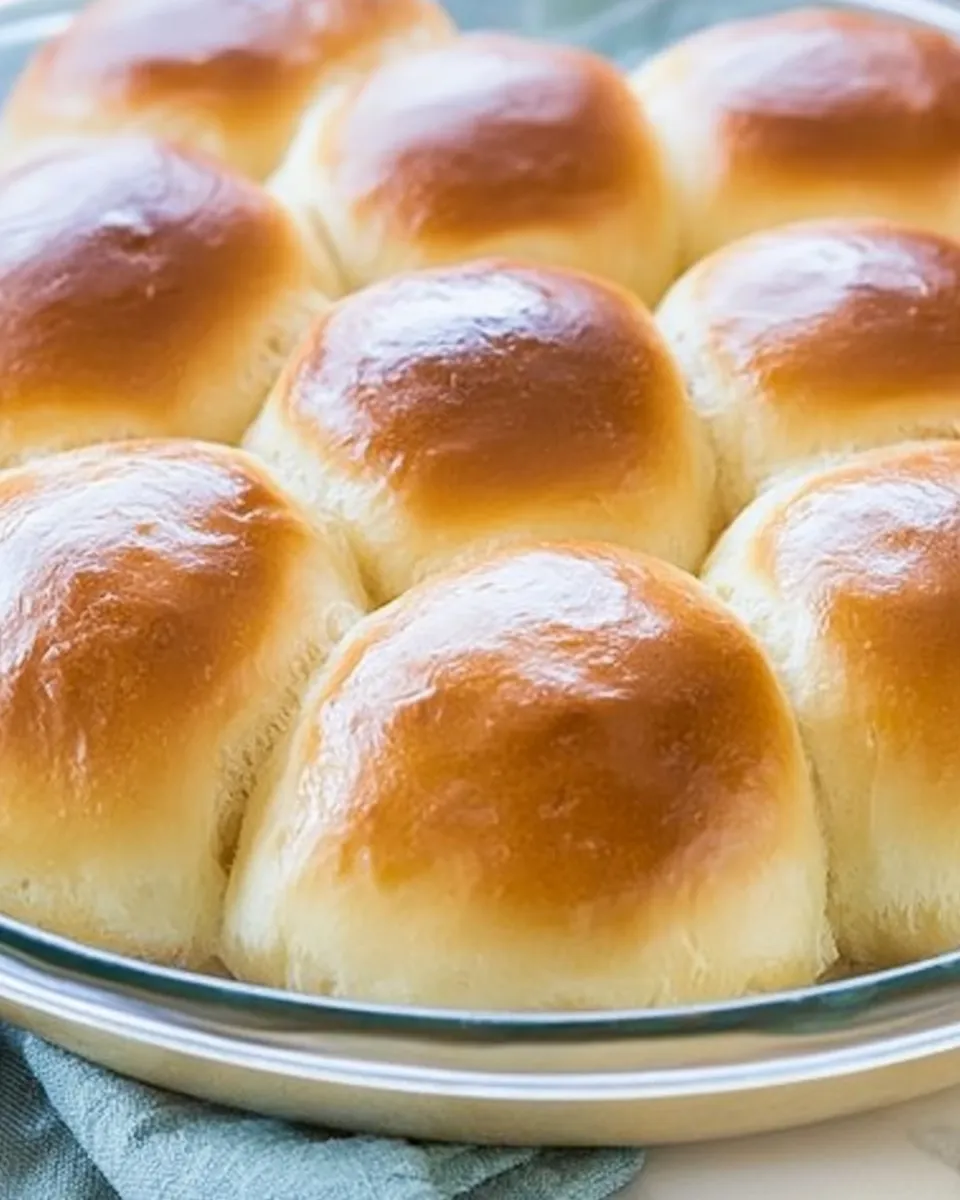
These yeast rolls are the ones I turn to when I want a reliable, tender roll that browns beautifully and melts in your mouth. They rise predictably, take advantage of simple pantry staples, and finish with a buttery sheen that makes people reach for seconds before the plate is even set down.
I tested this recipe until the texture and timing felt foolproof for a home kitchen — no commercial ovens, no specialty flours. The dough is soft and slightly sticky, forgiving if you add a tablespoon of flour too many or knead a minute longer. The method balances warm milk and a short water-yeast bloom to get active fermentation without overheating the yeast.
Read through the ingredient notes and the step-by-step instructions before you start. Timing matters for the rises, and a warm draft-free spot will save you a lot of waiting. Follow the tips and substitutions if you need to adapt for what’s in your pantry or dietary needs.
Ingredient Breakdown

Good yeast rolls are about harmony: fat for tenderness, sugar and warm liquid to feed the yeast, eggs for structure and richness, and flour to hold it all together. Each ingredient has a role and a small trick that improves the final texture.
I’ll list every ingredient with a short note so you know why it’s there and how to tweak handling if you need to. Keep the amounts exact when you can — yeast and liquids are sensitive — but the notes will help you troubleshoot.
Ingredients
- 1/2 cup whole milk — provides fat and flavor; scalding and then cooling a touch improves dough texture and can enrich the crumb.
- 1/2 cup granulated sugar — feeds the yeast and sweetens the roll; also helps with browning.
- 1/4 cup butter, melted — tenderizes the crumb and adds flavor; reserve about 1 tablespoon to brush the tops after baking.
- 1 1/2 teaspoons salt — balances sweetness and strengthens gluten structure; don’t skip or reduce too much.
- 1/2 cup water (105 to 115 degrees) — the warm water activates the yeast; keep it in that temperature window to foam reliably.
- 2 packages active dry yeast — the leavening life of the dough; make sure it’s not expired for a consistent rise.
- 2 large eggs, lightly beaten — add richness and help set the crumb; beat them lightly so they incorporate evenly into the dough.
- 4 1/2 cups all-purpose flour, may need a little more — forms the dough’s structure; add extra by tablespoons only if the dough is too wet to handle.
Yeast Rolls, Made Easy
- Melt 1/4 cup butter and set aside about 1 tablespoon to brush on the baked rolls; use the remaining melted butter for the dough and to grease the bowl.
- Place 1/2 cup whole milk in a small saucepan and bring just to a boil. Immediately remove from heat and stir in 1/2 cup granulated sugar, the remaining melted butter, and 1 1/2 teaspoons salt. Let the mixture cool until lukewarm (not hotter than 115°F / 46°C).
- In a heatproof measuring cup, combine 1/2 cup warm water (105°–115°F) and 2 packages active dry yeast. Stir briefly and let sit 5–10 minutes, until foamy.
- In the bowl of a stand mixer (or a large mixing bowl), pour in the foamy yeast mixture, add the cooled milk mixture and 2 lightly beaten eggs. Add 2 cups of the all-purpose flour and beat with the paddle attachment just until combined.
- Gradually beat in the remaining 2 1/2 cups flour until incorporated. The dough should come together into a soft, slightly sticky ball; you may need a little more flour—add by tablespoons if necessary.
- Knead the dough: with a dough hook on speed 2, knead about 5–7 minutes until smooth and elastic. Or turn onto a lightly floured surface and knead by hand 8–10 minutes (you can do about 5 minutes on the hook and finish by hand if preferred).
- Lightly grease a medium bowl with a little melted butter, place the dough in the bowl, and turn to coat all sides. Cover with a kitchen towel or plastic wrap and set in a warm place to rise until doubled, about 1 hour.
- Punch the dough down. Divide into balls of about 2 to 3 tablespoons each and place them in a greased 9×13-inch pan (about 5 rows of 4 rolls). Cover and let rise in a warm place until nearly doubled, about 1 hour.
- About 10 minutes before the end of the second rise, preheat the oven to 375°F.
- Bake the rolls 20–25 minutes, or until golden brown on top. Immediately brush the tops with the reserved tablespoon of melted butter and serve.
Why It’s Crowd-Pleasing
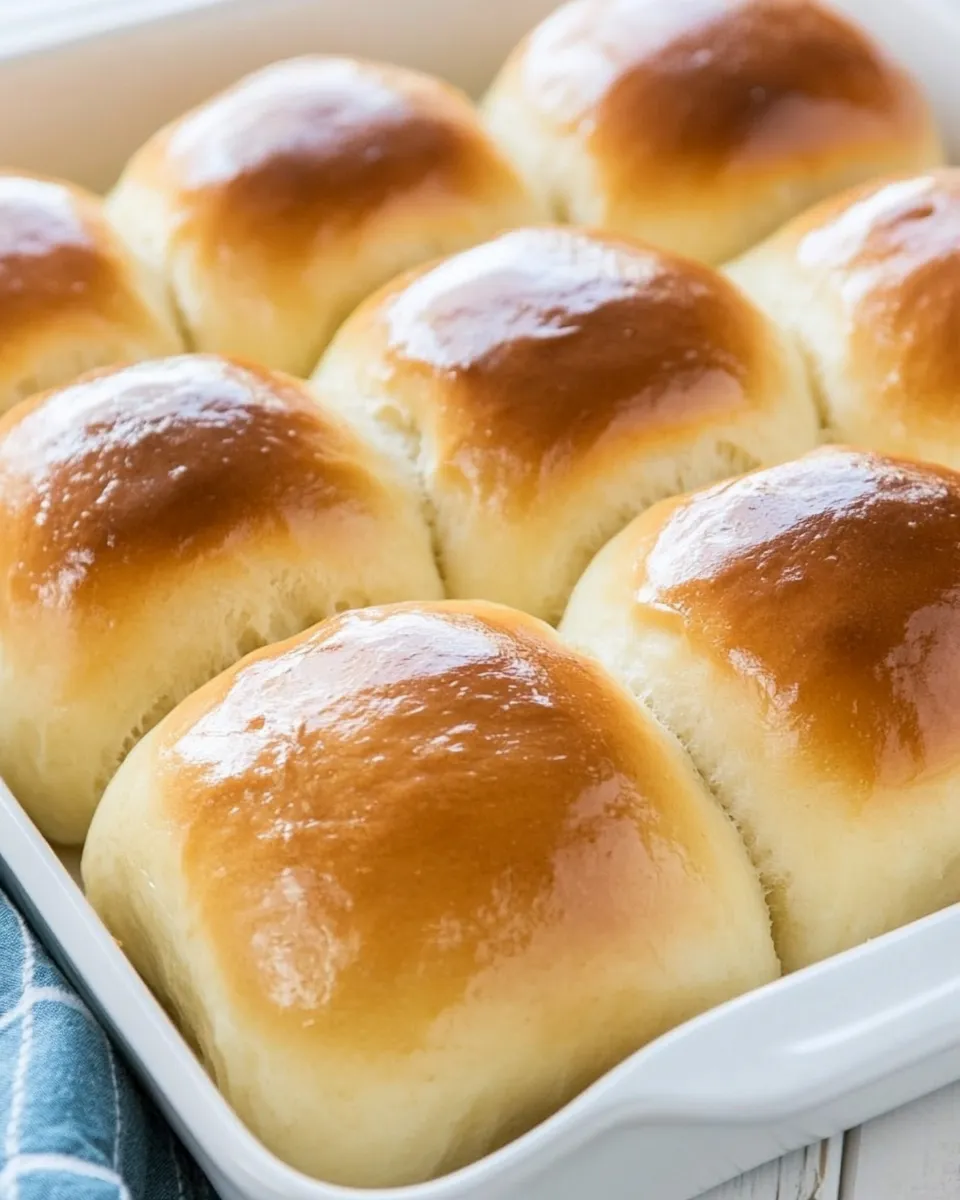
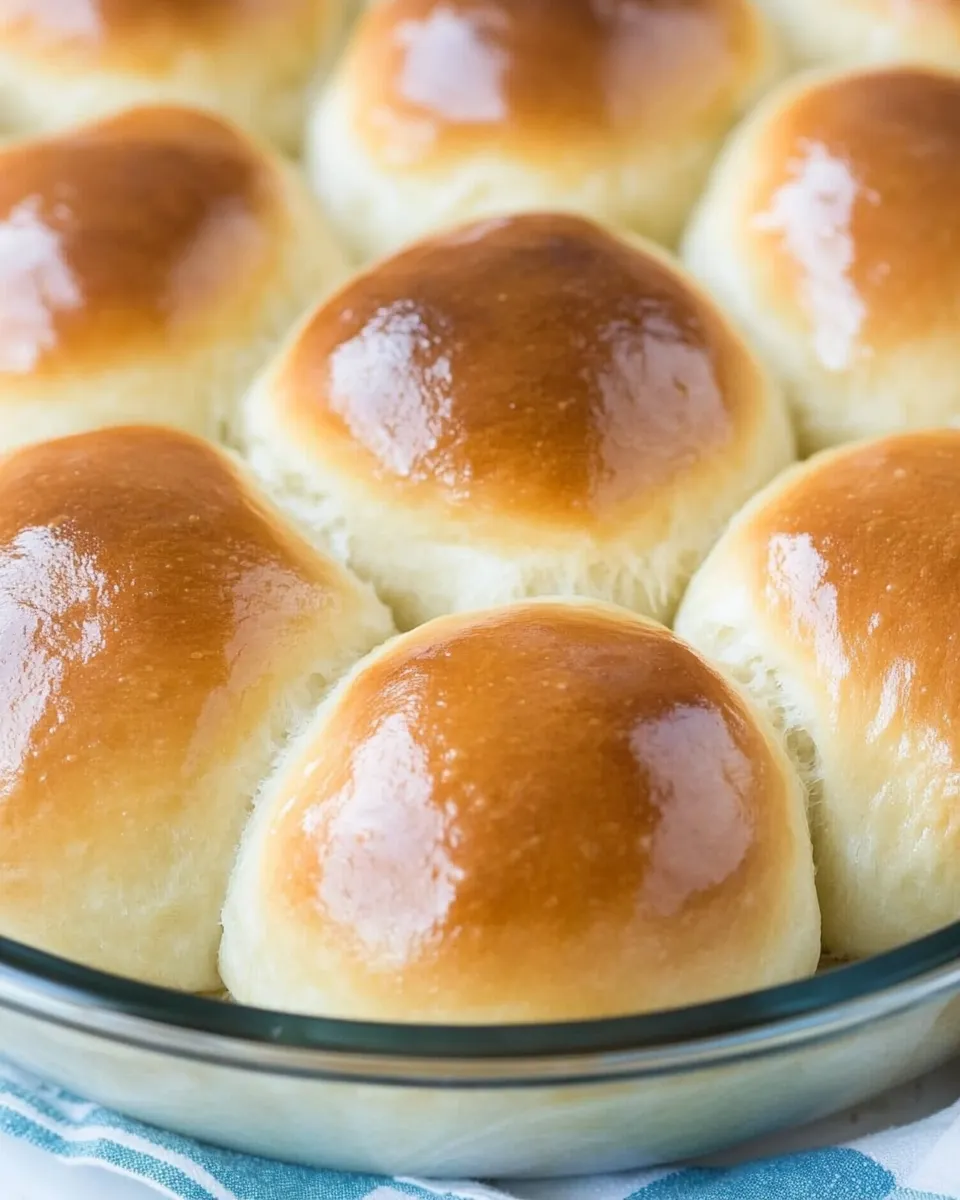
These rolls hit the comfort-food sweet spot. They’re tender from fat and eggs, slightly sweet for broad appeal, and richly browned on top — a look that invites people to grab one. The texture is soft but not gummy, so they pair with jam, roast chicken, or stand alone at a holiday table.
They’re also forgiving. The dough holds up to a little extra flour or a slightly longer rise, which means home bakers get consistent results without obsessing over minute measurements. And because the method uses common ingredients, you can whip a batch without a special trip to the store.
Substitutions by Category
Dairy & Fat
- Milk: You can substitute 1/2 cup evaporated milk diluted with 2 tablespoons water for a richer roll; warm it to the same temperature. Skipping milk entirely and using water will make a leaner roll that’s less tender.
- Butter: Swap an equal amount of neutral oil for the melted butter in the dough if needed, though the flavor will be less buttery. Keep the reserved tablespoon for brushing with melted butter or a vegan spread if you choose oil.
Flour & Texture
- All-purpose flour: If you prefer a slightly softer crumb, you can replace up to 1 cup with bread flour for more chew and structure, but the original balance is tuned for all-purpose.
- Adding more flour: Add by tablespoons only if the dough is too sticky to handle; over-flouring yields dense rolls.
Yeast & Rising
- Active dry yeast: If you only have instant yeast, reduce by about 25% (use about 1 1/2 packages) and sprinkle it directly into the flour rather than blooming it in water. The method will still work but expect slightly faster rises.
Equipment Breakdown
You don’t need fancy gear, but a few tools make the process cleaner and more predictable:
- A stand mixer with a dough hook speeds kneading and yields consistent gluten development, but hand-kneading works perfectly well.
- Heatproof measuring cup or small bowl to proof the yeast — being able to measure and hold the warm water is important for the yeast to foam.
- A 9×13-inch pan for the bake gives the rolls the soft-sided pull-apart look; you can also use individual round pans for dinner-roll presentation, adjusting spacing.
- An instant-read thermometer is useful to check that the milk/water temperatures stay in the safe range for yeast activation (105°–115°F for water; milk should be cooled to not exceed 115°F before adding yeast).
Slip-Ups to Skip
Common mistakes are easy to avoid once you know what to watch for:
- Don’t pour hot milk straight onto the yeast — it kills it. Cool the milk mixture until lukewarm before combining with the foamy yeast.
- Underproofing leaves dense rolls; let the dough double in the first rise and nearly double for the second. Patience matters more than extra flour.
- Over-flouring during kneading creates heavy rolls. Keep the dough slightly tacky and add flour by tablespoons only if it won’t hold together.
- Baking at a too-high temperature browns the top before the center sets. Preheat to 375°F as directed and check for a golden top and internal set.
Dietary Swaps & Alternatives
If you need dietary adjustments, here are practical swaps that keep the spirit of the roll while adapting for restrictions.
- Egg-free: Replace the eggs with 1/4 cup unsweetened applesauce plus an extra tablespoon of oil to retain moisture. Expect a slightly different crumb and color.
- Dairy-free: Use a plant-based milk (soy or oat are closest in richness) warmed and treated exactly like the milk in the recipe; replace butter with a neutral oil, reserving some oil for brushing if you want a glossy finish.
- Lower-sugar: Reduce sugar slightly (for example to 1/3 cup) if you prefer less sweetness; expect a slightly slower rise since yeast has less sugar to feed on.
- Gluten-free: This dough relies on gluten for structure; for a gluten-free version, use a tested gluten-free roll recipe instead of direct substitution.
Cook’s Commentary
I use this recipe when I want a dependable, classic roll that tastes like the kind your grandmother might have made: warm, slightly sweet, and buttery. There’s something satisfying about the rhythm of the two rises and the final brush of butter that makes the kitchen feel cozy and put-together.
When I taught this to friends, the two biggest questions were about yeast and dough texture. If the yeast doesn’t foam, start over with fresh yeast and ensure the water is in the right temperature window. For texture, aim for a soft, slightly sticky dough — it bakes into the most tender rolls. If you overwork it, you’ll still get a roll, but it won’t be as soft.
One little trick I like: when forming the balls, use a light hand and a consistent size (2–3 tablespoons each as directed) so they bake evenly and pull apart nicely. If you want a glossy, slightly sweet finish, brush with a light sugar-water glaze instead of plain butter right after baking.
Save It for Later
These rolls are best the day they’re baked, but you can store leftovers smartly to keep them soft:
- Room temperature: Place cooled rolls in an airtight container for up to 2 days. Reheat in a 300°F oven for 8–10 minutes to refresh.
- Freezing: Wrap cooled rolls individually in plastic wrap and freeze in a sealed bag for up to 3 months. Thaw at room temperature and warm briefly before serving.
- Make-ahead: You can do the first rise, refrigerate the dough overnight, then shape and let the second rise in the morning. Allow extra time to come to room temperature and rise.
Questions People Ask
Q: My rolls didn’t rise. What went wrong?
A: Chances are one of these: the yeast was old, the water was too hot or too cold, or the dough sat somewhere too cool. Fresh yeast and a warm, draft-free rise space are key.
Q: Can I make smaller or larger rolls?
A: Yes. Adjust size and baking time accordingly. Smaller rolls will bake faster (start checking at 12–15 minutes); larger ones may need a few extra minutes. Aim for golden brown tops.
Q: Can I use milk straight from the fridge?
A: No — the recipe calls for warming and then cooling milk to enrich the dough. Cold milk will slow yeast activity and change dough temperature balance.
Save & Share
If you loved these rolls, save the recipe and share it with a friend — they’re the kind of baked good that makes dinner feel special without fuss. Leave a note about what you served them with: butter and jam, a roast, or a soup — those details help others imagine the meal and will make the recipe live on your table.
Pin, print, or email this page so you have the method at hand when you’re ready to bake. And if you make any tweaks that worked well — a glaze you loved, a timing shortcut — jot them down beside the recipe so your next batch gets even better.
The Best Yeast Rolls
Ingredients
Ingredients
- 1/2 cupwhole milk
- 1/2 cupgranulated sugar
- 1/4 cupbutter melted
- 1 1/2 teaspoonssalt
- 1/2 cupwater 105 to 115 degrees
- 2 packagesactive dry yeast
- 2 largeeggs lightly beaten
- 4 1/2 cupsall-purpose flour may need a little more
Instructions
Instructions
- Melt 1/4 cup butter and set aside about 1 tablespoon to brush on the baked rolls; use the remaining melted butter for the dough and to grease the bowl.
- Place 1/2 cup whole milk in a small saucepan and bring just to a boil. Immediately remove from heat and stir in 1/2 cup granulated sugar, the remaining melted butter, and 1 1/2 teaspoons salt. Let the mixture cool until lukewarm (not hotter than 115°F / 46°C).
- In a heatproof measuring cup, combine 1/2 cup warm water (105°–115°F) and 2 packages active dry yeast. Stir briefly and let sit 5–10 minutes, until foamy.
- In the bowl of a stand mixer (or a large mixing bowl), pour in the foamy yeast mixture, add the cooled milk mixture and 2 lightly beaten eggs. Add 2 cups of the all-purpose flour and beat with the paddle attachment just until combined.
- Gradually beat in the remaining 2 1/2 cups flour until incorporated. The dough should come together into a soft, slightly sticky ball; you may need a little more flour—add by tablespoons if necessary.
- Knead the dough: with a dough hook on speed 2, knead about 5–7 minutes until smooth and elastic. Or turn onto a lightly floured surface and knead by hand 8–10 minutes (you can do about 5 minutes on the hook and finish by hand if preferred).
- Lightly grease a medium bowl with a little melted butter, place the dough in the bowl, and turn to coat all sides. Cover with a kitchen towel or plastic wrap and set in a warm place to rise until doubled, about 1 hour.
- Punch the dough down. Divide into balls of about 2 to 3 tablespoons each and place them in a greased 9×13-inch pan (about 5 rows of 4 rolls). Cover and let rise in a warm place until nearly doubled, about 1 hour.
- About 10 minutes before the end of the second rise, preheat the oven to 375°F.
- Bake the rolls 20–25 minutes, or until golden brown on top. Immediately brush the tops with the reserved tablespoon of melted butter and serve.
Equipment
- Electric Stand Mixer
- 9x13 inch Baking Dish