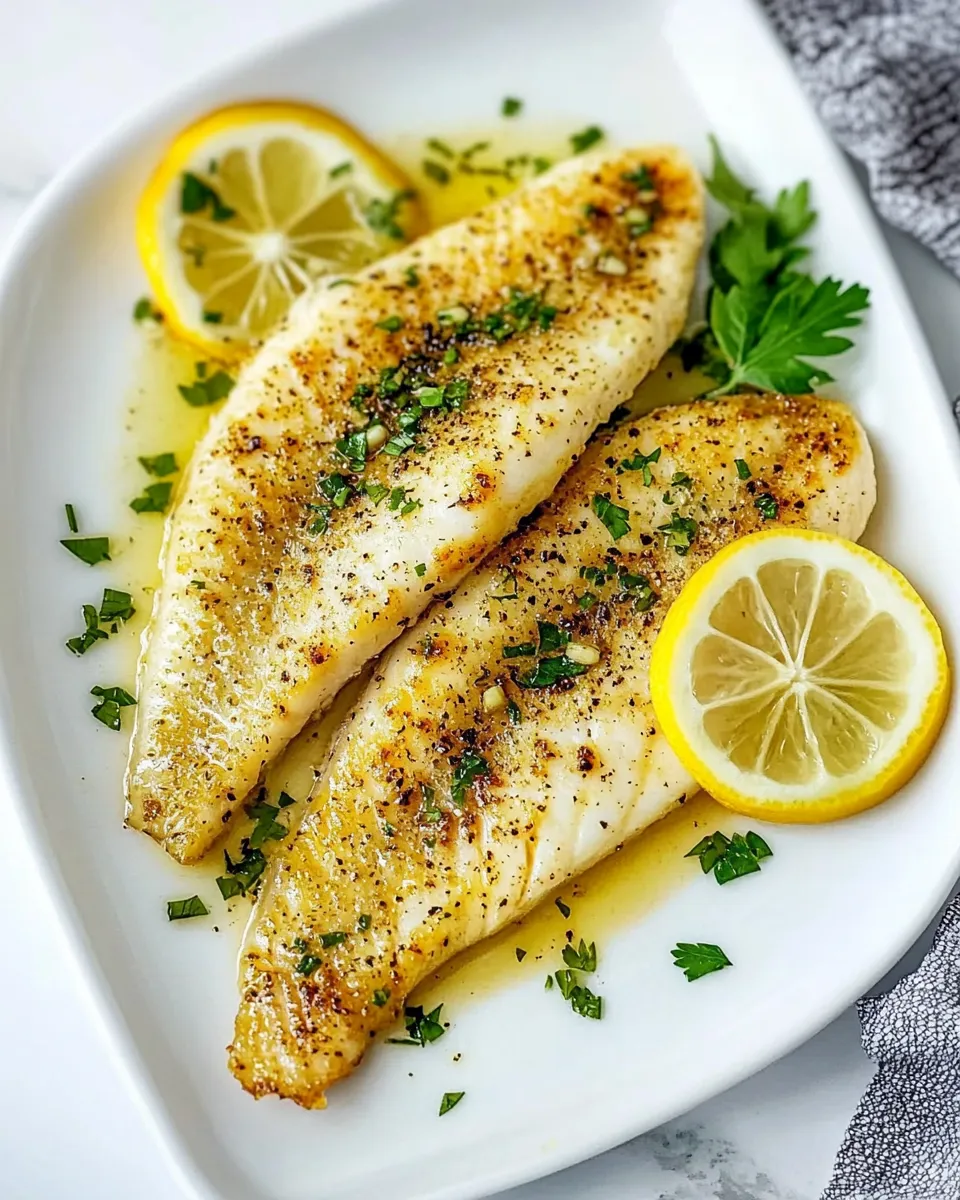
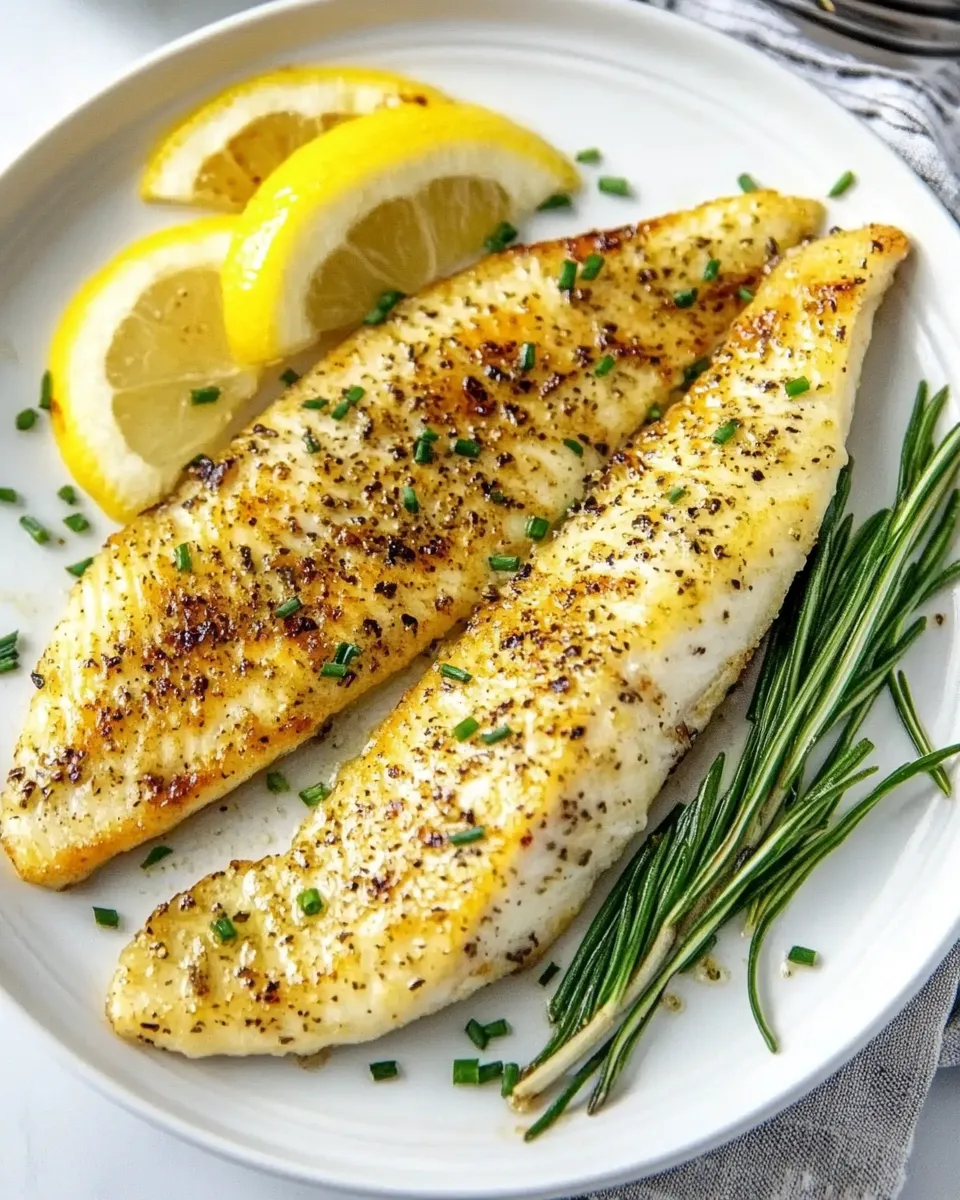
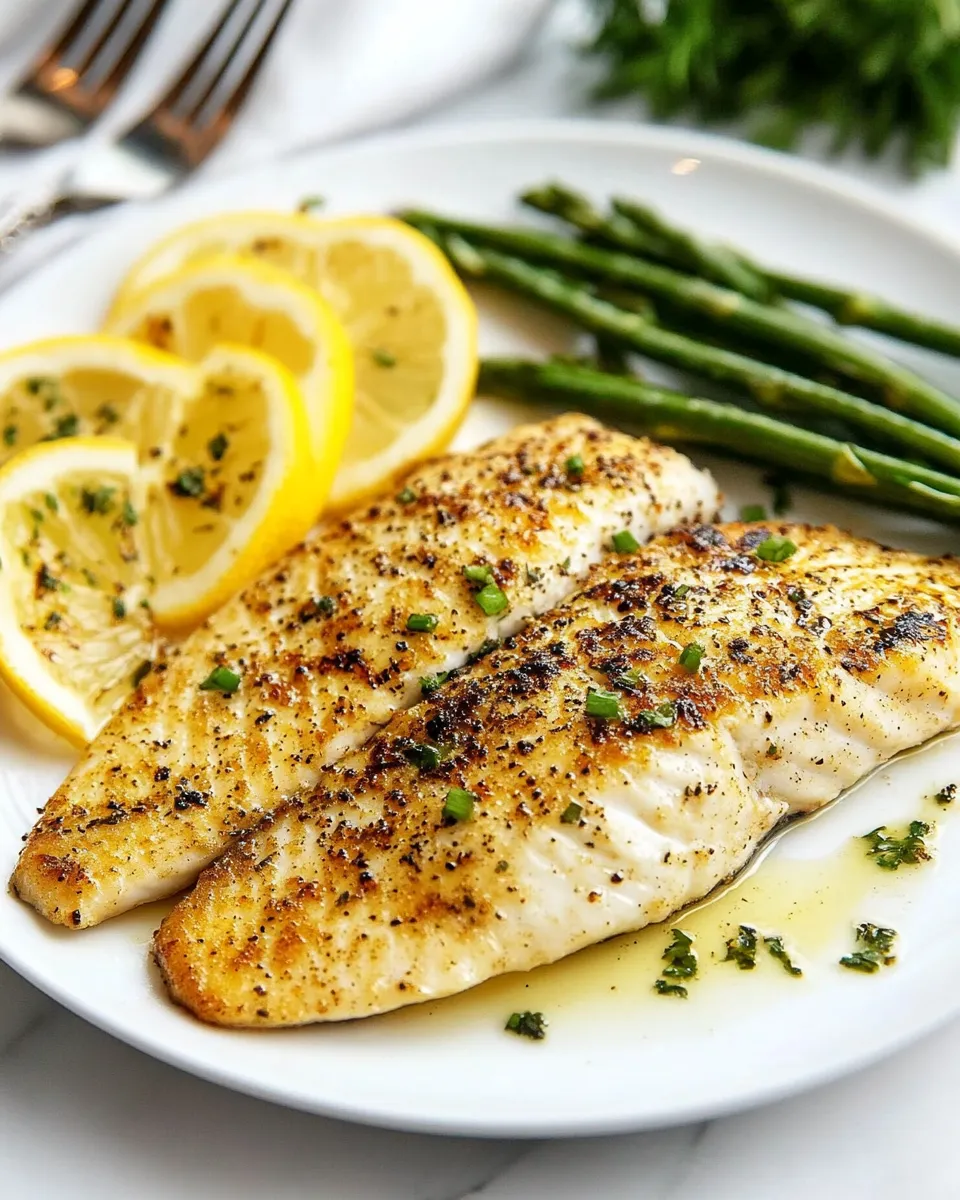
Broiled Tilapia with Garlic
This is the kind of weeknight dish I turn to when I want dinner that feels fresh, cooks fast, and still tastes like I put effort into it. Tilapia is forgiving and broiling brings out a gentle, golden finish that makes the fish flake perfectly. The garlic here is smashed and scattered so every bite gets a bright hit without scorching.
I like recipes that have a short shopping list and clear steps. This one fits into my calendar on busy nights or when guests drop by unexpectedly. The whole process is straightforward: a quick rinse, a sprinkle of herbs, a drizzle of extra virgin olive oil, and the broiler does the rest.
Below you’ll find the ingredient notes, the exact steps to follow under the broiler, and practical tips for getting the best texture and flavor. There are also simple swaps for dietary needs, seasonal variations, and answers to the questions I get asked most often when I post this on Instagram.
Gather These Ingredients

Ingredients
- 6 tilapia fillets, 6 oz each — choose even-sized fillets so they cook at the same rate.
- 3 cloves garlic, crushed — crushing releases oils and flavor; distribute across fillets to avoid burning in one spot.
- 3 teaspoons extra virgin olive oil — helps the surface brown and carries the garlic flavor.
- 1 teaspoon dried oregano — adds a warm, slightly peppery herb note.
- 1 teaspoon fresh parsley — brightens the dish when sprinkled on before broiling.
- Kosher salt and black pepper, to taste — essential for seasoning; salt especially helps the fish flake tenderly.
- 1 large lemon, cut into wedges — squeezed over the hot fillets for acidity and brightness at the table.
Broiled Tilapia with Garlic — Do This Next
- Rinse the tilapia fillets under cold water and pat them dry with paper towels.
- Line a broiler pan or a rimmed baking sheet with aluminum foil. Position the oven rack 6 to 8 inches from the heating element and set the broiler to Low.
- Arrange the 6 tilapia fillets in a single layer on the foil with space between each fillet.
- Season each fillet with kosher salt and black pepper to taste. Sprinkle the 1 teaspoon dried oregano and the 1 teaspoon fresh parsley evenly over the fillets.
- Drizzle the 3 teaspoons extra virgin olive oil evenly over the fillets, then distribute the 3 crushed garlic cloves evenly on top (spread the garlic so it is not piled in one spot).
- Place the pan under the broiler and cook on Low for about 6 to 8 minutes, without turning, until the fish is opaque and flakes easily with a fork—watch the garlic to avoid burning.
- Remove the fish from the oven and serve immediately with the lemon wedges for squeezing over the fillets.
Why I Love This Recipe
This recipe is a reliable crowd-pleaser because it highlights the clean flavor of tilapia without smothering it. Garlic and olive oil are classic partners for fish, and the oregano and parsley add a comforting Mediterranean touch. The broiler makes the skin-side (if the fillets have skin) and the surface slightly caramelized in a way that feels special but takes very little hands-on time.
It’s also forgiving. Timing is short, but because the fillets are similar in size and broiling is fast, you get consistent results. There’s minimal cleanup—foil on a rimmed sheet does most of the work. I reach for this whenever I want a quick, healthy meal that looks like I spent longer on it than I did.
Dairy-Free/Gluten-Free Swaps
This recipe is naturally dairy-free and gluten-free as written, which makes it a great go-to for most diets. If you’re serving someone with a citrus intolerance, omit the lemon wedges and add a splash of white wine vinegar after broiling for brightness. If you want a richer finish without dairy, try a tiny drizzle (about 1/2 teaspoon) of high-quality nut oil after broiling—use sparingly so it doesn’t overpower the fish.
Tools of the Trade
- Rimmed baking sheet or broiler pan — rimmed sheets catch juices and avoid oven messes.
- Aluminum foil — lines the pan for easy cleanup and even heat reflection.
- Paper towels — for patting fillets dry to help them brown.
- Tongs or a spatula — useful for transferring fillets and serving.
- Sharp knife and cutting board — for trimming and prepping the lemon wedges.
Easy-to-Miss Gotchas
Broiling is fast. That’s the point, but it’s also why timing matters. Six to eight minutes on Low is the window; if your oven runs hot or you set the broiler to High, the fish can overcook or the garlic can burn within minutes. Keep the oven rack 6 to 8 inches from the heating element as directed. That distance helps the fish cook through without charring the garlic.
Another common pitfall is overcrowding the pan. Give each fillet space. If you cram them together, they steam instead of broil and won’t develop the slight surface texture that makes this recipe sing. Finally, pat the fillets dry. Moisture on the surface delays browning and can lead to uneven cooking.
Variations by Season
Spring: Fold in bright, fresh herbs. Swap the dried oregano for a teaspoon of chopped fresh dill and scatter a few thinly sliced radishes or snap peas on the side. The lemon will feel particularly lively.
Summer: Add a splash of chopped cherry tomatoes tossed with a pinch of salt and pepper just before serving. The heat of the fish slightly softens the tomatoes and adds a juicy contrast.
Autumn/Winter: Give the dish a heartier feel with a small sprinkling of toasted pine nuts after broiling, and add a pinch of smoked paprika to the fillets before broiling for a warm aroma.
Pro Tips & Notes
Timing and doneness
Look for opaque flesh and easy flaking with a fork. Tilapia cooks quickly; overcooking makes it dry. If you have a thermometer, aim for 145°F (63°C) in the thickest part.
Garlic placement
Spread the crushed garlic cloves so they sit across the fillets instead of heaping in one spot. If a garlic piece does look like it’s browning too quickly, slide the pan out and move that piece away from the direct heat slightly.
Serving
Serve immediately. The lemon squeeze adds brightness and brings the dish to life right at the table. Offer salt and pepper for guests to adjust to taste.
Leftovers & Meal Prep
Leftover tilapia will keep in an airtight container in the refrigerator for up to 2 days. Store the lemon wedges separately. Reheat gently in a low oven (about 275°F / 135°C) for 8–10 minutes, covered lightly with foil, to avoid drying; or flake cold into salads for a quick protein boost. Avoid reheating in a microwave if you want to preserve texture — it tends to make the fish gummy.
If you’re meal prepping, cook the fish and pack it with a grain like quinoa or farro and a simple vegetable like roasted asparagus. Add lemon wedges and reserve any dressings separately until you’re ready to eat.
Your Top Questions
Q: Can I use frozen tilapia?
A: Yes. Thaw fully in the refrigerator and pat dry before starting. Excess moisture from partially frozen fillets will affect browning and timing.
Q: What if my fillets are thicker or thinner than 6 oz?
A: Adjust timing slightly. Thinner fillets may be done in as little as 4–5 minutes; thicker ones might take 8–10. Keep an eye on opacity and flake-test with a fork.
Q: Can I swap the oil?
A: You can use a neutral oil with a high smoke point, but extra virgin olive oil adds flavor that complements the garlic and herbs. Use the same amount: 3 teaspoons total across the fillets.
Q: Why not turn the fish?
A: Tilapia is delicate. Turning can cause it to break apart. The recipe is designed to broil one side until the fillet is cooked through evenly.
Final Bite
This Broiled Tilapia with Garlic is one of those dependable recipes that fits into the rhythm of real life: fast, flavorful, and adaptable. The garlic and herbs give it personality, the lemon brightens it right when you need it, and the broiler keeps it simple. Keep the ingredients on hand and you’ll have a go-to dinner that looks and tastes like you spent longer than you did.
Enjoy it with a simple green salad or roasted vegetables. Let me know how you like to tweak your version — I love hearing variations from other kitchens.

Broiled Tilapia with Garlic
Ingredients
Ingredients
- 6 tilapia fillets 6 oz each
- 3 clovesgarlic crushed
- 3 teaspoonsextra virgin olive oil
- 1 teaspoondried oregano
- 1 teaspoonfresh parsley
- kosher salt and black pepper to taste
- 1 largelemon cut into wedges
Instructions
Instructions
- Rinse the tilapia fillets under cold water and pat them dry with paper towels.
- Line a broiler pan or a rimmed baking sheet with aluminum foil. Position the oven rack 6 to 8 inches from the heating element and set the broiler to Low.
- Arrange the 6 tilapia fillets in a single layer on the foil with space between each fillet.
- Season each fillet with kosher salt and black pepper to taste. Sprinkle the 1 teaspoon dried oregano and the 1 teaspoon fresh parsley evenly over the fillets.
- Drizzle the 3 teaspoons extra virgin olive oil evenly over the fillets, then distribute the 3 crushed garlic cloves evenly on top (spread the garlic so it is not piled in one spot).
- Place the pan under the broiler and cook on Low for about 6 to 8 minutes, without turning, until the fish is opaque and flakes easily with a fork—watch the garlic to avoid burning.
- Remove the fish from the oven and serve immediately with the lemon wedges for squeezing over the fillets.
Equipment
- Broiler
- broiler pan or rimmed baking sheet
- Aluminum Foil