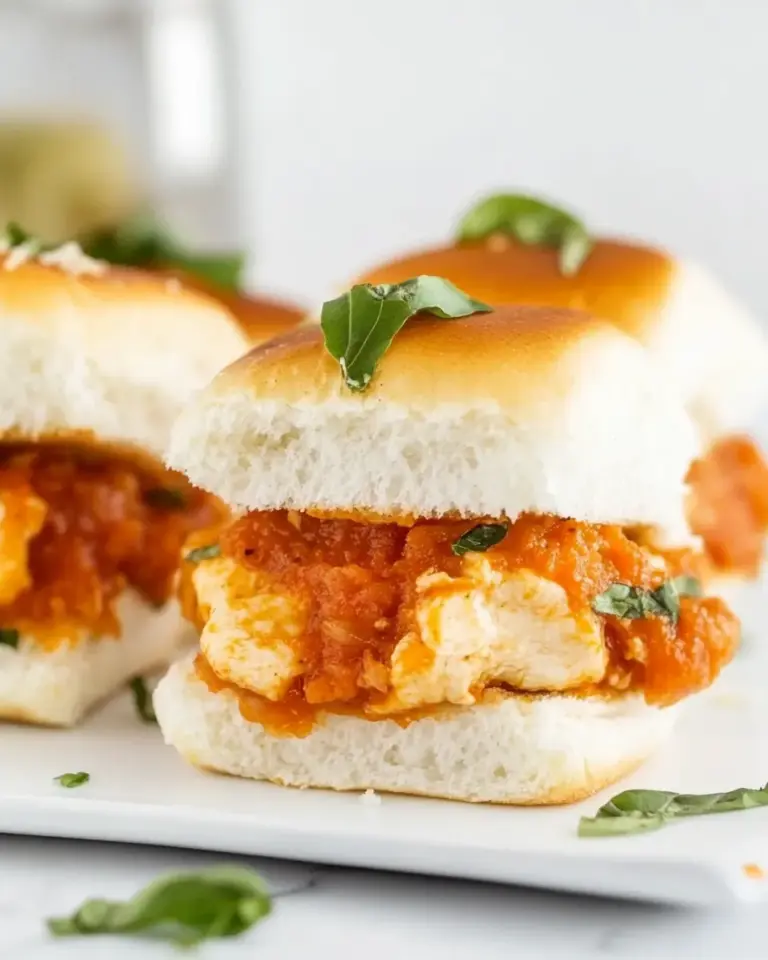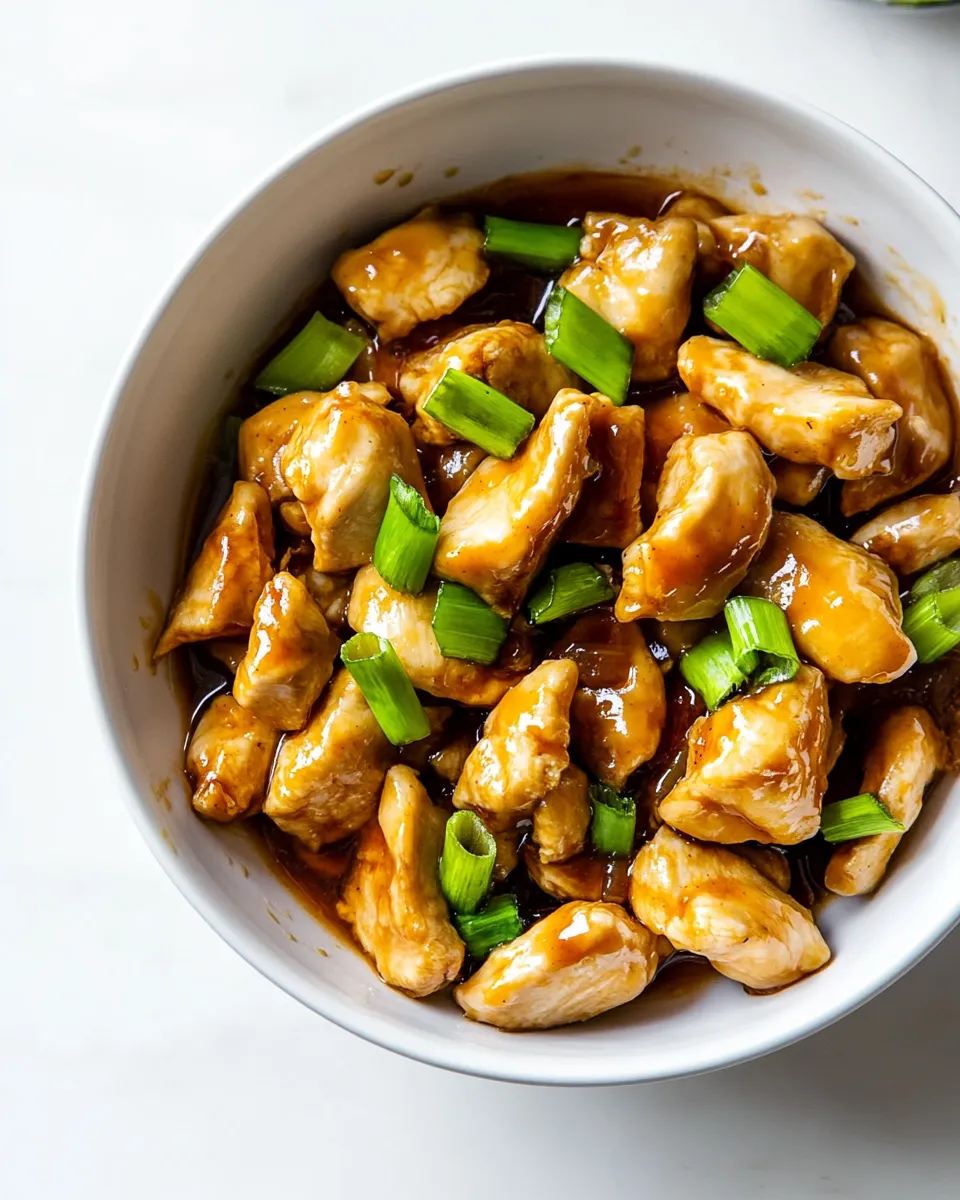
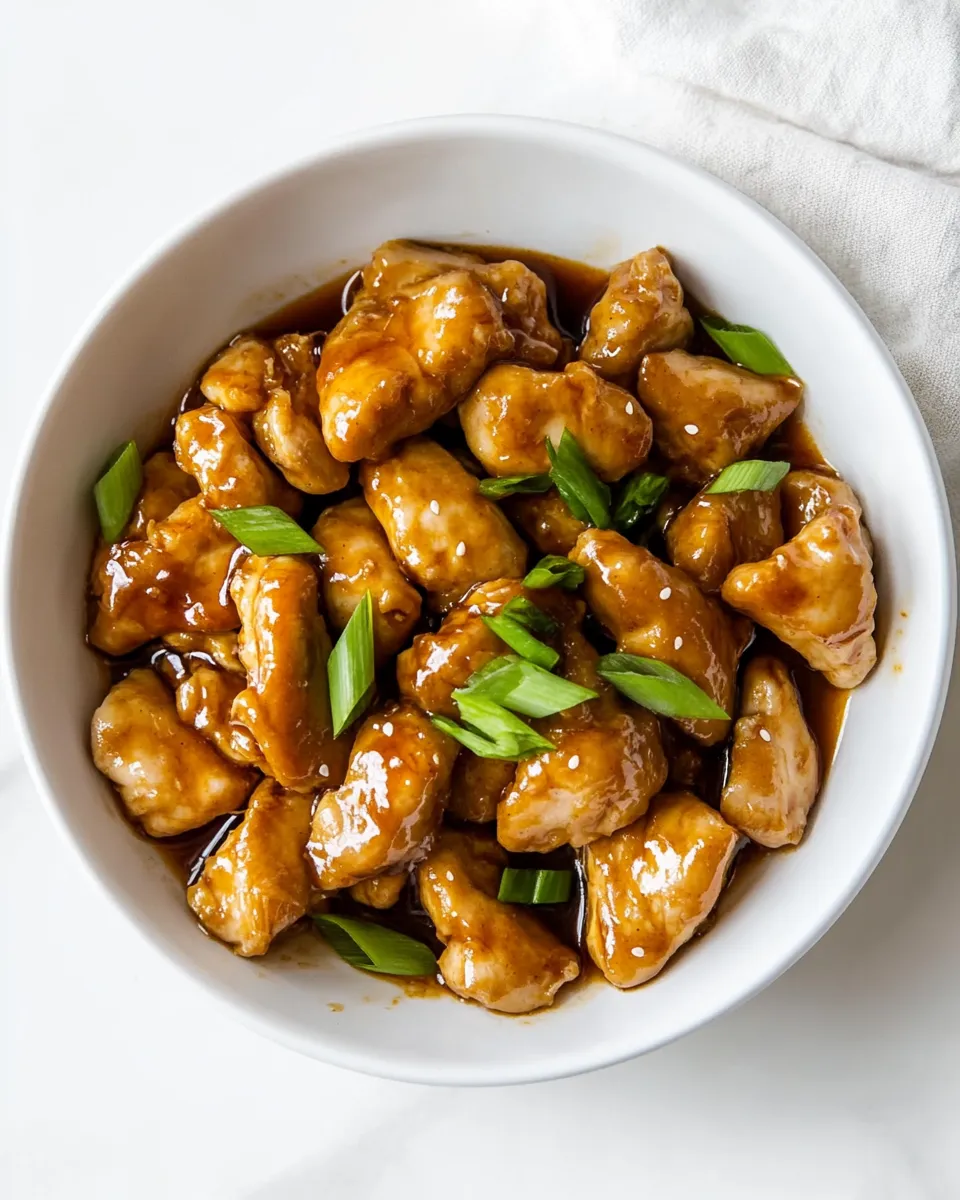
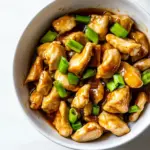
Honey Ginger Chicken
Bright, sticky, and deeply satisfying, this Honey Ginger Chicken is the kind of dinner that makes weeknights feel special without the fuss. Tender pieces of boneless, skinless chicken thighs get a light flour coating, pan-seared until golden, then finished in a glossy, aromatic sauce made from honey, fresh ginger, garlic, soy sauce, and a splash of vinegar. It’s balanced, cozy, and comes together quickly — the perfect recipe for busy cooks who still want big flavor.
Why you’ll love this recipe

This recipe strikes the sweet-salty-acidic balance so many takeout favorites chase. The chicken stays juicy because thighs have a little more fat than breasts, and a thin flour coating gives just the right amount of browning without becoming heavy. Fresh ginger and garlic keep the sauce lively, while honey gives it a caramelized shine. A pinch of red pepper flakes adds warmth if you like a subtle kick.
Ingredients
- 1 teaspoon cornstarch
- 3 tablespoons soy sauce, divided
- 2 pounds boneless, skinless chicken thighs, cut into 2-inch pieces
- ⅓ cup (43g) all-purpose flour*
- ¼ teaspoon salt
- 1 tablespoon extra virgin olive oil
- 1 tablespoon (14g) butter
- 3 cloves garlic, crushed or minced
- 2 teaspoons grated fresh ginger
- Pinch of red pepper flakes (optional)
- ⅓ cup honey
- 2 tablespoons white vinegar
*Note: Using the listed all-purpose flour gives a thin, crisp coating; do not substitute unless you are adapting for dietary needs.
Prep and advance tips
- Cut your chicken into uniform 2-inch pieces so they cook evenly. If the pieces vary widely, smaller bits will overcook while larger ones finish.
- Grate the ginger fresh for the brightest flavor. Pre-minced ginger from a jar lacks the same zing.
- Measure the soy sauce and divide it as listed: a portion goes into a small slurry with cornstarch and a portion seasons the chicken directly.
- If you like a spicier finish, have crushed red pepper flakes or a drizzle of chili oil on hand.
Step-by-step directions
Follow these steps in order for the best result. I’ve rewritten the original directions for clarity while keeping the same ingredient amounts and the same overall order.
- Make the cornstarch-soy slurry: In a small bowl combine 1 teaspoon cornstarch with 1 tablespoon of the soy sauce. Stir until the cornstarch is fully dissolved and set this mixture aside. This will thicken the sauce later.
- Season the chicken: Place the 2 pounds of boneless, skinless chicken thighs cut into 2-inch pieces into a medium bowl. Add 1 tablespoon of soy sauce (from the remaining 3 tablespoons) and ¼ teaspoon salt. Toss the pieces so they are evenly coated. Let the chicken sit for 5 minutes while you prepare the flour coating.
- Coat the chicken in flour: Put ⅓ cup (43g) all-purpose flour into a shallow dish. Dredge each seasoned chicken piece in the flour until lightly coated on all sides, shaking off excess. The coating should be thin, not clumpy.
- Heat the pan and oil: Warm a large skillet over medium-high heat. Add 1 tablespoon extra virgin olive oil and 1 tablespoon (14g) butter to the pan. Allow the butter to melt and the oil to shimmer but not smoke.
- Brown the chicken: Working in a single layer (and in batches if necessary so you don’t crowd the pan), add the floured chicken pieces to the hot skillet. Cook without moving them for 3–4 minutes until the undersides are golden brown, then flip and cook the other side for another 3–4 minutes. Transfer the cooked pieces to a plate and repeat with any remaining chicken. The chicken does not need to be fully cooked through at this stage because it will finish cooking in the sauce.
- Sauté the aromatics: Reduce the heat to medium. In the same skillet, add the minced or crushed 3 cloves garlic and 2 teaspoons grated fresh ginger. Sauté for about 30–45 seconds while stirring constantly so the garlic and ginger become fragrant but do not burn. If using, add a pinch of red pepper flakes now and stir to combine.
- Add the sweet and tangy elements: Pour in ⅓ cup honey and 2 tablespoons white vinegar, and the remaining 1 tablespoon soy sauce (the recipe calls for 3 tablespoons total; you used 1 for the chicken and 1 to make the slurry, so add the last tablespoon here). Stir the mixture to combine and bring it to a gentle simmer so the honey loosens and integrates with the other liquids.
- Thicken the sauce: Give the cornstarch-soy slurry a quick stir in case it settled, then pour it into the simmering sauce. Stir constantly for 1–2 minutes as the sauce thickens and becomes glossy. You should notice it coat the back of a spoon — that’s the texture you want.
- Return the chicken to the pan: Add the browned chicken pieces back into the skillet, nestling them into the sauce. Spoon the sauce over each piece so they’re well coated. Simmer for 3–5 minutes, stirring occasionally, until the chicken is cooked through (internal temperature should reach 165°F/74°C) and the sauce clings to the chicken.
- Finish and rest: Once the chicken is cooked, remove the pan from the heat. Let the dish rest for 2 minutes so the sauce thickens a touch more and settles on the chicken. Taste and adjust seasoning if needed; a small pinch of salt or an extra splash of soy sauce can deepen the savory notes, while a squeeze of lemon or a touch more vinegar brightens the acidity.
- Serve: Transfer the Honey Ginger Chicken to a serving platter or bowls. Spoon any remaining sauce over the top and serve immediately with steamed rice, sautéed greens, or a crisp salad.
Serving suggestions
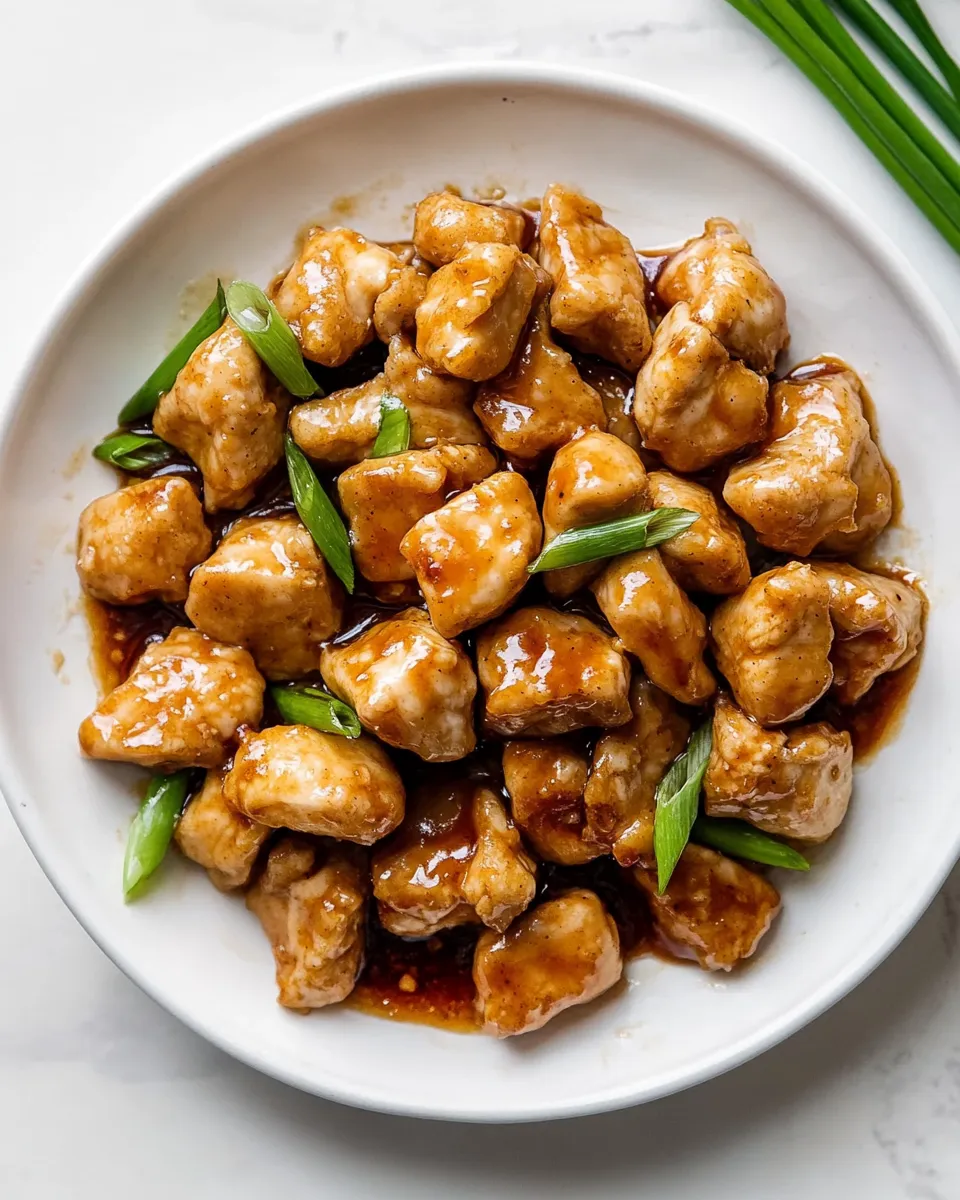
For a classic pairing, serve this chicken over steamed white or brown rice to soak up every bit of sauce. For a lighter plate, pair it with cauliflower rice or wilted bok choy. Toasted sesame seeds and sliced green onions make quick, flavorful garnishes. If you want extra texture, toss in some steamed broccoli florets during the last minute of simmering so they’re bright and tender.
Make-ahead and storage
- Refrigerator: Store cooled leftovers in an airtight container for up to 3 days. Reheat gently in a skillet over low heat with a splash of water to loosen the sauce, or microwave in 30-second intervals, stirring between, until warmed through.
- Freezer: This dish can be frozen, though texture changes are possible after thawing. Freeze in a shallow, airtight container for up to 2 months. Thaw overnight in the refrigerator before reheating.
- Prep ahead: You can cut and flour the chicken and store it in a single layer covered in the refrigerator for a few hours before cooking. Keep the cornstarch slurry in a small covered container and the honey mixture measured out for easy assembly.
Flavor variations
- Soy swap: If you prefer a lower-sodium option, use a reduced-sodium soy sauce and taste before adding extra salt.
- Heat it up: Add 1 teaspoon chili garlic sauce to the sauce for more pronounced heat. Alternatively, increase the red pepper flakes to your taste.
- Citrus lift: Stir in 1 teaspoon fresh lime or lemon juice at the end to brighten the sauce.
- Herb finish: Garnish with chopped cilantro or basil for a fresh contrast to the sweet sauce.
Notes on ingredients
All ingredients listed are commonly found in kitchens. The recipe uses modest amounts of soy sauce divided for marinating, flavoring the sauce, and making the cornstarch slurry. Cornstarch is used only as a thickener and is combined with soy sauce to dissolve before hitting the hot pan so it thickens evenly. Using butter along with olive oil helps with browning while contributing a rounded flavor to the sauce.
Common questions
Can I use chicken breasts instead? Yes, you can substitute boneless, skinless chicken breasts cut into 2-inch pieces. Keep a close eye while cooking as breasts can dry out faster than thighs.
Can I make this gluten-free? To adapt this recipe, use a gluten-free all-purpose flour in place of the listed all-purpose flour and replace soy sauce with tamari or a certified gluten-free soy sauce.
Is the sauce very sweet? The honey gives a noticeable sweetness, but it is balanced by vinegar and soy sauce. Taste as you go and adjust the balance to your preference.
Final thoughts
This Honey Ginger Chicken lives somewhere between a weeknight workhorse and a simple dinner-party dish. It’s approachable enough to make on a Tuesday and polished enough to serve to guests. The technique — a light flour coating, quick pan-sear, and finishing in a glossy sauce — creates a satisfying contrast of textures and layers of flavor. Keep the ginger fresh, the honey measured, and the skillet hot, and you’ll have a sticky, fragrant plate of comfort on the table in under 30 minutes.
Enjoy this Honey Ginger Chicken with your favorite sides, and tweak the seasonings to match your palate. Whether you’re craving something sweet, tangy, or with a little heat, this recipe is a versatile go-to that rewards simple ingredients with big flavor.
Honey Ginger Chicken
Ingredients
- 1 teaspoon cornstarch
- 3 tablespoons soy sauce divided
- 2 pounds boneless skinless chicken thighs cut into 2-inch pieces
- 1/3 cup all-purpose flour (43 g) optional, for dredging
- 1/4 teaspoon salt
- 1 tablespoon extra virgin olive oil
- 1 tablespoon butter (14 g)
- 3 cloves garlic crushed or minced
- 2 teaspoons fresh ginger grated
- pinch red pepper flakes optional
- 1/3 cup honey
- 2 tablespoons white vinegar
Instructions
- Prep and assemble all ingredients so they are ready to use.
- In a small bowl, whisk 1 teaspoon cornstarch with 1 tablespoon soy sauce until dissolved, then stir in the remaining 2 tablespoons soy sauce; set aside.
- Place the chicken in a medium-large bowl; sprinkle the flour and 1/4 teaspoon salt over the chicken and toss until evenly coated (skip the flour if not using).
- Heat a 12-inch skillet over medium-high and add 1 tablespoon olive oil; when shimmering, add the chicken in a single layer and cook undisturbed for 3 minutes.
- Stir the chicken and continue cooking until the outside is no longer pink, about 2–3 more minutes.
- Reduce heat to medium and push the chicken to one side of the skillet. In the empty space, add the butter, then add the garlic, grated ginger, and a pinch of red pepper flakes; cook until fragrant and garlic is lightly golden, about 30 seconds to 1 minute.
- Stir the reserved soy-cornstarch mixture to re-mix any settled cornstarch, then add it to the skillet along with the honey and white vinegar.
- Stir to combine, bring to a simmer, and cook until the sauce is thickened and the chicken is cooked through, about 6–8 minutes (the sauce should take several seconds to flow back when you swipe the pan).
- Taste and add salt if needed, then serve immediately over rice if desired.
Equipment
- 12-inch skillet
- medium-large bowl
- Small Bowl
- Spatula or Wooden Spoon
Notes
- The flour is optional; it helps the sauce cling and aids browning.
- Use fresh grated ginger for best flavor.
- Adjust red pepper flakes to control spice level.
- Stir the cornstarch mixture before adding to avoid lumps.
- Cook the chicken until no pink remains to ensure doneness.