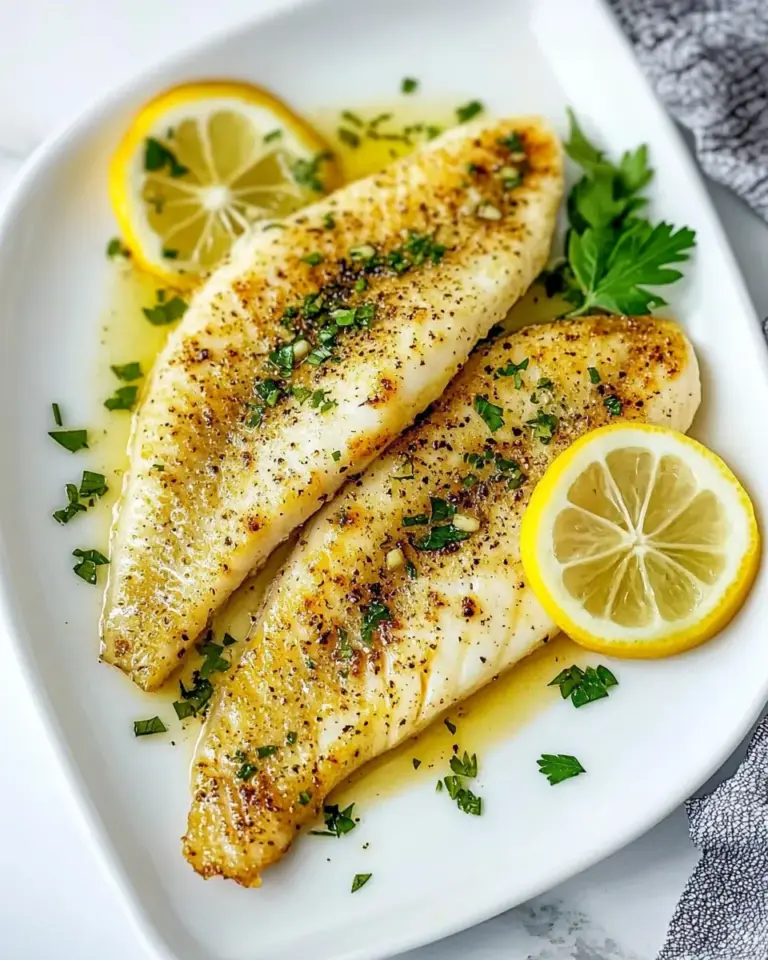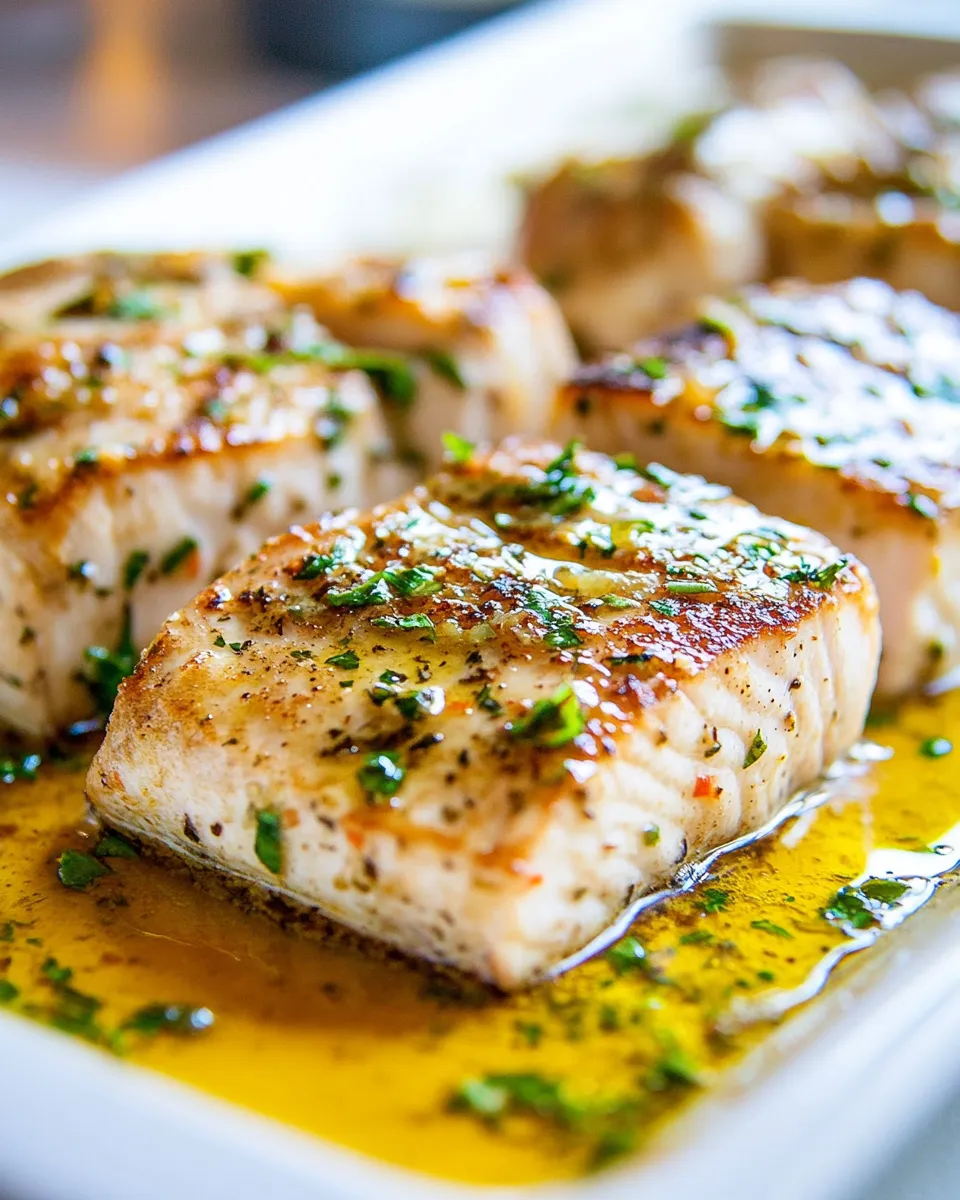
Garlic Butter Mahi Mahi
This is the kind of weeknight recipe I keep coming back to: unfussy, bright, and reliably delicious. A few pantry staples and a hot skillet turn four modest fillets into a dinner that feels restaurant-worthy. The sauce is the star — garlic and butter boosted by lemon slices so every bite is glossy and fresh.
I like recipes that respect time and technique. This one asks for a quick sear and a short pan sauce; nothing fussy, but a few small moves make a big difference. Dry the fish, control the heat, and don’t let the garlic burn. Follow those points and the mahi mahi stays tender and flaky.
Below you’ll find a compact shopping list, a precise ingredient breakdown with tips, the step-by-step instructions I use every time, and practical help: equipment, common traps, seasonal tweaks, and straightforward storage guidance. Let’s get you set up for a confident, delicious dinner.
Shopping List

- 2 small lemons
- 4 mahi-mahi fillets (4–6 oz each)
- Salt
- Ground black pepper
- 2 tablespoons olive oil
- 2 cloves garlic, minced
- 4 tablespoons unsalted butter
- 1 tablespoon fresh parsley, chopped
Ingredients
- 2 small lemons — one for squeezing to build the sauce, one sliced for visual appeal and bright flavor.
- 4 mahi-mahi fillets, 4-6 oz each — firm white fish that holds up to pan searing; size keeps cooking time predictable.
- Salt — seasons the fillets and enhances brightness in the sauce; use to taste.
- Ground black pepper — adds warmth and a little bite; freshly ground is best.
- 2 tablespoons olive oil — for searing; heats hotter than butter without burning for the initial crust.
- 2 cloves garlic, minced — garlic is central to the sauce; mince finely so it releases flavor quickly in the butter.
- 4 tablespoons unsalted butter — melts into the lemon-garlic sauce for richness and gloss; unsalted lets you control seasoning.
- 1 tablespoon fresh parsley, chopped — a last-minute herb to lift the dish and add a fresh green note.
Mastering Garlic Butter Mahi Mahi: How-To
- Cut one small lemon in half and squeeze the juice into a small bowl, removing any seeds. Slice the other small lemon into thin rounds and set the slices aside.
- Rinse the mahi-mahi fillets with cold water and pat them dry with paper towels. Season both sides of each fillet with salt and ground black pepper to taste.
- Heat 2 tablespoons olive oil in a large skillet or nonstick frying pan over medium heat until shimmering.
- Add the mahi-mahi fillets to the skillet and cook undisturbed for 5 minutes. Gently flip each fillet and cook about 5 minutes more, until the fish is opaque through the center and flakes easily with a fork (cooking time may vary with thickness).
- Transfer the cooked fillets to a plate and let them rest while you make the sauce.
- Reduce the skillet heat to medium-low. Add the reserved lemon juice and 2 cloves minced garlic to the skillet with a pinch of salt. Stir constantly for about 30 seconds, until the garlic is fragrant (do not let it burn).
- Add the lemon slices and 4 tablespoons unsalted butter to the skillet. Stir until the butter melts and the sauce is combined.
- Return the mahi-mahi fillets to the skillet and spoon the sauce over them. Cook 1 to 2 minutes more to reheat the fillets and coat them with the sauce.
- Turn off the heat, sprinkle 1 tablespoon chopped fresh parsley over the fillets, and serve immediately.
What Makes This Recipe Special

It’s deceptively simple. You get three main sensations: a golden sear from the olive oil, a silky lemon-butter sauce, and a garlic lift that never overwhelms. The lemon slices are a small but effective detail — they warm through in the butter, releasing essential oils and adding a pretty, aromatic element to the plate.
The technique is straightforward and repeatable: dry the fish, hot pan, undisturbed sear, then a quick pan sauce. That short rest between sear and sauce gives you control over doneness and helps keep the fillets tender. It’s a quick recipe that reads like comfort food but delivers on finesse.
What to Use Instead

- For the fish: substitute any firm, white, mild-tasting fillet — cod, halibut, or sea bass work well if mahi-mahi isn’t available.
- For olive oil: a neutral oil with a high smoke point (canola or grapeseed) will also sear the fish nicely.
- For butter: ghee or a high-quality plant-based butter can provide richness while tolerating higher heat.
- For parsley: chopped chives, cilantro, or dill bring a different but complementary freshness if you prefer those flavors.
- For lemon: lime will give a sharper, slightly more floral brightness if that’s your preference.
Gear Checklist
- Large skillet or nonstick frying pan — big enough for four fillets without crowding.
- Tongs or a spatula — for gentle flipping.
- Sharp knife and cutting board — for lemons and parsley.
- Small bowl — to collect lemon juice and catch seeds.
- Measuring spoons — for oil and butter, if you like precision.
- Paper towels — to pat the fillets dry for a better sear.
- Plate — to rest the fillets while you make the sauce.
Avoid These Traps
Overcooking is the most common mistake. Mahi mahi flakes easily when done; once it turns opaque through the center, it’s ready. Carryover heat continues to cook the fillet while it rests, so remove it from the pan promptly.
Burnt garlic will make the sauce bitter. Reduce the heat to medium-low before adding garlic and stir constantly for no more than about 30 seconds to release aroma without charring. If the pan is too hot, remove it briefly from the burner while you add the juice and garlic.
Also, don’t skip drying the fillets. Moisture on the surface steams the fish and prevents a proper sear. Pat them thoroughly with paper towels and season right before they hit the pan.
Variations by Season
Spring
Add a scatter of fresh peas or asparagus tips on the side and finish with a handful of chopped tarragon or chives for a herbaceous lift.
Summer
Use charred lemon halves and serve the fillets over a bright corn and tomato salad. Or grill the fillets briefly for a smoky edge and finish them in the pan with the garlic butter.
Fall
Include a spoonful of capers in the butter sauce for briny contrast, or serve alongside roasted root vegetables for a heartier plate.
Winter
Keep it cozy: serve the fillets over mashed potatoes or a creamy risotto and add an extra pat of butter to the sauce for richness.
Flavor Logic
Lemon and butter are a classic pairing because the acid of the lemon cuts richness, balancing the mouthfeel and brightening the overall flavor. Garlic adds savory depth, while a touch of salt amplifies both the fish and the sauce. Olive oil gives the initial sear a clean, high-heat edge; butter finishes the sauce with gloss and a soft, rounded flavor.
The lemon slices bring two things to the table: aroma and texture. Warmed in the sauce, they release citrus oils and add a gentle acidity with each bite. The parsley at the end refreshes the palate and keeps the dish from feeling heavy.
Prep Ahead & Store
Prep: you can squeeze the lemon and mince the garlic up to a day ahead; keep them covered in the fridge. Trim and pat the fillets dry just before cooking for the best sear.
Store: cooled leftovers keep well in an airtight container in the fridge for up to 2 days. Reheat gently in a low oven (about 250–275°F) or in a skillet over low heat, spooning the sauce over the fillets so they don’t dry out. Avoid reheating at high heat, which will overcook the fish.
Handy Q&A
- Can I use frozen mahi-mahi? Yes. Thaw fully in the fridge overnight and pat dry before cooking.
- How do I tell when the fish is done? It should be opaque through the center and flake with a fork. For assurance, the internal temperature for cooked fish is commonly around 145°F, but visual flaking is a reliable cue here.
- What if my garlic starts to brown? Remove the pan from heat briefly and lower your burner. Browned garlic is bitter; it’s better to cook it more gently.
- Can I make the sauce without butter? Yes, though butter adds the signature richness. A drizzle of good olive oil or a splash of cream can work in a pinch.
Ready to Cook?
Lay out the fillets, lemon, and garlic. Heat the pan until the oil shimmers, then trust the steps: sear, rest, sauce, finish. It’s a short list of actions for a satisfying result. Serve with a simple starch or a green salad and a glass of white wine if you like. Quick, bright, and unfussy — that’s the point. Now go make it, and enjoy every buttery, lemon-bright bite.
Garlic Butter Mahi Mahi
Ingredients
Ingredients
- 2 small lemons
- 4 mahi-mahi fillets 4-6 oz each
- salt
- Ground black pepper
- 2 tablespoonsolive oil
- 2 clovesgarlic minced
- 4 tablespoonsunsalted butter
- 1 tablespoonfresh parsley chopped
Instructions
Instructions
- Cut one small lemon in half and squeeze the juice into a small bowl, removing any seeds. Slice the other small lemon into thin rounds and set the slices aside.
- Rinse the mahi-mahi fillets with cold water and pat them dry with paper towels. Season both sides of each fillet with salt and ground black pepper to taste.
- Heat 2 tablespoons olive oil in a large skillet or nonstick frying pan over medium heat until shimmering.
- Add the mahi-mahi fillets to the skillet and cook undisturbed for 5 minutes. Gently flip each fillet and cook about 5 minutes more, until the fish is opaque through the center and flakes easily with a fork (cooking time may vary with thickness).
- Transfer the cooked fillets to a plate and let them rest while you make the sauce.
- Reduce the skillet heat to medium-low. Add the reserved lemon juice and 2 cloves minced garlic to the skillet with a pinch of salt. Stir constantly for about 30 seconds, until the garlic is fragrant (do not let it burn).
- Add the lemon slices and 4 tablespoons unsalted butter to the skillet. Stir until the butter melts and the sauce is combined.
- Return the mahi-mahi fillets to the skillet and spoon the sauce over them. Cook 1 to 2 minutes more to reheat the fillets and coat them with the sauce.
- Turn off the heat, sprinkle 1 tablespoon chopped fresh parsley over the fillets, and serve immediately.
Equipment
- skillet or nonstick frying pan
- Small Bowl
- Paper Towels
- Fork
Notes
Recipe Source:
The Kitchen