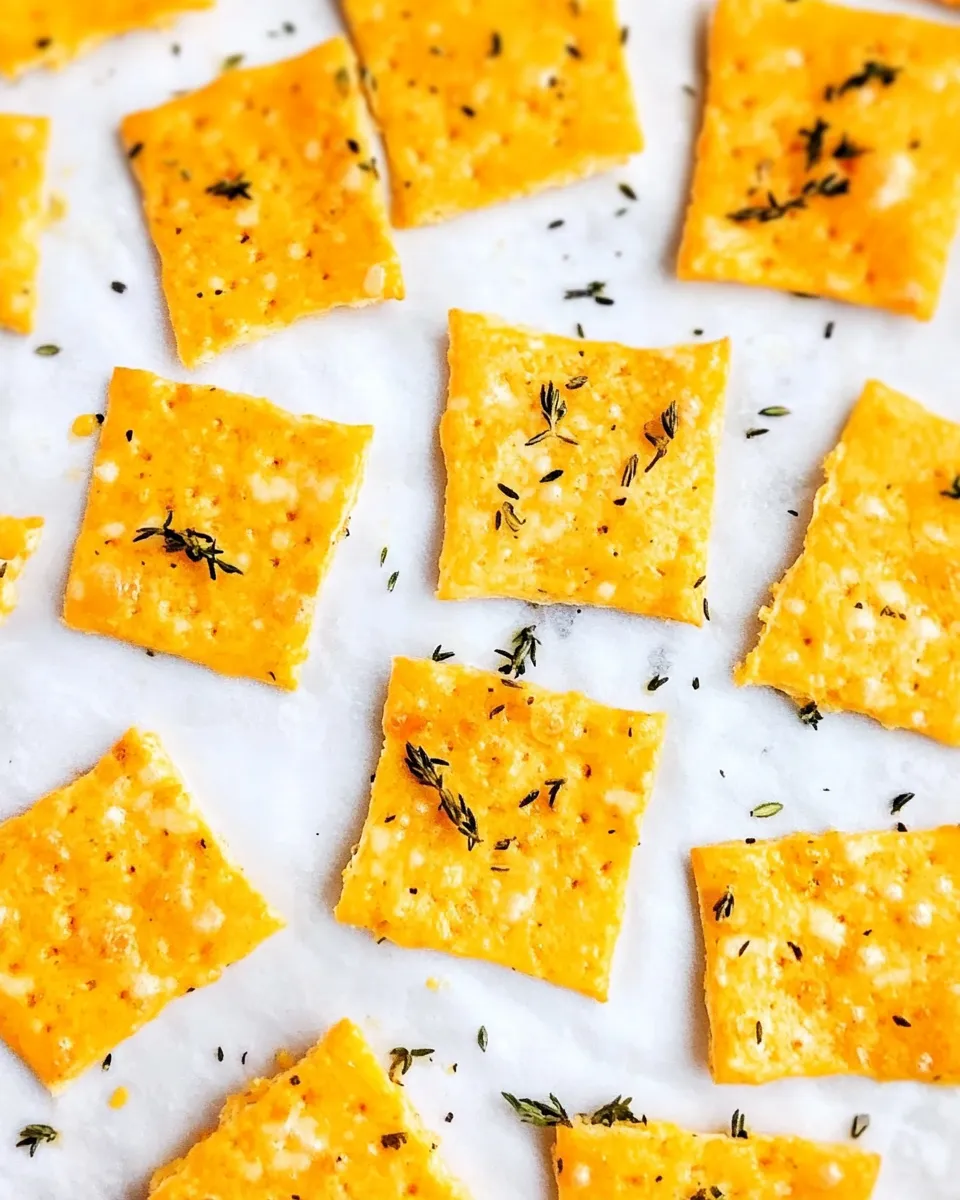
DIY Cheese Crackers
I’m endlessly fond of snacks that feel fancy but aren’t fussy. These DIY cheese crackers are one of those little wins: two pantry items, one hot oven, and five minutes of hands-on prep. They’re crunchy on the edges, slightly chewy in the center at first, and then crisp up as they cool. They make a stellar hostess gift, a last-minute party nibble, or a simple solo snack with coffee or tea.
I started making them when I wanted something salty and homemade without baking dough or measuring multiple ingredients. The method is forgiving, and the result always tastes better than the store-bought rounds. You’ll learn the exact steps in a moment, but know this: timing and spacing are what turn melted blobs into tidy crackers.
Below you’ll find the ingredients, the exact method I follow, troubleshooting tips, and how to store leftovers. Read the short method once, then keep the page open as you work. These crackers come together fast, and you’ll be snacking before you know it.
What Goes Into DIY Cheese Crackers

For this recipe, simplicity is the point. You only need sharp cheddar slices and a touch of garlic salt. The cheddar brings flavor, fat, and that beautiful melting behavior. The garlic salt adds a savory lift that edges the richness without overwhelming it. Because there are only two components, small choices matter: one brand or slice thickness can change the bake time and texture.
Ingredients
- 8 oz sharp cheddar cheese slices — the base of each cracker; choose slices for even melting and consistent size.
- 1/4 teaspoon garlic salt — a light seasoning that enhances the cheese; measured sparingly to avoid overpowering the crackers.
The Method for DIY Cheese Crackers
- Preheat the oven to 350°F (180°C).
- Line a baking pan with parchment paper.
- Cut each cheddar cheese slice into four equal pieces (quarters).
- Arrange the cheese pieces in a single layer on the prepared pan, leaving about 1/2 inch (1 cm) between pieces.
- Evenly sprinkle the 1/4 teaspoon garlic salt over the arranged cheese pieces.
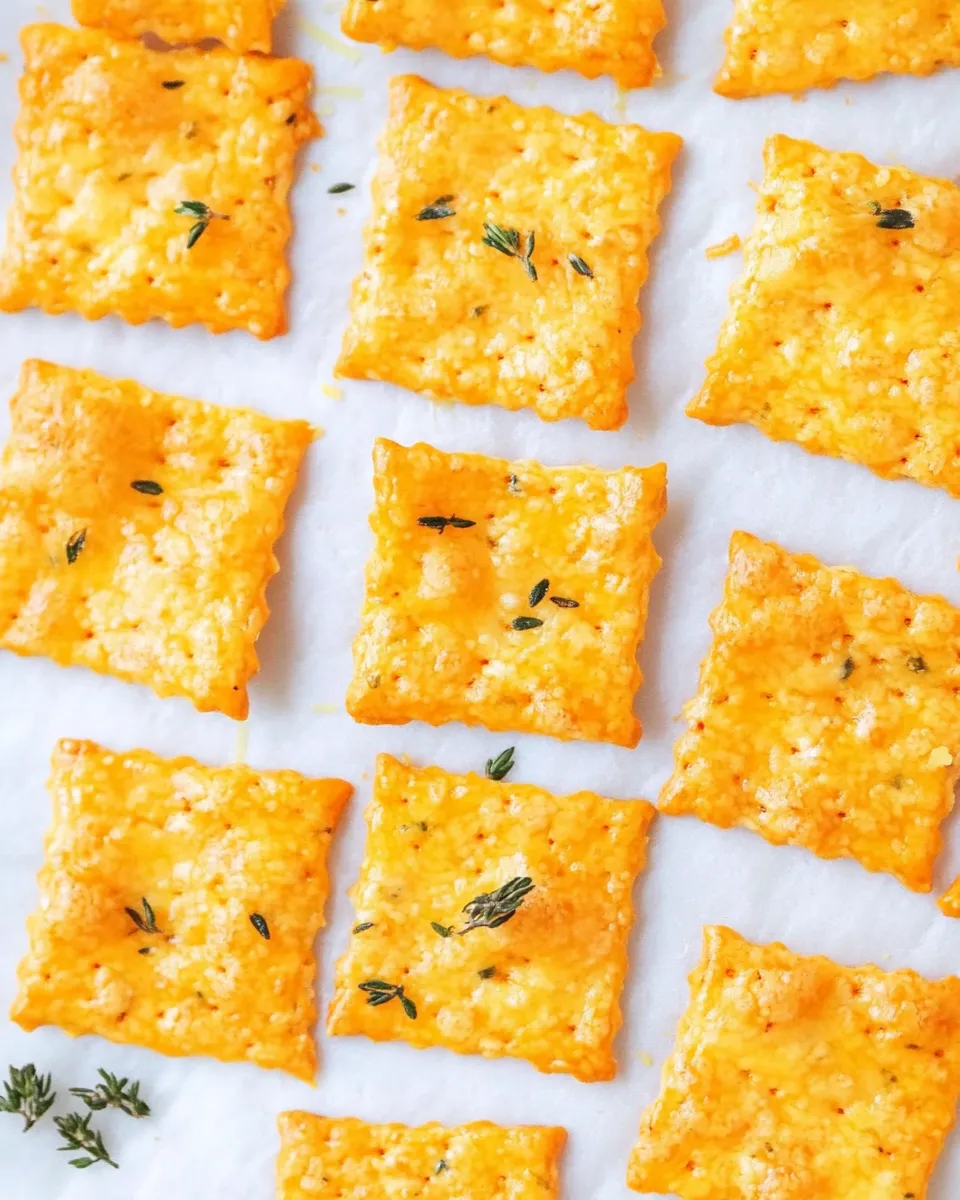
- Bake for 15 minutes, until the edges are lightly golden and the cheese is bubbling.
- Remove the pan from the oven and let the crackers cool on the pan for about 5 minutes; they will harden as they cool. Transfer to a rack if desired and serve once firm.
Why It’s Crowd-Pleasing
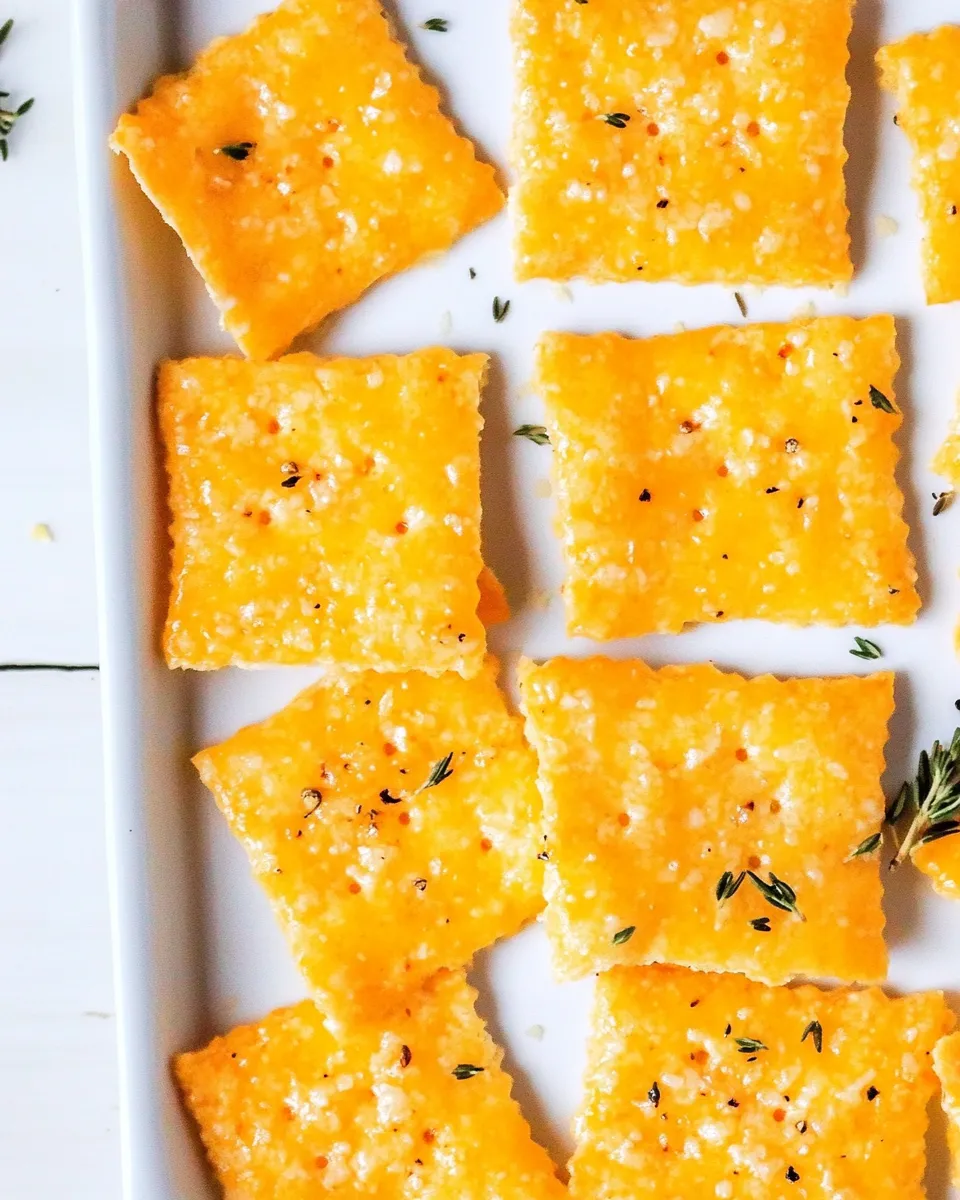
These crackers hit familiar salty, savory notes with minimal fuss. They’re visually appetizing: golden edges and bubbling cheese tell guests something good is happening in the kitchen. Flavor-wise, sharp cheddar offers salt and tang, while the garlic salt adds a bright counterpoint. Texturally they satisfy a universal craving for crunch.
They’re also versatile in presentation. Serve them plain, stack them with deli meats, or place a smear of jam or a slice of apple on top for a sweet-and-salty bite. Because the crackers are essentially pure cheese, they pair beautifully with nearly any wine, beer, or a simple sparkling water.
Texture-Safe Substitutions
If you need to tweak the texture or work with what you have, focus on cheese type and slice thickness rather than introducing foreign ingredients. Firmer, higher-fat cheeses will behave similarly when sliced and baked; very soft cheeses won’t set into crisp crackers. If slice thickness varies, adjust spacing on the pan and keep a close eye on baking time.
For a slightly lighter bite, use thinner slices and reduce the bake time by a minute or two, watching for bubbling and golden edges. If you want a chewier center, leave the slices a touch thicker and give them the full 15 minutes. The goal is to let the edges brown first and the center bubble—then cooling finishes the crisp.
Cook’s Kit
A few reliable tools make this recipe effortless. A rimmed baking pan prevents grease from running off. Parchment paper keeps the crackers from sticking and allows you to lift them off easily. A sharp knife and a small cutting board help you quarter slices cleanly and evenly. A cooling rack is optional but useful for crisping the bottom if you bake multiple sheets.
That’s it. No mixers, no rolling pins, no measured herbs beyond what’s listed. The simplicity is part of the charm.
Avoid These Mistakes
Spacing is non-negotiable. If pieces are too close, they will merge into one cheesy sheet rather than individual crackers. Leave about 1/2 inch (1 cm) between each piece so heat can circulate and edges can crisp.
Don’t skip the parchment. Without it, the cheese can bond to the pan and tear when you try to remove the crackers. Likewise, putting them in a cold oven or baking at a significantly higher temperature can cause uneven melting and burning before the center has a chance to bubble properly.
Finally, resist the urge to move the pan mid-bake. Stabilize the oven racks in advance. The bubbles and browning develop best with steady heat.
How to Make It Lighter
Because these crackers are pure cheese, “lighter” is relative. To reduce the perceived richness, make the slices thinner and watch the bake closely. Thinner slices will crisp faster and feel less dense. Serve smaller pieces and pair with acidic accompaniments—fresh fruit, pickles, or a dollop of low-fat yogurt-based dip—so the overall bite feels brighter.
Another practical option is to use the crackers as a garnish rather than the main snack: crumble a few over salads or soups instead of serving a plateful. That way you get the flavor punch without the full caloric load.
What I Learned Testing
I ran these multiple times to pin down a reliable window for timing and spacing. The biggest revelation: identical-looking slices from the same brand still vary a hair in thickness, and that affects crisp time. I tested different baking pans, too. Dark pans brown faster; if you use one, check at 13 minutes.
Cooling time matters as much as the bake. If you try to move a cracker right out of the oven, it will be soft and likely stick or break. Give them the five minutes on the pan, then transfer to a rack if you want faster overall crisping. I also learned to trust small tweaks—an extra 30 seconds can be the difference between nicely golden edges and a burnt corner.
Storage & Reheat Guide
Stored in an airtight container at room temperature, these crackers keep their texture for about 24–48 hours. After that, they start to lose their crispness as ambient moisture softens them. If you expect leftovers, let the crackers cool completely before sealing the container. Any trapped heat creates steam and ruins the crunch.
To refresh softened crackers, reheat them in a single layer on a baking sheet at 300°F (150°C) for 3–5 minutes. Watch closely; they can go from warmed to browned quickly. Alternatively, a dry skillet over low heat can bring back crispness in a minute or two—flip once and remove as soon as they sizzle and firm.
Your Questions, Answered
Q: Can I make these ahead for a party? A: Yes. Make them the day of if possible for peak crispness. If you must prepare ahead, bake and cool completely, then store in a loose container and re-crisp in the oven shortly before serving.
Q: Will different cheeses work? A: In general, firmer cheeses with good melting properties will behave similarly. Softer, high-moisture cheeses won’t crisp. If you experiment, do a small test batch to dial in timing.
Q: What about seasoning variations? A: The garlic salt is a simple, reliable choice. If you opt to change seasonings, use them sparingly—cheese is already salty. A light dusting will go a long way.
Before You Go
These DIY Cheese Crackers are a proof that simple food can be delightful. They require almost no planning, no complicated technique, and they reward you immediately. Keep a sleeve of cheddar slices and a shaker of garlic salt on hand, and you’ll always have a quick, homemade snack ready.
Try one tray, then tweak to your taste. Thinner slices, a touch more seasoning, a slightly longer bake—small adjustments let you personalize crunch and richness. I’ll be in my kitchen, testing the next tiny variation. Let me know how yours turn out.
DIY Cheese Crackers
Ingredients
Ingredients
- 8 ozsharp cheddar cheese slices
- 1/4 teaspoongarlic salt
Instructions
Instructions
- Preheat the oven to 350°F (180°C).
- Line a baking pan with parchment paper.
- Cut each cheddar cheese slice into four equal pieces (quarters).
- Arrange the cheese pieces in a single layer on the prepared pan, leaving about 1/2 inch (1 cm) between pieces.
- Evenly sprinkle the 1/4 teaspoon garlic salt over the arranged cheese pieces.
- Bake for 15 minutes, until the edges are lightly golden and the cheese is bubbling.
- Remove the pan from the oven and let the crackers cool on the pan for about 5 minutes; they will harden as they cool. Transfer to a rack if desired and serve once firm.
Equipment
- Oven
- Baking Pan
- Parchment Paper
- Knife
- Cooling Rack
Notes
Line the baking pan with parchment paper to prevent the cheese crackers from sticking to the pan.
Bake the cheese crackers in a preheated oven at 350°F for 15 minutes. Do not increase the temperature or over bake the cheese crackers, or they will become burnt and taste bitter.