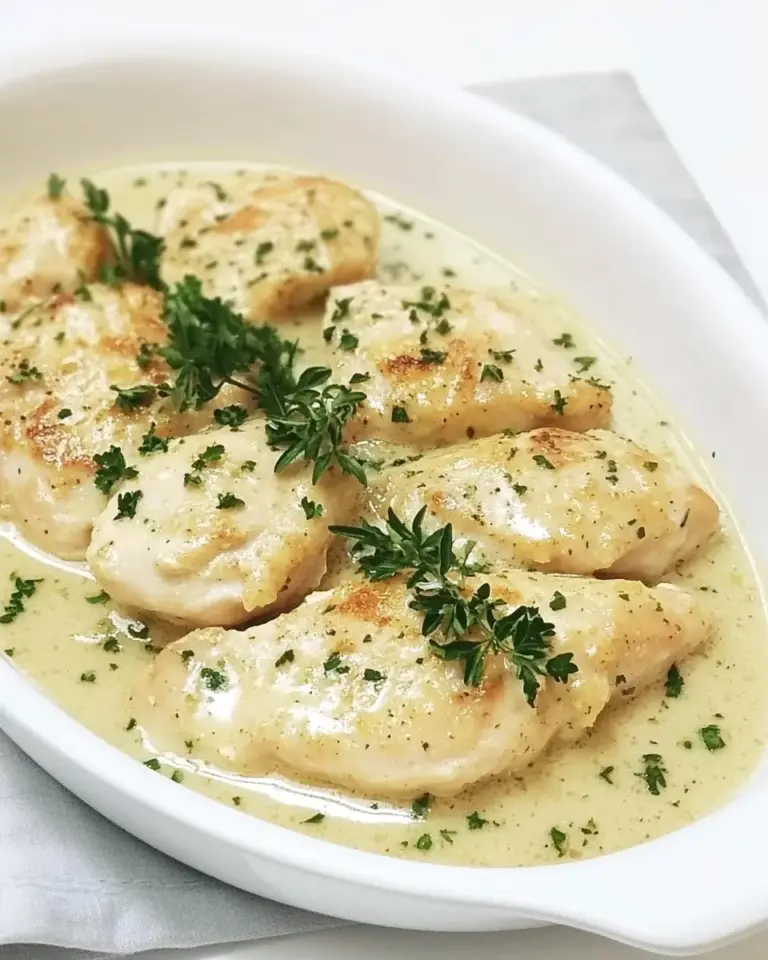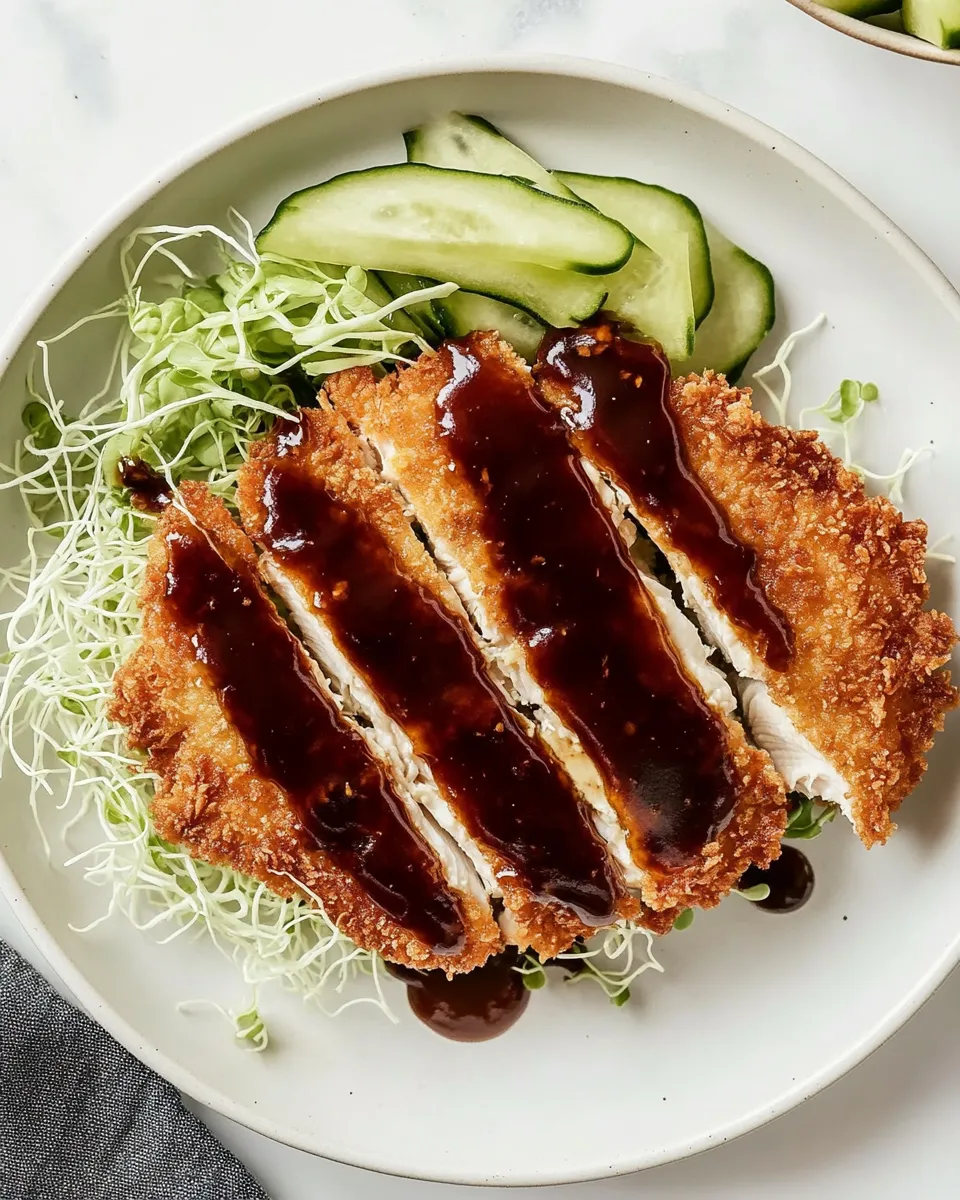
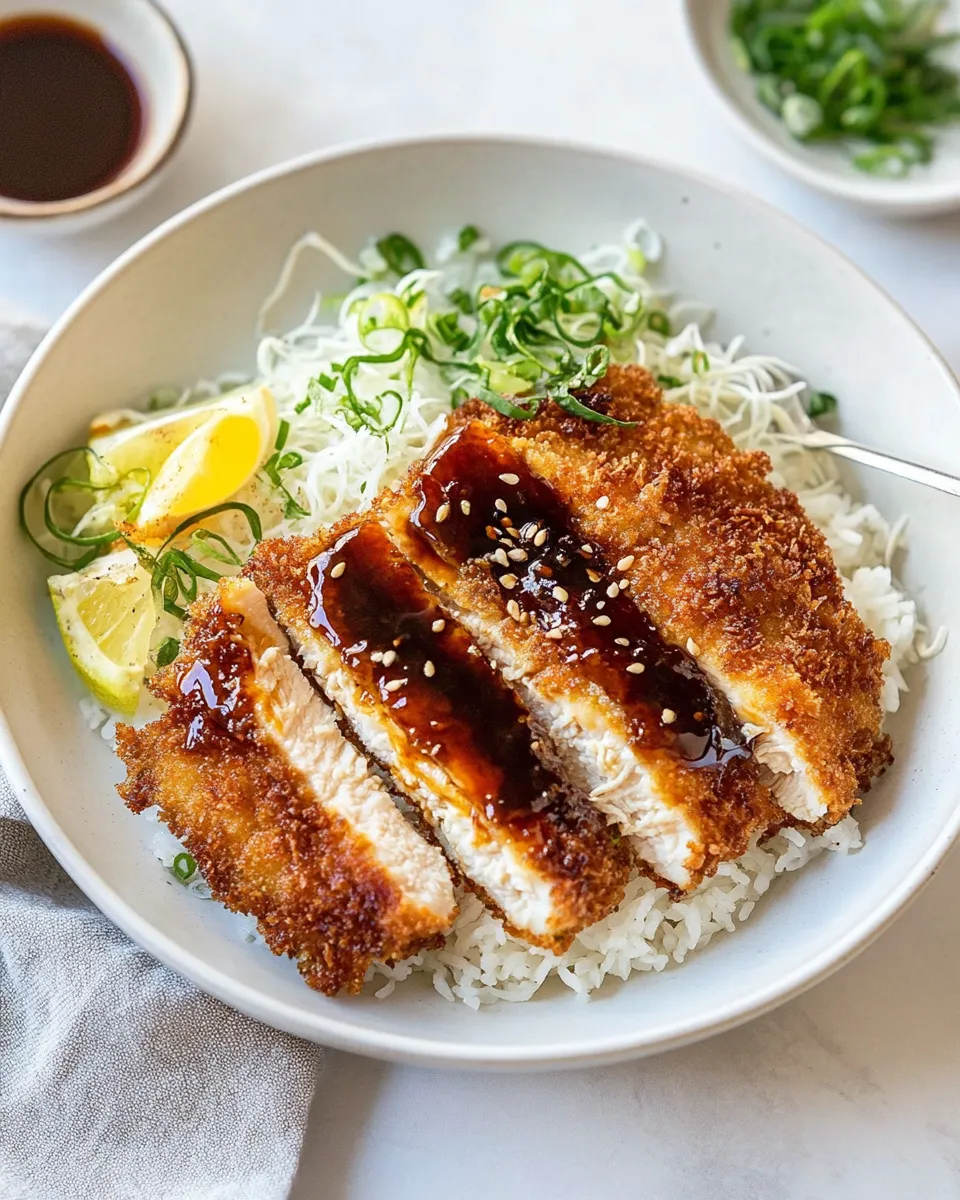
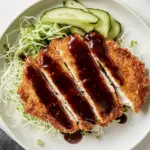
Chicken Katsu
I learned to make chicken katsu the way my kitchen teaches most lessons: by doing it repeatedly until the technique outlasts the nerves. It’s straightforward: thin chicken cutlets, a seasoned egg wash, a crispy panko crust, and a quick fry. The result is reliable comfort with a texture that makes people pause mid-bite.
This recipe is built to be practical. I include clear steps for pounding, breading, and frying so the crust stays crisp and the meat stays juicy. There are small tricks—letting the breading set, keeping oil temperature steady, finishing with a sprinkle of good salt—that turn a good katsu into one you’ll want to repeat.
Below you’ll find a tidy shopping list, the step-by-step instructions exactly as written, and the tips I use when I cook for friends. Read through once, gather your tools, and this will be dinner in less time than you expect.
Shopping List

- Chicken — 28-ounce boneless, skinless chicken breasts (this is the main ingredient; buy whole breasts so you can slice and pound for even cutlets).
- Salt — kosher salt for seasoning and a finishing salt such as Maldon (kosher salt seasons the meat; finishing salt adds a bright crunch at the end).
- Coating dry — ½ cup rice flour or cornstarch and 2 cups panko bread crumbs (rice flour or cornstarch helps the egg cling; panko gives that signature airy crunch).
- Eggs — 2 eggs (they bind the panko to the chicken and are mixed with Maggi or soy for extra umami).
- Seasoning — ½ teaspoon Maggi seasoning, or use soy sauce or tamari (adds savory depth to the egg wash).
- Frying oil — 12 ounces canola oil, vegetable oil, or sunflower oil (neutral oils with high smoke points are best for frying).
- Garnish — 1 teaspoon sesame seeds (optional) and 1 teaspoon finishing salt, such as Maldon sea salt (for presentation and flavor boost).
Ingredients
- 28-ounce boneless, skinless chicken breasts — the amount gives you several cutlets; slice and pound for even cooking.
- ½ teaspoon kosher salt — seasons the cutlets lightly before breading.
- ½ cup rice flour or cornstarch — helps the egg adhere and gives a light initial layer for the panko.
- 2 eggs — whisked and mixed with Maggi or soy to glue the panko and add flavor.
- ½ teaspoon Maggi seasoning, or use soy sauce or tamari — adds umami to the egg wash; use tamari for gluten-free option.
- 2 cups panko bread crumbs — the main crisping agent; use fresh panko for best texture.
- 12 ounces canola oil, vegetable oil, or sunflower oil — neutral oil for frying; measure the amount so it fits your pan safely.
- 1 teaspoon finishing salt, such as Maldon sea salt — sprinkled right after frying to heighten the crunch and flavor.
- 1 teaspoon sesame seeds, (optional) — for a toasty finish and visual interest.
Chicken Katsu Made Stepwise
- Trim any excess fat from the 28-ounce boneless, skinless chicken breasts. Slice each breast in half from tip to tail to make thinner cutlets. Working with one cutlet at a time, place it between two pieces of plastic wrap and pound with a meat mallet or rolling pin to 1/4-inch thickness. Repeat for all cutlets.
- Lightly season both sides of all cutlets with the 1/2 teaspoon kosher salt.
- Set up a breading station with three shallow bowls or rimmed plates: put 1/2 cup rice flour or cornstarch in the first bowl, crack and whisk the 2 eggs into the second bowl and stir in 1/2 teaspoon Maggi seasoning (or soy/tamari if you prefer), and place 2 cups panko bread crumbs in the third bowl.
- Line a baking sheet with a wire rack and set it nearby to hold breaded cutlets.
- Working one cutlet at a time, dredge it in the rice flour or cornstarch, tapping off any excess back into the bowl.
- Dip the floured cutlet into the egg mixture, coating both sides and letting excess egg drip back into the bowl.
- Press the cutlet into the panko crumbs on both sides so the crumbs adhere well. Transfer the breaded cutlet to the wire rack on the prepared baking sheet. Repeat Steps 5–7 with the remaining cutlets.
- (Optional) Cover the baking sheet and refrigerate the breaded cutlets for up to 3 hours to help the coating set.
- Pour 12 ounces of canola, vegetable, or sunflower oil into a large, high-sided skillet and heat over medium until the oil reaches 350°F on a thermometer. (The oil is ready when a small pinch of flour or a few breadcrumbs sizzle on contact.)
- Fry the cutlets in batches so they do not crowd the skillet (one or two at a time, depending on pan size). Use tongs to lower each cutlet into the oil. Cook about 1 1/2 minutes, flip and cook another 1 1/2 minutes, then flip again and cook an additional 30–60 seconds, or until the crust is golden brown and the chicken is cooked through (an internal temperature of 165°F).
- Transfer cooked cutlets to the wire rack-lined baking sheet to drain. Immediately sprinkle the hot cutlets with the 1 teaspoon finishing salt.
- If using, sprinkle up to 1 teaspoon sesame seeds over the cutlets. Serve immediately.
Why It’s My Go-To

Chicken katsu is fast to assemble and forgiving. Pounding the chicken thin removes doubt about doneness and shortens cook time, which means you avoid dry meat. The method is repeatable: once you’ve set up the breading station, the rhythm of flour, egg, panko becomes second nature.
It’s also endlessly adaptable. Serve it simply with a lemon wedge and steamed rice, or dress it up with a homemade katsu sauce or shredded cabbage. The texture contrast—crisp exterior, tender interior—works every time, and guests often mistake the effort involved. That’s the real reason it’s my go-to dish for weeknight impressing.
Low-Carb/Keto Alternatives
- Swap panko for crushed pork rinds to keep the crunch without the carbs. Press the crumbs firmly so they stick.
- Use almond flour or crushed pork rinds in place of rice flour/cornstarch for the initial dredge. The egg wash remains the same.
- Consider shallow-baking the coated cutlets at 425°F on a wire rack, flipping once, to reduce oil. Results won’t be identical but will still be crispy.
Recommended Tools
Essential
- Meat mallet or rolling pin — for pounding cutlets to 1/4-inch thickness.
- Three shallow bowls or rimmed plates — for the breading station (flour, egg, panko).
- Large, high-sided skillet — holds the oil safely for shallow frying.
- Deep-fry thermometer — to monitor oil temperature and keep it near 350°F.
- Wire rack and baking sheet — to drain and keep crust crisp after frying.
Helpful extras
- Tongs — for safely lowering and turning cutlets in the oil.
- Kitchen timer — three short fry intervals add up; the timer helps you keep track.
Learn from These Mistakes
- Overcrowding the pan — it cools the oil and leads to soggy breading. Fry in batches and keep the oil at temperature.
- Skipping the rest time — letting breaded cutlets chill for up to 3 hours helps the coating set and stay on during frying.
- Not pounding evenly — thick centers cook slower and can dry out before the crust browns. Aim for consistent 1/4-inch thickness.
- Too high heat — if the oil smokes or the crust browns instantly, the interior won’t reach 165°F. Maintain ~350°F and check doneness with a thermometer.
Spring–Summer–Fall–Winter Ideas
Spring: Serve Chicken Katsu with a bright, thinly dressed cabbage slaw and a wedge of lemon. The acidity cuts through the fried richness.
Summer: Make katsu sandwiches (katsu sando) using soft white bread, a smear of tonkatsu sauce, and crisp lettuce. Add sliced cucumber and a chilled beer on the side.
Fall: Pair with steamed rice mixed with a little toasted sesame and quick-pickled daikon. The warm rice fits the season’s comfort-food mood.
Winter: Serve alongside miso soup and braised greens for a cozy, warming plate. Finish with extra finishing salt to lift the flavors.
Behind-the-Scenes Notes
I keep my breading station arranged left-to-right: dry, wet, dry. It avoids cross-contamination and keeps the panko clean. When I’m cooking for more people, I double up wire racks so the cutlets can rest without steaming the crust on a flat surface.
The finishing salt is non-negotiable for me. A flaky sea salt on hot katsu makes the flavor pop in a way table salt doesn’t. And if you want a little extra perfume, a quick toast of sesame seeds in a dry pan before sprinkling adds a toasty note.
Make-Ahead & Storage
Make-ahead: You can bread the cutlets and refrigerate them, covered, for up to 3 hours to set the coating before frying. This is handy if you want to prep before guests arrive.
Storage: Cooked katsu keeps in an airtight container in the refrigerator for up to 3 days. Reheat on a wire rack in a 350°F oven until warmed through to help revive the crust. Avoid microwaving directly on a plate; it softens the breading.
Freezing: Cool completely, wrap each cutlet tightly, and freeze up to 1 month. Reheat from frozen in a 400°F oven until hot and crisp, or shallow-fry briefly to refresh the crust.
Reader Q&A
- Q: Can I use bone-in chicken? A: The recipe calls for boneless, skinless breasts to produce even, thin cutlets. Bone-in pieces would need longer cooking and a different method.
- Q: My panko falls off—what am I doing wrong? A: Tap off excess flour, let the excess egg drip, and press the panko into the cutlet. Chilling the breaded cutlets for up to 3 hours helps the crust adhere.
- Q: How do I make a dipping sauce? A: Traditional tonkatsu or bottled katsu sauce works great. For a quick mix, combine equal parts ketchup and Worcestershire sauce with a splash of soy; taste and adjust.
Hungry for More?
If you enjoyed this Chicken Katsu, try variations like pork katsu or katsu sandwiches. Search the blog for “katsu sando” or “tonkatsu sauce” for quick add-on recipes. And if you try this version at home, leave a note about what you served it with—those small swaps are the best part of cooking.
Chicken Katsu
Ingredients
Ingredients
- 28- ounceboneless skinless chicken breasts
- 1/2 teaspoonkosher salt
- 1/2 cuprice flour or cornstarch
- 2 eggs
- 1/2 teaspoonMaggi seasoning or use soy sauce or tamari
- 2 cupspanko bread crumbs
- 12 ouncesCanola oil vegetable oil, or sunflower oil
- 1 teaspoonfinishing salt such as Maldon sea salt
- 1 teaspoonsesame seeds (optional)
Instructions
Instructions
- Trim any excess fat from the 28-ounce boneless, skinless chicken breasts. Slice each breast in half from tip to tail to make thinner cutlets. Working with one cutlet at a time, place it between two pieces of plastic wrap and pound with a meat mallet or rolling pin to 1/4-inch thickness. Repeat for all cutlets.
- Lightly season both sides of all cutlets with the 1/2 teaspoon kosher salt.
- Set up a breading station with three shallow bowls or rimmed plates: put 1/2 cup rice flour or cornstarch in the first bowl, crack and whisk the 2 eggs into the second bowl and stir in 1/2 teaspoon Maggi seasoning (or soy/tamari if you prefer), and place 2 cups panko bread crumbs in the third bowl.
- Line a baking sheet with a wire rack and set it nearby to hold breaded cutlets.
- Working one cutlet at a time, dredge it in the rice flour or cornstarch, tapping off any excess back into the bowl.
- Dip the floured cutlet into the egg mixture, coating both sides and letting excess egg drip back into the bowl.
- Press the cutlet into the panko crumbs on both sides so the crumbs adhere well. Transfer the breaded cutlet to the wire rack on the prepared baking sheet. Repeat Steps 5–7 with the remaining cutlets.
- (Optional) Cover the baking sheet and refrigerate the breaded cutlets for up to 3 hours to help the coating set.
- Pour 12 ounces of canola, vegetable, or sunflower oil into a large, high-sided skillet and heat over medium until the oil reaches 350°F on a thermometer. (The oil is ready when a small pinch of flour or a few breadcrumbs sizzle on contact.)
- Fry the cutlets in batches so they do not crowd the skillet (one or two at a time, depending on pan size). Use tongs to lower each cutlet into the oil. Cook about 1 1/2 minutes, flip and cook another 1 1/2 minutes, then flip again and cook an additional 30–60 seconds, or until the crust is golden brown and the chicken is cooked through (an internal temperature of 165°F).
- Transfer cooked cutlets to the wire rack-lined baking sheet to drain. Immediately sprinkle the hot cutlets with the 1 teaspoon finishing salt.
- If using, sprinkle up to 1 teaspoon sesame seeds over the cutlets. Serve immediately.
Equipment
- Meat Mallet or Rolling Pin
- Plastic Wrap
- three shallow bowls or rimmed plates
- Wire Rack
- Baking Sheet
- large high-sided skillet
- Thermometer
- Tongs