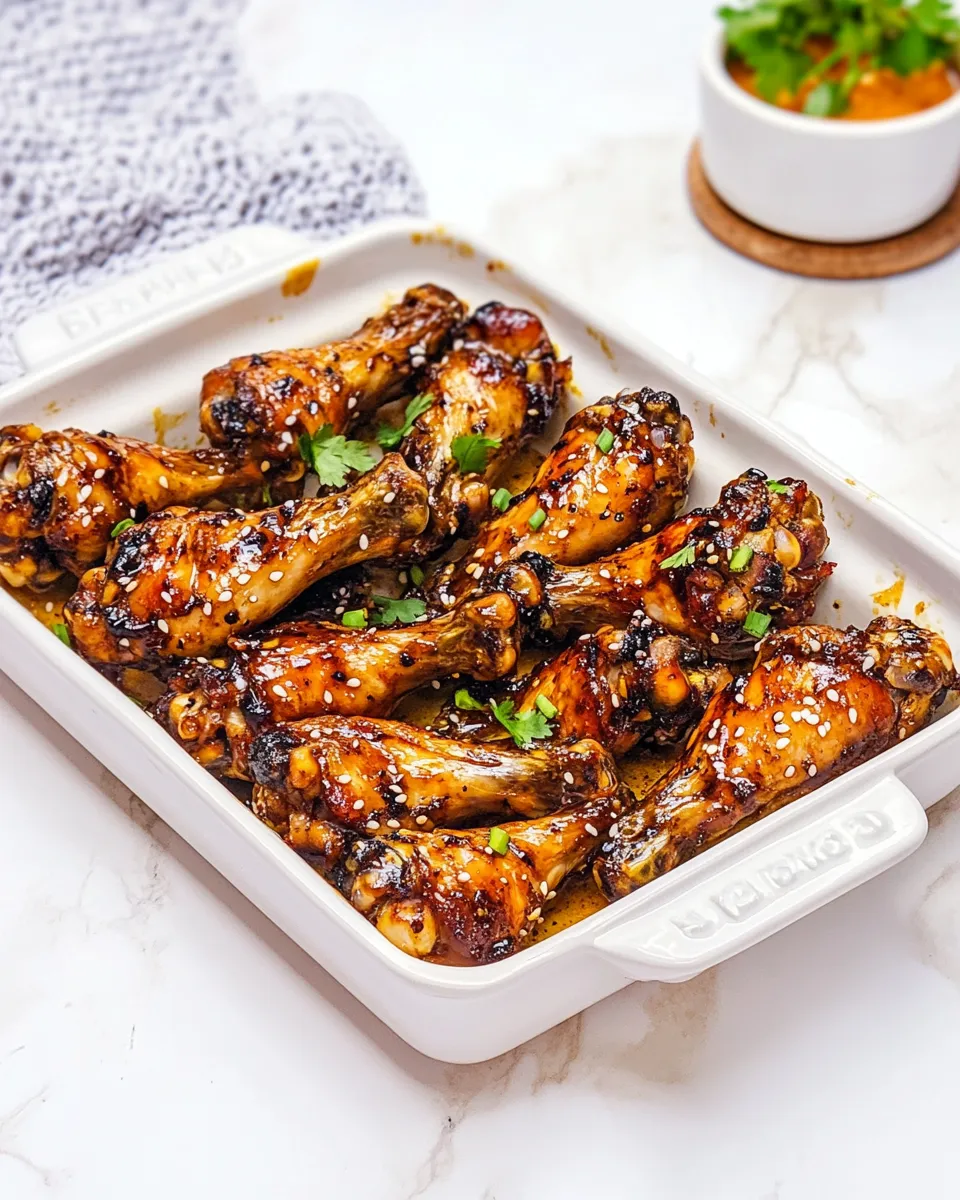
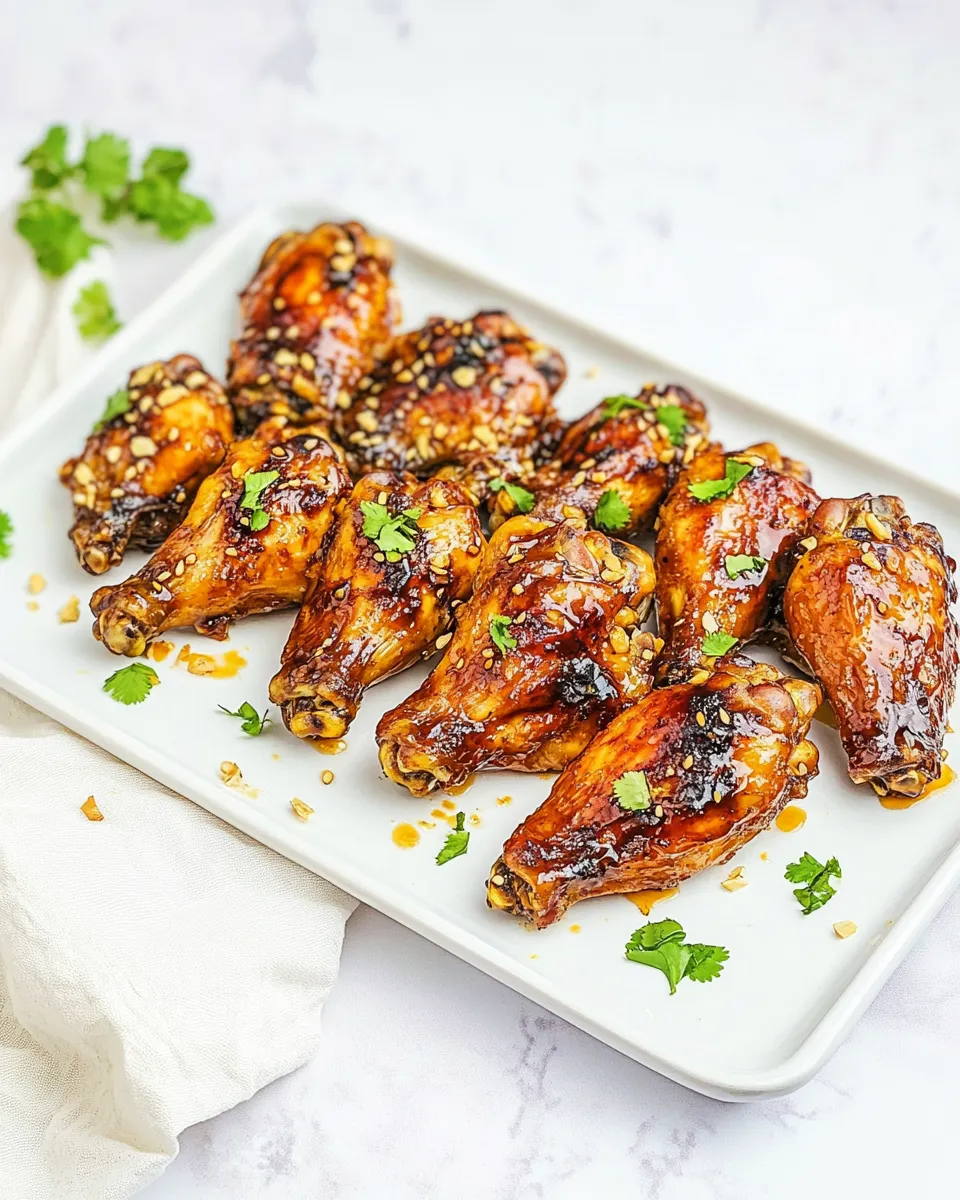
Teriyaki Chicken Wings
These Teriyaki Chicken Wings are the kind of recipe I reach for when I want something straightforward, satisfying, and reliably delicious. They take simple pantry staples and turn them into sticky, caramelized wings with a balance of sweet, salty, and warm spice. No fancy techniques—just a little time in the oven and a quick broil at the end to get the edges crisp.
I love that this method is forgiving: the wings braise in the sauce long enough to cook through evenly, then you finish them under the broiler to lock in texture. That two-stage approach delivers tender meat and the glossy, slightly charred finish everyone expects from good teriyaki wings.
Below you’ll find the exact ingredient list and step-by-step directions I use every time, plus practical tips, troubleshooting, swaps, and storage advice so your batch comes out great whether it’s game day, a weeknight, or a small dinner party.
Ingredients

- 3 pounds chicken wings — tips removed and split at the joint; this helps them cook evenly and makes them easier to eat.
- 1 cup low-sodium soy sauce — the salty, savory backbone of the glaze; low-sodium keeps the sauce from overpowering the wings.
- 2/3 cup water — thins the sauce so it penetrates the wings and prevents over-thickening in the pan.
- 1 cup brown sugar — gives sweetness and fuels caramelization when broiled.
- 2 tablespoons dry mustard — adds a subtle tang and helps balance the sweetness.
- 1 tablespoon ground ginger or fresh grated ginger root — warm, aromatic flavor; fresh grated will be brighter, ground is more convenient.
- 3 garlic cloves — minced; they mellow and deepen the sauce as it cooks.
What We’re Using
This recipe leans on a short list of pantry-friendly items that combine into a glossy teriyaki-style sauce. Low-sodium soy sauce keeps the salt in check so the brown sugar and aromatics—ginger and garlic—can show. Dry mustard is a small but important addition: it cuts through the sweetness and gives the sauce more complexity.
For the chicken, use wings with tips removed and split at the joint. That’s the way they’re called for in the recipe and it’s not just tradition—taking the tips off and splitting lets the meat cook all the way through on a consistent schedule, which is especially helpful since the method relies on baking in a single layer in a shallow pan.
Teriyaki Chicken Wings: From Prep to Plate
- Preheat the oven to 350°F. Arrange the 3 pounds of chicken wings (tips removed and split at the joint) in a single layer in a large, shallow baking pan.
- In a medium saucepan, combine 1 cup low-sodium soy sauce, 2/3 cup water, 1 cup brown sugar, 2 tablespoons dry mustard, 1 tablespoon ground or fresh grated ginger, and 3 minced garlic cloves. Stir to combine.
- Bring the mixture to a boil over medium heat, stirring until the brown sugar is dissolved, then remove the pan from the heat.
- Pour the sauce evenly over the wings in the baking pan, turning the wings as needed so they are well coated.
- Bake the wings, uncovered, in the preheated 350°F oven for 1 hour and 30 minutes, turning the wings once halfway through the baking time (after about 45 minutes).
- When the baking time is complete, transfer the wings to a broiler pan and position an oven rack about 6 inches below the broiler element. Set the oven to Broil.
- Broil the wings, turning occasionally, until they are crisped and browned to your liking — a few minutes per side (watch closely to prevent burning).
- Remove the wings from the broiler and let them rest a few minutes before serving.
Why This Recipe Is Reliable

There are two simple reasons this version consistently works: time and finishing heat. Baking the wings in a single layer for 90 minutes lets the meat cook gently in the sauce, which prevents drying and ensures that every bite is tender. The gentle simmer and longer bake also let the flavors marry.
The broiler step does the heavy lifting for texture. It crisps and caramelizes the exterior quickly without drying the interior, turning a floppy glazed wing into something with a satisfying bite. Because the wings spend ample time in the sauce, you don’t need a complicated marinade or repeated basting to get flavor through the meat.
Vegan & Vegetarian Swaps
Want the glaze but not the chicken? You can adapt the sauce to plant-based carriers. Firm tofu cut into oblong “wing” shapes, cauliflower florets, or thick mushroom caps work well when treated the same way: roast or bake in a single layer in a shallow pan with the sauce, then finish under the broiler for color and texture.
Note: plant-based items will have different cook times and textures than chicken. Keep an eye on them while baking and broiling so you get a good balance of tenderness and caramelization without burning.
Essential Tools for Success
- Large shallow baking pan — lets the sauce surround the wings and promotes even cooking.
- Medium saucepan — for bringing the sauce together and dissolving the sugar evenly.
- Broiler pan or wire rack over a rimmed baking sheet — necessary for that high, direct heat finish.
- Tongs — for turning wings during the bake and while broiling without tearing the skin.
- Oven with broiler — the method depends on a good broiler to crisp the glaze at the end.
Troubleshooting Tips
If the wings taste too sweet: Reduce the brown sugar slightly next time or serve the wings with a squeeze of fresh citrus at the table to brighten and cut sweetness.
If the wings are undercooked in the thickest parts: Make sure you started with the tips removed and joints split as called for. If needed, return them to the oven at 350°F until the internal meat reaches a safe temperature and is no longer pink at the bone.
If the outside burns during broiling: Your oven’s broiler may run hotter than average. Move the oven rack down an inch or two, and broil for shorter intervals—check every minute or so. The sauce caramelizes rapidly because of the sugar, so vigilance is key.
If the skin is soft instead of crisp: Broil a little longer, turning often. Also, avoid overcrowding when you move them to the broiler pan; give each wing some space so the heat reaches all sides.
Variations for Dietary Needs
Gluten-free: Swap regular soy sauce for gluten-free tamari or coconut aminos. Both provide a similar savory backbone without gluten.
Lower sugar: Halve the brown sugar or experiment with a concentrated liquid sweetener. The texture of the glaze will change, so broiling times may need adjusting to reach the same caramelized finish.
Lower sodium: The recipe already calls for low-sodium soy sauce, which helps. You can further reduce sodium by rinsing the wings briefly before baking or diluting the sauce with a bit more water, then broil longer to concentrate the glaze.
Method to the Madness
There’s a clear logic to each stage: bring the sauce to a boil so the sugar dissolves evenly and the flavors meld; bake covered in a shallow pan so the wings cook through in a flavor bath; then broil to convert that soft, glossy coating into sticky, slightly charred glaze. Turning the wings halfway through the bake ensures even color and saturation.
Timing matters more than fancy gadgets here. The 1 hour and 30 minute bake is not arbitrary—it guarantees the meat reaches tenderness while allowing the sauce to reduce around the pieces. The broil is a quick, high-heat technique to finish things without overshooting the internal doneness.
Storage & Reheat Guide
Refrigerate leftover wings in an airtight container for up to 3–4 days. To freeze, lay wings on a tray to flash-freeze, then transfer to a freezer-safe bag for up to 3 months. Thaw overnight in the refrigerator before reheating.
To reheat and retain texture: preheat the oven to 350°F and arrange wings on a baking sheet. Heat for 10–15 minutes until warmed through, then hit them briefly under the broiler to restore crispness. An air fryer also works well for reheating—2–4 minutes at a high temperature will bring back the edge.
Quick Questions
- Can I double the recipe? Yes. Use a larger shallow pan or two pans so the wings remain in a single layer.
- Can I make the sauce ahead? Yes. Make the sauce, cool it, and refrigerate up to 3 days. Warm it gently before pouring over the wings.
- Are the wings fully cooked after 1 hour 30 minutes? Yes, the recipe is designed so they reach doneness during the bake; broiling is only for texture.
- Can I grill instead of broiling? You can finish on a hot grill to get similar char, but watch carefully—the sugar will flare up quickly.
See You at the Table
These teriyaki-style wings are one of my go-to recipes when I want a hands-off bake that finishes with a crisp, sticky flourish. The technique is straightforward, forgiving, and scale-friendly. Whether you serve them as an appetizer, game-day snack, or part of a casual dinner, they’re crowd-pleasers that come together from a short list of pantry items.
If you try them, tell me how you finished them—extra broil time, a squeeze of citrus, or a sprinkle of sesame seeds. Little adjustments are how these recipes find their way into weekly rotation. Happy cooking, and see you at the next recipe.
Teriyaki Chicken Wings
Ingredients
Ingredients
- 3 poundschicken wingstips removed and split at the joint
- 1 cuplow-sodium soy sauce
- 2/3 cupwater
- 1 cupbrown sugar
- 2 tablespoonsdry mustard
- 1 tablespoonground ginger or fresh grated gingerroot
- 3 garlic clovesminced
Instructions
Instructions
- Preheat the oven to 350°F. Arrange the 3 pounds of chicken wings (tips removed and split at the joint) in a single layer in a large, shallow baking pan.
- In a medium saucepan, combine 1 cup low-sodium soy sauce, 2/3 cup water, 1 cup brown sugar, 2 tablespoons dry mustard, 1 tablespoon ground or fresh grated ginger, and 3 minced garlic cloves. Stir to combine.
- Bring the mixture to a boil over medium heat, stirring until the brown sugar is dissolved, then remove the pan from the heat.
- Pour the sauce evenly over the wings in the baking pan, turning the wings as needed so they are well coated.
- Bake the wings, uncovered, in the preheated 350°F oven for 1 hour and 30 minutes, turning the wings once halfway through the baking time (after about 45 minutes).
- When the baking time is complete, transfer the wings to a broiler pan and position an oven rack about 6 inches below the broiler element. Set the oven to Broil.
- Broil the wings, turning occasionally, until they are crisped and browned to your liking — a few minutes per side (watch closely to prevent burning).
- Remove the wings from the broiler and let them rest a few minutes before serving.
Equipment
- large shallow baking pan
- Medium Saucepan
- broiler pan
- oven rack
- Oven