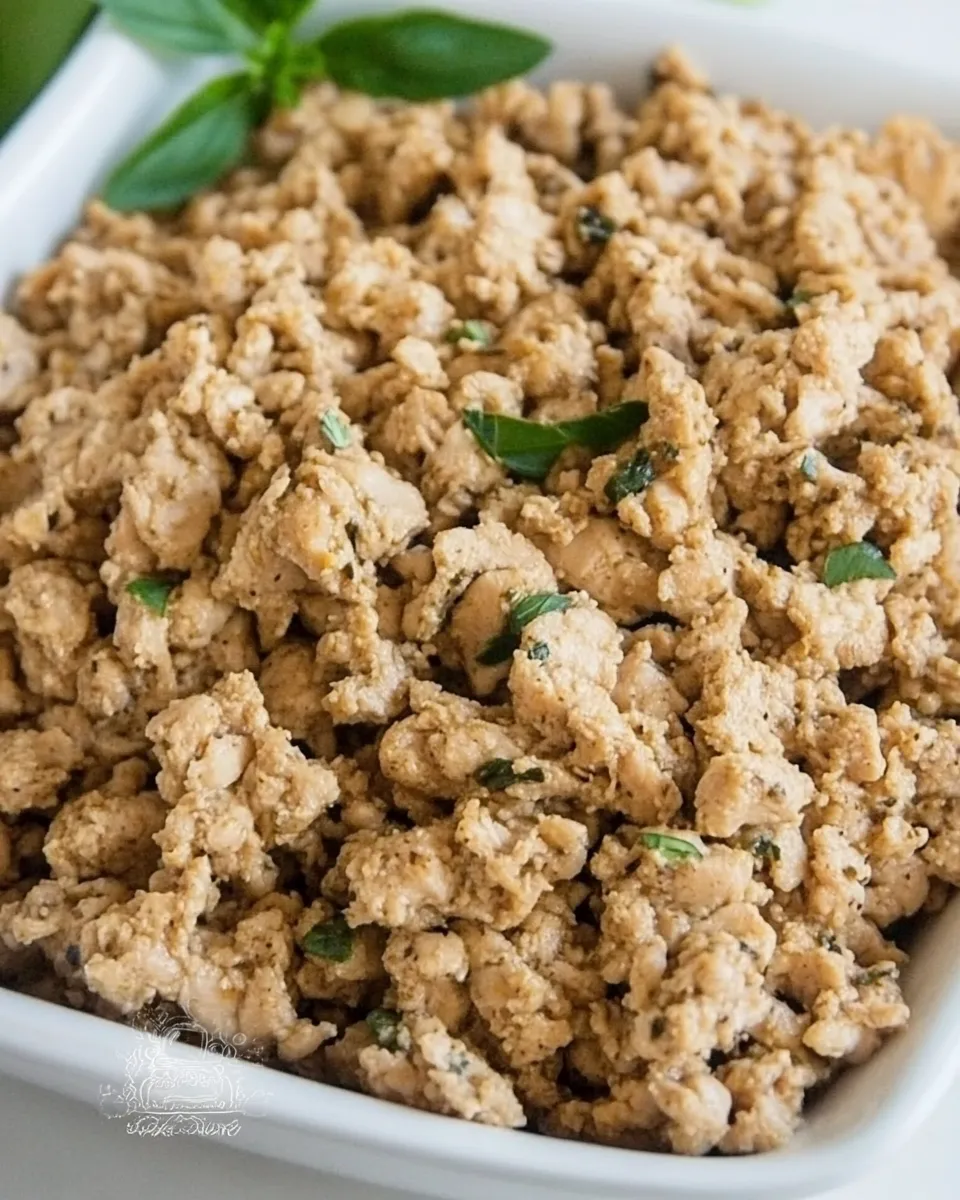
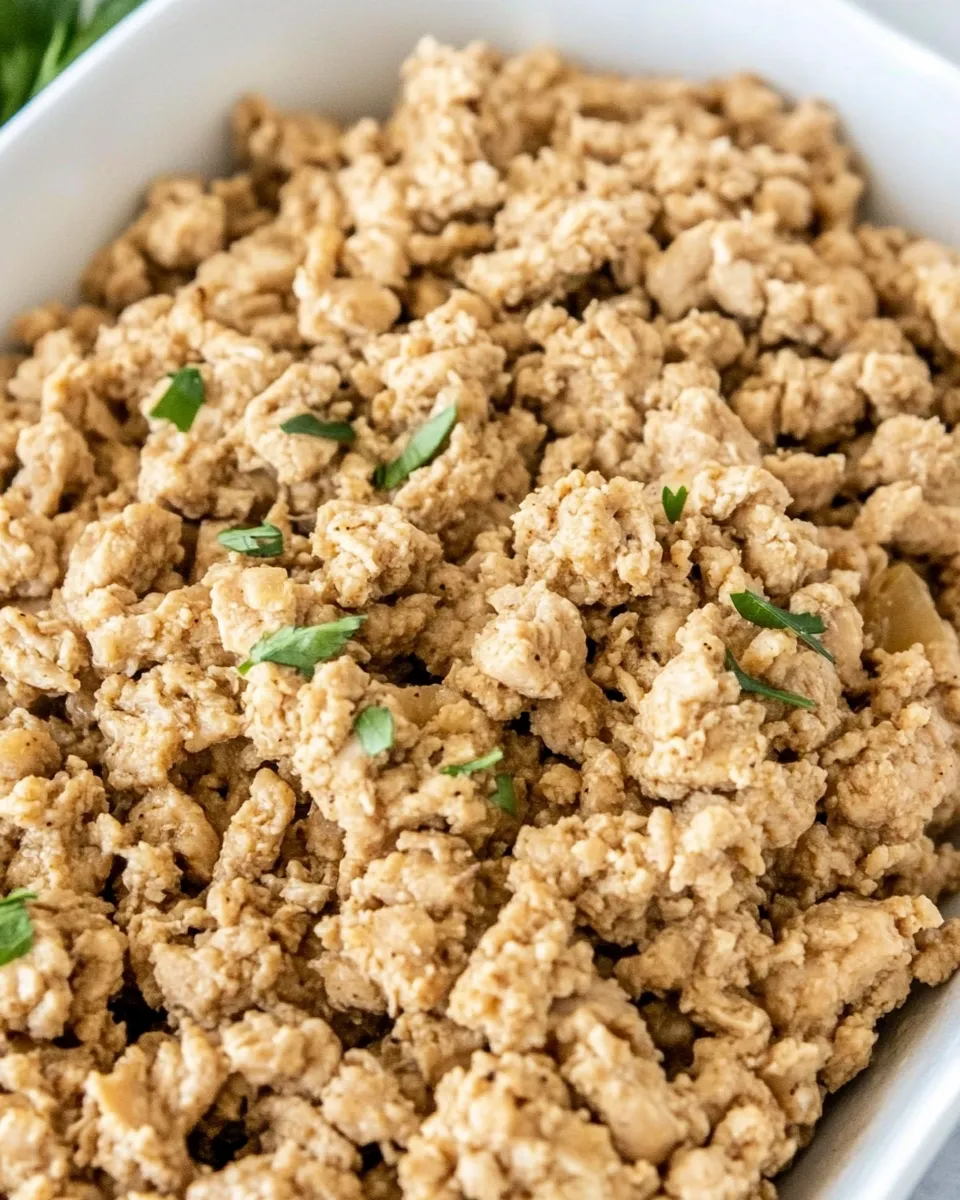
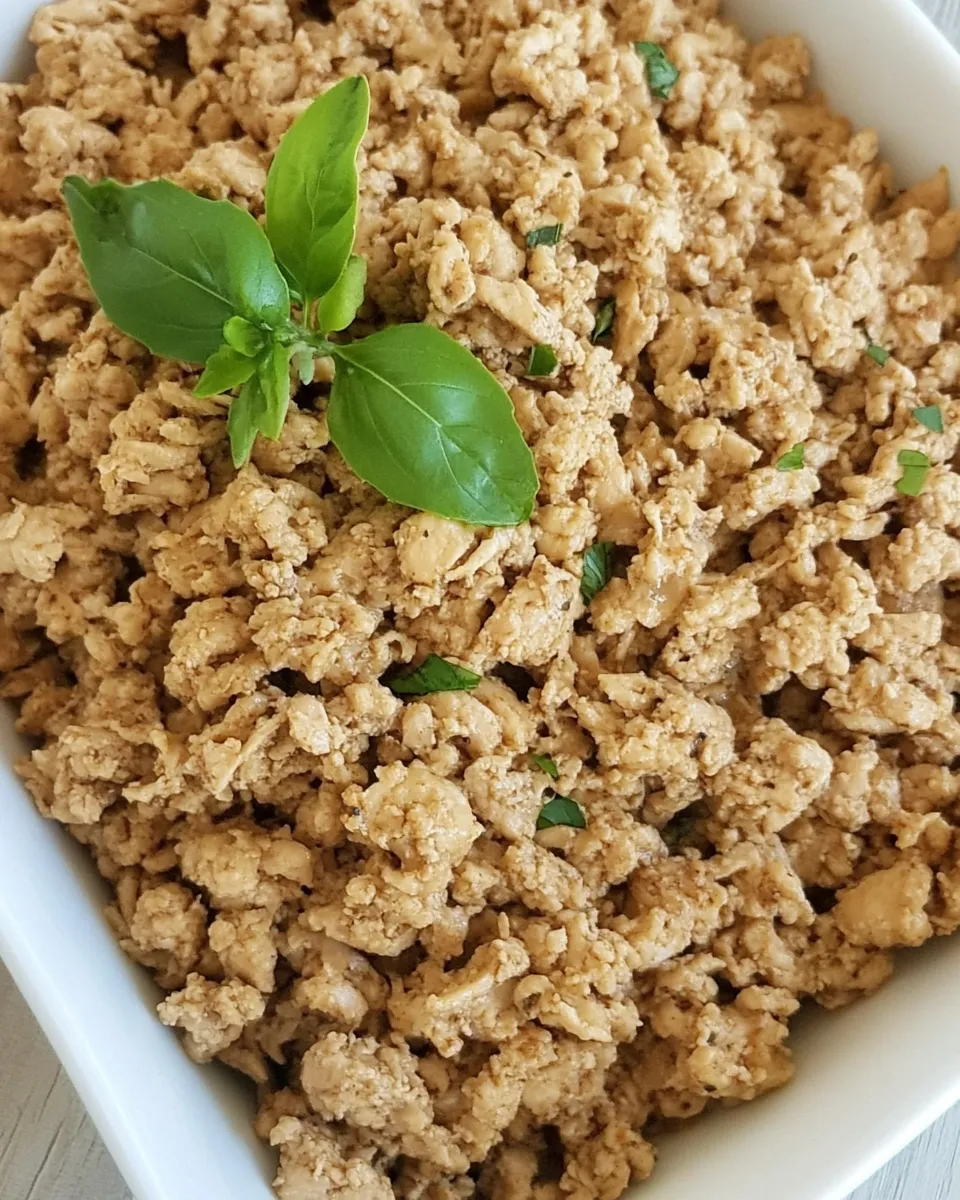
Seasoned Ground Chicken
I make a lot of ground meat recipes in my kitchen, and this seasoned ground chicken has become a quiet favorite. It’s straightforward, forgiving, and adapts to a hundred weeknight plans — tacos, bowls, lettuce wraps, or mixed into pasta. No complicated steps, just a small seasoning mix that turns plain ground chicken into something with real personality.
You’ll find the method below is fast and predictable. The seasoning mix is mixed ahead so you can add it in one move. There’s a short finish on low heat to let the flavors settle into the meat. I like this for busy evenings when I want something tasty without babysitting the pan.
Read on for tool notes, substitutions, common mistakes, and storage tips. If you need an easy base to build meals from, this is it. I’m sharing what worked in testing so you get consistent results every time.
What We’re Using

Ingredients
- 2 pounds ground chicken — the lean protein base; breaks apart easily and soaks up the seasoning.
- 1 large onion, finely diced — adds moisture, sweetness, and texture to balance the chicken.
- 1 teaspoon salt — essential for seasoning the meat through; don’t skip or reduce without tasting.
- 1 teaspoon garlic powder — concentrated garlic flavor without the bite of fresh garlic.
- ½ teaspoon paprika — adds color and a mild smoky-sweet note.
- ½ teaspoon onion powder — boosts onion flavor without extra moisture.
- ½ teaspoon ground black pepper — for background heat and contrast.
- ¼ teaspoon dried thyme — a subtle herbaceous lift that complements poultry.
Seasoned Ground Chicken: From Prep to Plate
- In a small bowl, combine 1 teaspoon salt, 1 teaspoon garlic powder, ½ teaspoon paprika, ½ teaspoon onion powder, ½ teaspoon ground black pepper, and ¼ teaspoon dried thyme; stir until evenly mixed.
- Heat a large skillet over medium-high heat. Add 2 pounds ground chicken and 1 large finely diced onion to the skillet.
- Cook, stirring regularly and breaking the meat apart with a spatula or spoon, until the chicken is no longer pink (about 6–8 minutes).
- If excess liquid or fat accumulates, carefully drain it from the skillet (tilt and spoon off or pour through a strainer), then return the chicken and onion to the skillet.
- Reduce the heat to low, add the prepared seasoning mix, and stir until all of the meat is evenly coated, about 1–2 minutes.
- Remove the skillet from the heat.
Why You’ll Keep Making It
This recipe clicks for three reasons: speed, versatility, and reliable flavor. It cooks in under ten minutes of active time and gives you a seasoned protein that can be stretched across meals. Substitute the sides and the mood changes — one night it’s tacos, the next it’s a grain bowl or stuffed peppers.
The seasoning is small but balanced: salt and garlic punch; paprika for color and warmth; a touch of thyme for depth. Those six seasonings are enough to make the chicken interesting without overpowering whatever you pair it with. If you’re looking for a foundation recipe to lean on during the week, this one will earn a permanent spot.
It also scales cleanly. Two pounds is a great batch for meal prep or feeding a family, and if you need less, the method stays the same. You’ll end up with moist, well-seasoned meat thanks to the short finish on low heat that lets everything settle without drying out.
Low-Carb/Keto Alternatives
Ground chicken is already a low-carb protein, so the basic recipe fits keto and low-carb plans as written. Keep your sides keto-friendly — cauliflower rice, sautéed greens, low-carb tortillas, or a big green salad.
If you want to add fat for satiety (helpful on keto), toss the finished meat with a little olive oil or butter before serving, or serve it over riced cauliflower sautéed in butter. Bacon crumbles or a spoonful of full-fat sour cream on top work too if you’re aiming for higher fat content.
What You’ll Need (Gear)
- Large skillet — wide surface helps the chicken brown and lets moisture evaporate.
- Spatula or wooden spoon — for breaking up the meat as it cooks.
- Small bowl — to mix the dry seasonings so they distribute evenly.
- Strainer or spoon — for draining excess liquid if needed.
- Sharp knife and cutting board — for finely dicing the onion efficiently.
Things That Go Wrong
- Dry, crumbly meat — usually from overcooking on high heat. Solution: finish on low and remove from heat promptly when seasoned.
- Bland flavor — a sign you missed adding the seasoning mix or under-salted. Taste and adjust salt before serving.
- Soggy texture — when too much liquid remains in the pan. Drain excess liquid and return to a hot pan briefly to evaporate moisture before finishing on low.
- Uneven seasoning — caused by dumping spices directly on top of meat. Mix the dry spices first, then add and stir on low so they coat evenly.
Substitutions by Diet
Here are practical swaps if you need to adjust for allergies, preferences, or pantry limits:
- For dairy-free and paleo: the recipe is already compliant — just watch your sides and toppings.
- For lower sodium: reduce the salt slightly and finish with a squeeze of lemon or a dash of vinegar to lift the flavor without adding sodium.
- Vegetarian swap: use crumbled, firm tofu or a textured vegetable protein in place of the ground chicken; increase aromatic cooking time for better flavor pickup.
- Gluten-free: the recipe is naturally gluten-free. Avoid sauces or sides that contain gluten.
- To increase fat for certain diets: finish with olive oil, ghee, or avocado oil; top with avocado for extra healthy fats.
What I Learned Testing
When I tested this recipe multiple times, a few small habits made the biggest difference. First: mix the dry spices ahead in a small bowl. It sounds trivial, but it prevents clumping and gives you an even coating instantly when added to the warm meat.
Second: don’t rush the cook time. Ground chicken can go from tender to dry if the pan is too hot or you cook it too long. The 6–8 minutes on medium-high just until no pink remains, then a low-heat minute or two with the spices is the sweet spot.
Third: drain any excess liquid. Ground chicken sometimes releases more moisture than beef. If you skip draining, the final texture can be loose and watery. I prefer to tip the pan and spoon out the liquid carefully, then return to the burner to finish.
Meal Prep & Storage Notes
This seasoned chicken stores well and is a meal-prep workhorse. Cool the meat to room temperature, then transfer to airtight containers. It will keep in the refrigerator for 3–4 days. Reheat gently on the stovetop over low heat or in a microwave just until warmed through. If it seems dry, add a splash of broth, water, or olive oil while reheating.
For longer storage, freeze in portioned bags or containers for up to 3 months. Thaw overnight in the fridge before reheating. If you plan to freeze, cool completely and press out as much air as possible from storage bags to prevent freezer burn.
Portioning tips: divide into single-serving containers for quick lunches, or into larger containers for family dinners. It reheats cleanly and pairs with rice, roasted vegetables, or salad greens without losing flavor.
Frequently Asked Questions
- Can I use ground turkey instead of ground chicken? Yes. Ground turkey is a one-to-one swap and will take the seasoning well. Watch for moisture levels; turkey can be slightly different in fat content.
- Do I need fresh herbs? No. The recipe uses dried thyme so it’s pantry-friendly. If you do use fresh herbs, add them at the end for a bright finish.
- Can I brown the chicken more for extra flavor? Yes. If you prefer more browning, cook on medium-high without crowding the pan so moisture can evaporate. Stir less frequently to allow searing, then break apart as needed.
- Is it safe to eat ground chicken fully cooked at 165°F? Yes. Cook until the meat is no longer pink and reaches a safe internal temperature. The time in the method generally gets you there for small crumbles.
- How do I make this spicier? Add crushed red pepper flakes, cayenne, or a hot sauce to taste. Add small amounts and taste — ground chicken picks up heat quickly.
Time to Try It
Make a batch this week. Prepare the small seasoning mix ahead and keep the cooked meat in the fridge for quick bowls, tacos, or stuffed peppers. It’s simple food that plays well with different cuisines and preferences. Start with the base method, then tweak the herbs or heat to match your family’s tastes.
If you test this in your kitchen, tell me how you used it — tacos, salads, or something else entirely. I love hearing practical swaps and favorite pairings. Happy cooking!

Seasoned Ground Chicken
Ingredients
Ingredients
- 2 poundsground chicken
- 1 large onion finely diced
- 1 teaspoonsalt
- 1 teaspoongarlic powder
- 1/2 teaspoonpaprika
- 1/2 teaspoononion powder
- 1/2 teaspoonground black pepper
- 1/4 teaspoondried thyme
Instructions
Instructions
- In a small bowl, combine 1 teaspoon salt, 1 teaspoon garlic powder, ½ teaspoon paprika, ½ teaspoon onion powder, ½ teaspoon ground black pepper, and ¼ teaspoon dried thyme; stir until evenly mixed.
- Heat a large skillet over medium-high heat. Add 2 pounds ground chicken and 1 large finely diced onion to the skillet.
- Cook, stirring regularly and breaking the meat apart with a spatula or spoon, until the chicken is no longer pink (about 6–8 minutes).
- If excess liquid or fat accumulates, carefully drain it from the skillet (tilt and spoon off or pour through a strainer), then return the chicken and onion to the skillet.
- Reduce the heat to low, add the prepared seasoning mix, and stir until all of the meat is evenly coated, about 1–2 minutes.
- Remove the skillet from the heat.
Equipment
- Small Bowl
- Large Skillet
- Spatula or spoon
- Strainer
Notes
To save leftovers, separate into meal sized portions and then place in an airtight container and store:
in the refrigerator for 3-4 days
in the refrigerator for 3-4 days
in the freezer for 3-4 months
in the freezer for 3-4 months
How to Freeze:
Follow the recipe as instructed, then let it cool completely.
Follow the recipe as instructed, then let it cool completely.
Divide it out into meal-sized portions, place into freezer-safe containers, then store in the freezer for 3-4 months.
Divide it out into meal-sized portions, place into freezer-safe containers, then store in the freezer for 3-4 months.
When you’re ready to serve, simply thaw overnight in the fridge, then use as desired.
When you’re ready to serve, simply thaw overnight in the fridge, then use as desired.
How to Reheat:To reheat leftovers, let them thaw overnight in the fridge if frozen, then warm in a skillet on the stove with a splash of broth to moisten if needed.
How to Scale:This recipe can be doubled, tripled, or even halved to make just the right amount for you.