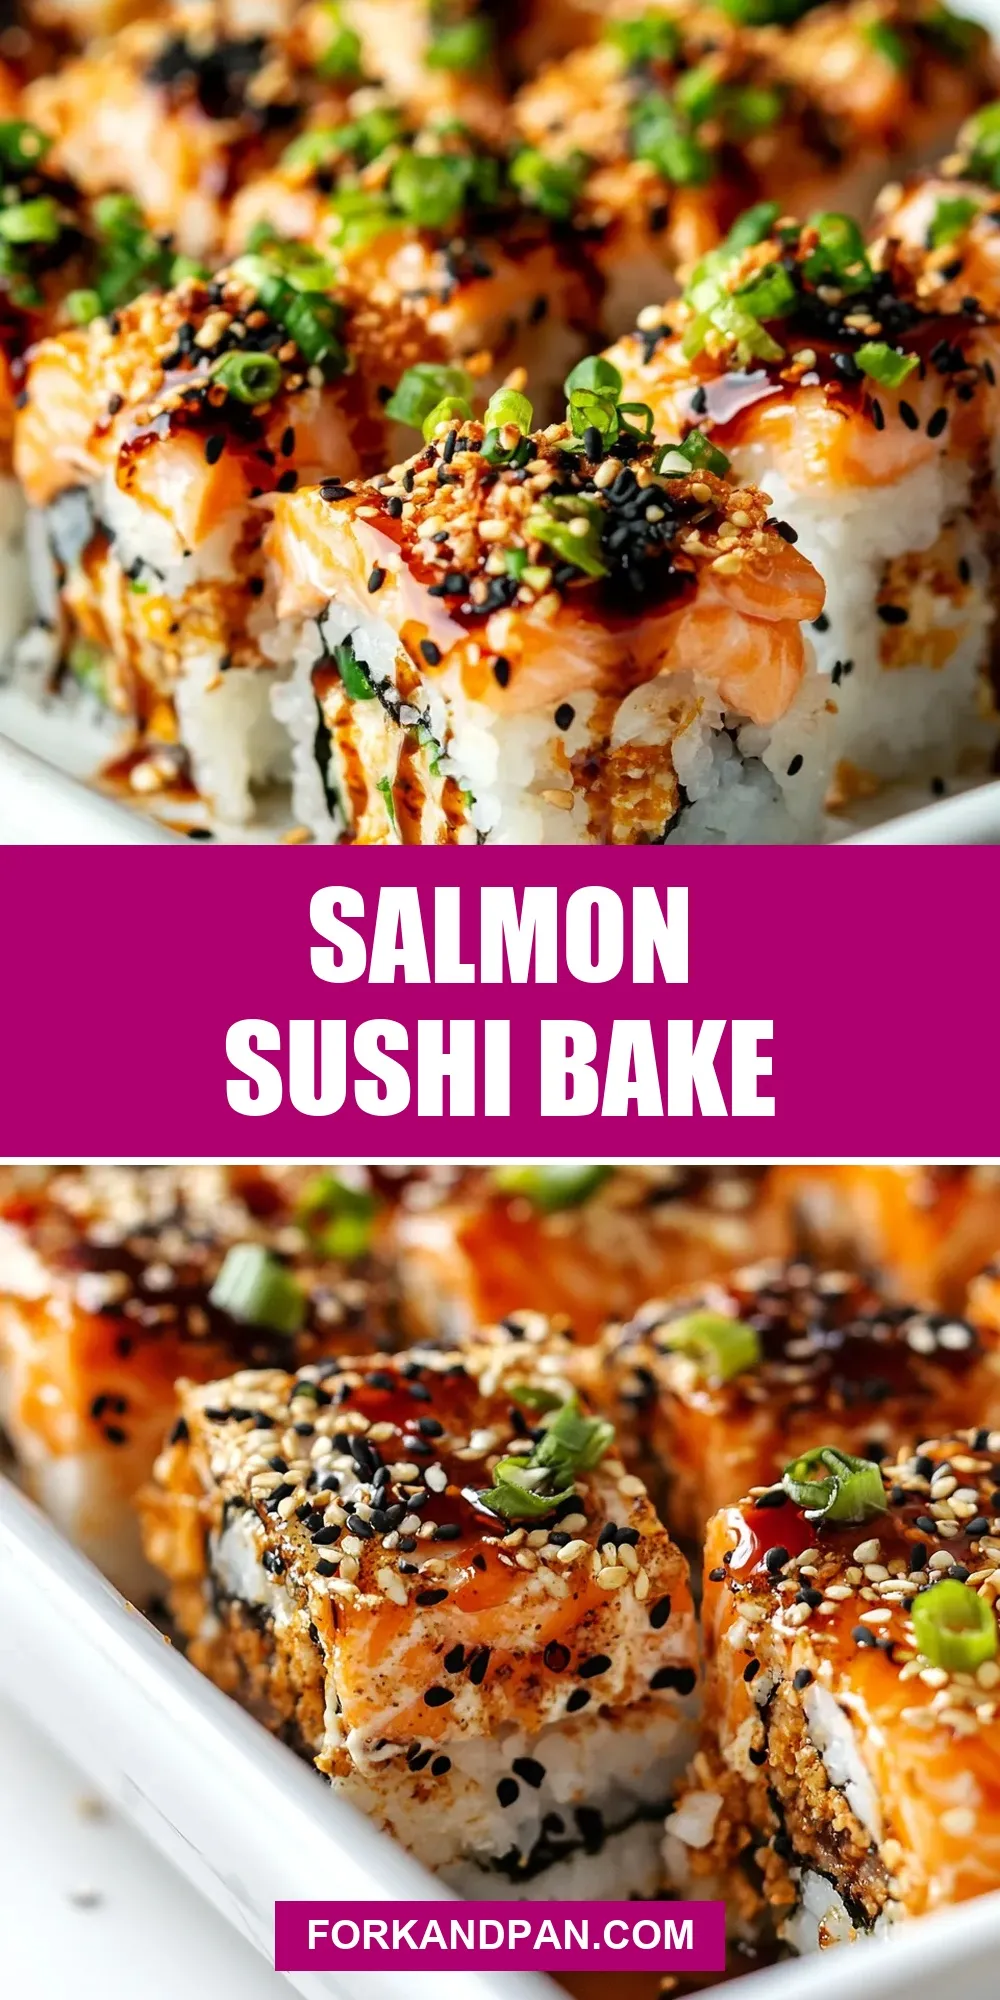
Salmon Sushi Bake
This Salmon Sushi Bake is one of those recipes I reach for when I want the flavor of a sushi roll without the rolling. It’s a layered, shareable casserole built on sticky rice, nori, a cream cheese cushion and a spicy baked salmon topping. You get the creamy heat of sriracha mayo, the umami of soy and eel sauce, and that addictive crunch from furikake and green onions.
It’s forgiving and quick to assemble if you prep your rice and have a good piece of salmon. The method below is practical: bake the salmon, press a bed of seasoned sticky rice into a pan, layer nori and cream cheese, top with flaked salmon mixed with sriracha mayo, then bake briefly to set the top. Cut it into pieces and everyone digs in with crackers, cucumbers, or sheets of nori.
I’ll walk through exactly what to buy and the step-by-step directions you need to follow, plus swaps for plant-based eaters, equipment notes, common mistakes to avoid, and storage tips so you can plan a crowd-friendly meal or a relaxed weeknight treat.
Shopping List

- 1 ½–2 pounds wild sockeye salmon filet
- 2 tablespoons soy sauce
- 32 ounces ready-made cooked sticky rice or 3 cups dried sushi rice, cooked according to package
- 2 tablespoons rice vinegar
- 2–3 nori sheets
- 16 ounces cream cheese, softened to room temperature
- ½ cup sriracha mayonnaise
- ½ cup chopped green onions
- 3 tablespoons eel sauce or oyster sauce
- 1–2 tablespoons furikake rice seasoning
- Optional garnishes: thinly sliced radish, cucumbers, jalapeño, avocado, and/or pickled ginger
Ingredients
- 1 ½–2 pounds wild sockeye salmon filet — the star; wild sockeye has bright flavor and holds up well to baking.
- 2 tablespoons soy sauce — seasons the salmon as it bakes and adds umami.
- 32 ounces ready-made cooked sticky rice or 3 cups dried sushi rice, cooked according to package — the foundation; sticky rice anchors the layers and mimics sushi rice texture.
- 2 tablespoons rice vinegar — seasons the rice and adds that subtle sushi tang.
- 2–3 nori sheets — a layer between rice and cream cheese that gives authentic sea flavor and keeps moisture balanced.
- 16 ounces cream cheese, softened to room temperature — creates a creamy barrier and carries richness.
- ½ cup sriracha mayonnaise — mixes with flaked salmon for the spicy, creamy topping.
- ½ cup chopped green onions — bright, sharp finish when sprinkled over the finished bake.
- 3 tablespoons eel sauce or oyster sauce — drizzle over finished pieces for sweet-salty lacquer.
- 1–2 tablespoons furikake rice seasoning — adds crunch, sesame, and extra umami on top.
- Optional garnishes: thinly sliced radish, cucumbers, jalapeño, avocado, and/or pickled ginger — choose one or a few to add freshness, heat, or creaminess.
Directions: Salmon Sushi Bake
- Preheat the oven to 400°F. Line a large rimmed baking sheet with parchment paper.
- Place the 1 ½–2 pounds wild sockeye salmon filet on the prepared baking sheet and drizzle 2 tablespoons soy sauce evenly over the top.
- Bake the salmon at 400°F for about 15 minutes, or until cooked through and it flakes easily. Remove from the oven and let cool until you can handle it.
- While the salmon bakes, prepare a 9 x 13-inch baking dish by spraying it with nonstick cooking spray.
- Add the rice to the prepared baking dish: use 32 ounces ready-made cooked sticky rice, or cook 3 cups dried sushi rice according to the package and use that. Drizzle 2 tablespoons rice vinegar over the rice, toss briefly to distribute, then press the rice firmly and evenly into the bottom of the dish.
- Lay 2–3 nori sheets over the rice, trimming with scissors as needed so the nori covers the rice surface evenly.
- Spread the softened 16 ounces cream cheese in an even layer over the nori using a large, flat spatula.
- When the salmon is cool enough to handle, remove and discard the skin. Crumble the cooked salmon into a mixing bowl, add ½ cup sriracha mayonnaise, and mix until well combined.
- Spread the salmon–mayo mixture evenly over the cream cheese layer.
- Return the baking dish to the oven and bake for 10 to 15 minutes, until the top salmon layer is set and warmed through.
- Remove the sushi bake from the oven and let it cool for at least 10 minutes before cutting, or refrigerate until cold if you prefer to serve chilled.
- Cut the sushi bake into 12 to 24 pieces. Sprinkle 1–2 tablespoons furikake over the tops, drizzle 3 tablespoons eel sauce (or oyster sauce) evenly over the pieces, and sprinkle ½ cup chopped green onions over everything.
- Serve with optional garnishes as desired: thinly sliced radish, cucumbers, jalapeño, avocado, and/or pickled ginger.
Why It’s Crowd-Pleasing

There are a few reasons this dish disappears fast. First, the flavors are familiar and craveable: spicy-sweet-salty with creamy texture. People who like sushi but are hesitant about raw fish find it approachable because the salmon is baked. Family-style serving makes it casual — put it on the table and everyone can serve themselves the portion they want.
Texture plays a big role. You’ve got the chew of sticky rice, the silky cream cheese layer, the tender flaked salmon, and the finish of furikake and green onions. The contrasting textures make each bite satisfying, and the presentation—slices arranged on a platter—looks impressive without fuss.
Vegan & Vegetarian Swaps

If you want to keep the spirit of the dish but skip seafood or dairy, there are several solid swaps:
- Replace the salmon with roasted or smoked carrots, maple-glazed for extra depth, or use shredded marinated king oyster mushrooms for a meaty, umami-rich bite.
- Swap cream cheese for a thickened blend of silken tofu whipped with a splash of lemon and a pinch of salt, or a store-bought vegan cream cheese.
- Use vegan mayonnaise mixed with sriracha to mimic the sriracha mayo.
- Replace eel sauce with a kombu-based or mushroom-based vegan glaze, or use tamari mixed with a touch of mirin and brown sugar.
Setup & Equipment
- Oven capable of 400°F.
- Large rimmed baking sheet lined with parchment for baking the salmon.
- 9 x 13-inch baking dish (glass or metal) for the sushi bake.
- Nonstick cooking spray to prevent sticking on the baking dish.
- Large flat spatula to spread cream cheese and press rice evenly.
- Mixing bowl for flaking and combining the salmon with sriracha mayo.
- Kitchen scissors to trim nori sheets so they fit the pan.
- Sharp knife for cutting the finished bake into pieces.
Mistakes That Ruin Salmon Sushi Bake
A few missteps will change the outcome quickly. Avoid these:
- Undercooking or overcooking the salmon: undercooked salmon is unsafe; overcooked salmon dries out and won’t flake nicely. Aim for flakes that are moist but fully cooked.
- Using non-sticky rice: the texture depends on sticky sushi rice. Regular long-grain rice won’t hold shape or give the same mouthfeel.
- Not letting the salmon cool enough before handling: hot salmon mixed with mayo and cream cheese will melt the layers and become greasy.
- Skipping the nori: it’s optional but helps bridge the rice and cream cheese, adding authentic flavor and preventing sogginess over time.
- Applying too much sauce before serving: eel sauce and mayo are powerful; add modestly and adjust to taste so the dish isn’t cloying.
Warm & Cool Weather Spins
In cooler months serve the sushi bake warm right out of the oven — the cream cheese is soft, and the top is lightly set. Warm servings are comforting and great paired with a hot miso soup. For warmer weather, chill the assembled bake in the fridge and slice cold; cold slices are refreshing and perfect with crisp cucumber or pickled ginger.
For summer outdoor meals, make the rice and cooked salmon ahead of time, assemble and chill, then transport cold in a cooler. Add the furikake and eel sauce at the last minute so you maintain texture.
Chef’s Rationale
This build is deliberate. Pressing seasoned sticky rice into the pan creates a firm base that behaves like a sheet of sushi rice. The nori layer preserves that rice and delivers the seaweed flavor without allowing the cream cheese to seep into the rice. Cream cheese creates a smooth, stable layer that contrasts with the spicy flaked salmon; it also browns lightly if you bake the top for a few minutes. Mixing the salmon with sriracha mayo ensures each forkful is seasoned and creamy — you don’t need to add more sauce to every bite.
Shelf Life & Storage
Cool the sushi bake to room temperature, then cover and refrigerate. Use within 3 days for the best texture and food safety. Do not leave the baked dish at room temperature for more than two hours total.
Freezing the fully assembled bake is not recommended because cream cheese and sriracha mayo change texture after freezing and thawing. If you want to prepare ahead for freezing, you can freeze cooked salmon fillets (without mayo) for up to 1–2 months and thaw in the refrigerator before assembling. Reheat gently in a low oven if you prefer warm slices, or serve chilled after refrigeration.
Your Questions, Answered
Q: Can I use other salmon varieties?
A: Yes. The recipe calls for wild sockeye for its flavor and color, but you can use other salmon fillets; adjust baking time for thickness. Farmed salmon has more fat and may be softer after baking.
Q: Can I assemble this ahead of time?
A: You can assemble it and refrigerate for a few hours or overnight. Wait to add furikake, eel sauce, and chopped green onions until just before serving to maintain texture and brightness.
Q: What can I serve it with?
A: Crispy rice crackers, toasted nori squares, cucumber ribbons, sliced avocado, or plain leafy greens all work. Pickled ginger and sliced jalapeño provide contrast.
Q: How spicy is this?
A: Spiciness comes from the sriracha mayonnaise. Use less or swap for plain mayo with a dash of hot sauce to tone it down.
The Last Word
Salmon Sushi Bake is one of those dishes that feels elevated but is completely manageable. It’s flexible: feed a crowd, adapt it to dietary needs, or make it for a quiet night in. Follow the steps closely for texture—sticky rice, flat cream cheese layer, properly cooked salmon—and you’ll end up with the rich, tangy, savory bites people return to again and again. Keep the garnishes simple and fresh, and let the layers do the heavy lifting.
Salmon Sushi Bake
Ingredients
Ingredients
- 1 1/2 – 2 poundswild sockeye salmon filet
- 2 tablespoonsoy sauce
- 32 ouncesready-made cooked sticky riceor 3 cups dried sushi rice cooked according to package
- 2 tablespoonsrice vinegar
- 2-3 nori sheets
- 16 ouncescream cheesesoftened to room temperature
- 1/2 cupsriracha mayonnaise
- 1/2 cupchopped green onions
- 3 tablespoonseel sauceor oyster sauce
- 1-2 tablespoonsfurikake rice seasoning
- Optional garnishes: thinly slicedradish cucumbers, jalapeno, avocado, and/or pickled ginger
Instructions
Instructions
- Preheat the oven to 400°F. Line a large rimmed baking sheet with parchment paper.
- Place the 1 ½–2 pounds wild sockeye salmon filet on the prepared baking sheet and drizzle 2 tablespoons soy sauce evenly over the top.
- Bake the salmon at 400°F for about 15 minutes, or until cooked through and it flakes easily. Remove from the oven and let cool until you can handle it.
- While the salmon bakes, prepare a 9 x 13-inch baking dish by spraying it with nonstick cooking spray.
- Add the rice to the prepared baking dish: use 32 ounces ready-made cooked sticky rice, or cook 3 cups dried sushi rice according to the package and use that. Drizzle 2 tablespoons rice vinegar over the rice, toss briefly to distribute, then press the rice firmly and evenly into the bottom of the dish.
- Lay 2–3 nori sheets over the rice, trimming with scissors as needed so the nori covers the rice surface evenly.
- Spread the softened 16 ounces cream cheese in an even layer over the nori using a large, flat spatula.
- When the salmon is cool enough to handle, remove and discard the skin. Crumble the cooked salmon into a mixing bowl, add ½ cup sriracha mayonnaise, and mix until well combined.
- Spread the salmon–mayo mixture evenly over the cream cheese layer.
- Return the baking dish to the oven and bake for 10 to 15 minutes, until the top salmon layer is set and warmed through.
- Remove the sushi bake from the oven and let it cool for at least 10 minutes before cutting, or refrigerate until cold if you prefer to serve chilled.
- Cut the sushi bake into 12 to 24 pieces. Sprinkle 1–2 tablespoons furikake over the tops, drizzle 3 tablespoons eel sauce (or oyster sauce) evenly over the pieces, and sprinkle ½ cup chopped green onions over everything.
- Serve with optional garnishes as desired: thinly sliced radish, cucumbers, jalapeño, avocado, and/or pickled ginger.
Equipment
- Oven
- Rimmed Baking Sheet
- Parchment Paper
- 9 x 13-inch baking dish
- Mixing Bowl
- large flat spatula
- scissors
Notes
Sushi bake can be served at any temperature, but I prefer to enjoy it cold or at room temperature.
Leftovers will keep well for a day or two in the fridge. Cool the casserole completely before transferring to an airtight container and storing in the fridge.