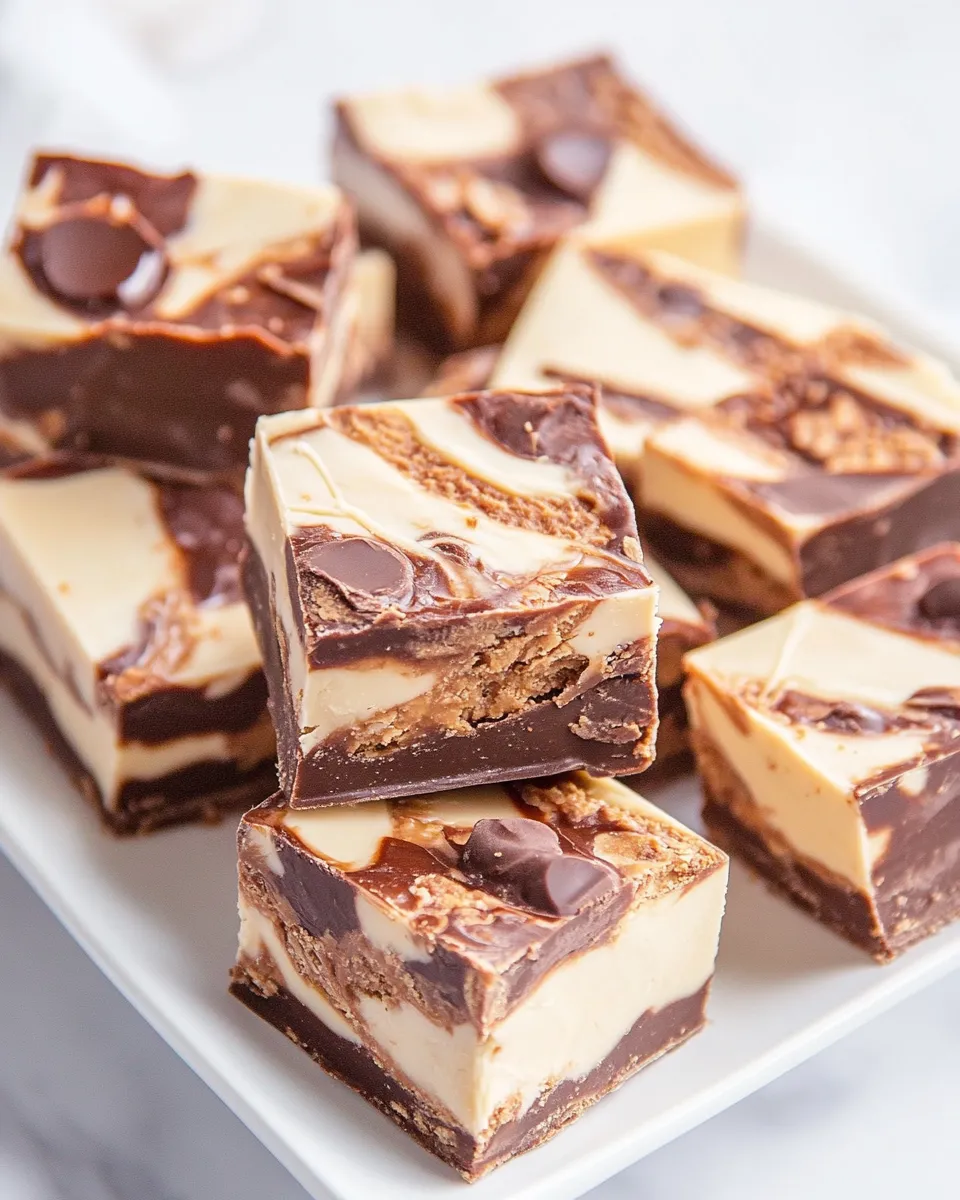
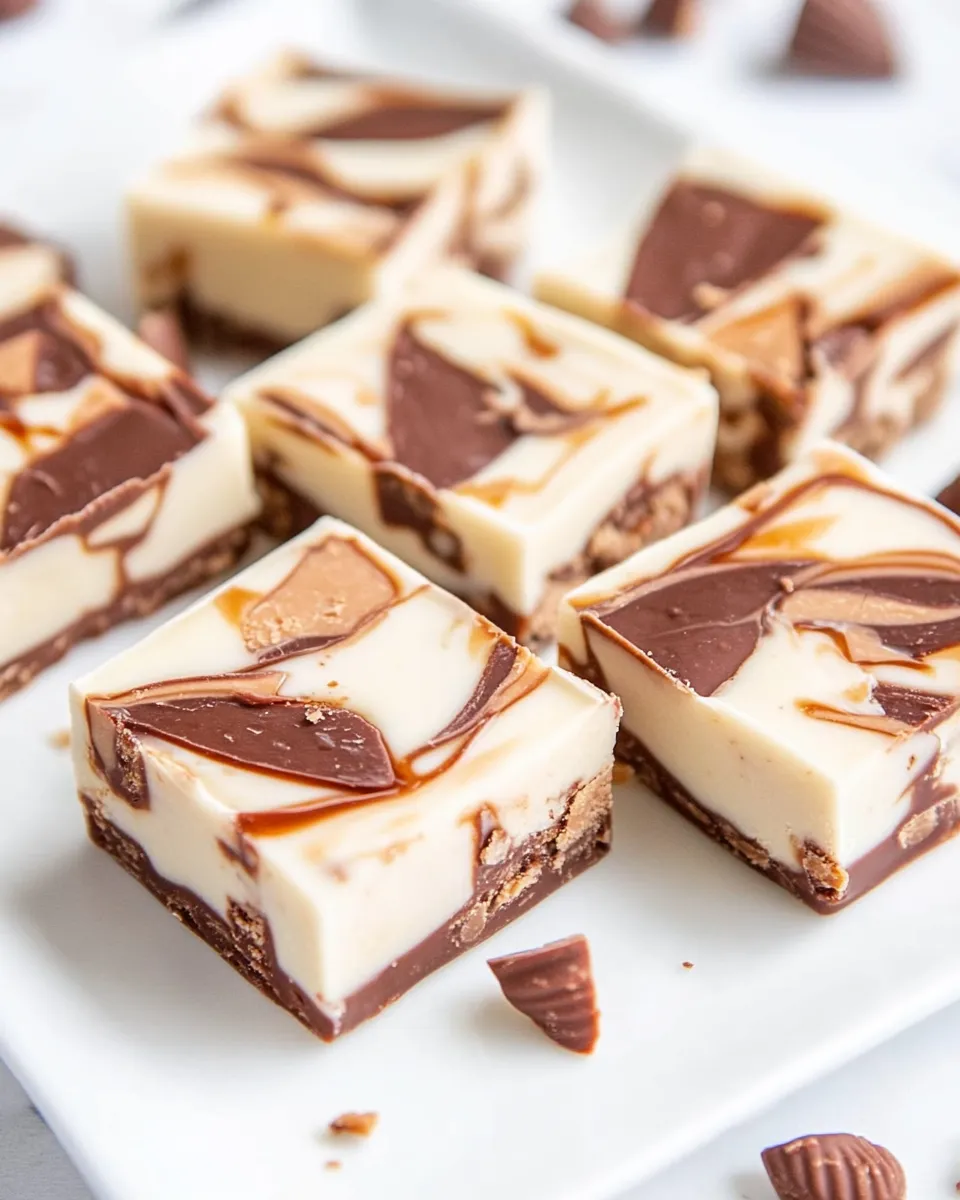
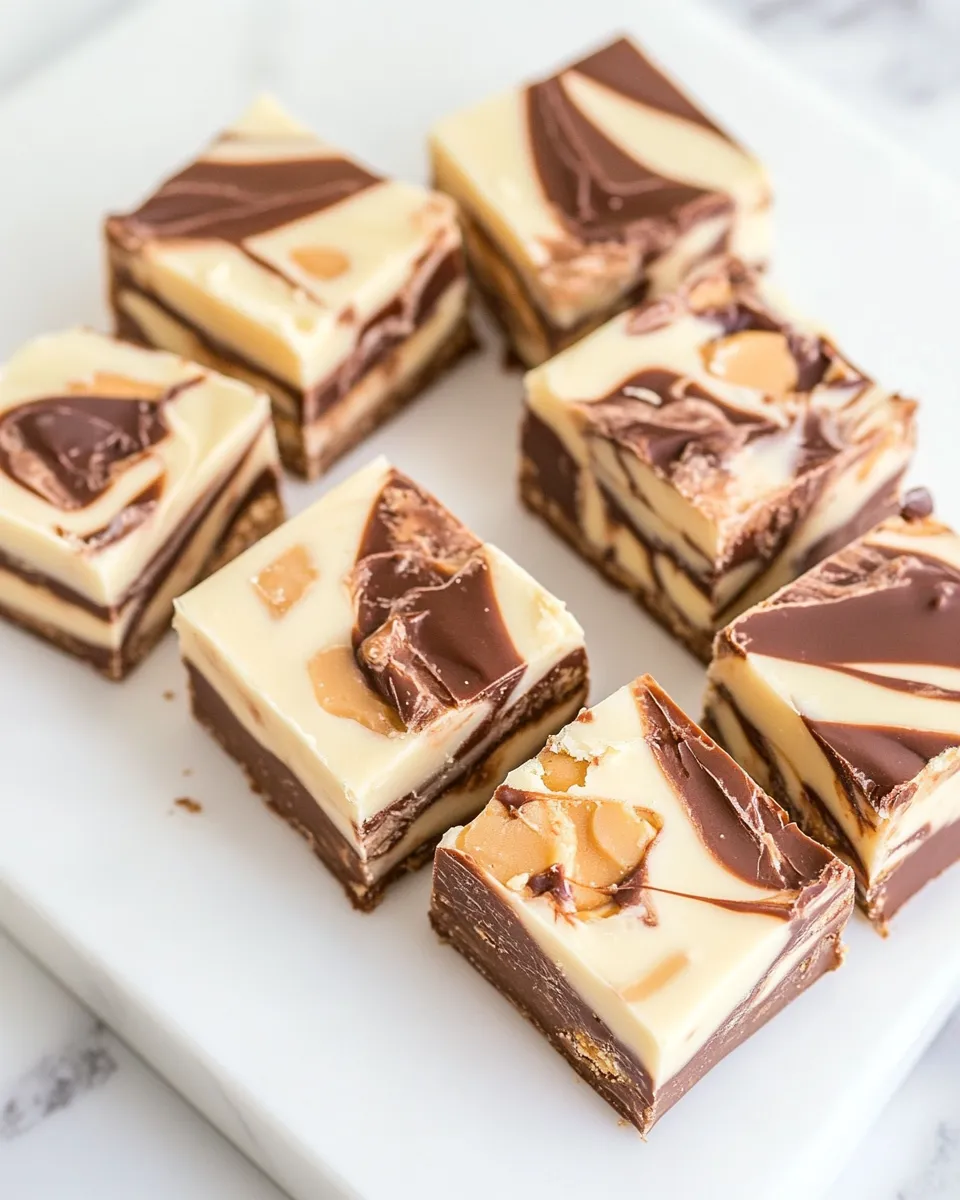
Peanut Butter Cup Fudge
This fudge is one of those no-fuss desserts that tastes like you spent all afternoon in a candy shop. It’s rich, glossy, and studded with mini Reese’s Cups so every bite gets a peanut-buttery hit. The method is straightforward and forgiving, which is why I keep this recipe tucked in my go-to list for gifts, potlucks, and weeknight dessert emergencies.
There’s no tempering or candy thermometer required. You’ll melt white chocolate into sweetened condensed milk, stir in vanilla, and fold in half of the chopped mini cups for a marbled interior. The rest go on top so the finished squares look and taste like those peanut butter cup bites you can’t stop reaching for.
If you like clean, predictable results without a lot of steps, this is the kind of recipe you’ll make again and again. I’ll walk you through what to buy, exactly how to assemble it step by step, what can go wrong (and how to fix it), plus a few swaps for diet needs and storage tips so your squares stay perfect. Let’s get to it.
What to Buy

Shop for a few quality basics and one fun ingredient: mini Reese’s Cups. The white chocolate does the heavy lifting here, so pick a brand you like melting. Sweetened condensed milk is the shortcut that gives this fudge its creaminess and glossy finish—don’t substitute with evaporated milk or regular milk. And the mini Reese’s add both texture and that unmistakable peanut-butter candy flavor.
Buy everything in one trip if you can: white chocolate chips, a can of sweetened condensed milk, pure vanilla extract, and mini Reese’s Cups. If you plan to gift, grab parchment and a nice box or tin for presentation.
Ingredients
- 3 cups white chocolate chips (510 grams) — melts into a smooth, sweet base; use good-quality chips for the best texture.
- 14 ounces sweetened condensed milk (396 grams, 1 can) — provides sweetness and the creamy binder; do not substitute.
- 1 teaspoon pure vanilla extract (4 grams) — brightens the white chocolate and balances sweetness.
- 1 cup mini Reese’s Cups (20 grams), chopped into chunks and divided — half get folded into the fudge for marbling; the rest are for the top so each piece has a peanut-butter bite.
Make Peanut Butter Cup Fudge: A Simple Method
- Line a 9×9-inch square dish with parchment paper or use a silicone pan; set aside. Chop 1 cup mini Reese’s Cups into chunks and divide the chunks into two equal portions.
- In a medium saucepan over medium heat combine 3 cups white chocolate chips and 14 ounces sweetened condensed milk. Stir continuously, scraping the bottom and sides, until the chocolate is completely melted and the mixture is smooth.
- Remove the saucepan from the heat and stir in 1 teaspoon pure vanilla extract until incorporated.
- Add one of the reserved portions of Reese’s chunks to the chocolate mixture. Stir only 2–3 times to distribute them—do not overmix if you want a marbled effect.
- Pour or scrape the fudge mixture into the prepared 9×9-inch dish and spread it into an even layer.
- Evenly sprinkle the remaining Reese’s chunks over the top and gently press them into the surface so they adhere.
- Refrigerate the fudge for 2–3 hours, or until fully set and firm.
- Remove the fudge from the dish, peel off the parchment (or pop out the silicone), and cut into small bite-sized squares.
Why This Recipe Is Reliable
Two ingredients—white chocolate and sweetened condensed milk—create a dependable ganache-like texture that sets firmly in the fridge. Because you’re not heating sugar to a specific candy stage, the margin for error is much wider than with traditional fudge recipes. You’ll get a glossy, sliceable block every time as long as you melt gently and stir to a smooth consistency.
The addition of mini Reese’s Cups is both structural and flavor-driven: some pieces folded in create visual interest and pockets of peanut-butter candy, while the pieces on top ensure every square has visible bits. The recipe is short on steps and long on payoff, which is why it’s become a reliable weeknight make or last-minute gift.
International Equivalents
Fudge in various forms shows up globally—think rich, sweet confections that rely on condensed milk or concentrated dairy. In the U.K., a similar sweet might use condensed milk with melted chocolate and mix-ins to make traybakes. In parts of Asia, condensed milk is common in sweets and used to create dense, sliceable treats similar in texture to this fudge.
For readers outside the U.S., look for local equivalents of mini peanut-butter cups if Reese’s aren’t available. Salted peanut pralines or chopped peanut chocolates can substitute, though they’ll shift the flavor profile slightly. The method remains the same: melt, fold, chill.
Kitchen Gear Checklist
- 9×9-inch square baking dish or 8–9-inch silicone pan.
- Parchment paper (if using a regular dish) for easy removal.
- Medium saucepan with a heavy bottom to melt chocolate evenly.
- Rubber spatula for scraping and spreading.
- Sharp knife for cutting the set fudge into squares.
- Cutting board or chilled surface to rest the pan while slicing.
Pitfalls & How to Prevent Them
Even though this recipe is forgiving, a few missteps can affect texture and appearance:
- Overheating the chocolate: Melt over medium heat and stir constantly. If you see seizing (grainy texture), remove from heat immediately and keep stirring—sometimes a splash more condensed milk can help but don’t add liquids beyond what the recipe specifies.
- Too-wet pan: If your parchment or pan is damp, the surface can weep. Make sure your parchment is dry and the pan is room temperature.
- Not cutting cleanly: Chill the fudge fully for the 2–3 hours recommended. For cleaner cuts, warm the knife slightly under hot water and dry it before slicing; wipe between cuts.
- Mixing too much after adding the Reese’s: If you want a marbled effect, stir only 2–3 times as instructed. Overmixing will distribute the bits uniformly and lose the marbling.
- Top pieces falling off: Press the remaining Reese’s a little into the surface so they adhere rather than sitting loose on top.
Variations for Dietary Needs
There isn’t a one-to-one swap that preserves texture exactly because sweetened condensed milk is integral. But here are workable ideas:
- Nut-free option: Replace Reese’s Cups with chopped chocolate-covered caramel bites or chopped allergy-friendly peanut-free chocolate candies.
- Dairy-free attempt: Use a high-quality vegan white chocolate and a canned sweetened condensed coconut milk product. Results vary by brand—check texture before chilling.
- Lower sugar: This is inherently a very sweet candy; any reduction in sugar will alter set and texture. If you must, use lower-sugar white chocolate designed for baking, but expect differences.
Pro Tips & Notes
Melting and Texture
Take your time melting. A heavy-bottomed saucepan prevents hotspots. Stir continuously and scrape the sides so no chocolate sits against hot metal too long. The mixture should be homogenous and glossy before you remove it from heat.
Presentation
For gift boxes, line a small tin with parchment and stack squares in layers separated by parchment squares. If you want extra shine, a quick brush of melted white chocolate over the cut surface can make the pieces look professionally finished, but it’s optional.
Cutting Tips
Chill long enough that the squares hold their shape. For uniform pieces, mark with the tip of a knife before cutting and use a ruler if you want precise dimensions.
Timing
Plan on about 10–15 minutes of active work (chopping and melting) and 2–3 hours chill time. You can make the fudge a day ahead; it holds well in the fridge for several days.
Freezer-Friendly Notes
This fudge freezes well. Arrange squares in a single layer on a tray and freeze until firm, then transfer to a freezer-safe container with parchment between layers to prevent sticking. Thaw in the fridge overnight before serving. Keep in mind freezer-stored chocolate can bloom slightly (white streaks) as it temperates; flavor remains fine.
Common Qs About Peanut Butter Cup Fudge
Q: Can I use chopped full-size Reese’s instead of mini?
A: Yes, you can chop full-size Reese’s to similar chunk sizes, but the distribution will change. You may get fewer pieces in each square unless you chop them small.
Q: What if my fudge is too soft after chilling?
A: Ensure you chilled it at a cold fridge temperature and for the full 2–3 hours. If your fridge is warm or overcrowded, it may take longer. If it still won’t set, a short stint in the freezer (20–30 minutes) can firm it up—watch closely to avoid freezing solid.
Q: Can I skip the vanilla?
A: You can, but vanilla brightens and balances the intense sweetness of white chocolate. It’s a small amount that makes a noticeable difference.
Q: Will the white chocolate seize?
A: If water or steam gets into the pan, white chocolate can seize. Keep utensils dry, and keep a low, steady heat. Stirring constantly prevents local overheating and helps maintain a smooth melt.
Hungry for More?
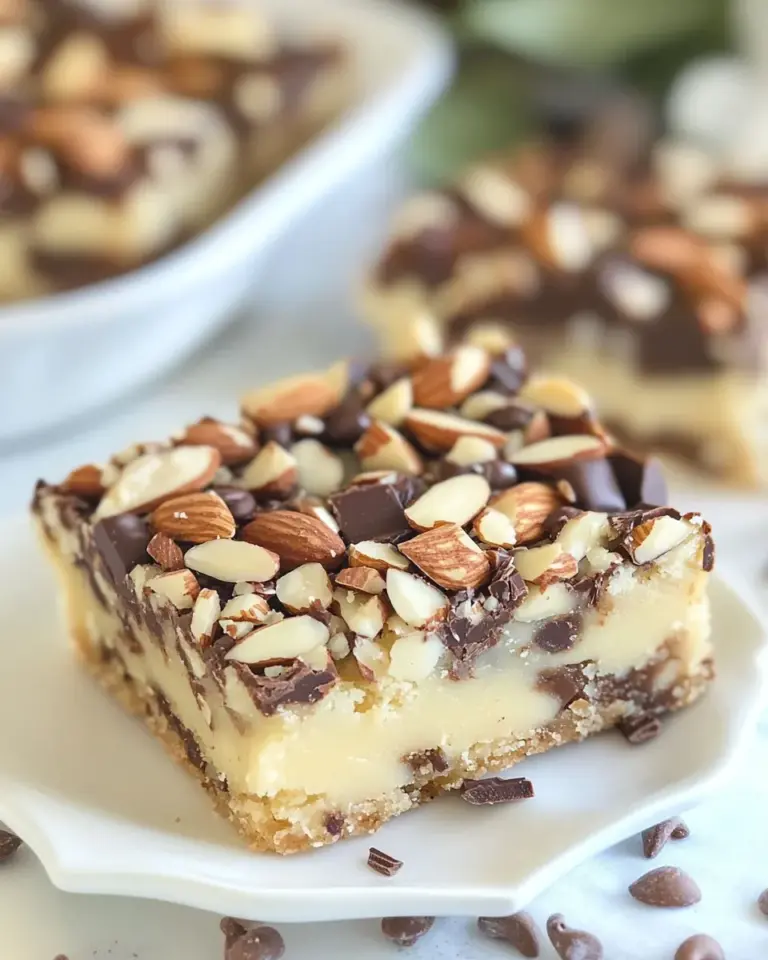
If you enjoyed this simple tray fudge, try these quick ideas next: swap in dark chocolate chips for an adult version (and use fewer Reese’s for balance), fold in toasted chopped nuts for crunch, or drizzle melted milk chocolate over the top for added color and depth. Keep a small batch of this recipe in your freezer for last-minute desserts or hostess gifts—it’s one of my favorite quick wins that always looks like you fussed.
Make it once, and you’ll see why this recipe becomes a constant in the rotation. It’s fast, forgiving, and hits the candy-sweet spot that makes people smile. Happy mixing—and save me a square if you can.

Peanut Butter Cup Fudge
Ingredients
Ingredients
- 3 cupswhite chocolate chips510 grams
- 14 ouncessweetened condensed milk396 grams 1 can
- 1 teaspoonpure vanilla extract4 grams
- 1 cupmini Reese’s Cups20 grams chopped into chunks and divided
Instructions
Instructions
- Line a 9×9-inch square dish with parchment paper or use a silicone pan; set aside. Chop 1 cup mini Reese’s Cups into chunks and divide the chunks into two equal portions.
- In a medium saucepan over medium heat combine 3 cups white chocolate chips and 14 ounces sweetened condensed milk. Stir continuously, scraping the bottom and sides, until the chocolate is completely melted and the mixture is smooth.
- Remove the saucepan from the heat and stir in 1 teaspoon pure vanilla extract until incorporated.
- Add one of the reserved portions of Reese’s chunks to the chocolate mixture. Stir only 2–3 times to distribute them—do not overmix if you want a marbled effect.
- Pour or scrape the fudge mixture into the prepared 9×9-inch dish and spread it into an even layer.
- Evenly sprinkle the remaining Reese’s chunks over the top and gently press them into the surface so they adhere.
- Refrigerate the fudge for 2–3 hours, or until fully set and firm.
- Remove the fudge from the dish, peel off the parchment (or pop out the silicone), and cut into small bite-sized squares.
Equipment
- Kitchen Scale(optional)
- 9x9 inch baking pan
Notes
You can melt the chocolate in the microwave, but do it in small increments and stir to make sure that it doesn’t burn.