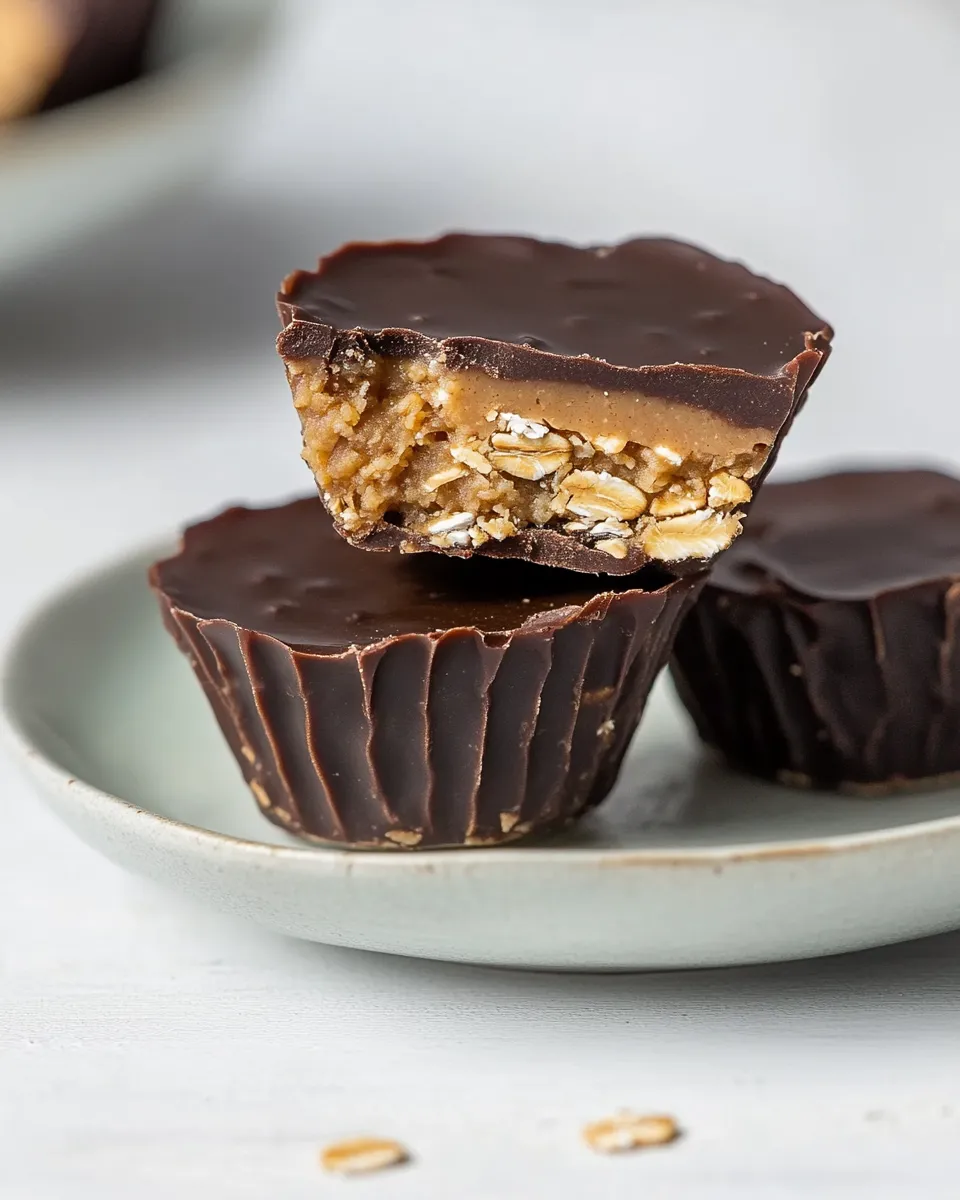
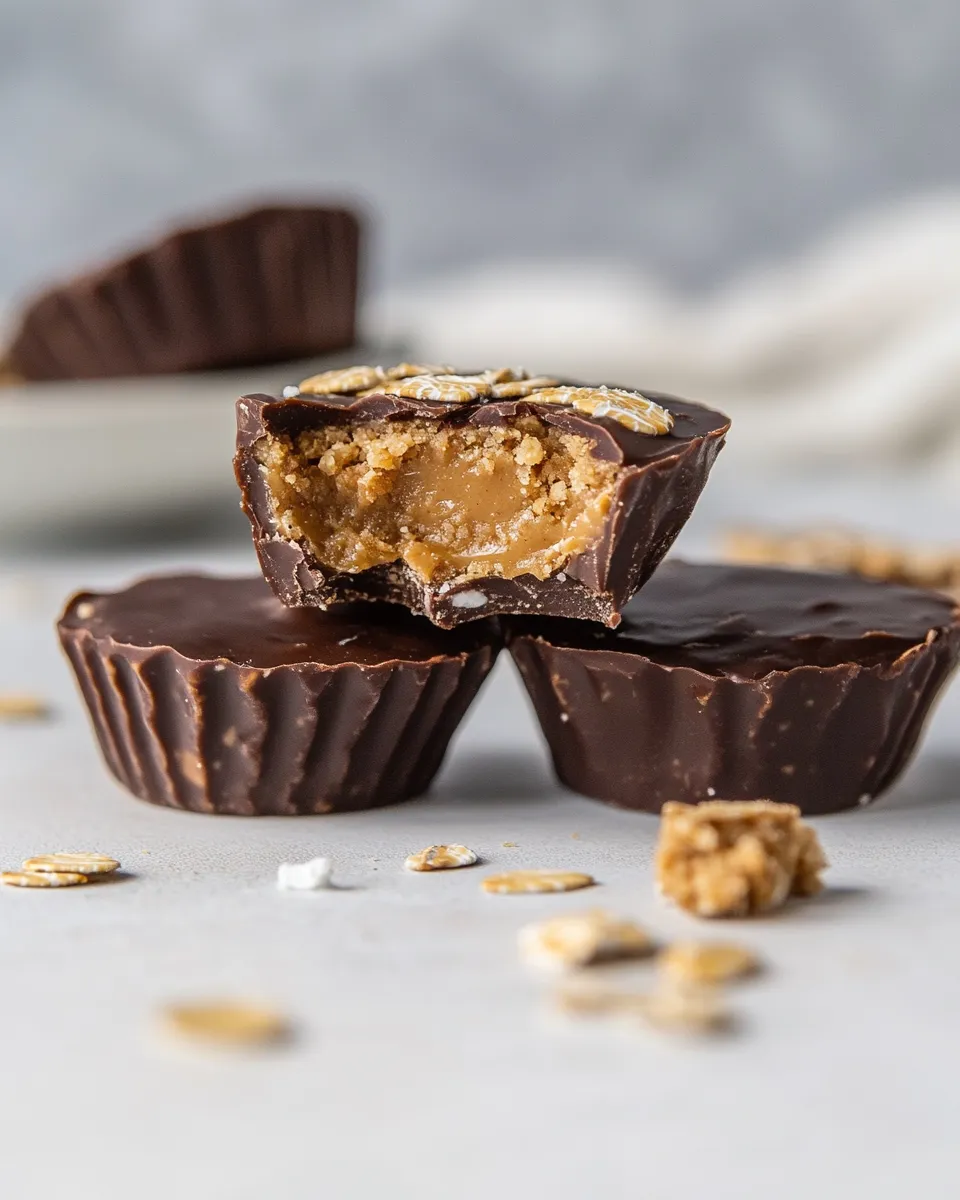
No-Bake Oatmeal Peanut Butter Cups
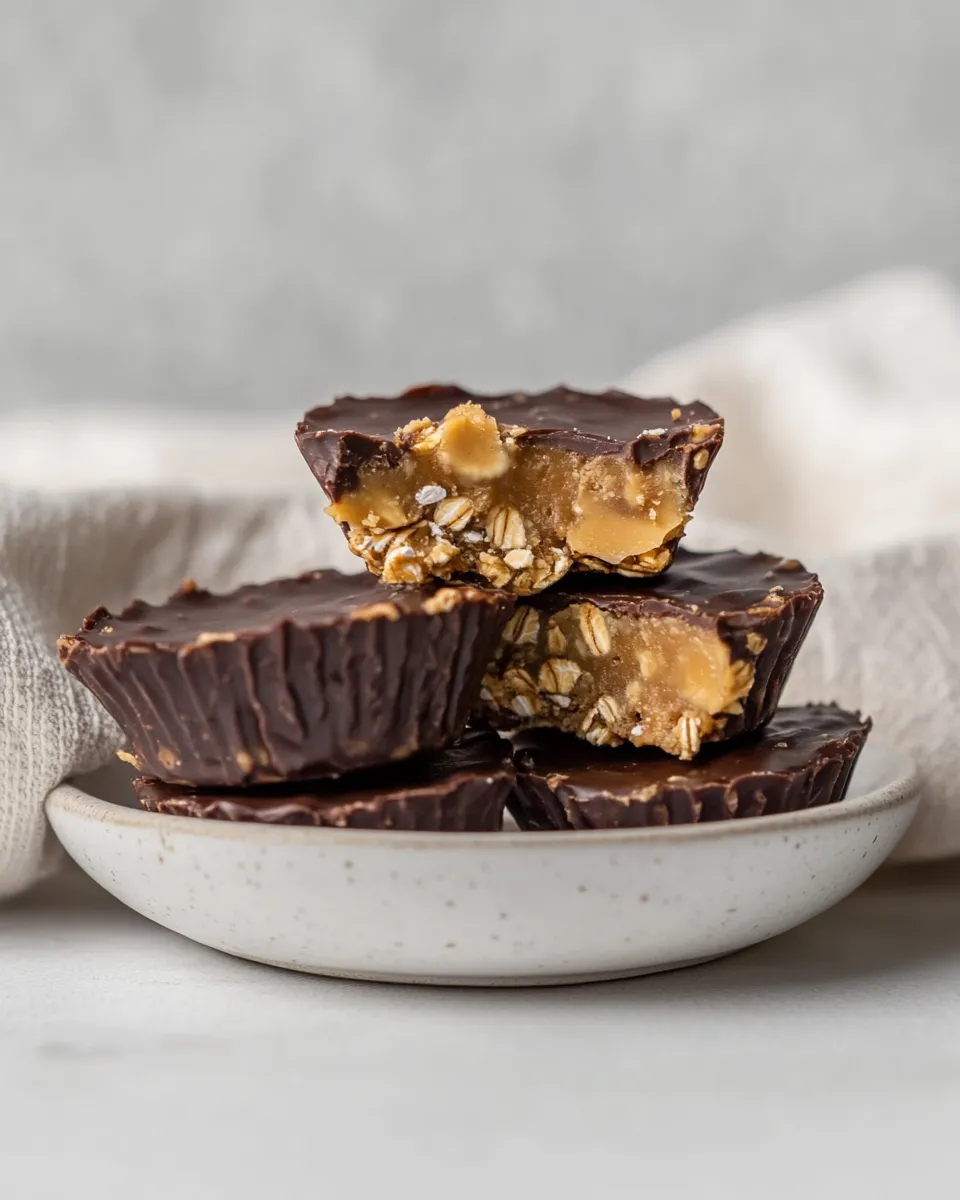
I make these no-bake oatmeal peanut butter cups on repeat. They’re fast, forgiving, and hold up well in the freezer—perfect for when I want a homemade treat without the oven or the fuss. The texture is somewhere between a chewy cookie and a candy cup: hearty oats, creamy peanut butter, and a glossy chocolate cap.
This recipe is practical and straightforward. There are no tempering steps, no melting into a double boiler if you don’t want one, and the ingredient list is short. I treat it like a little assembly project: mix, press, top with chocolate, then freeze until firm. That simplicity makes them an ideal make-ahead snack or a quick gift when wrapped in parchment.
I’ll walk you through what each ingredient does, how to avoid common mistakes, and little tweaks that keep the final cups stable but still soft enough to bite into. If you want a portable, pantry-friendly dessert that’s naturally portioned, these are exactly the kind of recipe you’ll pull out again and again.
The Essentials

Yield and timing: This recipe fills either an 8-cup or 10-cup muffin tin, depending on whether you want larger or smaller cups. Active hands-on time is about 15–20 minutes. Chill time in the freezer is 1–2 hours.
Texture and storage: Expect a chewy peanut butter-oat base with a firm chocolate top. The coconut oil keeps the chocolate shiny and easy to bite through right out of the freezer. Store them frozen for longer life or refrigerated for immediate snacking.
Ingredients
- 1 cup unsweetened peanut butter — the binding and fat that holds the oat base together; unsweetened keeps the sugar level in check.
- 1/3 cup pure maple syrup — sweetener and binder; provides a little moisture and a clean flavor that plays well with peanut butter.
- 1 tsp pure vanilla extract — flavor enhancer; a small amount brightens the peanut butter and chocolate.
- 1 1/2 cups quick oats or rolled oats — the body of the cups; quick oats yield a slightly softer texture, rolled oats give more chew.
- 1/4 tsp sea salt — balances sweetness and amplifies flavor in the peanut butter base.
- 2/3 cup chocolate chips — the melting layer; use dark or semisweet for contrast against the sweet base.
- 2 Tbsp coconut oil — helps the chocolate set shiny and firm; also makes the top easier to scoop and bite.
- Flaky sea salt (optional) — garnish to highlight the chocolate and cut through the richness.
Mastering No-Bake Oatmeal Peanut Butter Cups: How-To
- If your peanut butter is cold and stiff, microwave it in a microwave-safe bowl for 20-second intervals, stirring between intervals, until it is soft and easy to stir.
- In a mixing bowl, stir together 1 cup unsweetened peanut butter, 1/3 cup pure maple syrup, and 1 teaspoon pure vanilla extract until smooth and well combined.
- Add 1 1/2 cups quick oats or rolled oats and 1/4 teaspoon sea salt to the peanut butter mixture. Stir until a thick, evenly mixed dough forms.
- Prepare an 8- or 10-cup muffin tin: lightly grease each hole or line with paper or silicone liners. Decide whether you want 8 larger cups or 10 smaller ones.
- Divide the peanut butter-oat mixture evenly among 8 to 10 prepared muffin holes. Press and flatten each portion into the bottom of its hole to form an even base for the chocolate layer.
- Place 2/3 cup chocolate chips and 2 tablespoons coconut oil in a microwave-safe bowl. Microwave in 20-second increments, stirring well between intervals, until the chocolate is fully melted and smooth.
- Spoon the melted chocolate over each peanut butter base so the tops are covered. If desired, sprinkle each top with flaky sea salt.
- Freeze the muffin tin for 1 to 2 hours, or until the cups are completely set.
- Run a butter knife around the edge of each cup to loosen, then lift them out of the muffin tin. Let sit a minute at room temperature if they are very firm, then enjoy.
What Sets This Recipe Apart
This is no-bake comfort food that doesn’t feel like a compromise. The oat base makes these more substantial than a plain peanut butter cup, so they satisfy better and travel well. Quick oats or rolled oats both work, so you can adapt based on what’s already in your pantry.
Maple syrup as the sweetener keeps the flavor clean and less cloying than corn syrup or a heavy sugar syrup. The modest amount of maple syrup also leaves room for peanut butter and chocolate to shine without making the mixture overly sticky.
Finally, the recipe is intentionally forgiving: if your peanut butter needs warming, a quick zap in the microwave gets everything moving. The freezer finish gives a candy-like snap, but a short rest at room temperature softens them to the perfect chew.
If You’re Out Of…
- Peanut butter: Almond or cashew butter can work in a 1:1 swap; texture will be slightly different and flavor will change accordingly.
- Maple syrup: Honey can substitute in a pinch, though it will alter the flavor note.
- Quick oats: Use rolled oats, but pulse lightly in a food processor if you prefer a finer texture.
- Chocolate chips: Chop a chocolate bar into small pieces for melting; the recipe requires a total of 2/3 cup.
- Coconut oil: A neutral-tasting oil with a high melting point will work, though coconut oil adds shine and helps the chocolate set cleanly.
Cook’s Kit
Tools you’ll want on hand:
- 8- or 10-cup muffin tin (or silicone liners)
- Mixing bowl and spatula
- Measuring cups and spoons
- Microwave-safe bowl for melting chocolate
- Butter knife for releasing the cups
- Small ladle or spoon for spreading chocolate layers
Don’t Do This
Do not skip the chill time. The chocolate needs to set fully; otherwise the cups will be squishy and hard to remove. Also, avoid overheating the chocolate—melt in short bursts and stir between intervals to prevent burning.
Don’t over-press the oat base. You want it compact enough to hold together, but pressing too hard will make a dense, hockey-puck result. Aim for even, firm pressure that levels each base without compressing every air pocket out of the oats.
How to Make It Lighter
If you want a lighter-feeling cup, try these approaches without changing recipe quantities:
- Use natural peanut butter (separated oils stirred back in) rather than a high-fat commercial blend; the mouthfeel will feel slightly less heavy.
- Serve slightly chilled rather than straight from the freezer; letting them temper for a minute softens the chocolate and reduces that dense, cold sensation.
- Reduce the amount you eat at once—these are satisfying, so a smaller portion can still feel indulgent.
Behind the Recipe
This recipe is a practical adaptation of the peanut butter cup concept, scaled down to pantry-friendly components. Oats add structure and chew while keeping the ingredient list short. Maple syrup acts not only as sweetener but also as a glue that helps bind the oats to the peanut butter without needing extra fats or flours.
Coconut oil in the chocolate is the small technical trick that makes life easier. It thins the melted chocolate slightly for a smoother pour and helps the top set with a glossy finish. If you skip it, the chocolate will still set, but it can be harder and less pleasant to bite into straight from the freezer.
Save for Later: Storage Tips
Freeze for long-term storage: place the cups in a single layer on a lined tray until firm, then transfer to an airtight container with parchment between layers. They keep well for up to 3 months.
Refrigerate for short-term use: store in a sealed container in the fridge for up to 1 week. If you prefer a softer texture, remove a few minutes before eating; if you want a firm bite, keep them chilled.
Common Qs About No-Bake Oatmeal Peanut Butter Cups
- How long do they last? Frozen: up to 3 months. Refrigerated: about 1 week. Room temperature: best within a day if it’s cool; otherwise keep frozen or refrigerated.
- Can I make them nut-free? Yes. Use a sunflower seed butter or another seed butter, but note the flavor and color may change and seeds can be slightly grittier.
- Can I use crunchy peanut butter? Yes. Crunchy will add texture; if the large pieces make pressing difficult, stir a bit to distribute them before forming the bases.
- Do I have to use the coconut oil? No, but it improves the texture and set of the chocolate. If omitted, the chocolate will still harden but may be firmer and less glossy.
- Why did my chocolate bloom? Bloom (grayish streaks) can happen if chocolate is exposed to temperature changes. It’s still safe to eat and usually due to storing in warm-to-cool transitions.
Bring It to the Table
Serve straight from the freezer for a candy-like snap, or let them rest a minute at room temperature for an easier bite. A quick sprinkle of flaky sea salt before the chocolate sets adds contrast and looks elegant. Package a few in parchment paper or small boxes for thoughtful homemade gifts.
Pair with black coffee or a glass of cold milk. If you want to make a more elaborate dessert, chop one or two and scatter over vanilla ice cream for a crunchy, peanut-butter-chocolate topping.
These cups are intentionally simple. They come together fast, store beautifully, and satisfy a chocolate-and-peanut-butter craving without a lot of effort. Keep the recipe in your back pocket for days when you want something homemade but low-maintenance.
No-Bake Oatmeal Peanut Butter Cups
Ingredients
Ingredients
- 1 cupunsweetened peanut butter
- 1/3 cuppure maple syrup
- 1 tsppure vanilla extract
- 1 1/2 cupsquick oatsor rolled oats
- 1/4 tspsea salt
- 2/3 cupchocolate chips
- 2 Tbspcoconut oil*
- Flaky sea saltoptional
Instructions
Instructions
- If your peanut butter is cold and stiff, microwave it in a microwave-safe bowl for 20-second intervals, stirring between intervals, until it is soft and easy to stir.
- In a mixing bowl, stir together 1 cup unsweetened peanut butter, 1/3 cup pure maple syrup, and 1 teaspoon pure vanilla extract until smooth and well combined.
- Add 1 1/2 cups quick oats or rolled oats and 1/4 teaspoon sea salt to the peanut butter mixture. Stir until a thick, evenly mixed dough forms.
- Prepare an 8- or 10-cup muffin tin: lightly grease each hole or line with paper or silicone liners. Decide whether you want 8 larger cups or 10 smaller ones.
- Divide the peanut butter-oat mixture evenly among 8 to 10 prepared muffin holes. Press and flatten each portion into the bottom of its hole to form an even base for the chocolate layer.
- Place 2/3 cup chocolate chips and 2 tablespoons coconut oil in a microwave-safe bowl. Microwave in 20-second increments, stirring well between intervals, until the chocolate is fully melted and smooth.
- Spoon the melted chocolate over each peanut butter base so the tops are covered. If desired, sprinkle each top with flaky sea salt.
- Freeze the muffin tin for 1 to 2 hours, or until the cups are completely set.
- Run a butter knife around the edge of each cup to loosen, then lift them out of the muffin tin. Let sit a minute at room temperature if they are very firm, then enjoy.
Equipment
- 1Muffin Tin
Notes
*Rather than using coconut oil, you can use 2 tablespoons of unsalted butter, or 2 to 3 tablespoons of peanut butter if you’d like