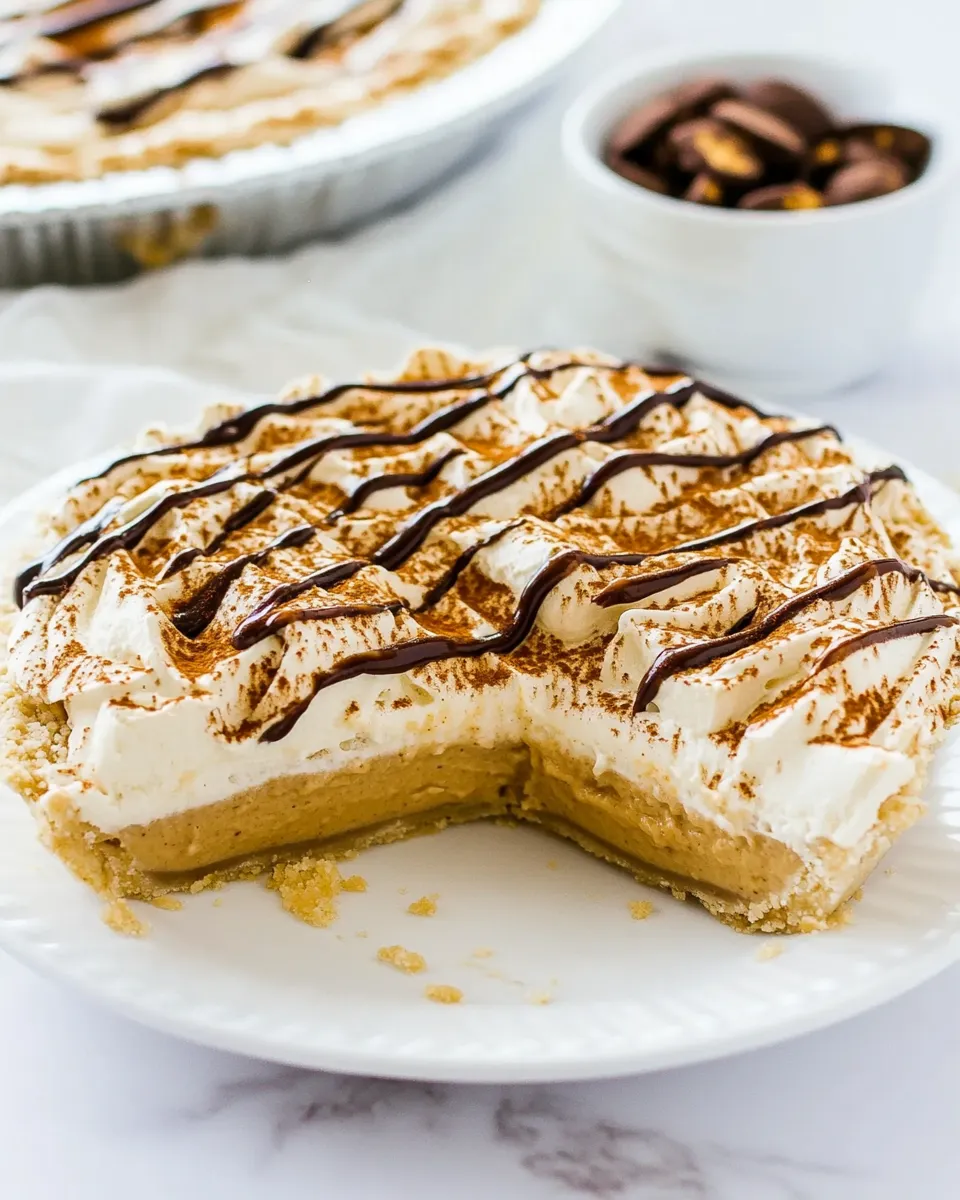
No Bake Dulce de Leche Pie
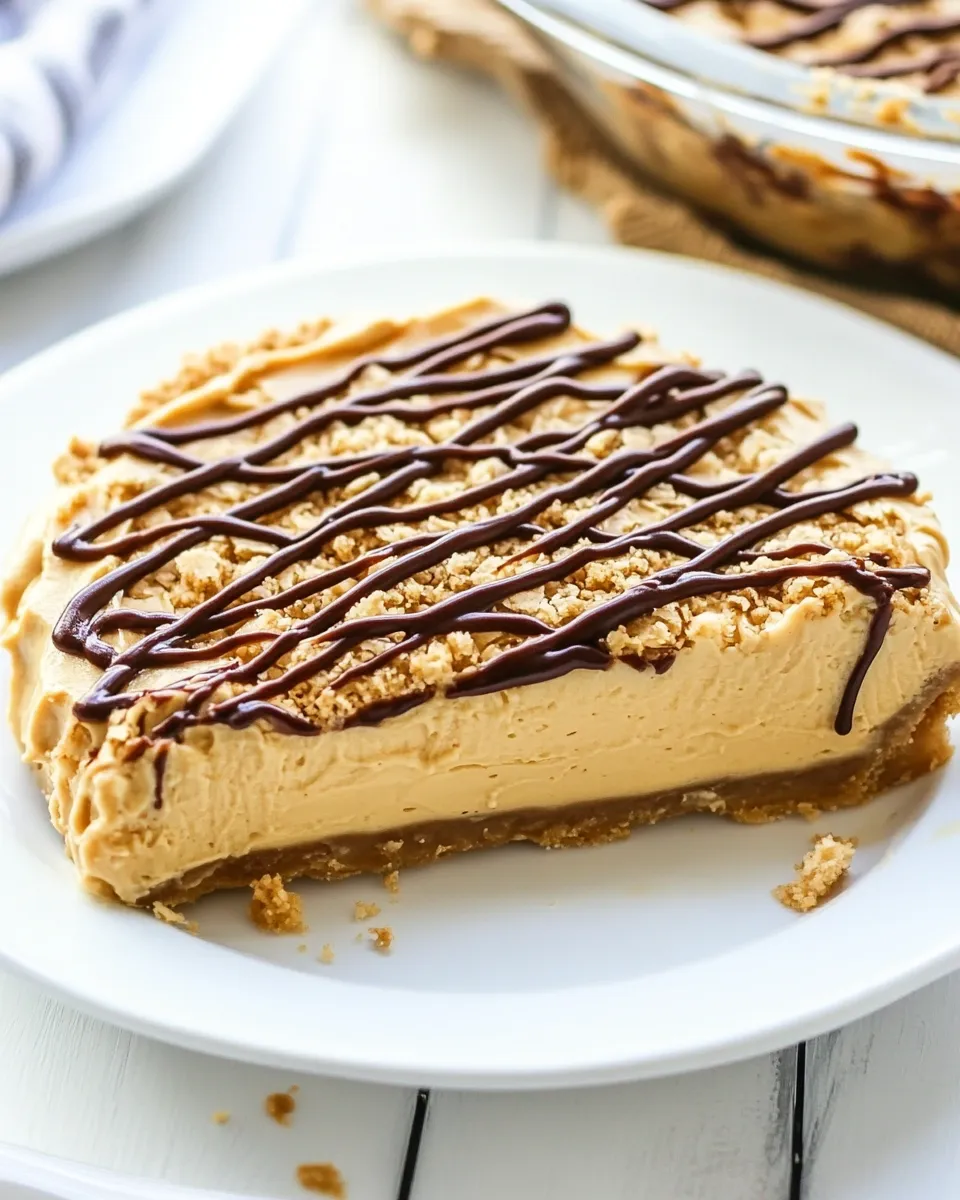
This pie is comfort in a slice: a crisp graham crust, a thin chocolate shield, and a cloud of dulce de leche–flecked cream. It’s the kind of dessert I bring when I want something that looks special but doesn’t demand oven time or complicated technique. It sets in the fridge, not the oven, which makes it a reliable choice for warm days or last-minute entertaining.
There’s a tidy rhythm to assembling it. You melt chocolate for the base, whip a cream cheese and dulce de leche filling until it’s silky, fold in Cool Whip, and finish with a drizzle of hot fudge or a quick ganache. Little steps, predictable results. I’ll walk you through what to buy, exactly what to do, and how to rescue things if they go sideways.
Do this once and you’ll have a go-to no-bake dessert for birthdays, potlucks, or a quiet weekend treat. It stores well, travels well, and—honestly—disappears fast. Read the shopping notes, follow the method, and you’ll have a glossy, crowd-pleasing pie without fuss.
Your Shopping Guide

Buy ingredients that match the recipe specifications—this isn’t the time to substitute wildly. Look for a sturdy 19-inch graham cracker crust if you want clean slices; a homemade crust works, but a good store-bought shell saves time. Pick semi-sweet chocolate chips that melt smooth and taste balanced with the dulce de leche. For the dairy elements, room-temperature cream cheese makes a smooth base while Cool Whip provides the lightness without needing to whip cream.
Plan your chilling time. The chocolate layer needs about 15–30 minutes to firm, and the whole pie needs at least an hour after topping. Bring the cream cheese and dulce de leche to room temperature before you start; they blend more easily and give a lump-free filling. If you’re serving to a crowd, buy an extra container of Cool Whip—you’ll be glad for a little margin.
Ingredients
- 19-inch graham cracker crust from scratch or from the store — the pie shell; choose store-bought for speed or homemade for a firmer, butter-forward crust.
- 1 cup (170 g) semi-sweet chocolate chips — melts into the chocolate bottom; semi-sweet balances the dulce de leche sweetness.
- ⅓ cup (79 ml) heavy whipping cream — for melting chocolate and making a smooth chocolate layer or ganache.
- 8 ounces (226 g) cream cheese room temperature — gives structure and slight tang to the filling; room temperature is key for a smooth mix.
- ½ cup dulce de leche room temperature (from scratch or the store) — the star flavor; room temperature keeps the filling smooth.
- ¼ cup (50 g) granulated sugar — rounds out the sweetness and helps stabilize the cream cheese.
- 1 teaspoon vanilla extract — lifts the flavors and complements the dulce de leche.
- 18 ounce container Cool Whip (regular, light, or fat-free) — folded in for volume and a fluffy texture; use the version you prefer.
- ⅓ cup hot fudge sauce OR — one topping option for a quick, glossy finish.
- ⅓ cup semi-sweet chocolate chips — if you choose the ganache route instead of hot fudge.
- 1 tablespoon heavy whipping cream — used with chocolate chips to make a simple ganache topping.
Make No Bake Dulce de Leche Pie: A Simple Method
- Make sure the 19-inch graham cracker crust is chilled and ready to fill.
- Prepare the chocolate bottom: place 1 cup (170 g) semi-sweet chocolate chips and 1/3 cup (79 ml) heavy whipping cream in a microwave-safe bowl or measuring cup. Microwave on HIGH for 45 seconds, then whisk until smooth. If not fully melted, microwave an additional 15–30 seconds and whisk again until glossy and smooth.
- Pour the melted chocolate mixture into the chilled crust and spread to an even layer covering the bottom. Chill in the refrigerator until the chocolate layer is set, about 15–30 minutes.
- Make the filling: in a medium bowl, beat 8 ounces (226 g) room-temperature cream cheese, 1/2 cup dulce de leche (room temperature), 1/4 cup (50 g) granulated sugar, and 1 teaspoon vanilla extract with a hand mixer (or whisk) until smooth and lump-free.
- Fold in the entire 18-ounce container of Cool Whip gently until the mixture is uniform and no streaks remain.
- Spread the cream cheese–dulce de leche filling evenly over the chilled chocolate layer in the crust, smoothing the top.
- Choose a topping method:
- Hot fudge option: warm 1/3 cup hot fudge sauce in the microwave in 10–15 second increments until pourable but not boiling. Transfer to a small zip-top bag, snip off a small corner, and pipe your desired design over the filling.
- Ganache option: place 1/3 cup semi-sweet chocolate chips and 1 tablespoon heavy whipping cream in a microwave-safe bowl. Melt in 15-second increments at 50% power, stirring between each, until smooth. Transfer to a small zip-top bag, snip off a corner, and pipe the ganache design over the filling.
- Return the pie to the refrigerator and chill until the filling and topping are firm, at least 1 hour before serving.
- Store the pie covered in a sealed container in the refrigerator for up to 5 days.
Why This Recipe Works
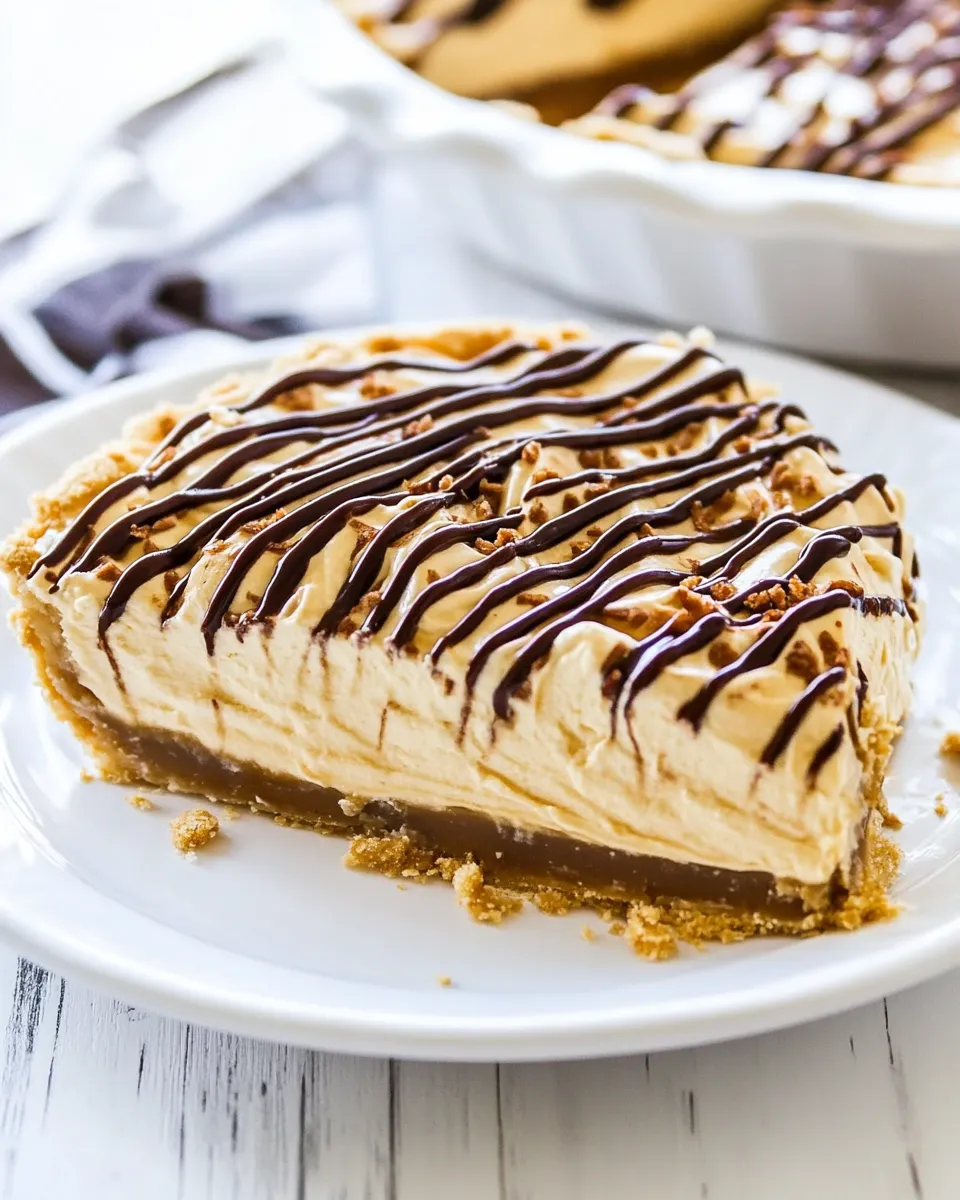
Each component has a clear job. The thin chocolate layer seals the crust so it doesn’t go soggy and adds a clean, bitter contrast to the dulce de leche. Cream cheese provides body and structure; without it the filling would be too loose. Cool Whip introduces air and makes the filling light enough to slice cleanly while still holding shape.
The method depends on temperature control. Room-temperature cream cheese and dulce de leche combine smoothly, creating a uniform base for folding in Cool Whip. Chilling the chocolate base first gives you a firm foundation that keeps the filling from mixing into the crust. The two topping options—hot fudge or quick ganache—are simple but impactful: both give a glossy finish that feels purposeful and polished.
Quick Replacement Ideas
Stick to the ingredient choices listed when possible. The recipe already allows small variations that won’t break the texture:
- Use the 18-ounce container Cool Whip regular, light, or fat-free — choose based on your preference for richness and calories.
- The graham cracker crust can be store-bought or homemade — both are listed as acceptable; homemade will be firmer and butterier.
- Dulce de leche may be homemade or store-bought — both are listed and will work; homemade is deeper in flavor but store-bought is convenient.
- For the topping choose either 1/3 cup hot fudge sauce or the ganache made from 1/3 cup semi-sweet chocolate chips and 1 tablespoon heavy whipping cream — both are provided as options.
Essential Tools for Success
- Microwave-safe bowl or measuring cup — for melting chocolate and cream without scorched spots.
- Hand mixer or whisk — a mixer speeds things up and ensures a lump-free cream cheese base.
- Spatula — for folding Cool Whip and spreading the filling cleanly.
- Small zip-top bag — perfect for piping hot fudge or ganache precisely.
- Refrigerator with reliable cold — the recipe depends on chilling time to set layers.
- 9- or 10-inch pie server or sharp knife — for neat slices after the pie chills.
Troubleshooting Tips
If your chocolate doesn’t melt smoothly: stop microwaving and whisk. Chocolate often finishes melting from residual heat; keep short bursts and stir well. Overheating can seize chocolate, so patience is key.
If the filling seems lumpy after beating: those lumps usually come from cold cream cheese. Let the cream cheese sit longer at room temperature next time and beat until smooth before adding dulce de leche and sugar.
If the filling becomes runny after folding in Cool Whip: you may have overmixed. Fold gently until uniform; stop when streaks are gone. If it’s already runny, chill the pie longer—an extended refrigeration can help it firm up.
If slices are soft and messy: make sure the chocolate base had time to set before adding the filling and that the finished pie chilled for at least an hour. For cleaner slices chill the pie overnight and slice with a thin, hot knife (wipe between cuts).
Make It Year-Round
This pie is inherently seasonal because it’s no-bake. In warm months you’ll appreciate avoiding the oven. In cool months it’s a quick dessert that doesn’t require heating the kitchen. Serve it slightly chilled in summer, and let it sit 5 minutes at room temperature in winter to soften slightly for easier slicing.
For gatherings, make the pie a few hours ahead and keep it refrigerated. Transport it in a firm container with a flat base and keep it chilled until serving. Because it holds up to five days in the fridge, you can also make it a day ahead and save time on the event day.
Notes on Ingredients
19-inch graham cracker crust — a larger pie shell gives generous slices. Store-bought works fine; if you make your own, press firmly and chill so it stays crisp under the chocolate layer.
Semi-sweet chocolate chips — they’re used twice: once for the chocolate base and optionally for the ganache. Semi-sweet gives balanced bitterness against dulce de leche. Avoid chips labeled as “baking” if they contain stabilizers that melt less smoothly; standard semi-sweet chips are fine here.
Heavy whipping cream — used in small amounts to make the chocolate glossy and the ganache smooth. Measure carefully; you only need 1/3 cup for the base and 1 tablespoon if you choose ganache.
Cream cheese — full-fat room-temperature cream cheese yields the best texture. Low-fat versions may have different water content and can change the mouthfeel.
Dulce de leche — you can use jarred or homemade. Room temperature performs better in mixing; cold dulce de leche can cause lumps or streaks.
Cool Whip — the recipe specifies a full 18-ounce container; folding in the full carton gives the proper volume and texture. The label options (regular, light, fat-free) are included in the ingredient list, so choose what suits your needs.
Prep Ahead & Store
Make the chocolate bottom and chill it, then keep the crust covered until you finish the filling—this saves time on the day you plan to serve. You can also assemble the entire pie up to a day ahead and store it covered in a sealed container in the refrigerator for up to 5 days as the directions state.
For longer storage, this pie doesn’t freeze well because Cool Whip’s texture changes after freezing and thawing. Stick to refrigeration for best results. When storing, keep it sealed to prevent the pie from absorbing odors from the fridge.
Questions People Ask
Can I make the pie without a store-bought crust?
Yes. The ingredient list allows a crust from scratch. If you make one, press it firmly and chill before adding the chocolate to prevent sogginess.
Do I have to use Cool Whip?
The recipe calls for an 18-ounce container of Cool Whip (regular, light, or fat-free). It provides stable volume quickly. Substituting whipped heavy cream will change volume and stability, so follow the recipe as written for best texture.
How long should the pie chill before serving?
After topping, refrigerate at least 1 hour until the filling and topping are firm. For best slices, chill longer—2–4 hours or overnight.
Can I pipe the topping decoratively?
Yes. Warm your chosen topping until pourable, transfer to a zip-top bag, snip a small corner, and pipe patterns across the pie for a polished look.
The Last Word
No Bake Dulce de Leche Pie is simple to pull together and reliably delicious. Follow the sequence: set the chocolate base, make a lump-free cream cheese and dulce de leche filling, fold in the Cool Whip gently, and top with your choice of sauce. Keep temperatures in mind—room-temperature dairy blends better and the fridge is your friend for setting layers.
Make it the day before a party for stress-free serving, and trust that this pie will be a crowd favorite: sweet, creamy, and with the satisfying snap of chocolate under the filling. Happy baking—well, no-baking—and enjoy every slice.

No Bake Dulce de Leche Pie
Ingredients
Ingredients
- 19- inchgraham cracker crustfrom scratch or from the store
- 1 cup 170 g semi-sweet chocolate chips
- 1/3 cup 79 ml heavy whipping cream
- 8 ounces 226 g cream cheeseroom temperature
- 1/2 cupdulce de lecheroom temperature from scratch or the store
- 1/4 cup 50 g granulated sugar
- 1 teaspoonvanilla extract
- 18 ouncecontainer Cool Whip regular, light, or fat-free
- 1/3 cuphot fudge sauce OR
- 1/3 cupsemi-sweet chocolate chips
- 1 tablespoonheavy whipping cream
Instructions
Instructions
- Make sure the 19-inch graham cracker crust is chilled and ready to fill.
- Prepare the chocolate bottom: place 1 cup (170 g) semi-sweet chocolate chips and 1/3 cup (79 ml) heavy whipping cream in a microwave-safe bowl or measuring cup. Microwave on HIGH for 45 seconds, then whisk until smooth. If not fully melted, microwave an additional 15–30 seconds and whisk again until glossy and smooth.
- Pour the melted chocolate mixture into the chilled crust and spread to an even layer covering the bottom. Chill in the refrigerator until the chocolate layer is set, about 15–30 minutes.
- Make the filling: in a medium bowl, beat 8 ounces (226 g) room-temperature cream cheese, 1/2 cup dulce de leche (room temperature), 1/4 cup (50 g) granulated sugar, and 1 teaspoon vanilla extract with a hand mixer (or whisk) until smooth and lump-free.
- Fold in the entire 18-ounce container of Cool Whip gently until the mixture is uniform and no streaks remain.
- Spread the cream cheese–dulce de leche filling evenly over the chilled chocolate layer in the crust, smoothing the top.
- Choose a topping method: - Hot fudge option: warm 1/3 cup hot fudge sauce in the microwave in 10–15 second increments until pourable but not boiling. Transfer to a small zip-top bag, snip off a small corner, and pipe your desired design over the filling. - Ganache option: place 1/3 cup semi-sweet chocolate chips and 1 tablespoon heavy whipping cream in a microwave-safe bowl. Melt in 15-second increments at 50% power, stirring between each, until smooth. Transfer to a small zip-top bag, snip off a corner, and pipe the ganache design over the filling.
- Return the pie to the refrigerator and chill until the filling and topping are firm, at least 1 hour before serving.
- Store the pie covered in a sealed container in the refrigerator for up to 5 days.
Equipment
- microwave-safe bowl or measuring cup
- Whisk
- Hand mixer or whisk
- Medium Bowl
- Refrigerator
- small zip-top bag
Notes
Leftoverdulce de lechepie will keep in the refrigerator for up to five days. Just keep it in an air-tight container.
Can you usehomemade whipped creamin place of the Cool Whip? My honest answer is: no, I don’t recommend it especially if you are making the pie ahead of time.Cool Whipholds up a lot better than homemade whipped cream. It’s just more stable which is why it’s used a lot in no-bake desserts. Whipped cream is not as stable and the last thing you want is to open your fridge and have a sagging pie with weeping filling. Cool Whip works much better and you can count on it to hold up well.
For thefinishing touch, I like to drizzle some chocolate over the top of the pie. You can use chocolate ganache (just make another batch following the instructions for the pie crust) or you can use store-bought hot fudge sauce.