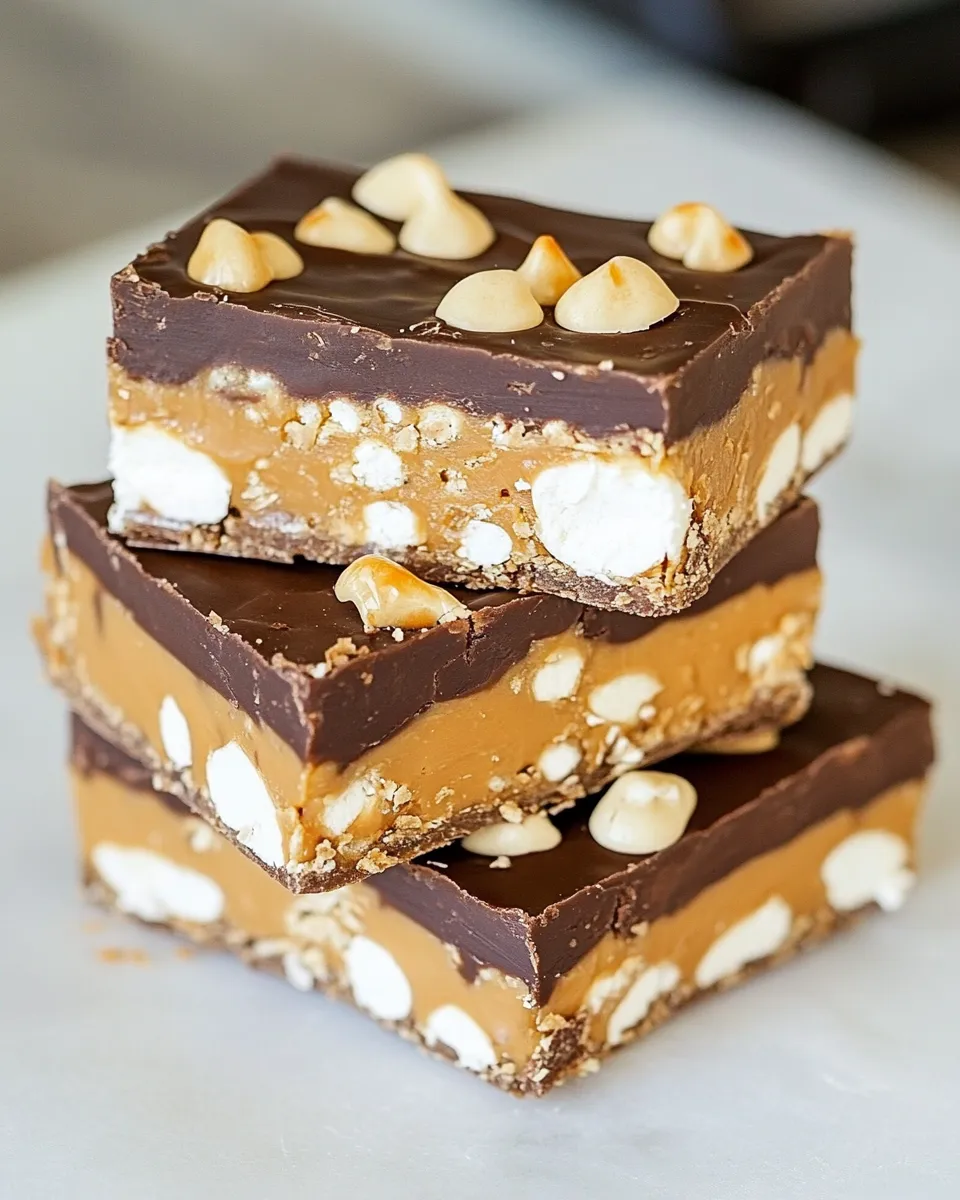
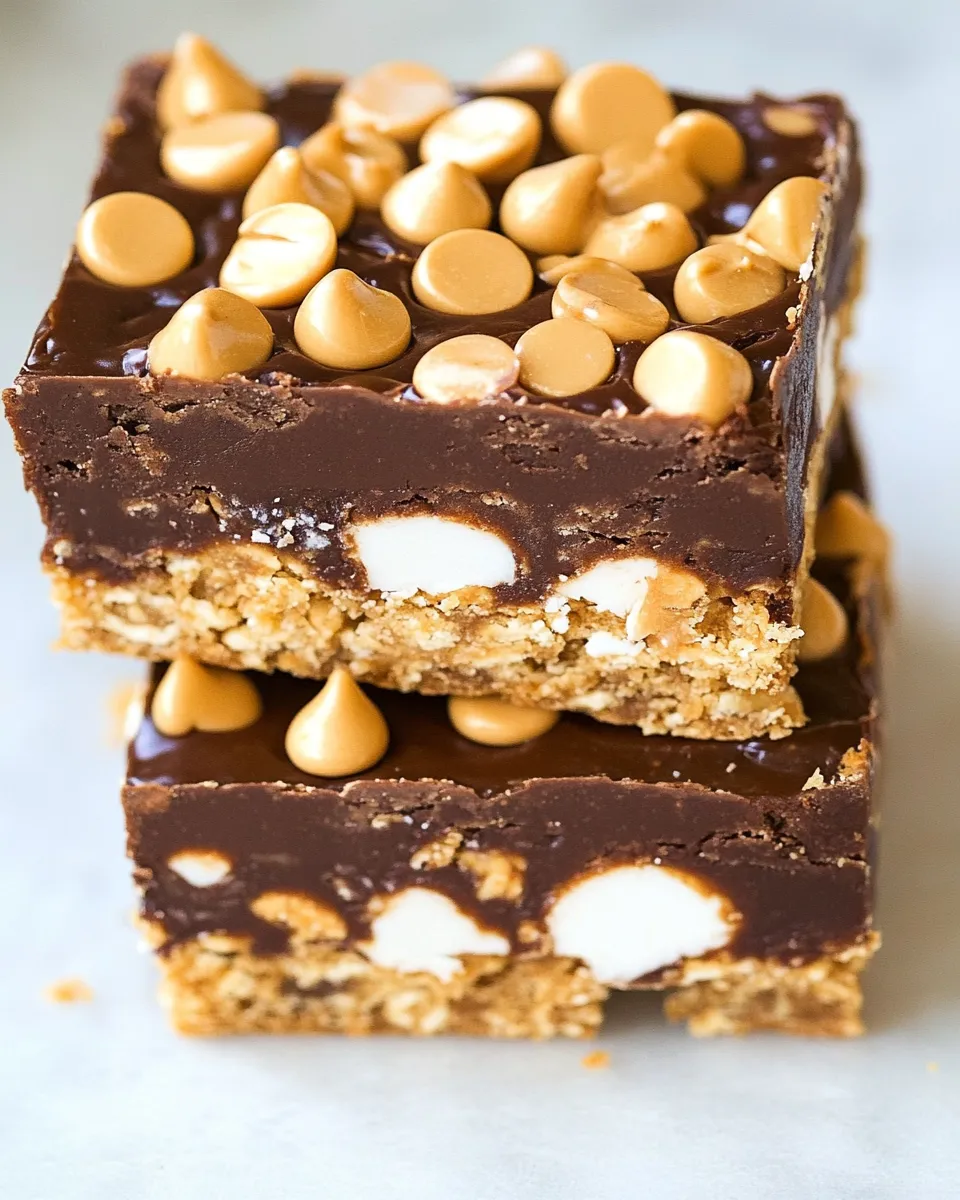
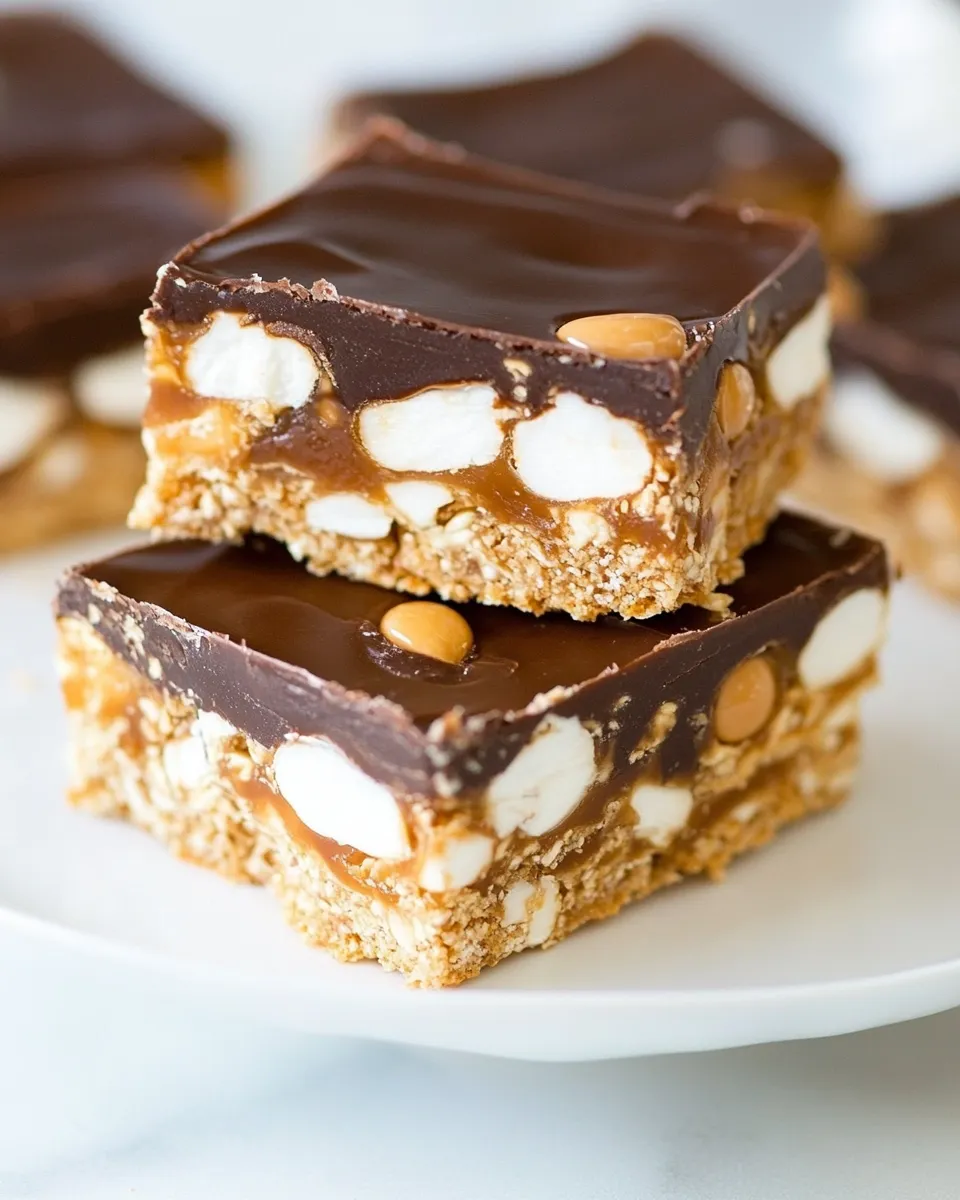
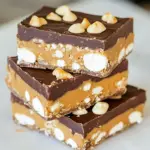
No-Bake Chubby Hubby Bars
I fell in love with this bar the first time I made it: salty, crunchy pretzels meet smooth peanut butter and two layers of glossy semisweet chocolate. There’s no oven involved, just a few simple steps and a little patience while layers set. It’s the kind of recipe that looks and tastes indulgent but takes minimal hands-on time.
These bars travel well and keep their texture in the refrigerator, which makes them ideal for potlucks, packed lunches, or a reliable after-dinner treat. Once you get the chocolate-melting rhythm down, the rest falls into place. The recipe is forgiving, and the technique is repeatable.
If you want an easy crowd-pleaser that uses pantry staples, this is it. Below I walk through the ingredients, the exact step-by-step method, swaps and pitfalls, and everything you need to make them tonight with confidence.
Ingredient Checklist

- 16ounces(453.59g)semisweet chocolate,finely chopped, divided — Chopped chocolate melts more evenly than chips; divided so you can form a base and a top layer.
- 3cups(168g)pretzel sticks — Provides crunch and a salty contrast to the sweet layers; arrange them flat for an even texture.
- 4tablespoonsunsalted butter,melted — Helps the peanut butter layer spread smoothly and adds richness.
- 1cup(258g)creamy peanut butter — The body of the filling; creamy gives the smooth, spreadable texture this bar needs.
- 1cup(120g)powdered sugar — Sweetens and firms the peanut butter layer so it slices cleanly.
Stepwise Method: No-Bake Chubby Hubby Bars
- Line a 9×13-inch pan with parchment paper, leaving an overhang on two sides for easy removal.
- Put half of the finely chopped semisweet chocolate (about 8 ounces) in a medium microwave-safe bowl. Microwave at 50% power in 30-second increments, stirring after each increment, until completely melted and smooth.
- Pour the melted chocolate into the prepared pan and use an offset spatula or the back of a spoon to spread it into an even layer covering the bottom.
- Arrange the pretzel sticks in a single, even layer over the chocolate, spacing them so they sit mostly flat. Press gently so the pretzels make contact with the chocolate but are not submerged. Refrigerate the pan until the chocolate is set, about 10–15 minutes.
- In a medium bowl whisk together the melted unsalted butter (4 tablespoons) and the creamy peanut butter (1 cup) until combined. Whisk in the powdered sugar (1 cup) until the mixture is smooth and spreadable.
- Spread the peanut butter mixture in an even layer over the set pretzel layer, smoothing the top with a spatula.
- Melt the remaining half of the finely chopped chocolate using the same microwave method (50% power, 30-second increments, stirring until smooth). Let the melted chocolate sit 30–60 seconds to cool slightly, then pour it over the peanut butter layer and spread into an even top layer.
- Refrigerate the pan until the top chocolate is fully set, about 30 minutes. Use the parchment overhang to lift the slab from the pan and transfer to a cutting board.
- Cut into bars and serve. Store leftovers in an airtight container in the refrigerator for up to 2 weeks.
Why This Recipe Is Reliable
This recipe relies on simple, repeatable actions: melt, layer, chill. There are no tempering tricks or delicate bakes. That reduces the variables that typically cause flaky results. The chocolate is chopped, which means it melts evenly, and using a 50% microwave power with short bursts prevents sudden overheating.
Layering is also straightforward and deliberate. The base chocolate creates a glue point for the pretzels so they sit flat, and chilling between stages ensures each layer sets cleanly before the next goes on. The peanut butter mix is bound with powdered sugar and butter, giving it enough body to spread without oozing into the gaps between pretzels.
Swap Guide
I keep swaps conservative so you get consistent results. Stick to similar textures and functions:
- Chocolate: the recipe calls for semisweet chocolate. Use the same quantity and keep it finely chopped for even melting.
- Pretzels: use sticks as specified; anything bulkier will change the layer height and how the peanut butter fills gaps.
- Peanut butter: the formula depends on creamy peanut butter’s spreadability. A thicker nut butter will alter texture; if you must substitute, expect a firmer filling.
- Butter and powdered sugar: these two create the right balance of richness and structure. Omitting or reducing either will make the filling softer and harder to slice neatly.
Must-Have Equipment
You don’t need a long tool list, but a few items make this effortless:
- 9×13-inch pan — the recipe is sized for this exactly; a different size will change thickness and set times.
- Parchment paper — for easy removal of the slab and cleaner cuts.
- Microwave-safe bowl — for melting chocolate safely in short bursts.
- Offset spatula or the back of a spoon — for spreading chocolate and the peanut butter layer smoothly.
- Whisk and medium bowl — to combine the butter, peanut butter, and powdered sugar into a spreadable filling.
- Sharp knife — for clean slices once the bars are fully chilled.
Mistakes Even Pros Make
These are the common missteps that wreck texture or make slicing messy, and how to avoid them:
- Overheating chocolate — heating too quickly or at full power can seize chocolate. Melt at 50% power in 30-second bursts and stir between each blast.
- Skipping the chill step after the pretzel layer — if you don’t let the base set, the pretzels will shift when you spread the peanut butter, creating uneven layers.
- Spreading a warm peanut butter mixture — make sure the butter is warm enough to blend but the mixture should not be hot; it should be spreadable. Hot filling will soften the set chocolate below.
- Cutting before fully set — the top layer needs the refrigeration time listed. Cutting early creates ragged edges and sticky bars.
Seasonal Adaptations
These bars are essentially a no-bake platform. Temperature and humidity affect set times more than anything else. In warm or humid weather, give the chocolate extra refrigeration time so the top layer firms fully before cutting.
Presentation changes with seasons: during colder months, serve bars straight from the refrigerator so the chocolate snaps cleanly. In warmer months, keep them chilled until seconds before serving to prevent softness. For gifting, keep them in a cool place and pack with a small ice pack if shipping or traveling in heat.
Testing Timeline
Follow these checkpoints to keep timing predictable:
- Prep and chop chocolate: 5–10 minutes.
- First melt and spread for base chocolate: 5–7 minutes.
- Chill for base set after pretzels: 10–15 minutes (depends on fridge temperature).
- Prepare peanut butter filling and spread: 5–10 minutes.
- Melt remaining chocolate and top layer: 5–7 minutes plus 30–60 seconds cooling.
- Final chill for top set: about 30 minutes.
Total active hands-on time is under 30 minutes. Most of the time is passive chilling.
How to Store & Reheat
Store the bars in an airtight container in the refrigerator. They’ll keep their texture and flavor for up to 2 weeks as directed. If you stack bars, separate layers with parchment to prevent sticking.
These bars are meant to be eaten cool. To take the chill off before serving, leave them at room temperature for 10–15 minutes — the chocolate will soften slightly and the peanut butter becomes more tender, but the bars will hold their shape. Do not microwave whole bars; brief, uneven heating will melt the chocolate and ruin the clean layers.
Handy Q&A
Q: Can I make these ahead?
A: Yes. Make them up to two weeks ahead and keep refrigerated. For best texture, bring to room temperature for 10–15 minutes before serving.
Q: My chocolate looked grainy after melting. What went wrong?
A: Grainy or seized chocolate is usually from overheating or from water contact. Stir frequently and use low power short bursts in the microwave. Keep bowls and utensils completely dry.
Q: How do I get clean cuts?
A: Use a sharp knife and warm the blade under hot water, then dry it before slicing. Wipe the blade between cuts for neat edges. Make sure the top layer is fully set.
Q: Can I freeze these?
A: Freezing is possible, but refrigeration is preferred for texture. If you freeze, wrap tightly and thaw in the refrigerator before bringing to room temperature. Expect a slight change in texture from condensation during thawing.
Make It Tonight
Plan a simple evening: start by lining the pan and chopping the chocolate so you can melt the first half quickly. While that base layer chills after you add the pretzels, whisk together the peanut butter, melted butter, and powdered sugar. That keeps things moving and avoids idle time.
Here’s a tight checklist to get them on the table tonight:
- Line 9×13-inch pan with parchment (5 minutes).
- Chop chocolate and melt first half (10 minutes).
- Spread base, arrange pretzels, chill (15 minutes).
- Mix and spread peanut butter filling (10 minutes).
- Melt remaining chocolate and top, chill until set (35 minutes).
Active time sits under half an hour. Most of the evening is convenient waiting while layers firm. Follow the method above exactly and you’ll have tidy, delicious No-Bake Chubby Hubby Bars to slice and share before dessert time.
No-Bake Chubby Hubby Bars
Ingredients
Ingredients
- 16 ounces 453.59 gsemisweet chocolate, finely chopped, divided
- 3 cups 168 gpretzel sticks
- 4 tablespoonsunsalted butter melted
- 1 cup 258 gcreamy peanut butter
- 1 cup 120 gpowdered sugar
Instructions
Instructions
- Line a 9x13-inch pan with parchment paper, leaving an overhang on two sides for easy removal.
- Put half of the finely chopped semisweet chocolate (about 8 ounces) in a medium microwave-safe bowl. Microwave at 50% power in 30-second increments, stirring after each increment, until completely melted and smooth.
- Pour the melted chocolate into the prepared pan and use an offset spatula or the back of a spoon to spread it into an even layer covering the bottom.
- Arrange the pretzel sticks in a single, even layer over the chocolate, spacing them so they sit mostly flat. Press gently so the pretzels make contact with the chocolate but are not submerged. Refrigerate the pan until the chocolate is set, about 10–15 minutes.
- In a medium bowl whisk together the melted unsalted butter (4 tablespoons) and the creamy peanut butter (1 cup) until combined. Whisk in the powdered sugar (1 cup) until the mixture is smooth and spreadable.
- Spread the peanut butter mixture in an even layer over the set pretzel layer, smoothing the top with a spatula.
- Melt the remaining half of the finely chopped chocolate using the same microwave method (50% power, 30-second increments, stirring until smooth). Let the melted chocolate sit 30–60 seconds to cool slightly, then pour it over the peanut butter layer and spread into an even top layer.
- Refrigerate the pan until the top chocolate is fully set, about 30 minutes. Use the parchment overhang to lift the slab from the pan and transfer to a cutting board.
- Cut into bars and serve. Store leftovers in an airtight container in the refrigerator for up to 2 weeks.
Equipment
- 9x13-inch pan
- Parchment Paper
- Offset Spatula
- Spoon
- Microwave-safe bowl
- Medium Bowl
- Spatula
- Microwave
- Refrigerator
- Cutting Board
- Airtight container
Notes
Nutritional values are based on one serving