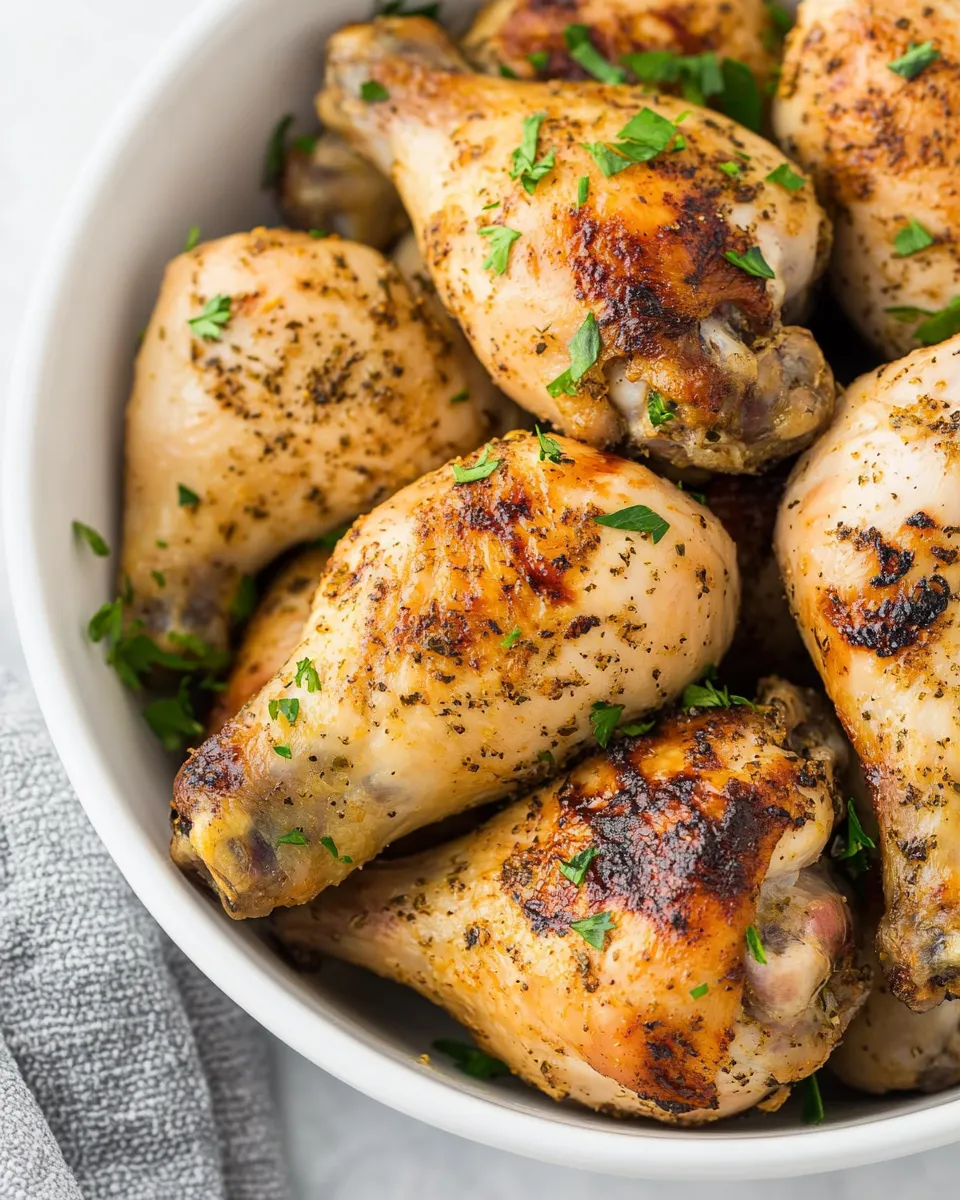
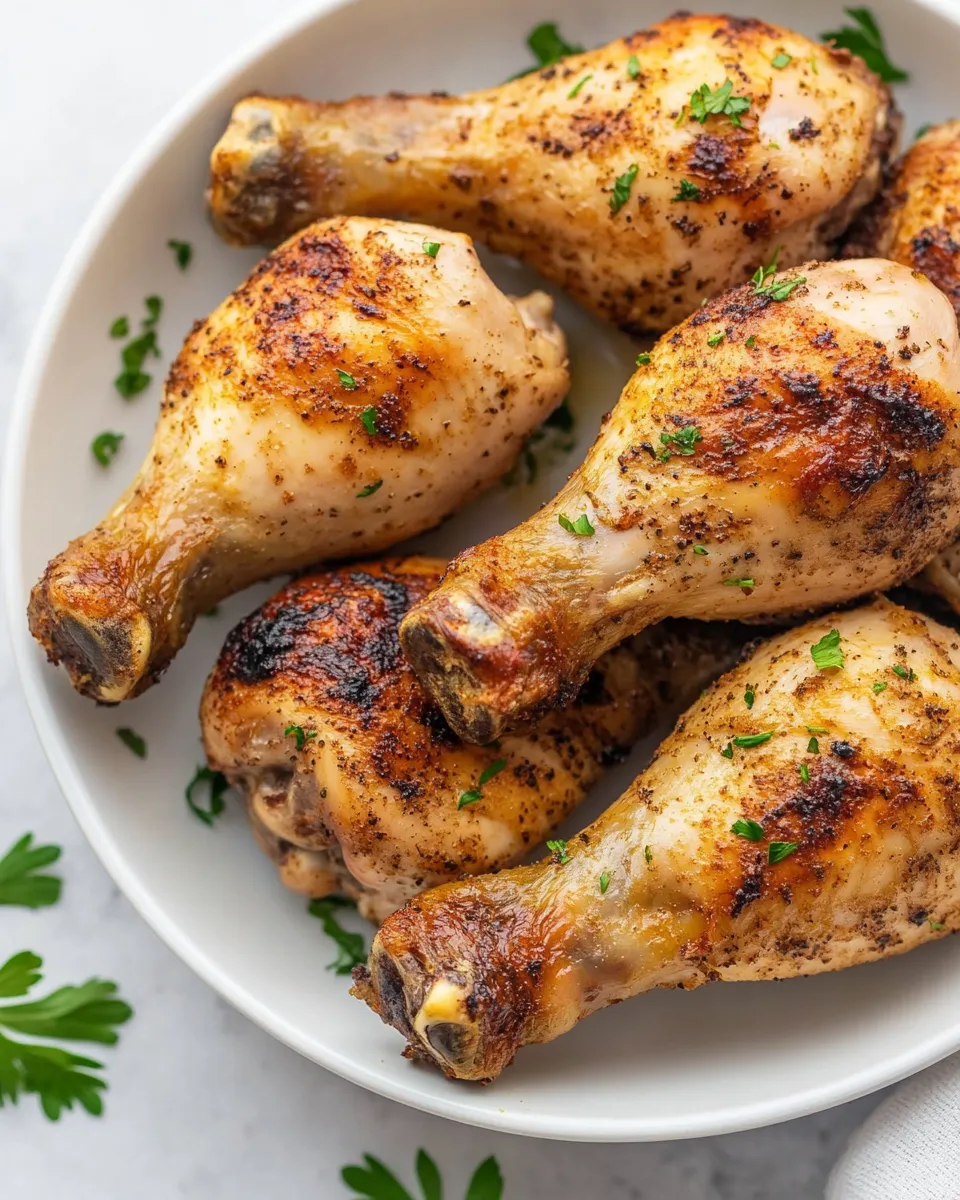
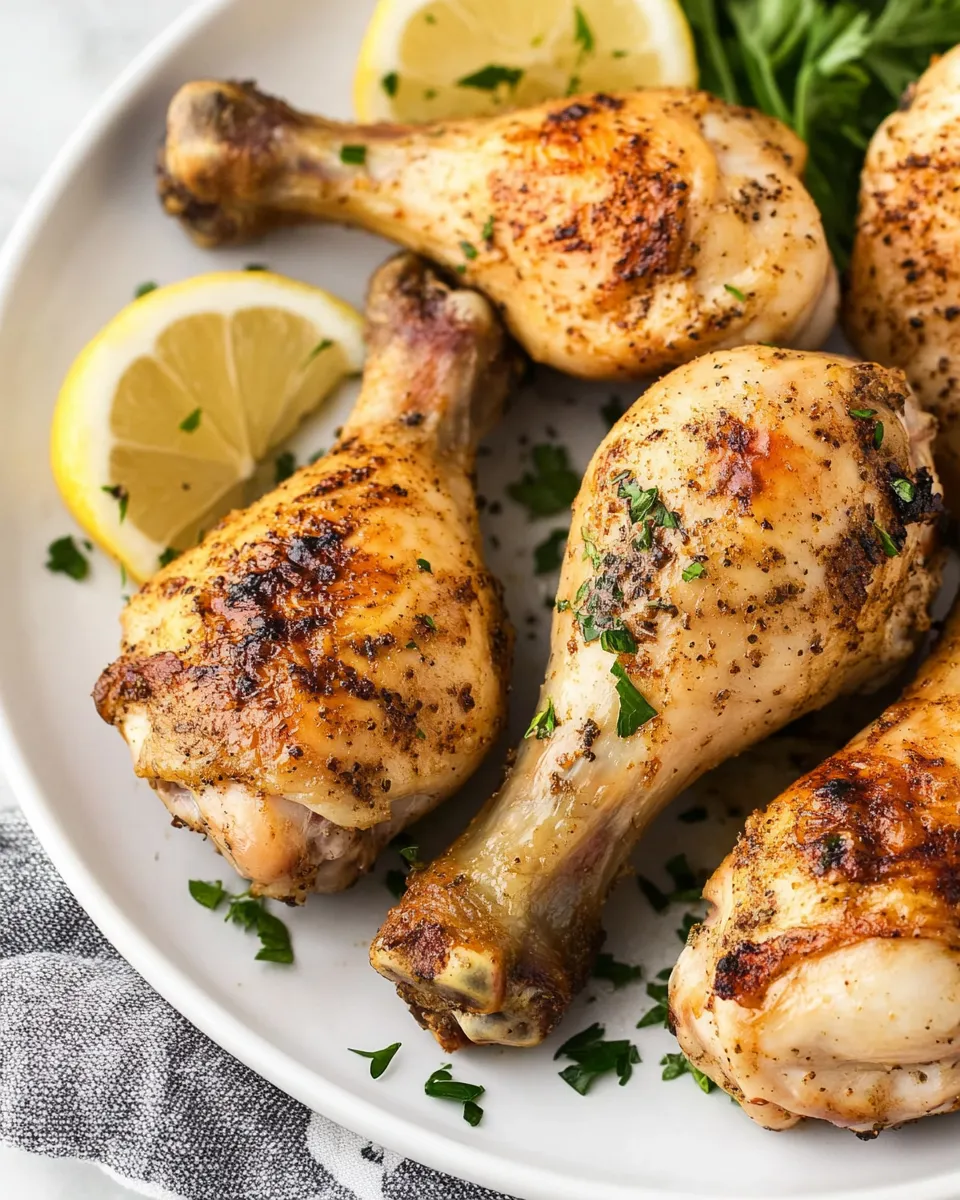
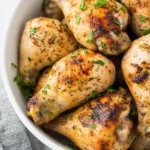
Instant Pot Chicken Drumsticks
These Instant Pot chicken drumsticks are the kind of weeknight recipe I reach for when I want dinner that feels thoughtful but doesn’t eat my evening. You get a simple dry rub, a quick sear to develop color, and the Instant Pot does the heavy lifting to make the meat tender. It’s straightforward, forgiving, and easy to scale when diners multiply.
I like this method because it balances speed and texture. The pressure cooking gives reliably juicy meat, and the short sauté step at the end reduces the cooking liquid into a glossy sauce you can spoon over the drumsticks. No marathon prep. No complicated ingredient list.
Below you’ll find the exact ingredients and the step-by-step program to follow, plus practical tips for crisping, storing, and dialing the flavors to your household’s taste. Read through once, then make it — you’ll be glad you did.
What Goes Into Instant Pot Chicken Drumsticks

This recipe relies on a focused dry rub and simple pantry staples. The rub seasons through while the Instant Pot steams and pressurizes, and the finishing step concentrates the cooking liquid into a quick sauce. No fillers, no long ingredient list — just what matters.
Ingredients
- 1 teaspoon paprika — gives color and a mild smoky-sweet backbone to the rub.
- 1 teaspoon dried oregano — adds herbal warmth and savory depth.
- 1 teaspoon garlic powder — for steady garlic flavor without raw bite.
- 1 ½ teaspoons salt — seasons the meat; adjust if you use low-sodium stock.
- ¾ teaspoon ground black pepper — sharpness and balance to the rub.
- 2 ½ pounds (1.2kg) chicken drumsticks — about 10 pieces — the star ingredient; size affects cook time slightly but this amount works well in a 6-quart Instant Pot.
- 1 tablespoon olive oil — used for browning; helps crisp and color the skin.
- 1 tablespoon butter — adds flavor to the sear and enriches the finishing sauce.
- 1 cup chicken stock or water — the cooking liquid that creates steam and becomes the base for the sauce.
Stepwise Method: Instant Pot Chicken Drumsticks
- In a small bowl, combine the paprika, dried oregano, garlic powder, salt, and ground black pepper to make the dry rub.
- Pat the drumsticks dry with paper towels, then season all over with the dry rub.
- Turn the Instant Pot to SAUTE. When the display reads “HOT,” add the olive oil and the butter and let the butter melt.
- Brown the drumsticks in the pot skin-side down for 2–3 minutes, then flip and brown the other side for about 2 minutes. Work in 2 batches so the pot is not crowded. Remove browned drumsticks and set them aside on a plate.
- Pour in 1 cup chicken stock or water. Use a wooden spoon or spatula to scrape the bottom of the pot and deglaze, lifting any stuck brown bits.
- Insert the trivet into the pot. Arrange the browned drumsticks on the trivet (they may overlap).
- Secure the lid and set the vent to SEALING. Select PRESSURE COOK/MANUAL on High pressure and set the time to 10 minutes. (The Instant Pot will take about 6–7 minutes to come to pressure.)
- When the cooking program ends, allow a natural pressure release for 10 minutes, then carefully turn the vent to VENTING to quick-release any remaining pressure. When the float valve drops, open the lid.
- Transfer the drumsticks to a serving plate. If you want a thicker sauce, set the Instant Pot to SAUTE and simmer the liquid until reduced to your desired consistency, stirring and scraping the bottom. Taste and add more salt if needed.
- Spoon the sauce over the drumsticks and serve.
Why This Recipe is a Keeper
This method consistently produces drumsticks that are juicy inside with a concentrated sauce for spooning. The short sear builds flavor quickly, and pressure cooking locks in moisture without long braises or babysitting. It’s the kind of recipe that works for a family dinner, a potluck, or a simple Sunday meal prep.
Another reason I keep coming back to it: it’s flexible. The basic rub is balanced enough to stand alone, but it’s also a great canvas for tossing in other spices or a splash of acid at the end. Worst-case scenario? You still have tender, well-seasoned chicken in under 45 minutes from start to finish.
Flavor-Forward Alternatives
Want to change the mood without changing technique? Try one of these swaps. Each keeps the same cook times and basic approach.
- Smokier: Replace paprika with smoked paprika for a deeper smoke note.
- Herby: Use 1 teaspoon fresh chopped rosemary or thyme mixed into the rub (add after pressure cooking if you prefer fresher flavor).
- Spicy: Add ½ teaspoon cayenne to the dry rub for heat, or a dash of hot sauce to the finished sauce.
- Citrus-bright: Stir a teaspoon of lemon or lime zest into the rub and finish with a squeeze of juice after cooking.
Equipment at a Glance
You don’t need fancy tools for this — just reliable basics:
- 6-quart Instant Pot (or similar electric pressure cooker) — big enough for about 2½ pounds of drumsticks.
- Instant Pot trivet — keeps the drumsticks elevated above the liquid.
- Sauté tools: wooden spoon or heatproof spatula for deglazing, plus tongs for flipping.
- Plate or tray to hold browned drumsticks between batches.
- Optional: oven broiler or hot skillet if you want extra-crisp skin after pressure cooking.
Frequent Missteps to Avoid
A few small mistakes can change the result. Watch for these common issues.
- Skipping the pat-dry step: wet skin steams instead of browns. Pat the drumsticks thoroughly before seasoning.
- Overcrowding the pot while browning: crowding prevents good color. Work in two batches as instructed.
- Not deglazing: the stuck browned bits under the pot mean less flavor in the sauce and can trigger a “burn” warning. Scrape well when you add the liquid.
- Quick-releasing immediately: the recipe calls for a 10-minute natural release. Skipping that can make the meat firmer and drier.
Better-for-You Options
If you want to lighten the dish without sacrificing satisfaction, try these tweaks:
- Use low-sodium chicken stock or water to reduce sodium; taste the sauce at the end and add salt only if needed.
- Swap butter for an extra tablespoon of olive oil for a fully plant-forward fat profile.
- Reduce salt slightly if you’re serving the drumsticks with salty sides or sauces.
- Serve over a bed of steamed vegetables, cauliflower rice, or a hearty green to add fiber and volume per serving.
Little Things that Matter
Small actions make a big difference for texture and flavor.
- Dry the skin well before you rub: it helps the sear stick and develop color quickly.
- Browning in batches matters: good color equals more depth in the finished sauce.
- When reducing the sauce on SAUTE, go slowly. Taste as it concentrates so you can correct seasoning before it becomes too intense.
- Rest the drumsticks loosely covered for 5 minutes after cooking to let juices redistribute.
Make-Ahead & Storage
Refrigerating and reheating
Cooked drumsticks can be refrigerated in an airtight container for 3–4 days. Reheat gently in a 350°F oven for 10–15 minutes until warmed through, or use the Instant Pot on SAUTE to reheat with a splash of stock to prevent drying.
Freezing
Freeze cooked drumsticks up to 3 months. Cool completely, then pack in freezer-safe containers or heavy-duty bags with the sauce if you like. Thaw overnight in the fridge before reheating. A 10–12 minute gentle oven reheat works well straight from chilled; if frozen, thaw first for best texture.
Make-ahead assembly
Do the dry rub and keep the seasoned drumsticks on a tray covered in the fridge for several hours before cooking. This short marinate step infuses flavor without extra effort.
Troubleshooting Q&A
Q: My Instant Pot displayed a “burn” message. What went wrong?
A: Most often it’s from not deglazing properly. Make sure to scrape up those brown bits after adding the liquid. Also ensure you used the correct amount of liquid (1 cup) and didn’t scorch the pot while sautéing at too-high heat.
Q: The skin was floppy after pressure cooking. How do I fix it?
A: Pressure cooking won’t crisp skin. After pressure cooking, transfer to a baking sheet and broil 3–5 minutes, watching closely, or crisp on a hot skillet for 2–4 minutes per side.
Q: The flesh tasted under-seasoned.
A: Taste the reduced sauce and add a pinch more salt if needed. Also make sure the rub was applied evenly and rubbed into the skin before searing.
Q: The drumsticks were dry.
A: Overcooking is usually the reason. Follow the 10-minute high-pressure time and the 10-minute natural release in this recipe. If your drumsticks are significantly smaller or larger than average, adjust gently—smaller pieces may need a minute less.
See You at the Table
Make this when you want dependable, dinner-table warmth without fuss. The technique is forgiving, and the results are reliably good: juicy meat, an easy sauce, and a dish that suits weeknights or casual company. If you try it, leave a note about any tweaks you loved — I always want to know how you made it your own.
Instant Pot Chicken Drumsticks
Ingredients
Ingredients
- ?1 teaspoonpaprika
- ?1 teaspoondried oregano
- ?1 teaspoongarlic powder
- ?1 1/2 teaspoonssalt
- ?3/4 teaspoonground black pepper
- ?2 1/2 pounds 1.2 kgchicken drumsticksabout 10 pieces
- ?1 tablespoonolive oil
- ?1 tablespoonbutter
- ?1 cupchicken stock or water
Instructions
Instructions
- In a small bowl, combine the paprika, dried oregano, garlic powder, salt, and ground black pepper to make the dry rub.
- Pat the drumsticks dry with paper towels, then season all over with the dry rub.
- Turn the Instant Pot to SAUTE. When the display reads “HOT,” add the olive oil and the butter and let the butter melt.
- Brown the drumsticks in the pot skin-side down for 2–3 minutes, then flip and brown the other side for about 2 minutes. Work in 2 batches so the pot is not crowded. Remove browned drumsticks and set them aside on a plate.
- Pour in 1 cup chicken stock or water. Use a wooden spoon or spatula to scrape the bottom of the pot and deglaze, lifting any stuck brown bits.
- Insert the trivet into the pot. Arrange the browned drumsticks on the trivet (they may overlap).
- Secure the lid and set the vent to SEALING. Select PRESSURE COOK/MANUAL on High pressure and set the time to 10 minutes. (The Instant Pot will take about 6–7 minutes to come to pressure.)
- When the cooking program ends, allow a natural pressure release for 10 minutes, then carefully turn the vent to VENTING to quick-release any remaining pressure. When the float valve drops, open the lid.
- Transfer the drumsticks to a serving plate. If you want a thicker sauce, set the Instant Pot to SAUTE and simmer the liquid until reduced to your desired consistency, stirring and scraping the bottom. Taste and add more salt if needed.
- Spoon the sauce over the drumsticks and serve.
Equipment
- Instant Pot
Notes
Storing.Once completely cooled, store them in an airtight container in the fridge for up to 2 days. Transfer to a freezer-friendly Ziploc to keep frozen for up to 1 month. Thaw in the fridge overnight before reheating.