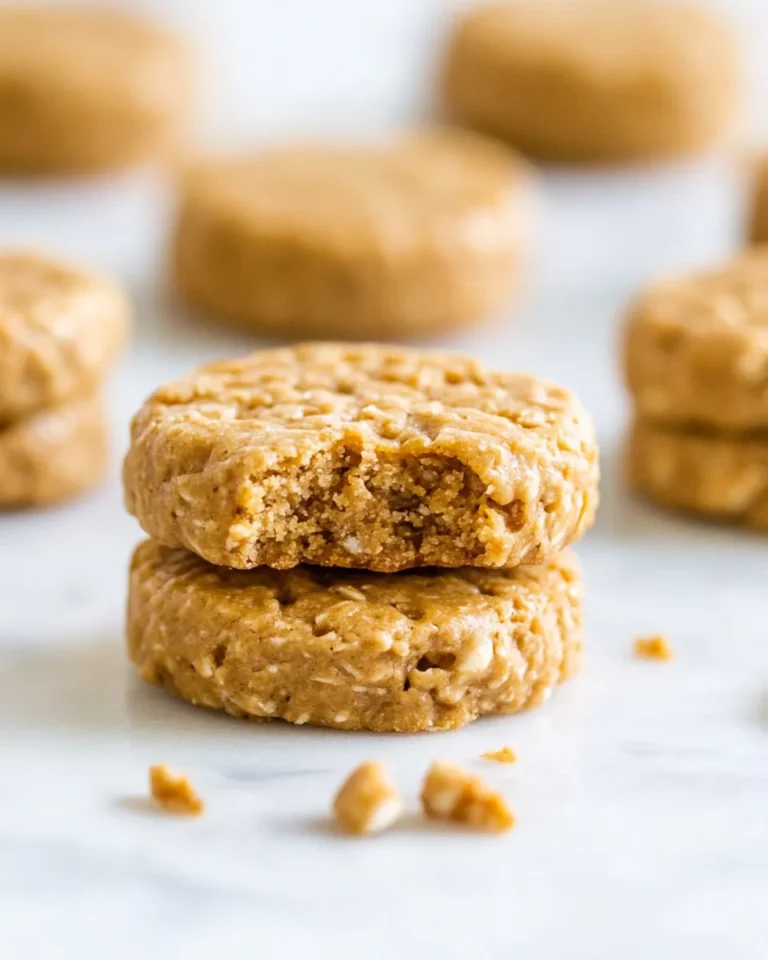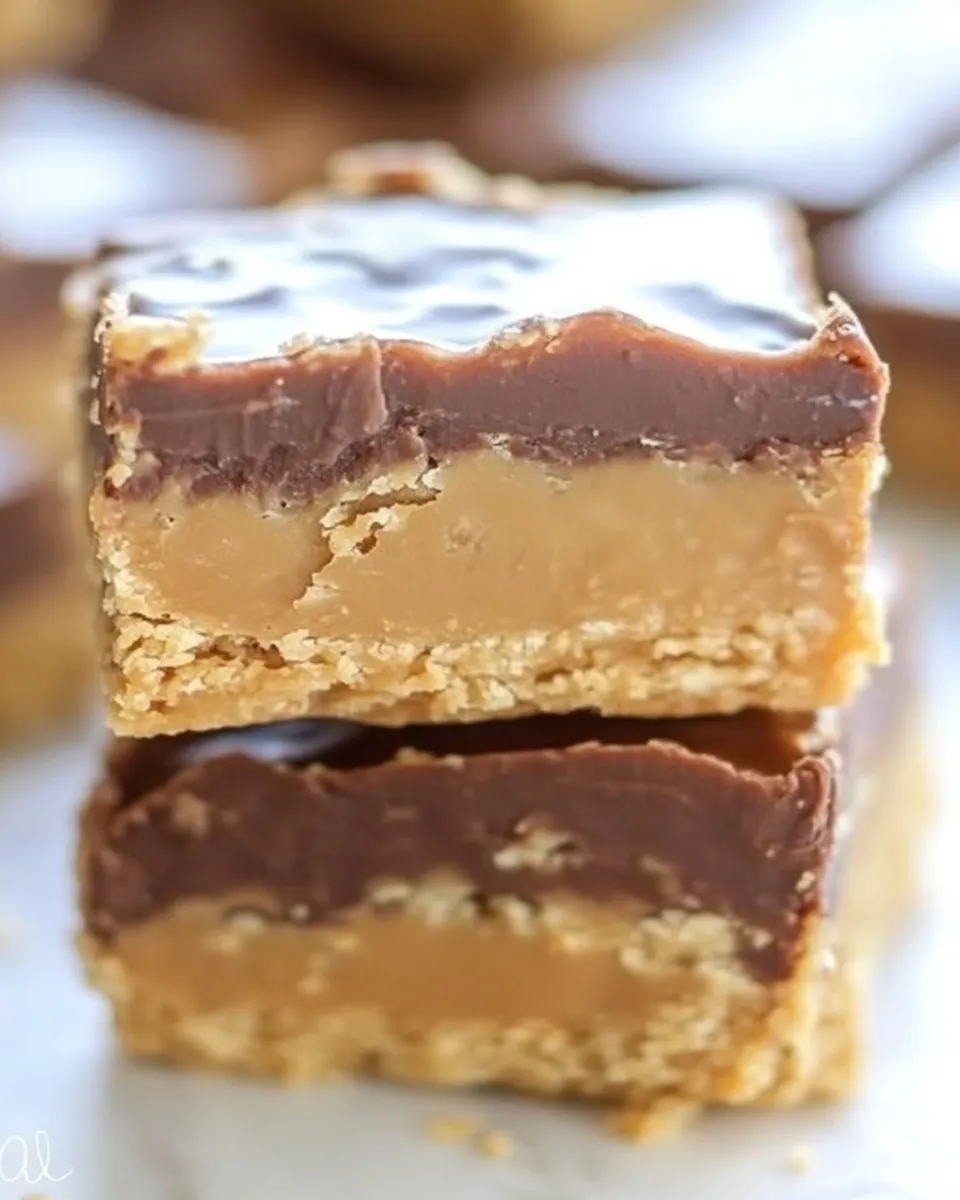
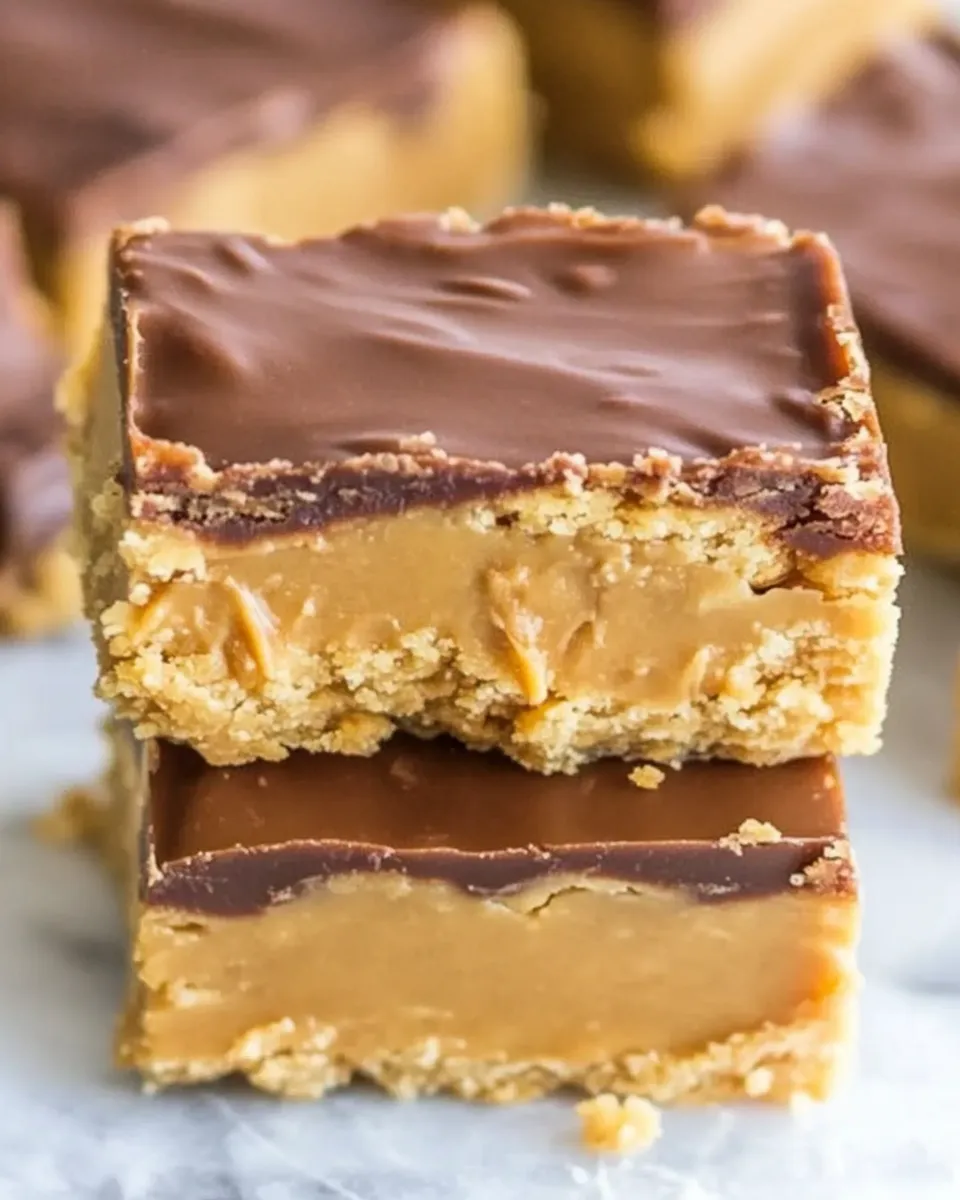
Healthy Peanut Butter Bars
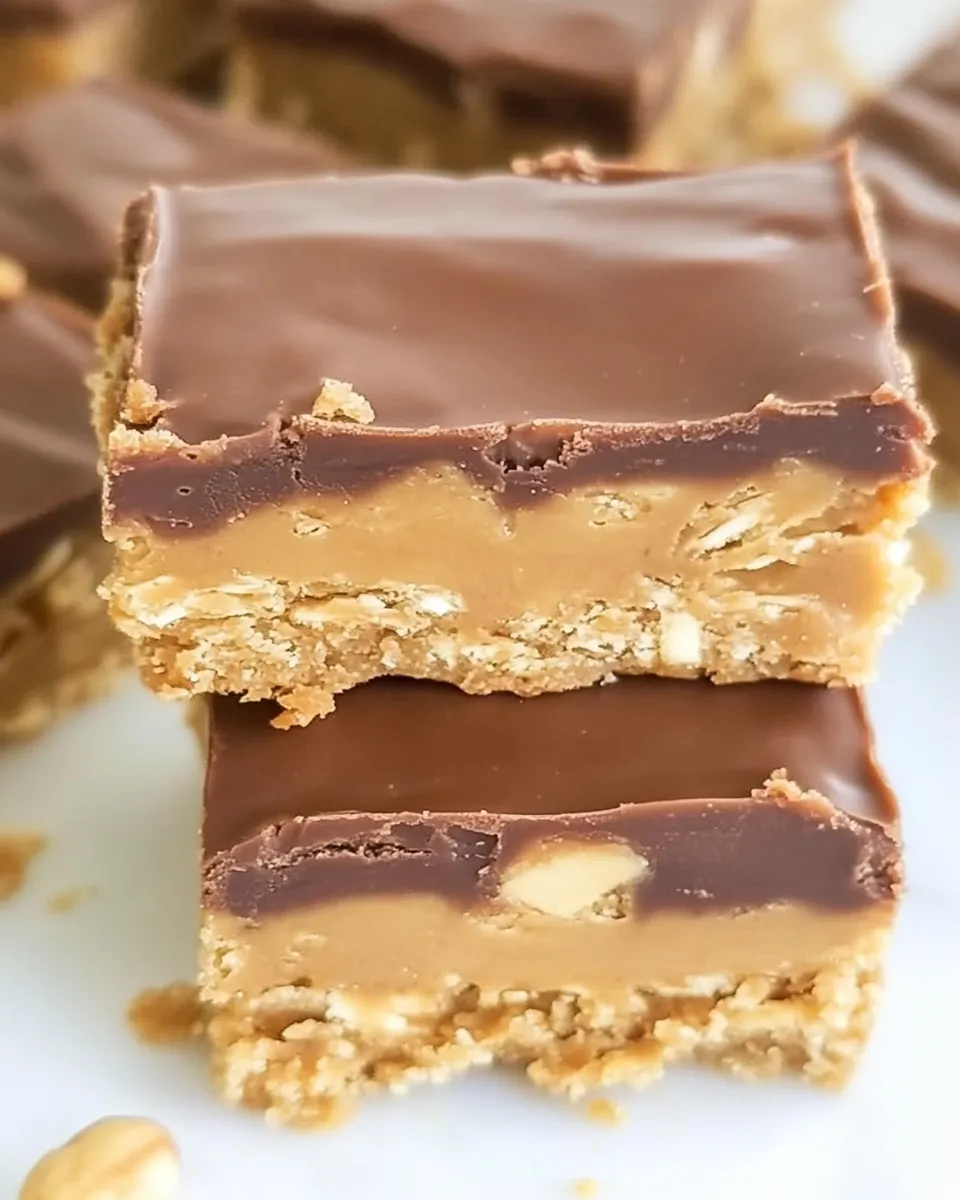
These peanut butter bars are one of those no-fuss recipes I reach for when I want something that feels indulgent but stays on the healthier side. They’re built around oats and peanut butter, use maple syrup for sweetness, and get a thick, fudgy peanut layer finished with a single serving of chocolate frosting. The texture is dense and satisfying; they’re chewy, not cakey, and they hold together cleanly once chilled.
I keep the method straightforward: a pressed oat base, a warmed peanut-butter fudge, a quick chill, and a thin frosting finish. There’s no baking required, and the whole process is hands-on but predictable. If you like making snack bars that travel well and store in the fridge for weekday grab-and-go, these are worth keeping in rotation.
Below I walk through the ingredients, the exact process, why these bars work, equipment that helps, and the common mistakes I see. If you want to change them up, I include options that stay within the same ingredient set so you don’t have to reinvent the wheel.
Ingredient Breakdown

Ingredients
- 3 cups rolled oats — The body of the base. Rolled oats give chew and structure; pressing them firmly helps the base hold.
- 1 cup peanut butter — Binds the oats in the base and adds peanut flavor. Can sub for any nut or seed butter of choice per the ingredient list.
- 3/4–1 cup maple syrup — Sweetener and glue for the base; use the lower end for less-sweet bars and the higher end for stickier bars.
- 2 cups peanut butter — The main component of the fudge layer; provides richness and smoothness. Can sub for any nut or seed butter of choice per the ingredient list.
- 1 cup maple syrup — Sweetens and thins the warmed peanut butter for the fudge layer so it spreads.
- 1 1/2 cups oat flour — Thickens the warmed peanut butter mixture into a spreadable fudge batter; helps the top layer set.
- 1 serving chocolate frosting* — A finishing layer to make the bars feel like a treat. Use a single serving to keep the frosting thin and settable.
Cooking (Healthy Peanut Butter Bars): The Process
- Line an 8 x 8 (or larger) baking dish with parchment paper, leaving an overhang on two sides for easy removal. Set aside.
- Make the base: in a large mixing bowl combine 3 cups rolled oats, 1 cup peanut butter, and 3/4–1 cup maple syrup. Stir until the mixture is evenly combined and sticky. Press the mixture firmly and evenly into the prepared baking dish. Refrigerate 15–30 minutes, or until the base is firm to the touch.
- Make the fudge layer: in a microwave-safe bowl or small saucepan combine 2 cups peanut butter and 1 cup maple syrup. Warm gently until the mixture is smooth and pourable (microwave in 20–30 second increments, stirring between, or heat over low heat while stirring). Remove from heat.
- Add 1 1/2 cups oat flour to the warmed peanut butter mixture and stir until a thick, smooth, spreadable fudge batter forms.
- Pour the fudge batter over the chilled base and use a spatula to spread it into an even layer. Refrigerate 20–30 minutes, or until the fudge layer is firm.
- Spread 1 serving of chocolate frosting evenly over the chilled fudge layer. Return the pan to the refrigerator and chill at least 30 minutes, or until the frosting has set.
- Use the parchment overhang to lift the slab from the pan, place on a cutting board, and cut into bars. Store the bars refrigerated.
Why You’ll Keep Making It
These bars hit that balance most of us want: familiar peanut-butter flavor, clean ingredients, and an easy make-ahead workflow. The oats provide sustained texture and a bit of whole-grain feel, while the double layer of peanut butter (base binder plus fudge) keeps the bars indulgent without needing butter or refined sugar—maple syrup is the sole sweetener listed.
They’re also forgiving. The chill steps give you windows to correct small issues—if the base isn’t firm enough, an added chill tightens it up before the fudge goes on. If the fudge becomes too stiff while you’re spreading it, a few seconds of gentle warming bring it back to a spreadable consistency. That predictability makes them a reliable pantry-to-pan snack when you want control over ingredients.
Healthier Substitutions
Within the provided ingredient set you already have the key swap built in: the recipe explicitly allows subbing peanut butter for any nut or seed butter of choice. That’s your safest, rules-following substitution. A few practical notes:
- Choose lower-salt nut/seed butters if you’re watching sodium; the consistency and binding behavior will be the same.
- Use 3/4 cup maple syrup in the base rather than 1 cup if you prefer bars that are less sweet and slightly drier; use 1 cup for a stickier base.
- Stick with oat flour in the fudge layer; it’s listed as the thickener and creates the right set. If you grind your own oats to make oat flour, keep the particle size fine for a smooth top layer.
Equipment at a Glance
- 8 x 8 (or larger) baking dish — Needed for the slab format and even chilling.
- Parchment paper — Essential for easy removal using an overhang.
- Large mixing bowl and spatula — For combining and pressing the base.
- Microwave-safe bowl or small saucepan — To warm peanut butter and maple syrup for the fudge layer.
- Measuring cups — Precise amounts help the layers set correctly.
- Cutting board and sharp knife — For clean bar edges when cutting after chilling.
Common Errors (and Fixes)
Base is too crumbly or won’t stick together
Why it happens: not enough maple syrup or not pressed firmly. Fix: press the base more firmly into the pan, then chill the full 15–30 minutes before adding the fudge. If the base still feels dry after chilling, you can gently warm a tablespoon of maple syrup with a spoonful of peanut butter and drizzle over the dry spots, then press and chill again.
Fudge layer is too thin or runny
Why it happens: the peanut butter and maple syrup weren’t warmed enough, or the oat flour measurement was low. Fix: warm the peanut butter/maple syrup mix a bit more so it’s fully fluid, then stir in the full 1 1/2 cups oat flour until the batter thickens. If you accidentally overheat and it’s too loose, add a bit more oat flour in small increments until spreadable.
Frosting won’t set
Why it happens: frosting is inherently dependent on the product used. Fix: chill the pan longer until the underlying layers are cold—this helps the frosting firm. If the frosting was applied warm, return it to the refrigerator and give it extra time. Use the single serving sparingly so it has a thin layer that will set.
Make It Your Way
Small adjustments let you tailor the bars without changing the ingredient list:
- Less sweet — Use 3/4 cup maple syrup in the base. That reduces sweetness but keeps the bind intact.
- Salt level — Choose a natural or low-salt peanut (or nut/seed) butter to reduce sodium.
- Thickness — Use an 8 x 8 dish for thicker bars, or a larger dish if you prefer thinner, more snackable pieces.
- No frosting option — If you’d rather skip the chocolate frosting, the bars are still complete with just the two peanut layers; chilling the top layer until firm gives a nice finish.
Behind the Recipe
I developed this slab-style bar because I wanted something portable that didn’t require refined sugar or long baking. Oats and peanut butter create a sturdy, familiar base; warming peanut butter with maple syrup gives you a rich, spreadable top layer once oat flour is added. The two-stage chill (base, then top) is the trick that keeps assembly straightforward while ensuring clean slices.
There’s also a practical reason maple syrup is used twice: in the base it provides the necessary stick to bind dry rolled oats; in the fudge layer it thins the peanut butter enough to accept oat flour and then sets into a dense, satisfying texture once chilled. Those repeated roles are why the bars hit the right mouthfeel without added fats like butter or oil.
Keep It Fresh: Storage Guide
Store the bars refrigerated as the recipe instructs. They hold well in an airtight container for several days—typically up to a week—though freshness is best within the first 3–4 days. To make them grab-and-go, wrap individual bars in parchment or beeswax wrap and keep them chilled until you’re ready to eat.
If you want to extend shelf life beyond a week, you can freeze the slab: wrap tightly in plastic and foil or use a freezer-safe container. Thaw overnight in the refrigerator before slicing to preserve texture and make cutting clean. Once thawed, consume within a week.
Troubleshooting Q&A
- Q: The base is still soft after chilling. How long should it feel firm?
A: It should be firm to the touch after 15–30 minutes in the refrigerator. If it’s still soft, chill in 10–15 minute increments until it’s cohesive. Pressing the base firmly before chilling accelerates firming. - Q: The fudge layer cracked when I sliced the bars. What went wrong?
A: Cracking can happen if the top layer was over-cooled or the knife was too blunt. Use a sharp knife warmed briefly under hot water and wiped dry for clean cuts. Let the slab sit at refrigerator temperature for a few minutes before slicing to reduce cracking. - Q: My frosting seeped into the fudge layer. Any tips?
A: Make sure the fudge layer is fully chilled and firm before spreading frosting. A thin layer of frosting sets faster and is less likely to migrate into the top layer.
Let’s Eat
Lift the slab from the pan using the parchment overhang, place it on a cutting board, and slice into bars. I like slightly larger squares that feel like a proper snack—about 12 pieces from an 8 x 8 pan—but adjust to your household’s needs. Keep them refrigerated and enjoy straight from the fridge for a firmer texture or let them sit at room temperature for five to ten minutes if you prefer them a touch softer.
These bars are sturdy in a lunchbox, satisfying with a coffee, and reliable as a make-ahead snack. They’re simple, adaptable within the stated ingredients, and they make it easy to feed yourself or others something that tastes indulgent but is built from straightforward pantry items.

Healthy Peanut Butter Bars
Ingredients
Ingredients
- 3 cupsrolled oats
- 1 cuppeanut buttercan sub for any nut or seed butter of choice
- 3/4-1 cupmaple syrup
- 2 cupspeanut buttercan sub for any nut or seed butter of choice
- 1 cupmaple syrup
- 1 1/2 cupsoat flour
- 1 servingchocolate frosting*
Instructions
Instructions
- Line an 8 x 8 (or larger) baking dish with parchment paper, leaving an overhang on two sides for easy removal. Set aside.
- Make the base: in a large mixing bowl combine 3 cups rolled oats, 1 cup peanut butter, and 3/4–1 cup maple syrup. Stir until the mixture is evenly combined and sticky. Press the mixture firmly and evenly into the prepared baking dish. Refrigerate 15–30 minutes, or until the base is firm to the touch.
- Make the fudge layer: in a microwave-safe bowl or small saucepan combine 2 cups peanut butter and 1 cup maple syrup. Warm gently until the mixture is smooth and pourable (microwave in 20–30 second increments, stirring between, or heat over low heat while stirring). Remove from heat.
- Add 1 1/2 cups oat flour to the warmed peanut butter mixture and stir until a thick, smooth, spreadable fudge batter forms.
- Pour the fudge batter over the chilled base and use a spatula to spread it into an even layer. Refrigerate 20–30 minutes, or until the fudge layer is firm.
- Spread 1 serving of chocolate frosting evenly over the chilled fudge layer. Return the pan to the refrigerator and chill at least 30 minutes, or until the frosting has set.
- Use the parchment overhang to lift the slab from the pan, place on a cutting board, and cut into bars. Store the bars refrigerated.
Equipment
- 8 x 8 baking dish (or larger)
- Parchment Paper
- Large Mixing Bowl
- Spatula
- Microwave-safe bowl
- Small Saucepan
- Cutting Board
- Refrigerator
Notes
Sea salt.Sprinkle the bars with coarse sea salt before slicing.
Mix-ins.Add dried fruit (I like raisins or cranberries), chopped nuts, or shredded coconut for added texture.
Nut butters.I love the combination of peanut butter and chocolate, but you could substitute any nut butter. I also had luck withalmond butterand cashew butter.