Hamburgers in the Oven
I love a good burger, but some nights I don’t want to fire up the grill or stand over a hot skillet. Baking hamburgers in the oven solves that: it’s hands-off, predictable, and still yields juicy, flavorful patties when you follow a few simple rules. This is the version I turn to when I need something honest and uncomplicated for weeknights or when I’m feeding a small group.
You’ll find timing, temperature, and assembly below, plus practical notes on toppings, small adjustments that matter, and how to avoid the few mistakes that can turn a decent burger into a dry one. No gimmicks — just solid technique and realistic tips so you can get dinner on the table without fuss.
If you’re new to oven-baked burgers, read the steps in order and give the internal temperature a quick check at the end. Once you’ve tried this method a couple times, you’ll appreciate how little attention the burgers demand while still tasting like something you would happily serve to friends.
What to Buy

Stick to a short shopping list: good ground beef, buns you like, and fresh lettuce and tomato. Pick a seasoning you enjoy — salt and pepper are perfectly fine — and decide if you want cheese. The oven does the heavy lifting, so prioritize freshness of produce and the fat content of the beef for better flavor and texture.
Ingredients
- 1 lb ground beef — the base for four patties; higher-fat blends (like 80/20) give juicier results.
- seasoning of your choice — salt and pepper work well; use whatever blend you enjoy to keep things simple.
- hamburger buns — pick buns that hold up when loaded with toppings; lightly toasting them helps.
- condimentsketchup, mustard and mayonnaise — the classic trio for building quick, familiar flavor.
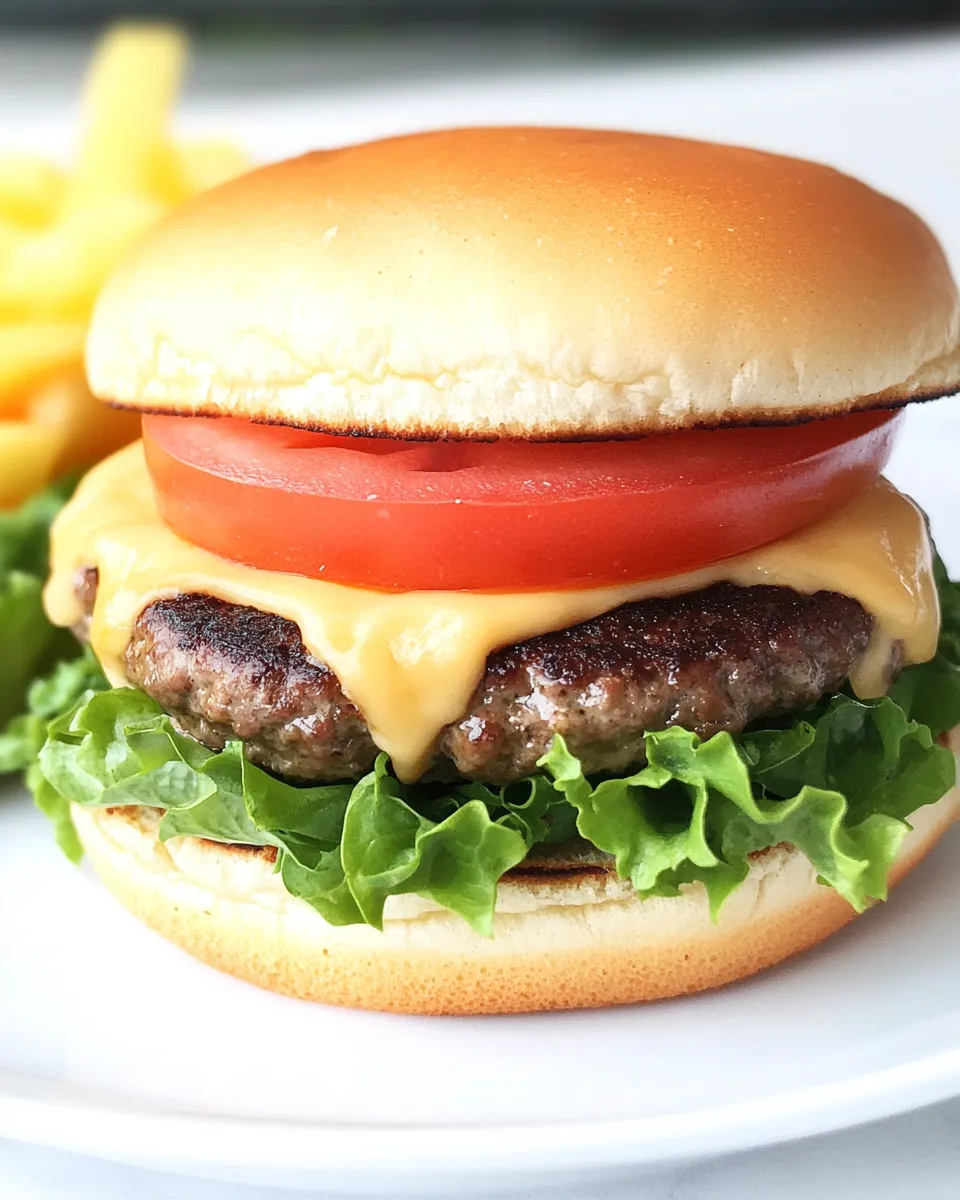
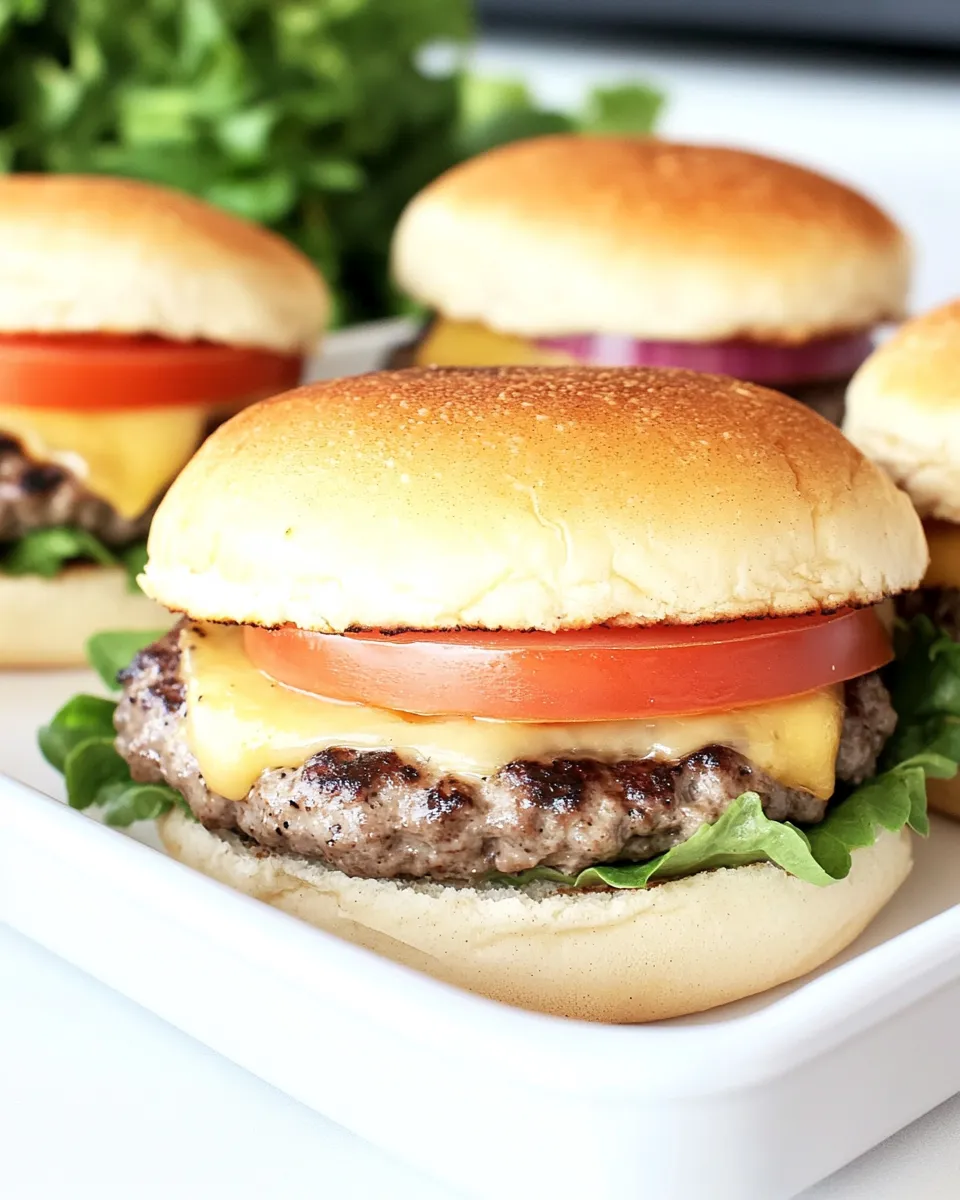
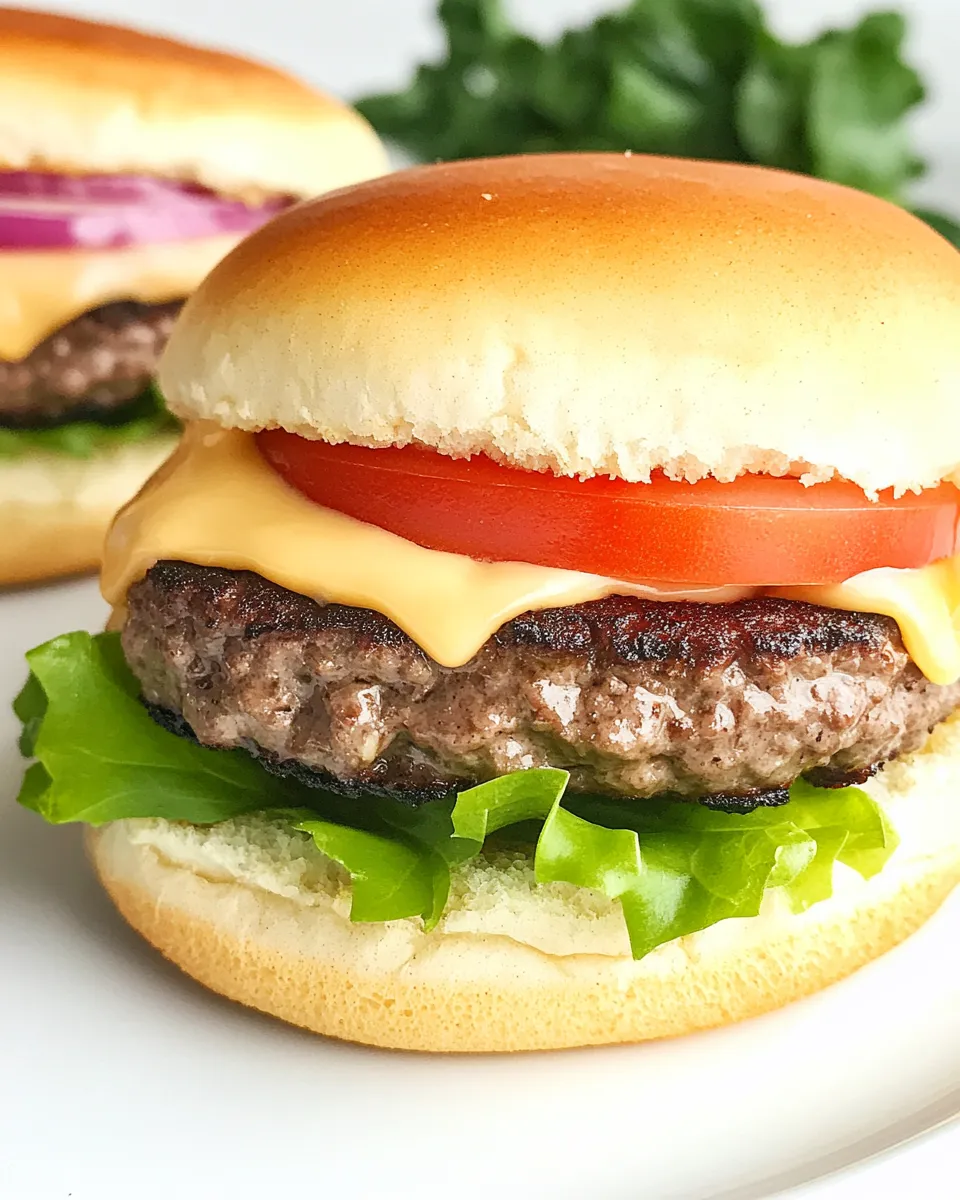
- fresh lettuce — adds crunch and a fresh contrast to the cooked meat.
- fresh sliced tomato — a ripe slice brings brightness and moisture.
- 4slicescheeseoptional for cheeseburger — add one slice per patty if you want cheeseburgers; melt briefly in the warm oven.
Hamburgers in the Oven: Step-by-Step Guide
- Preheat the oven to 375°F.
- Divide the 1 lb ground beef into four equal portions. Shape each portion into a patty using a patty shaper or your hands, keeping the patties roughly the same thickness so they cook evenly.
- Season both sides of each patty with seasoning of your choice.
- Arrange the patties in an ovenproof skillet or baking dish so they do not touch.
- Bake in the preheated oven for about 20 minutes, or until the patties reach your desired doneness. For a fully cooked burger, the internal temperature should reach 160°F.
- Remove the pan from the oven. If you want cheeseburgers, place one of the 4 slices of cheese on each patty, turn the oven off, return the pan to the warm oven, and let stand 2–3 minutes or until the cheese is melted.
- Place each burger on a hamburger bun. Top with ketchup, mustard, and mayonnaise, and add fresh lettuce and fresh sliced tomato as desired.
- Serve immediately.
Why It’s My Go-To
This method is reliable. I can prep the patties, pop them in the oven, and use those 20 minutes to make a quick salad or set the table. The heat surrounds the patties evenly, so you don’t get the odd overcooked edge you sometimes see from a pan that’s hotter than the center.
Oven baking also scales well. Need six or eight patties? Use a sheet pan and space them out. The process is forgiving: as long as the patties are similar thickness and the oven maintains temperature, you can expect consistent results every time.
Texture-Safe Substitutions
If you’re aiming for a particular texture without changing the recipe’s ingredient list, small technique tweaks do the trick. For a juicier bite, press a shallow dimple into the center of each patty before baking so they cook more evenly. For a firmer texture, make slightly thinner patties and shave a few minutes off the bake time.
Want a cheeseburger with a softer mouthfeel? Use the optional cheese slice and let it melt in the warm oven as instructed — it adds creaminess without changing fat content. If you prefer a brisker, crisper bite in the bun, toast the hamburger buns briefly under the broiler or in a dry skillet while the patties rest.
Gear Checklist
- Ovenproof skillet or baking dish — big enough so patties don’t touch.
- Baking sheet (optional) — useful when making more than four patties.
- Patty shaper or your hands — to get uniform patties.
- Instant-read thermometer — to check the 160°F internal temp for fully cooked burgers.
- Tongs or a spatula — to transfer patties to buns cleanly.
Slip-Ups to Skip
Overworking the meat: handle the ground beef gently. Pressing and kneading too much makes the patties dense.
Uneven patties: if some are thicker, they’ll finish at different times. Divide the meat evenly and aim for uniform thickness so the whole batch hits the target temperature together.
Overcrowding the pan: leave space between patties. Crowding traps steam and prevents proper browning.
Skipping the temperature check: oven times are a guideline. Use an instant-read thermometer to confirm doneness, especially if you like your burgers between medium and well-done.
Fresh Takes Through the Year
Spring and summer: make the most of ripe tomatoes and crisp lettuce. A thicker slice of tomato and crunchy leaf lettuce are all you need to brighten the sandwich.
Fall and winter: lean on warming condiments from your pantry, but keep the build simple. The oven method pairs well with heartier buns and melted cheese — the trick is still the same: even patties and the right internal temp.
Holiday gatherings: if you’re serving a crowd, bake in batches or use multiple pans. Keep finished patties warm on a baking sheet in the warm oven (turned off) with a foil tent so the cheese keeps its melt without overcooking the meat.
Little Things that Matter
Sear vs. no sear: this method skips stovetop searing. If you want a browned crust, you can quickly sear each patty in a hot pan for 30–45 seconds per side before baking — but it’s optional. The oven will still cook them through, and the resting time with the cheese will help finish the surface appeal.
Bun prep: butter and lightly toast buns for texture and a small flavor boost. It prevents the bun from getting soggy when the burger is loaded with tomato and condiments.
Resting: give the patties two minutes after you remove them for the cheese step. That short rest lets juices settle and makes them easier to handle.
Best Ways to Store
Refrigerate: cooled, cooked patties keep well in an airtight container for up to 3 days. Store buns separately to avoid sogginess.
Freeze: layer cooked patties with parchment between each and freeze in a sealed bag for up to 2 months. Reheat gently in a low oven until warmed through.
Reheating: avoid the microwave if you can — it can make the patties rubbery. Instead, reheat at 300°F on a rack over a baking sheet until warmed, or slip them into a skillet over medium-low heat, covered, for even heating. Add cheese at the end if desired.
Questions People Ask
Can I use more than 1 lb of beef? Yes. If you use more, keep the patties the same size and space them out on a larger pan. Bake time may change slightly depending on thickness and the number of pans in the oven.
How do I know when the burgers are done? For fully cooked burgers, check that the internal temperature reaches 160°F with an instant-read thermometer. If you prefer lower doneness levels, adjust accordingly but be mindful of food safety.
Should I flip the patties in the oven? The source method doesn’t call for flipping. Arranging them so they don’t touch and ensuring even thickness are more important than flipping for this bake-and-rest approach.
Can I add cheese during baking? The recommended method is to add cheese after baking and let it melt in the warm oven for 2–3 minutes. That keeps the cheese from overbrowning and ensures it melts evenly.
The Takeaway
Baking hamburgers in the oven is a straightforward, low-fuss way to get consistent, tasty patties on the table. With 1 lb of ground beef divided into four patties, a 375°F oven, and about 20 minutes of bake time, you’re looking at a reliable weeknight dinner or an easy option for feeding a few guests. Keep your patties uniform, season them simply, and use the short cheese melt step for cheeseburgers — it’s practical home cooking that tastes like you put in more effort than you did.

Hamburgers in the Oven
Ingredients
Ingredients
- 1 lbground beef
- seasoning of your choice
- hamburger buns
- condimentsketchup mustard and mayonnaise
- fresh lettuce
- fresh sliced tomato
- 4 slicescheeseoptional for cheeseburger
Instructions
Instructions
- Preheat the oven to 375°F.
- Divide the 1 lb ground beef into four equal portions. Shape each portion into a patty using a patty shaper or your hands, keeping the patties roughly the same thickness so they cook evenly.
- Season both sides of each patty with seasoning of your choice.
- Arrange the patties in an ovenproof skillet or baking dish so they do not touch.
- Bake in the preheated oven for about 20 minutes, or until the patties reach your desired doneness. For a fully cooked burger, the internal temperature should reach 160°F.
- Remove the pan from the oven. If you want cheeseburgers, place one of the 4 slices of cheese on each patty, turn the oven off, return the pan to the warm oven, and let stand 2–3 minutes or until the cheese is melted.
- Place each burger on a hamburger bun. Top with ketchup, mustard, and mayonnaise, and add fresh lettuce and fresh sliced tomato as desired.
- Serve immediately.
Equipment
- Cast-Iron Skillet
Notes
The best way to ensure your burgers are cooked to your liking is to use a meat thermometer. Please refer to the doneness chart below.