Easy Homemade Chocolate Syrup Recipe
I make this Chocolate Syrup nearly every week. It’s quick, forgiving, and beats anything in a bottle when you want true chocolate flavor without odd stabilizers. I like that it’s just a handful of pantry staples and a few minutes on the stove.
This version keeps the steps straightforward: whisk dry ingredients, add water, heat carefully, then finish with vanilla. There’s a moment when it looks thin and you worry — don’t panic. It thickens as it cools and stores beautifully in a small jar in the fridge.
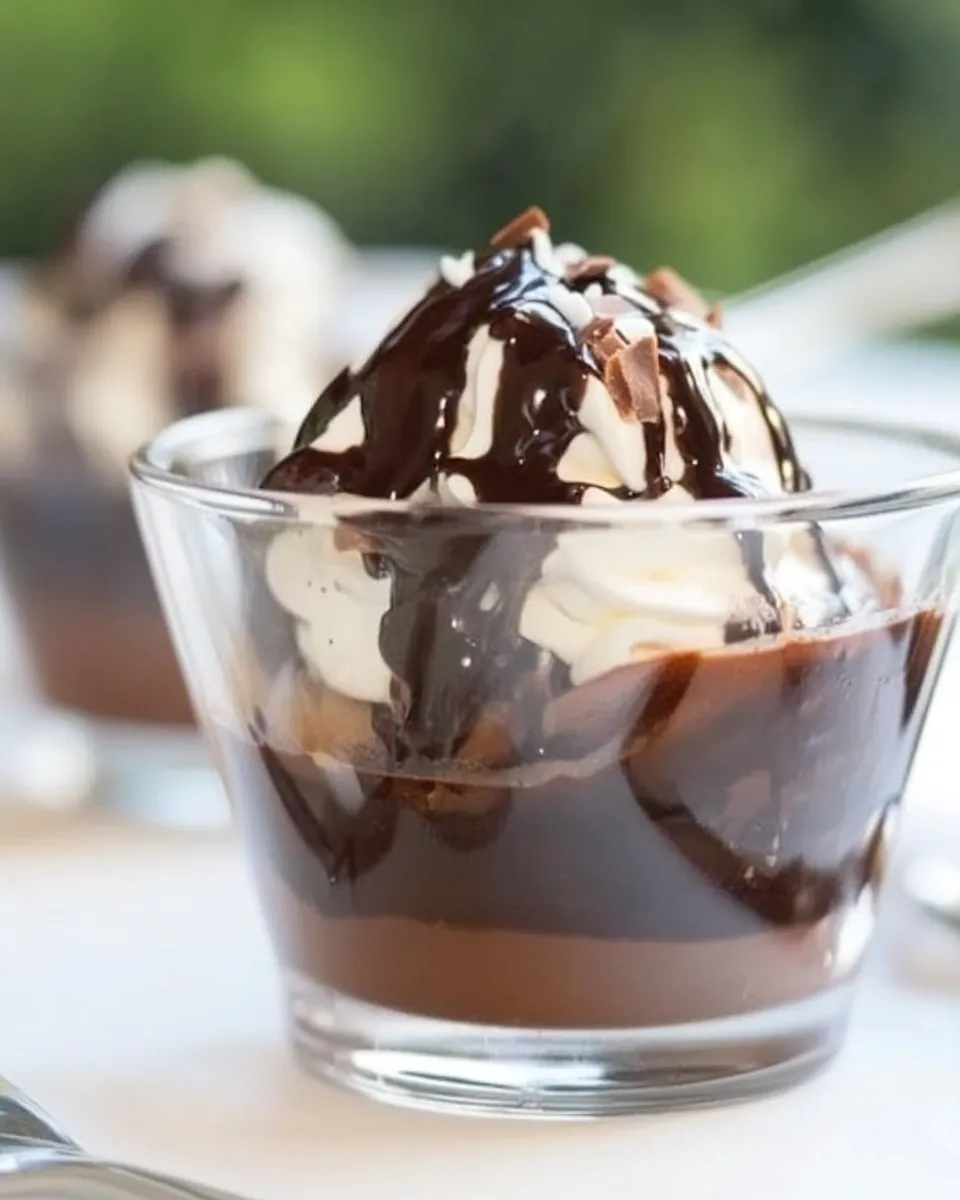
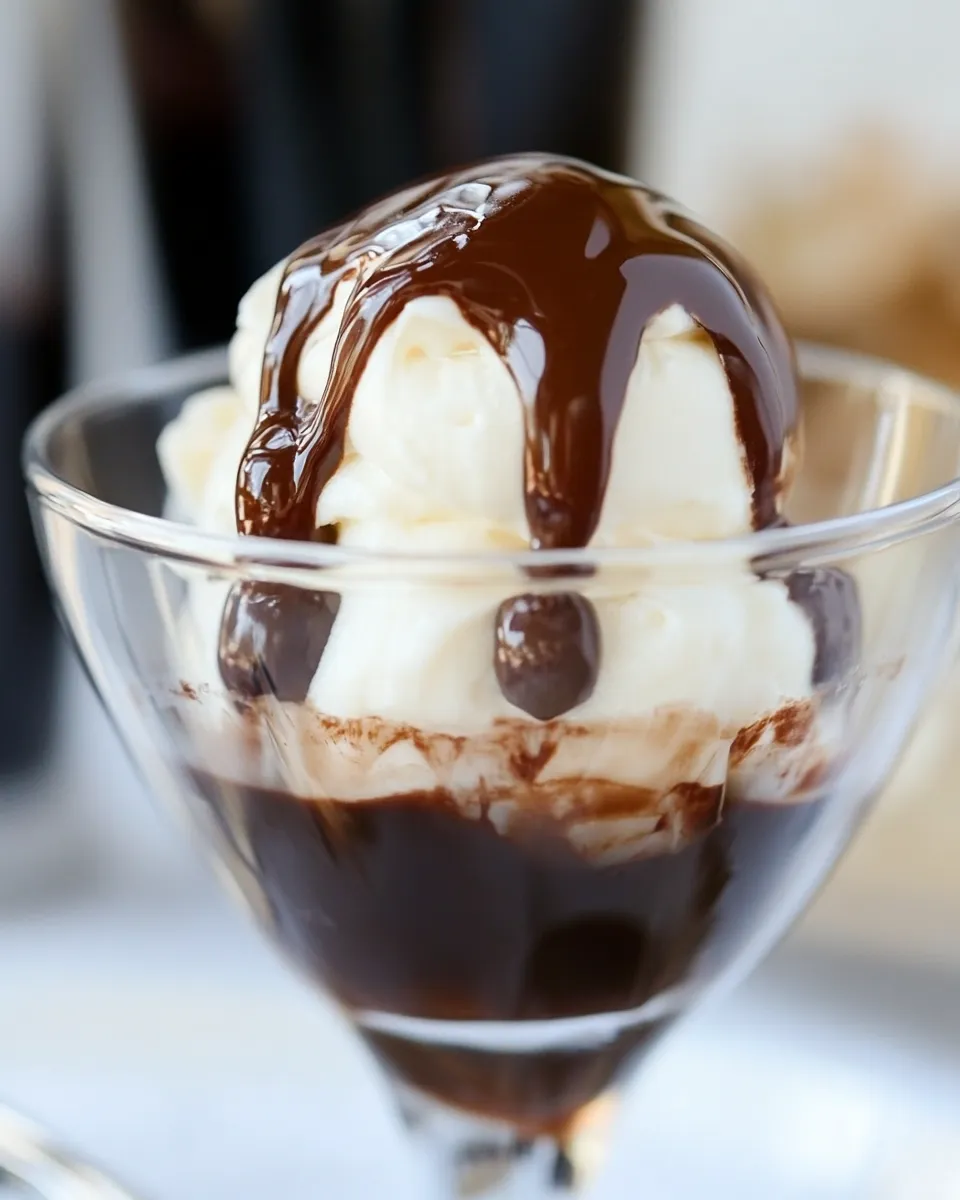
I’ll walk you through the exact ingredients, the step-by-step method, comfortable swaps, equipment notes, and the mistakes I’ve learned to avoid. Use it on ice cream, stirred into coffee, or drizzled over fresh fruit. You’ll reach for it all the time.
What You’ll Gather

Ingredients
- 1 cup good quality unsweetened cocoa powder — the backbone of flavor; choose Dutch-processed for milder, regular for brighter chocolate notes.
- 1 cup granulated sugar* — provides sweetness and body; you can adjust later if desired (see notes).
- 1 cup cold water — hydrates the cocoa and dissolves the sugar; cold helps avoid lumps when whisking.
- 1/2 teaspoon kosher salt (or to taste) — balances and lifts the chocolate flavor; start with the listed amount and adjust if needed.
- 1 tablespoon pure vanilla extract — brightens and rounds the syrup; add at the end off the heat to preserve aroma.
Chocolate Syrup Cooking Guide
- In a medium saucepan, whisk together 1 cup unsweetened cocoa powder and 1 cup granulated sugar until evenly blended and lump-free.
- Add 1 cup cold water and 1/2 teaspoon kosher salt (or less/more to taste) to the saucepan and whisk until smooth.
- Place the saucepan over medium heat and whisk constantly. Heat just until the mixture begins to boil (small bubbles forming around the edges and occasional bubbling across the surface).
- Once boiling, continue to boil while stirring constantly for about 3 minutes, until the hot mixture has thickened slightly. (It will be fairly thin while hot and will reach a syrup consistency as it cools.)
- Remove the pan from the heat and immediately stir in 1 tablespoon pure vanilla extract until combined.
- Taste the warm syrup carefully. If you want it sweeter, stir in additional granulated sugar a little at a time until dissolved; if you want more salt, add a small amount of kosher salt and stir to dissolve, tasting as you go.
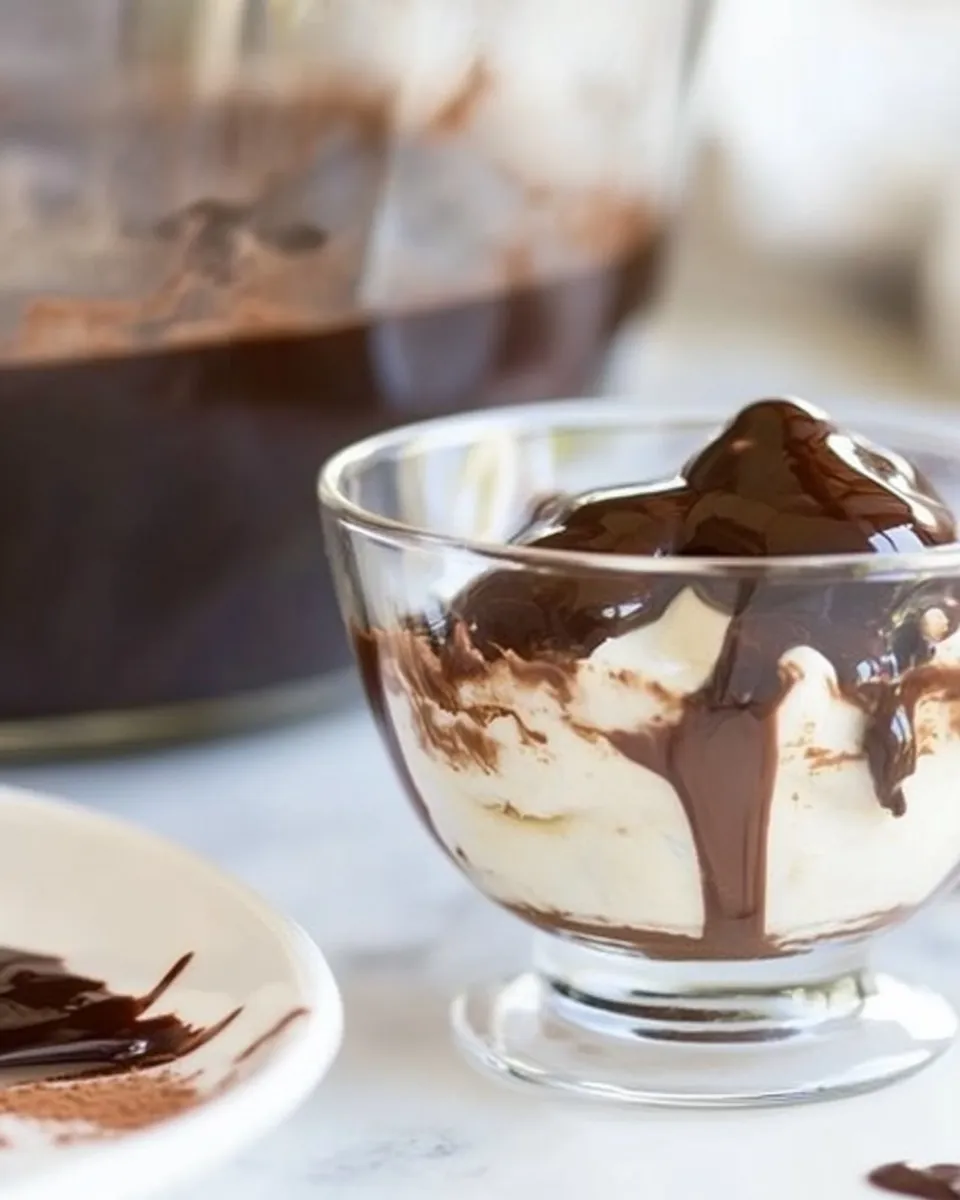
- Let the syrup cool to room temperature, then transfer it to an airtight glass container and refrigerate. The syrup will keep refrigerated for at least a month.
What You’ll Love About This Recipe
- Speed: from cupboard to jar in about 10–15 minutes. No long simmering, no tempering.
- Control: you taste and tweak at the end, so you get sweetness and salt at the level you prefer.
- Clean ingredient list: cocoa, sugar, water, salt, vanilla. No corn syrup, preservatives, or artificial colors.
- Versatility: use it on desserts, mix into milk for chocolate milk, or stir into your morning coffee for an instant mocha.
- Storage life: it lasts at least a month refrigerated, so you can make a double batch and reach for it whenever.
Vegan & Vegetarian Swaps
The recipe is already vegan and vegetarian as written, since it uses no dairy. If you want to tailor flavor:
- Vanilla swap: use almond or coconut extract sparingly for a different aromatic note.
- Sweetness change: swap white sugar for coconut sugar for a deeper, caramel-like flavor; note color and taste will shift.
Equipment Breakdown
- Medium saucepan — choose one with a thick bottom to prevent scorching; 2–3 quart is perfect for this volume.
- Whisk — essential. A whisk helps eliminate lumps when blending cocoa and sugar, and it keeps the mixture smooth while heating.
- Heatproof spatula or spoon — handy for scraping the pan and ensuring nothing sticks to the bottom.
- Glass jar or airtight container — glass is best for storage and presentation. A 12–16 ounce jar fits comfortably.
- Measuring cups and spoons — accuracy matters for the balance of cocoa to sugar and salt.
Learn from These Mistakes
- Not whisking dry cocoa first: cocoa likes to clump. Whisking the powder and sugar together until lump-free sets you up for success.
- Adding hot liquid too fast: use cold water as instructed. It helps the cocoa and sugar dissolve evenly and reduces lumps.
- Overheating or walking away: the mixture can scorch if left unattended. Whisk constantly once you heat it.
- Expecting instant thickness: the syrup will look thin when hot. It reaches proper viscosity as it cools. Don’t overboil trying to thicken it; you’ll risk a grainy texture.
- Skipping the final taste test: vanilla, sugar, and salt are personal choices. Taste while warm and adjust in small increments for best results.
Make It Your Way
Once you have the basic Chocolate Syrup, personalization is where it gets fun. Small changes make big differences:
- Deeper chocolate: stir in a tablespoon or two of strong brewed espresso after removing from heat for a mocha-forward syrup.
- Mint chocolate: add 1/4 teaspoon peppermint extract instead of vanilla, but reduce the amount — mint extracts are potent.
- Spiced chocolate: stir in a pinch (1/8–1/4 teaspoon) of cinnamon or smoked paprika for an adult twist.
- Thicker drizzle: if you prefer a thicker sauce for desserts, reduce the water slightly (try 3/4 cup water instead of 1 cup) but do so cautiously — the recipe’s design expects 1 cup and cools to a good syrup texture.
- Sweeter or lighter: adjust granulated sugar at the tasting step. Add a bit at a time until it matches your palate.
Cook’s Notes
- Consistency: warm syrup is runnier; it thickens in the fridge. If it becomes too thick chilled, let it sit at room temperature for a while or warm gently before using.
- Sweetness marker: the listed 1 cup sugar is a solid middle ground. I usually taste and add up to 2 tablespoons more if I’m using it in coffee.
- Salt control: kosher salt granules vary by brand. If you use table salt, reduce the amount slightly to avoid over-salting.
- Vanilla timing: add vanilla off the heat. High heat dulls its aroma, so stir it in right after you remove the pan from the burner.
- Batching: double everything in a larger saucepan, but keep an eye on whisking time — bigger batches might need a slightly longer brief boil to thicken.
Save for Later: Storage Tips
Transfer cooled syrup to an airtight glass container and refrigerate. A clean jar with a tight lid helps the syrup keep well and prevents fridge flavors from leaching in.
- Refrigeration life: the syrup will keep refrigerated for at least a month. If you spot any off smells or mold, discard.
- Freezing: I don’t recommend freezing; the texture can change and separate upon thawing. Stick to fridge storage for best results.
- Serving from fridge: if it’s too thick straight from the fridge, let the jar sit at room temperature for 10–20 minutes or warm a spoonful briefly in the microwave.
Questions People Ask
- Q: Can I use dutch-process cocoa? A: Yes. Dutch-process will give a smoother, less acidic chocolate flavor. The syrup color will be darker and the flavor more mellow.
- Q: Can I use brown sugar or honey instead of granulated sugar? A: Brown sugar will work and adds molasses notes; the texture and flavor will change. Honey is trickier because it introduces extra liquid and distinct flavor — not recommended without adjusting the recipe.
- Q: Is this safe for kids? A: Absolutely. All ingredients are pantry staples. Adjust sweetness to your family’s taste.
- Q: My syrup became grainy. What happened? A: Likely overcooking or too much sugar added at the end without dissolving properly. Reheat gently with a splash of water and whisk vigorously to smooth, then cool.
- Q: Can I make this sugar-free? A: Not directly with the same technique. Sugar contributes to body and mouthfeel. If you want sugar-free, look for tested recipes that use sugar substitutes designed for cooking.
Time to Try It
Gather your cocoa, sugar, water, salt, and vanilla. Whisk, heat, taste, and jar. In about 15 minutes you’ll have a homemade Chocolate Syrup that’s fresher and more honest than anything in a squeeze bottle.
Make a small batch first, use it generously, and take notes on any tweaks you prefer. Once you find your version, the jar will disappear faster than you expect. Let me know how you use yours — on ice cream, in coffee, or drizzled over pancakes, it’s a tiny luxury that lifts so many simple moments.

Easy Homemade Chocolate Syrup Recipe
Ingredients
Ingredients
- 1 cupgood quality unsweetened cocoa powder
- 1 cupgranulated sugar*
- 1 cupcold water
- 1/2 teaspoonkosher salt or to taste
- 1 tablespoonpure vanilla extract
Instructions
Instructions
- In a medium saucepan, whisk together 1 cup unsweetened cocoa powder and 1 cup granulated sugar until evenly blended and lump-free.
- Add 1 cup cold water and 1/2 teaspoon kosher salt (or less/more to taste) to the saucepan and whisk until smooth.
- Place the saucepan over medium heat and whisk constantly. Heat just until the mixture begins to boil (small bubbles forming around the edges and occasional bubbling across the surface).
- Once boiling, continue to boil while stirring constantly for about 3 minutes, until the hot mixture has thickened slightly. (It will be fairly thin while hot and will reach a syrup consistency as it cools.)
- Remove the pan from the heat and immediately stir in 1 tablespoon pure vanilla extract until combined.
- Taste the warm syrup carefully. If you want it sweeter, stir in additional granulated sugar a little at a time until dissolved; if you want more salt, add a small amount of kosher salt and stir to dissolve, tasting as you go.
- Let the syrup cool to room temperature, then transfer it to an airtight glass container and refrigerate. The syrup will keep refrigerated for at least a month.
Equipment
- Medium Saucepan
- Whisk
- airtight glass container
Notes
Consistency Tips
If it’s too thick, it cooked for too long. Try cooking for less time. If your current batch has thickened up too much, try heating the sauce gently and thin with a bit of water. If your syrup appears too thin, try cooking it for a bit longer, but if it’s coating the back of your spoon it’s probably the right consistency. Remember, it thickens a lot once it cools.
*Sugar/Sweetness Notes
Recipe as written makes a nice, dark, slightly less sweet chocolate sauce. Add up to 1/2 cup more sugar for a sweeter syrup. If you add the sugar after cooking the syrup, be sure to taste your chocolate syrup while it’s still warm and if it’s not quite as sweet as you’d like, add some more sugar, a couple of tablespoons at a time, until it’s sweet enough for you. Be sure to let it cook a bit more so that the sugar dissolves!
Storage Tips
Store syrup in an airtight glass container in the refrigerator. The syrup should keep, refrigerated, for at least a month. I haven’t yet tried freezing/thawing this homemade chocolate syrup, but I think it would work fine.
I have had readers ask if they can can this recipe, and my answer is that I wouldn’t do it, just because you have to be really careful what you preserve via canning. I’m not sure the pH for the chocolate syrup would make it a safe candidate.