Easy Fudge Recipe
I make a lot of sweets on the blog, but this fudge is the one I reach for when I want something that feels impressive but actually isn’t. It sets up firm, slices clean, and comes together in under an hour of active time. No candy thermometer, no tempering—just chocolate, sweetened condensed milk, a pinch of salt, and vanilla.
What I love about this version is its flexibility. You can melt everything on the stovetop or use the microwave method if you’re short on time or stovetop space. It accepts mix-ins without fuss, so you can tailor it to the season or the crowd: nuts for texture, cookies for crunch, or little candies for color.
Below you’ll find a shopping guide, the exact ingredient list and directions, plus practical notes on equipment, common mistakes, storage, and simple upgrades. I keep my language direct so you can get into the kitchen and get it done.
Your Shopping Guide

Before you head to the store, check what kind of chocolate you prefer: semi-sweet, milk, or dark. The recipe calls for two 12-ounce packages of chocolate chips, so you’ll want roughly 24 ounces total. For best texture and flavor, pick good-quality chips you like to snack on—this is essentially the whole show.
Sweetened condensed milk is non-negotiable here for the dense, fudgy texture. You can buy a can or make it at home if you already have a practice recipe; both work. Espresso powder is listed as optional but worth buying if you enjoy a rounder chocolate flavor—again, a small jar goes a long way.
Decide on mix-ins before you shop. The recipe allows up to 1/2 cup total of roasted nuts, candies, cookies, or fruit. Keep that measurement in mind so your add-ins don’t overwhelm the fudge structure. Also pick up parchment paper and plastic wrap if you don’t already have them—lifting the slab from the pan is much easier with a parchment overhang.
Ingredients
- 2 (12-ounce) packages chocolate chips — the foundation of the fudge; choose a flavor you enjoy (semi-sweet, milk, or dark).
- 1 1/4 cups sweetened condensed milk, homemade or store bought — provides sweetness and the creamy, set texture.
- 1/8 teaspoon kosher salt — balances sweetness and enhances chocolate flavor.
- 1 teaspoon vanilla extract — adds depth and rounds the chocolate.
- 1/8 teaspoon espresso powder, optional — intensifies chocolate without adding coffee flavor; skip if you prefer.
- Optional mix-ins: 1/2 cup roasted nuts, candies, cookies, or fruit — use up to 1/2 cup total for texture or contrast; pick one or a small combination.
Step-by-Step: Fudge Recipe
- Line an 8×8-inch baking dish with parchment paper, leaving an overhang on two opposite sides; set aside.
- Stovetop method: In a medium heavy-bottomed saucepan, combine 2 (12-ounce) packages chocolate chips, 1 1/4 cups sweetened condensed milk, 1/8 teaspoon kosher salt, and 1/8 teaspoon espresso powder (optional). Place over medium-low heat and stir frequently until the chocolate is melted and the mixture is smooth and fully combined. Remove from heat and stir in 1 teaspoon vanilla extract. Fold in up to 1/2 cup optional mix-ins (roasted nuts, candies, cookies, or fruit), if using.
- Microwave method: In a large microwave-safe bowl, combine 2 (12-ounce) packages chocolate chips, 1 1/4 cups sweetened condensed milk, 1/8 teaspoon kosher salt, and 1/8 teaspoon espresso powder (optional). Heat in 30-second increments, stirring well after each increment, until the mixture is melted, smooth, and creamy. Remove from microwave and stir in 1 teaspoon vanilla extract. Fold in up to 1/2 cup optional mix-ins, if using.
- Pour the prepared fudge mixture into the lined baking dish and spread it evenly with an offset spatula or rubber scraper.
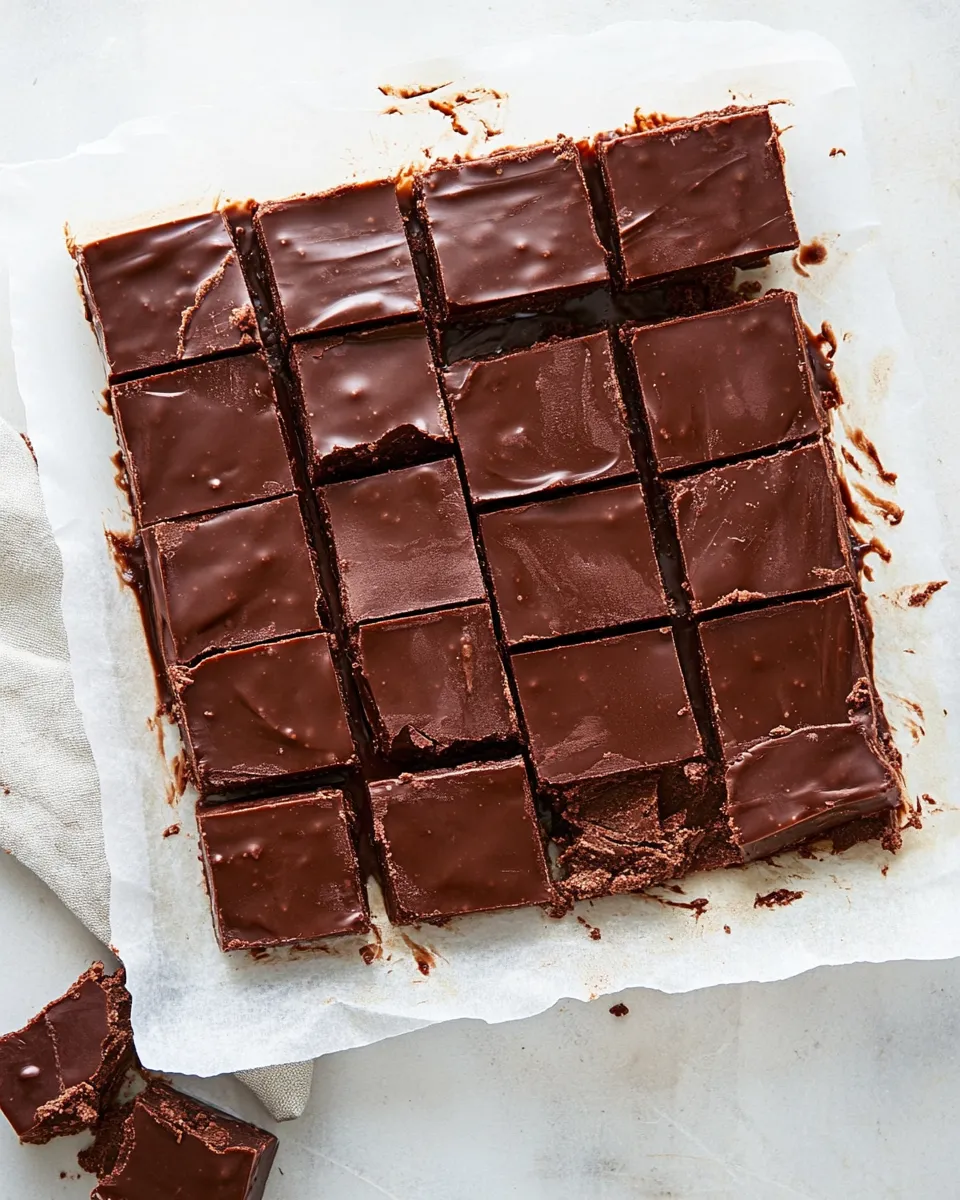
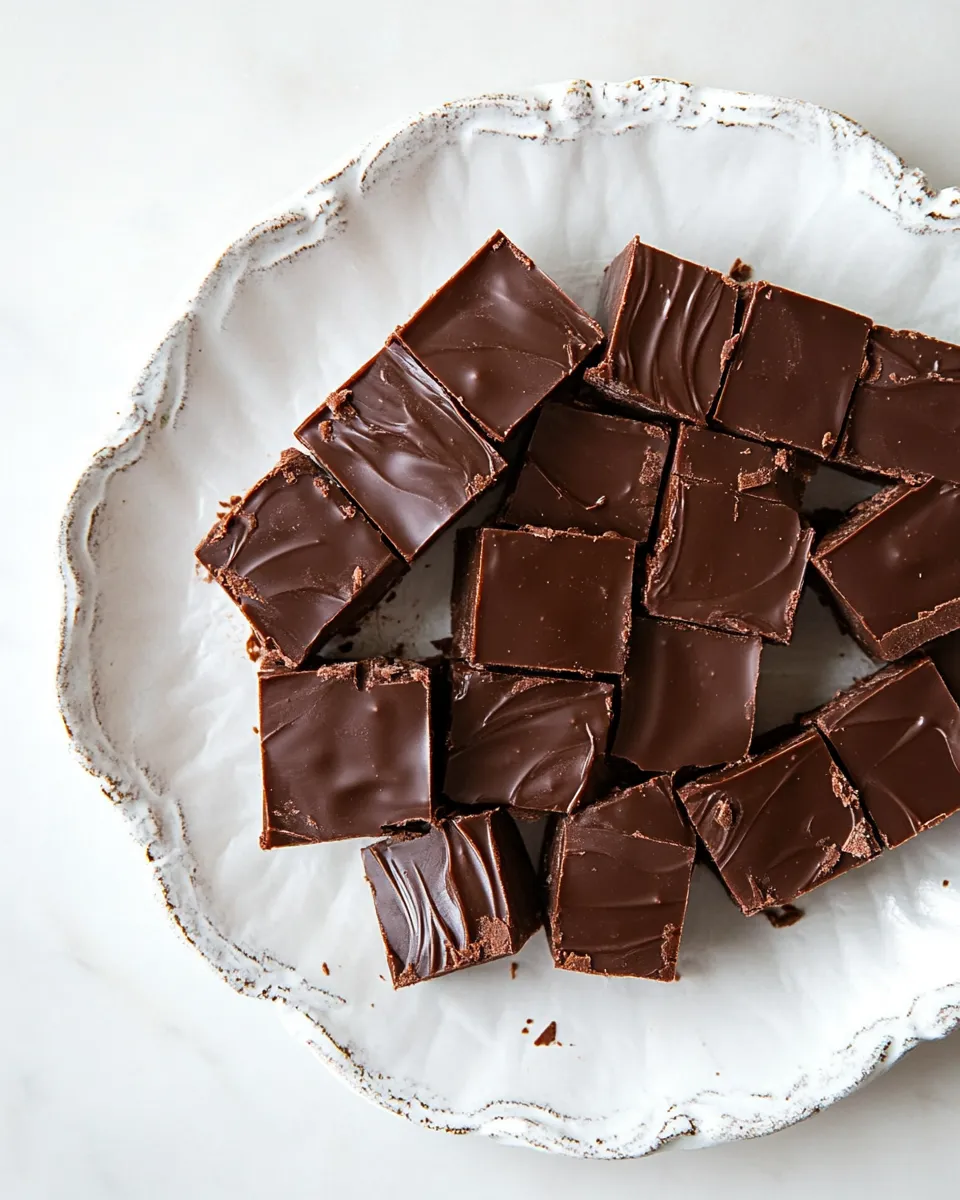
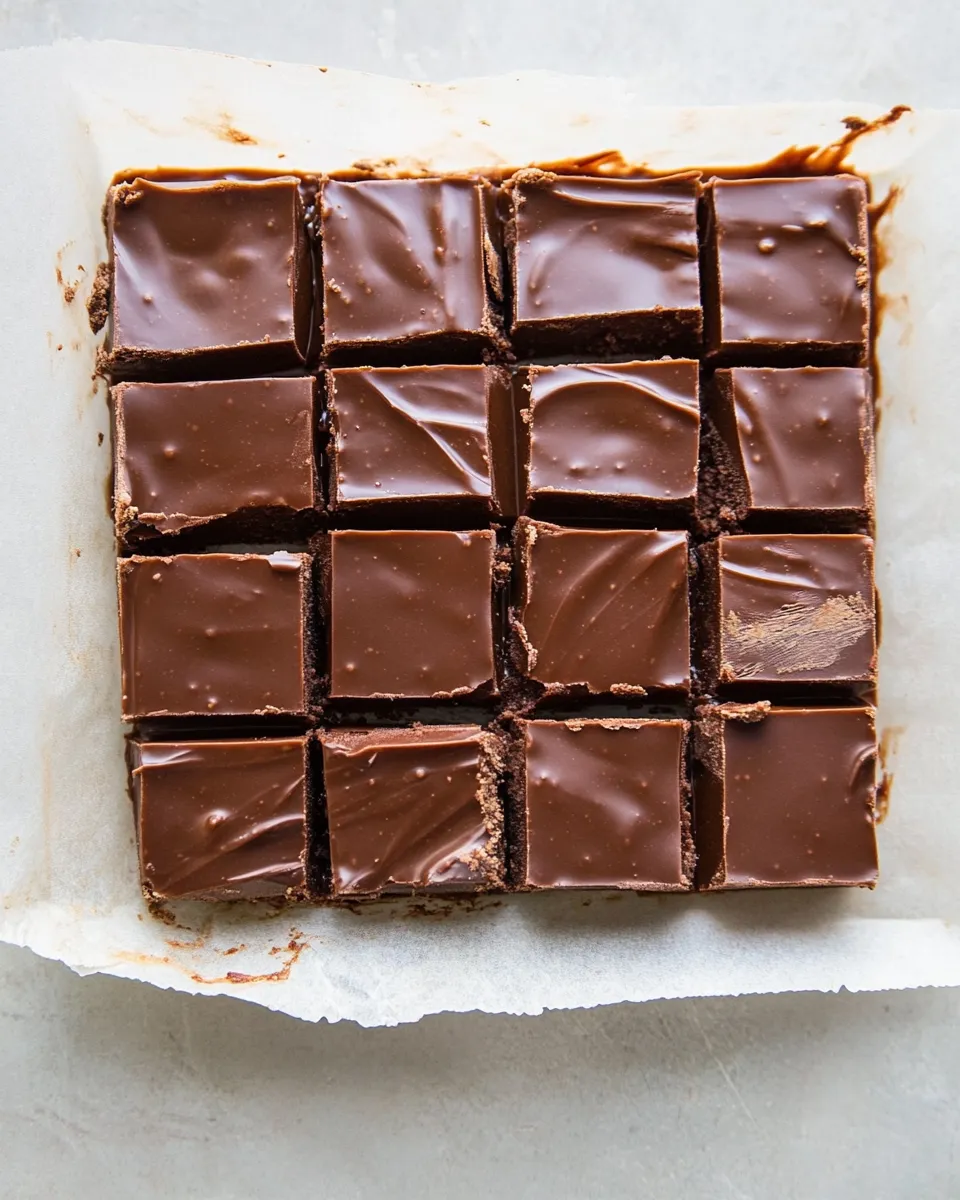
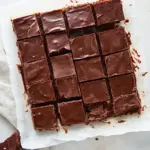
- Cover the surface with plastic wrap and refrigerate until firm, about 2 hours. Use the parchment overhang to lift the set fudge from the pan, peel off the parchment, and cut into 24 or 48 squares.
Why This Fudge Recipe Stands Out
It’s forgiving. Traditional fudge can be fussy—there’s often a need for careful boiling or thermometers. This recipe sidesteps that by using sweetened condensed milk as the setting agent. The result is reliably creamy, with minimal chance of graininess when you follow the melting instructions and stir consistently.
It’s also quick. The active cooking time—melting and stirring—is short. Most of the wait is passive refrigeration. That makes this a great option for holiday cookie trays, last-minute party treats, or something homemade to hand out as a gift without spending an afternoon in front of the stove.
Finally, it’s versatile. While the base is simple, the optional mix-ins let you change texture and flavor without altering the chemistry of the fudge. A modest addition of crunchy nuts or crushed cookies turns it into something completely different in the best way.
Budget & Availability Swaps
If you’re watching costs or can’t find a specific brand, here are practical swaps that won’t break the outcome:
- Chocolate chips: any standard 12-ounce package will work. Store-brand chips are fine; avoid chocolate with inclusions (like caramel-filled chips) unless you want to change the texture.
- Sweetened condensed milk: you can choose store-bought or homemade—both work. The recipe notes “homemade or store bought” so pick what’s easiest for you.
- Espresso powder: optional. If you don’t have it, simply omit it. The fudge will still taste chocolate-forward, just without that extra depth.
- Mix-ins: use whatever is available from the listed options—roasted nuts, candies, cookies, or fruit. Keep to the 1/2 cup maximum so the fudge sets properly.
Equipment Breakdown
Gather these tools so the process moves smoothly:
- 8×8-inch baking dish — the recipe’s specified size for the final thickness.
- Parchment paper — leave an overhang on two sides to lift the fudge cleanly.
- Medium heavy-bottomed saucepan — required for the stovetop melting method to distribute heat evenly.
- Large microwave-safe bowl — used if you pick the microwave method to melt the chocolate safely.
- Offset spatula or rubber scraper — to spread the mixture evenly without grooves.
- Plastic wrap — to cover the surface while refrigerating to prevent condensation and surface bloom.
- Refrigerator — chilling the fudge until firm takes about 2 hours.
Don’t Do This
Do not skip stirring when melting on the stovetop. The chocolate and condensed milk can scorch if left unattended; frequent stirring over medium-low heat prevents hot spots and graininess.
Do not overfill the pan with mix-ins. Exceeding the 1/2 cup recommendation can prevent the fudge from setting evenly and can lead to very uneven cuts.
Don’t remove the plastic wrap prematurely. If you uncover the fudge while it’s still slightly warm, it can develop a sticky top or attract fridge odors. Leave it covered until fully set.
Season-by-Season Upgrades
Spring and summer: keep it light with small, chewy fruit pieces (fresh fruit is too wet; use dried if you want fruit character) or mild candies that won’t overpower. Stick to the allowed mix-in categories so you don’t throw off the texture.
Fall and winter: roasted nuts and cookie pieces add warmth and crunch. For holidays, candies that match the color palette of your celebration work well—red and green for winter, autumnal tones for Thanksgiving trays.
Whenever you choose a seasonal tweak, remember the 1/2 cup total limit. Small changes are all you need to make the fudge feel seasonal without compromising texture.
Cook’s Commentary
I’ve made this batch-method fudge dozens of times. My go-to is the stovetop because I can control the heat more finely, but the microwave method is a real time-saver when a crowd is arriving. When I stir the chocolate as it melts, I always scrape the bottom and sides of the pan to integrate any chocolate clinging there—that’s where it can overcook first.
On flavor: a pinch of kosher salt and a teaspoon of vanilla really lift the chocolate. The optional espresso powder is subtle but effective—especially if your chips are milk chocolate and you want to add complexity. I treat the vanilla as an essential finishing touch; it brightens the whole mixture right as it comes off the heat.
Texture-wise, the fudge should be spreadable but not runny when you pour it into the pan. If it seems too thick to spread evenly, warm the bowl briefly and stir to loosen; if it’s too thin, a quick chill will firm it up before cutting.
Prep Ahead & Store
You can make the fudge up to 3 days in advance and store it in an airtight container in the refrigerator. For longer storage, freeze tightly wrapped pieces for up to 2 months. Thaw overnight in the refrigerator before serving.
To freeze: cut into squares, place parchment between layers to prevent sticking, and seal in an airtight container or freezer bag. When you’re ready to serve, move them to the refrigerator to thaw slowly so they retain a clean texture.
Reader Q&A
Q: Can I halve the recipe? A: Yes. The chemistry is simple: chocolate plus sweetened condensed milk sets reliably. Halve every ingredient if you want a smaller batch and use a smaller pan.
Q: My fudge turned grainy. What happened? A: Graininess usually comes from overheating or not stirring enough while melting. Use medium-low heat on the stovetop and stir frequently. In the microwave, stop to stir after each 30-second increment.
Q: Can I use chopped chocolate bars instead of chips? A: Chopped bars will work; they may melt faster and give a slightly different texture but remain a valid option if you prefer the flavor of a particular bar.
Q: How do I get neat slices? A: Use the parchment overhang to lift the slab from the pan. Chill until fully set, then use a sharp knife warmed under hot water and wiped dry between cuts for cleaner edges.
That’s a Wrap
This Fudge Recipe is exactly what I turn to when I want dependable, homemade candy without the drama. It’s flexible, forgiving, and a crowd-pleaser—perfect for gifts, potlucks, or an afternoon treat. Keep the ingredients simple, respect the melting steps, and you’ll have glossy, sliceable fudge every time.
If you make a batch, tell me how you customized it and whether you used the stovetop or microwave method. I always love hearing which mix-ins became favorites in your kitchen.
Easy Fudge Recipe
Ingredients
Ingredients
- 2 12-ounce packageschocolate chips
- 1 1/4 cupssweetened condensed milk homemade or store bought
- 1/8 teaspoonkosher salt
- 1 teaspoonvanilla extract
- 1/8 teaspoonespresso powder optional
- Optional mix-ins: 1/2 cup roasted nuts candies, cookies, or fruit
Instructions
Instructions
- Line an 8×8-inch baking dish with parchment paper, leaving an overhang on two opposite sides; set aside.
- Stovetop method: In a medium heavy-bottomed saucepan, combine 2 (12-ounce) packages chocolate chips, 1 1/4 cups sweetened condensed milk, 1/8 teaspoon kosher salt, and 1/8 teaspoon espresso powder (optional). Place over medium-low heat and stir frequently until the chocolate is melted and the mixture is smooth and fully combined. Remove from heat and stir in 1 teaspoon vanilla extract. Fold in up to 1/2 cup optional mix-ins (roasted nuts, candies, cookies, or fruit), if using.
- Microwave method: In a large microwave-safe bowl, combine 2 (12-ounce) packages chocolate chips, 1 1/4 cups sweetened condensed milk, 1/8 teaspoon kosher salt, and 1/8 teaspoon espresso powder (optional). Heat in 30-second increments, stirring well after each increment, until the mixture is melted, smooth, and creamy. Remove from microwave and stir in 1 teaspoon vanilla extract. Fold in up to 1/2 cup optional mix-ins, if using.
- Pour the prepared fudge mixture into the lined baking dish and spread it evenly with an offset spatula or rubber scraper.
- Cover the surface with plastic wrap and refrigerate until firm, about 2 hours. Use the parchment overhang to lift the set fudge from the pan, peel off the parchment, and cut into 24 or 48 squares.
Equipment
- 8x8-inch Baking Dish
- Parchment Paper
- medium heavy-bottomed saucepan
- large microwave-safe bowl
- Offset Spatula
- rubber scraper
- Plastic Wrap
- Refrigerator
Notes
Storage Tips:
To Make Ahead.
Prepare as directed. Store in an airtight container in a cool place for up to a week or in the refrigerator for up to 3 weeks.
To Store.
You can store fudge in individual squares or as a whole block. For individual pieces, place waxed paper between the layers of fudge in an airtight container. For a whole block, wrap the fudge well with plastic wrap. Store in a cool place for up to a week or in the refrigerator for up to 3 weeks.
To Freeze.
Allow the fudge to harden in the refrigerator as instructed in the recipe. Then, either cut the fudge into individual pieces or freeze it as a whole block of fudge. To freeze as individual pieces, place waxed paper between the layers of fudge in an airtight, freezer-safe container. To freeze a whole block of fudge, wrap it well with plastic wrap and then with foil. Then place in an airtight, freezer-safe container and freeze for up to 3 months. To serve, remove from the freezer and allow to thaw overnight in a cool place.
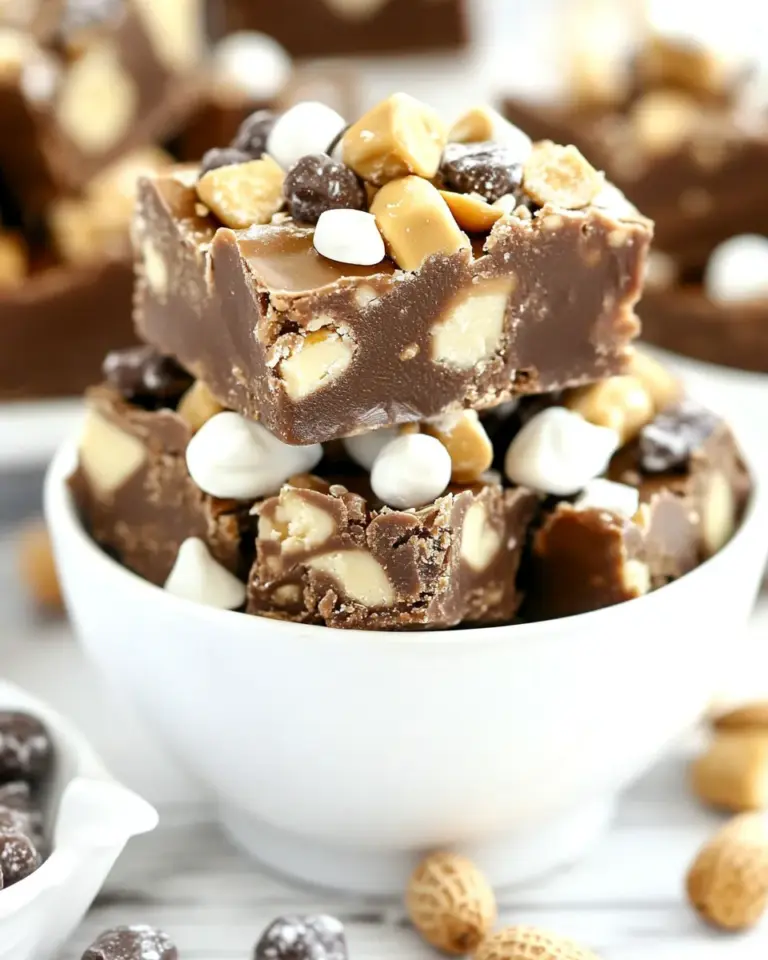
Favorite Fudge Flavors (Optional Mix-ins):
Roasted Nuts
– Add a cup of chopped, roasted nuts. Great options are
roasted pecans
, roasted peanuts, cashews, almonds, walnuts, pistachios, or even a mixture of your favorites.
Salted Caramel Fudge
– Stir ¼ cup of
salted caramel
into the mixture before chilling. Once chilled, top with flaky salt to enhance the flavor even more!
Rocky Road Fudge
– Add miniature marshmallows and roasted pecans or another favorite nut.
Oreo Fudge Recipe
– Stir a cup of roughly chopped Oreo cookies before chilling.
Chocolate Peanut Butter Fudge
– I’ve been told this recipe tastes like a peanut butter cup, and it’s super easy to make, too! To enhance that flavor, you can add chopped mini peanut butter cups.
Peppermint Fudge
– My favorite
peppermint fudge recipe
uses this classic recipe with the addition of peppermint. Peppermint perfection!