Crispy Baked Chicken Tenders
These tenders are my go-to when I want a fast, crowd-pleasing dinner that doesn’t rely on deep frying. They come out crunchy on the outside, tender inside, and the whole tray bakes hands-off in the oven. No complicated batter. No messy oil. Just a few pantry items and a little technique.
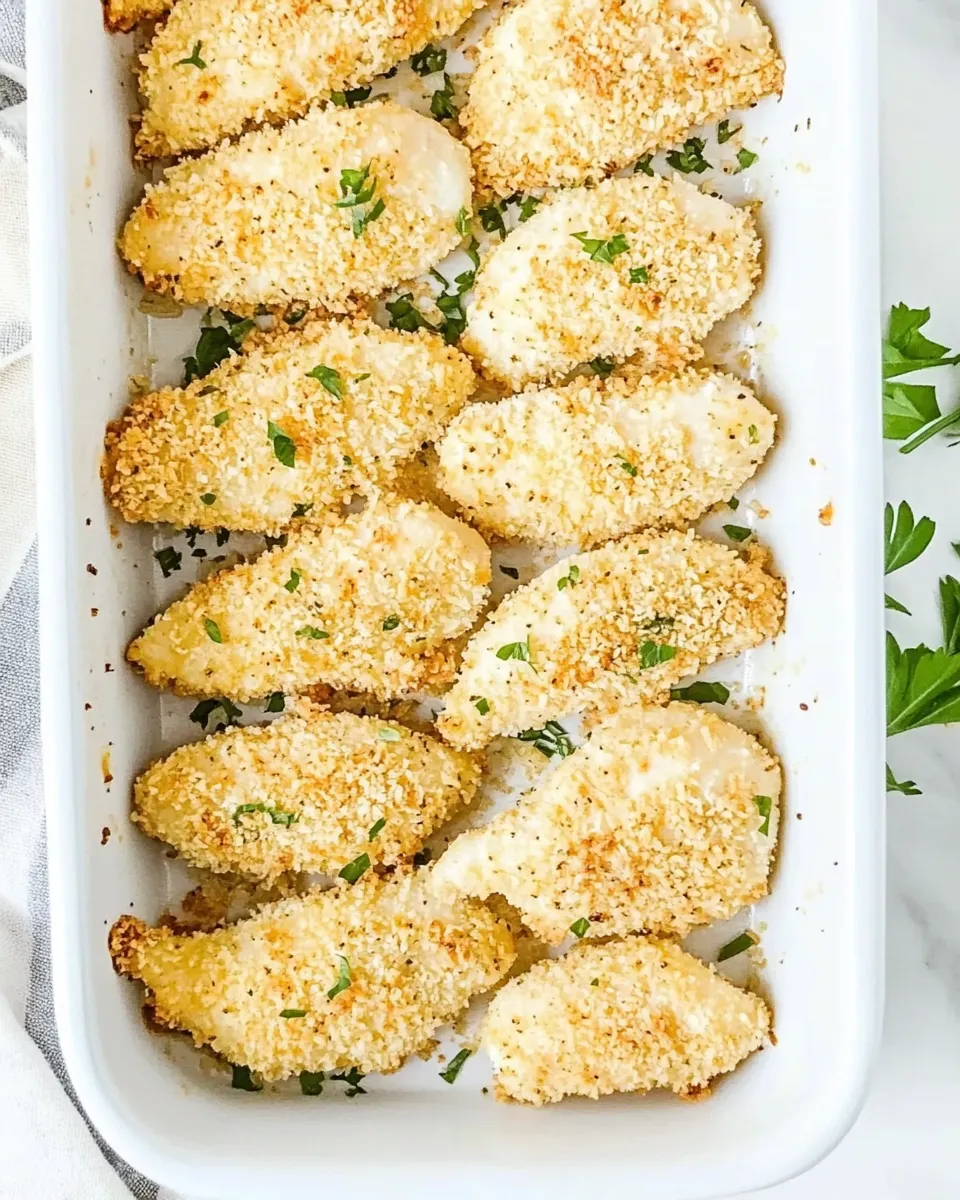
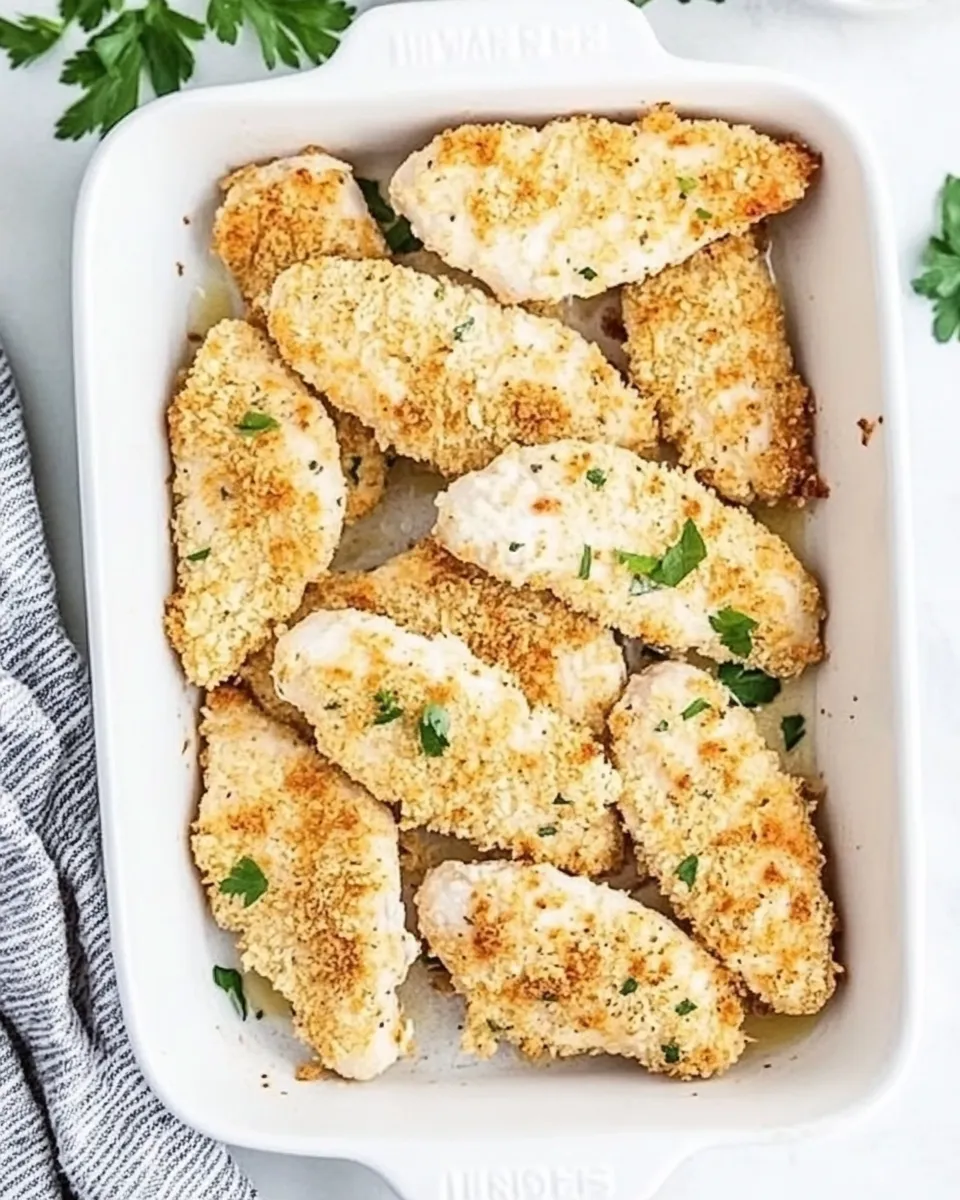
I developed this version to make the most of whole wheat ingredients without drying the meat. A light dredge in flour, a mustard step that acts like glue and flavor, then whole-wheat breadcrumb coating tossed with olive oil gives crispness and color in the oven. Parmesan and a touch of paprika add savory depth.
Below you’ll find everything you need: clear ingredient notes, exact step-by-step directions, sensible equipment suggestions, and options for swaps and make-ahead moves. If you want a dependable weeknight recipe that behaves every time, these are the tenders to keep in your rotation.
The Essentials

Yield: This recipe uses 1 pound of chicken breast tenders — enough for 3 to 4 people as part of a meal or 2 very hungry ones if you’re not serving much else.
Time: Plan about 10–15 minutes active prep and 40 minutes total oven time (20 minutes each side) plus a short rest. It’s easy to fit into a weeknight routine.
Texture: The oil-moistened whole wheat crumbs crisp in the oven without needing to submerge the chicken in oil. Dijon mustard keeps the coating adhered and adds tang.
Temperature: Use a hot 400°F (200°C) oven to encourage browning without overcooking the chicken.
Ingredients
- 1 pound Chicken breast tenders, uncooked — the star protein; tenders cook quickly and stay juicy when not overbaked.
- 2 slice bread, whole wheat — blitzed into crumbs for a whole-grain crust; gives structure and chew.
- 2 tablespoon Parmesan cheese — adds savory umami and helps the crumbs brown.
- 4 tablespoon mustard, dijon — acts as the adhesive and brings bright flavor to the coating.
- 1/4 tsp paprika — for subtle warmth and color.
- 1/4 cup flour, whole wheat — the first dry step so the mustard clings better to the chicken.
- 2 tablespoon olive oil — moistened into the crumbs to promote crispness while baking.
- 1/4 teaspoon salt — season the crumb mix; you can also season the tenders lightly before dredging if you prefer.
How to Prepare Crispy Baked Chicken Tenders
- Preheat the oven to 400°F (200°C). Place a metal roasting rack on top of a cookie sheet and set aside.
- Break the 2 slices whole wheat bread into pieces and place them in a blender or food processor with 2 tablespoons Parmesan cheese, 1/4 teaspoon paprika, and 1/4 teaspoon salt. Pulse until medium crumbs form.
- Transfer the crumbs to a shallow bowl. Drizzle 2 tablespoons olive oil over the crumbs and toss until the crumbs are evenly moistened.
- Place 1/4 cup whole wheat flour in a wide shallow bowl. Put 4 tablespoons Dijon mustard in a second shallow bowl. Keep the crumb mixture in a third shallow bowl.
- Working with one chicken tender at a time for the crumbs (and in small batches for the flour and mustard if you prefer), dredge each of the 1 pound chicken breast tenders first in the flour, shaking off excess, then dip into the Dijon mustard, allowing excess to drip, and finally press into the crumb mixture until evenly coated. Arrange the coated tenders on the prepared roasting rack with space between them.
- Bake for 20 minutes. Use tongs to flip each tender, then bake 20 minutes more, or until an instant-read thermometer inserted into the thickest part of a tender reads 170°F.
- Remove from the oven, let the tenders rest a few minutes, and serve hot.
Why I Love This Recipe
First, it’s downright reliable. The flour→mustard→crumb sequence keeps the coating intact through baking and flipping. Second, it’s simpler and cleaner than frying: less hands-on time and no splattering oil. Third, the use of whole-wheat bread and flour gives a nutty flavor and a sturdier crumb that holds up when dipped into sauces.
Finally, it’s flexible. The base technique welcomes a swap of spices, cheese, or a different bread without breaking the method. You can scale it up, feed a crowd, or double the coating steps and freeze extras for later.
If You’re Out Of…
If you don’t have whole wheat bread or flour, you can use regular white bread and all-purpose flour. The texture might be a touch lighter, but the method is the same. If you’re out of Dijon, a coarse-grain mustard or even a thin smear of yellow mustard will work; flavor will be milder.
No Parmesan? Skip it or replace it with a small handful of finely grated hard cheese you have. If you’re out of a blender, finely tear the bread and press it between two bowls or use a rolling pin to make crumbs — it will take a little longer but still works.
Appliances & Accessories
Essential: an oven that reaches 400°F (200°C), a cookie sheet, and a metal roasting rack. The rack is important — it lifts the tenders so hot air circulates and the bottom crisps instead of steaming.
Helpful: a blender or food processor for even crumbs, tongs for flipping, and an instant-read thermometer to check doneness. A set of three shallow bowls keeps the dredge line moving smoothly.
Don’t Do This
Don’t skip the mustard step. It’s not just for flavor; it’s the adhesive that keeps the crumbs attached during baking. Using too little mustard will cause the crumbs to fall off.
Don’t crowd the tenders on the rack. Overlapping pieces trap steam and prevent browning. Give each tender a little breathing room so heat can reach all sides.
Don’t assume baking time is exact for every oven or thickness. Use an instant-read thermometer if you can. The target is 170°F in the thickest part of the tender.
Warm & Cool Weather Spins
Warm weather
Serve the tenders cool or at room temperature as part of a picnic spread. They pair well with a lemon-herb yogurt dip and crisp salad. Wrap leftovers in lettuce for a handheld, lighter meal.
Cool weather
Make a cozy bowl: slice the warm tenders over mashed potatoes or creamy polenta and drizzle with pan jus or a warm mustard-cream sauce. Or tuck the tenders into a baked potato for a heartier dinner.
Pro Tips & Notes
- Breadcrumb texture: Pulse the bread until medium crumbs — too fine and they’ll become paste after the oil; too large and they won’t adhere well.
- Even coating: Press the crumbs into the mustard-coated tender to compact them slightly. This helps the crumbs hold through the first 20 minutes of baking.
- Oil distribution: Tossing the crumbs with 2 tablespoons of olive oil is key. It helps browning without deep frying. If your crumbs look dry after tossing, give a light extra drizzle, but don’t saturate.
- Flip gently: Use tongs to flip each tender halfway through to promote even color on both sides. Flip carefully so you don’t strip the coating.
- Season early: The provided 1/4 tsp salt is added to the crumb mix. If you prefer your chicken more seasoned, lightly salt the tenders before the flour step, but do so sparingly because the Parmesan adds salt too.
- Doneness: 170°F is the target; because tenders are thin, pull them promptly to avoid drying. They’ll rest a few minutes and finish gently.
Make Ahead Like a Pro

Coat the tenders up to the point of arranging them on the baking rack, then cover and refrigerate for up to 24 hours. When ready to bake, let them sit at room temperature for 10–15 minutes while the oven preheats, then bake as directed. This saves prep time on busy nights.
For freezing, place the coated tenders on a baking sheet in a single layer and flash-freeze until firm. Transfer to a freezer-safe bag and store up to 1 month. Bake from frozen, adding 5–8 extra minutes and checking for 170°F internal temp.
Popular Questions
Q: Can I use chicken thighs instead of tenders?
A: Yes. Trim and flatten if needed so pieces are even. Thighs will take a bit longer to reach 170°F — check with a thermometer and expect extra bake time.
Q: Will the coating get soggy if I make these ahead?
A: If you bake and then store the cooked tenders, the coating can soften in the fridge. Re-crisp them in a hot oven (425°F for 6–8 minutes) or under the broiler briefly, watching carefully to avoid burning.
Q: My crumbs browned on top but not underneath. What happened?
A: That usually means air circulation under the tenders was limited. A metal rack is crucial to allow the bottom to brown. If you don’t have a rack, flip the tenders halfway and consider increasing bake time slightly.
In Closing
These Crispy Baked Chicken Tenders are a dependable, everyday recipe that delivers on crispness without frying. The method is straightforward, and the results are forgiving: great for families, meal prep, and feeding a crowd. Keep the technique in your back pocket — it adapts to seasonings and sides and behaves consistently when you follow the simple steps.
Make a batch, try the make-ahead tip, and experiment with a spice or two in the crumbs. You’ll find a version that becomes your go-to. Happy cooking — and enjoy the crunchy, juicy payoff.

Crispy Baked Chicken Tenders
Ingredients
Ingredients
- 1 poundChicken breast tenders uncooked
- 2 slicebread whole wheat
- 2 tablespoonParmesan cheese
- 4 tablespoonmustard dijon
- 1/4 tsppaprika
- 1/4 cupflour whole wheat
- 2 tablespoonolive oil
- 1/4 teaspoonsalt
Instructions
Instructions
- Preheat the oven to 400°F (200°C). Place a metal roasting rack on top of a cookie sheet and set aside.
- Break the 2 slices whole wheat bread into pieces and place them in a blender or food processor with 2 tablespoons Parmesan cheese, 1/4 teaspoon paprika, and 1/4 teaspoon salt. Pulse until medium crumbs form.
- Transfer the crumbs to a shallow bowl. Drizzle 2 tablespoons olive oil over the crumbs and toss until the crumbs are evenly moistened.
- Place 1/4 cup whole wheat flour in a wide shallow bowl. Put 4 tablespoons Dijon mustard in a second shallow bowl. Keep the crumb mixture in a third shallow bowl.
- Working with one chicken tender at a time for the crumbs (and in small batches for the flour and mustard if you prefer), dredge each of the 1 pound chicken breast tenders first in the flour, shaking off excess, then dip into the Dijon mustard, allowing excess to drip, and finally press into the crumb mixture until evenly coated. Arrange the coated tenders on the prepared roasting rack with space between them.
- Bake for 20 minutes. Use tongs to flip each tender, then bake 20 minutes more, or until an instant-read thermometer inserted into the thickest part of a tender reads 170°F.
- Remove from the oven, let the tenders rest a few minutes, and serve hot.
Equipment
- Oven
- metal roasting rack
- Baking Sheet
- Blender
- Food Processor
- Shallow bowls
- Tongs
- Instant-read thermometer