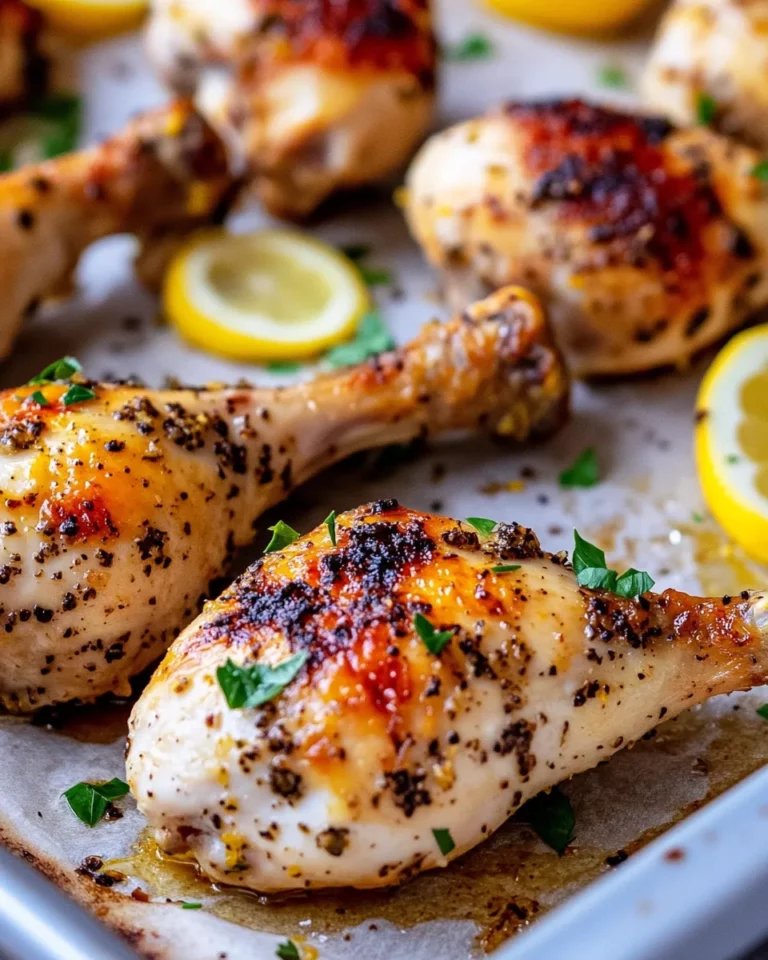
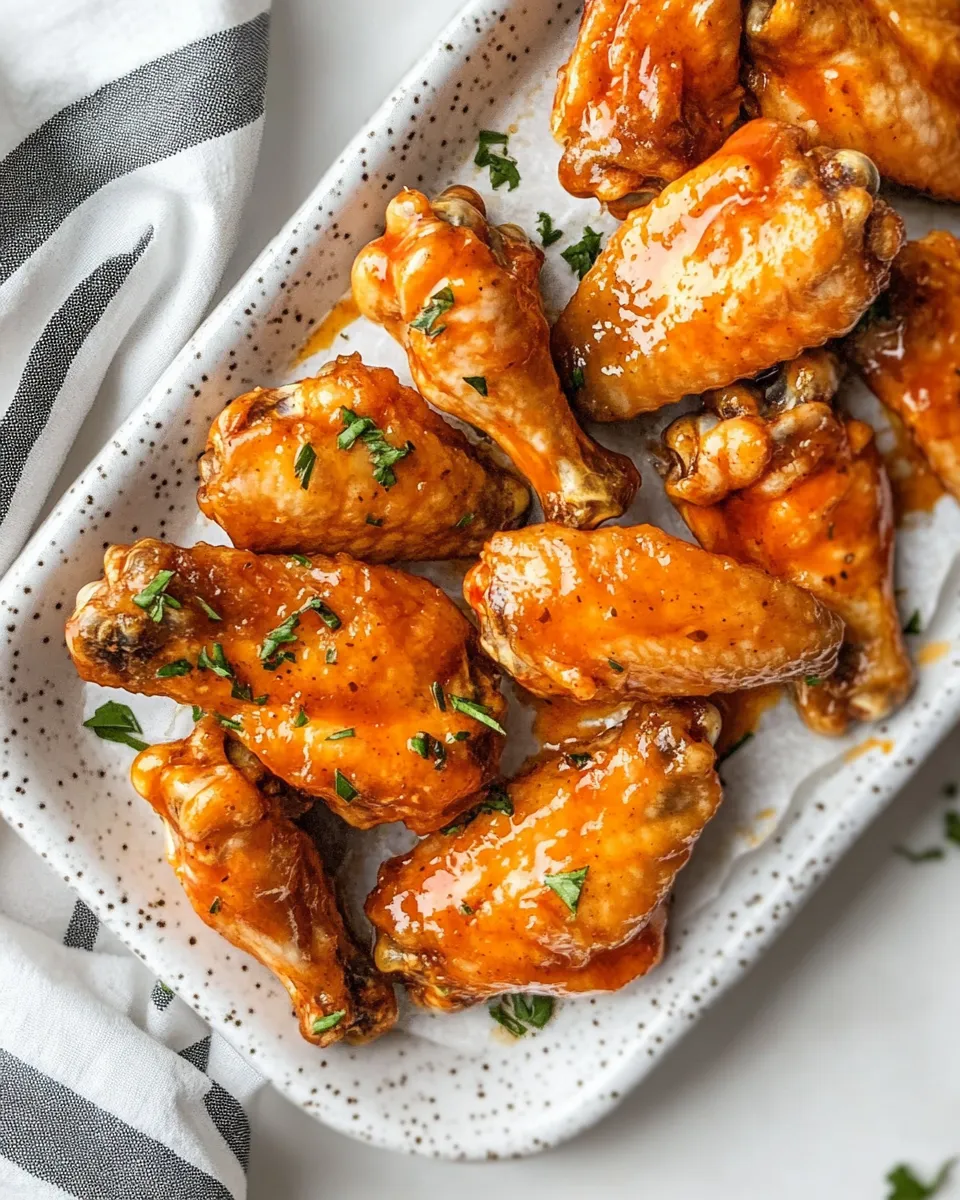
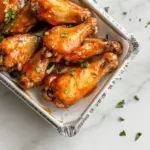
Chicken Wings
I love a tray of hot, crackly wings. They’re simple, crowd-pleasing, and forgiving — but only if you handle a few key steps with intention. Over the years I’ve roasted a lot of wings, tweaked timing and seasoning, and learned which details make the skin go from soft to satisfyingly crisp.
This recipe is a straightforward, oven-roasted approach that leaves you with reliably crisp skin and juicy meat. There’s no frying, no complicated batters — just a little chemistry with baking powder, smart airflow, and careful timing. You can toss the finished wings in hot sauce, leave them plain, or build a sauce later; the method gives you a great blank canvas.
Below you’ll find the exact ingredients and step-by-step directions I use when I’m feeding a hungry table. I’ve added practical tips, troubleshooting advice, and variations so you can adapt the recipe to what you have on hand — or to your guests’ preferences.
Shopping List

Keep this short list in your phone or on a sticky note when you head to the store. Everything is pantry-friendly except the wings themselves.
- Chicken wings — 4 pounds, halved at the joints, wingtips discarded.
- Baking powder (aluminum-free) — 2 tablespoons.
- Salt — 3/4 teaspoon.
- Ground black pepper — 1/2 teaspoon.
- Paprika — 1 teaspoon.
- Garlic powder — 1 teaspoon.
- Hot sauce — for tossing, optional.
- Kitchen basics you likely have: foil, oil spray, paper towels, tongs.
Cook Chicken Wings Like This
- Preheat the oven to 425°F and move the oven rack to the upper-middle position.
- Line a baking sheet with foil, place a wire rack on top of the foil, and spray the wire rack with non-stick cooking spray.
- If the wings are not already halved, cut each wing at the joints into pieces and discard the wingtips. Pat the 4 pounds of chicken wings dry with paper towels until surface moisture is removed.
- In a small bowl, combine 2 tablespoons aluminum-free baking powder, 3/4 teaspoon salt, 1/2 teaspoon ground black pepper, 1 teaspoon paprika, and 1 teaspoon garlic powder.
- Sprinkle the seasoning mixture evenly over the dry wings and toss (with tongs or clean hands) until all pieces are evenly coated.
- Arrange the wings in a single layer on the prepared wire rack with the skin-side up, leaving space between pieces so air can circulate.
- Bake for 40 minutes total: after 20 minutes, use tongs to flip each wing so the other side faces up, then continue baking the remaining 20 minutes, until the wings are crisp and browned.
- Remove the wings from the oven and let them rest on the rack for 5 minutes. Toss with hot sauce if desired, then serve.
Ingredients
- 4 pounds chicken wings — halved at joints, wingtips discarded; note: pat them dry so the skin crisps.
- 2 tablespoons baking powder — aluminum-free; note: this helps dry and blister the skin for crispiness.
- 3/4 teaspoon salt — seasoning baseline; adjust after tasting if you add a salty sauce.
- 1/2 teaspoon ground black pepper — for a mild heat and depth.
- 1 teaspoon paprika — adds color and gentle smoky flavor.
- 1 teaspoon garlic powder — savory backbone that pairs with hot sauce or dipping sauces.
- Hot sauce for tossing — optional; use just before serving if you want sauced wings.
Why You’ll Love This Recipe
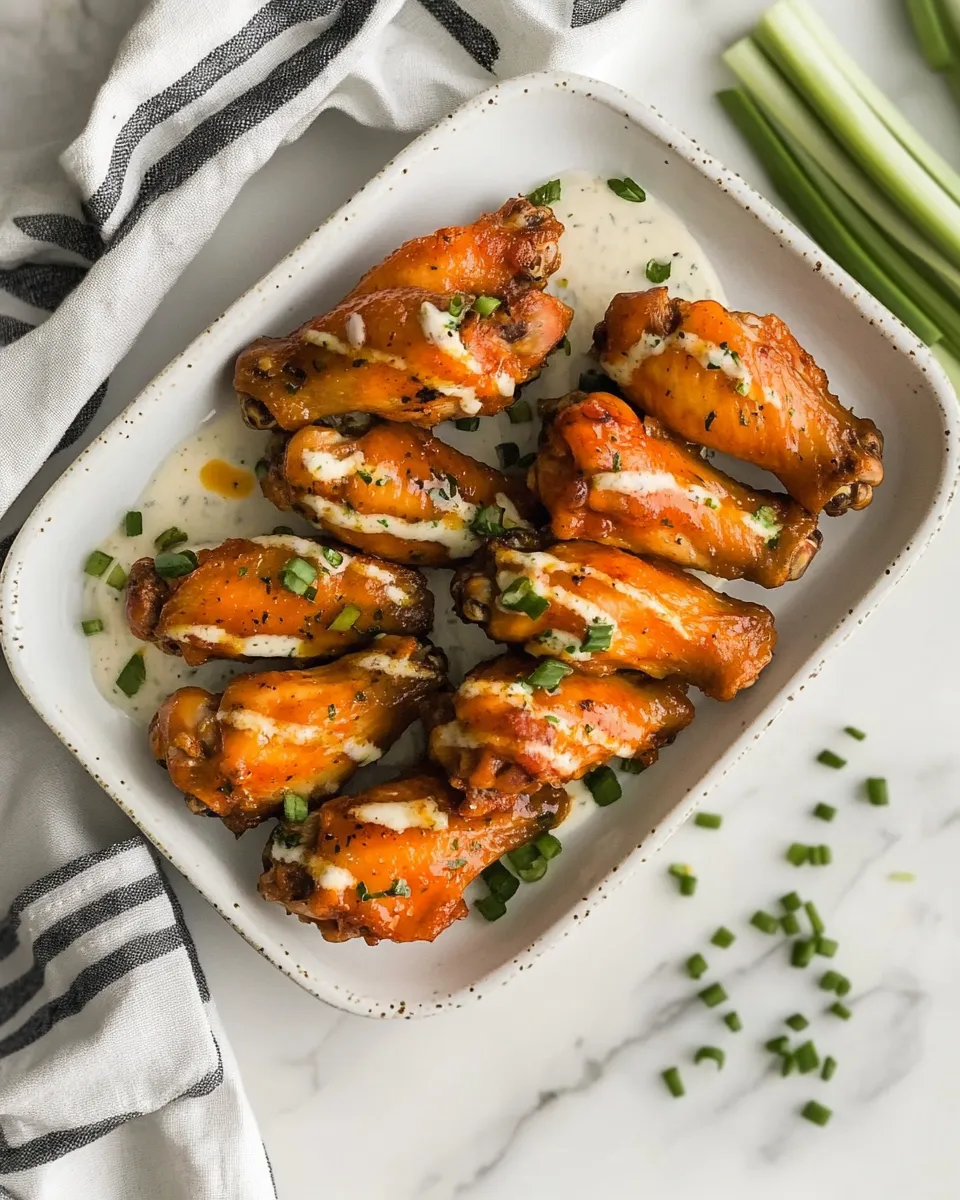
This method is honest and dependable. You get crispy skin without frying, which means fewer messy splatters and less hands-on time. The aluminum-free baking powder is the trick: it raises the pH on the skin surface and speeds moisture evaporation so the skin tightens and browns. The result is wings that snap when you bite them.
It’s also flexible. The seasoning mix is simple and balanced; it crisps and flavors without hiding the chicken. If you want buffalo, toss the finished wings in hot sauce. If you want something sticky, coat with a glaze after a brief broil. Because the wings are baked on a wire rack, air circulates for even crisping — it’s a restaurant result from a home oven.
Substitutions by Category
Here are safe swaps that keep the method intact.
- Protein: You can use the same technique on drumettes or small chicken thighs, but adjust time based on thickness. Thicker pieces take longer.
- Leavening: Do not substitute baking soda for baking powder here; baking soda changes flavor and browning behavior. If you must, use baking powder labeled aluminum-free.
- Seasonings: Paprika can be swapped with smoked paprika for a smokier note, and garlic powder can be replaced with 1/2 teaspoon onion powder plus 1/2 teaspoon granulated garlic if that’s what you have.
- Sauces: Hot sauce is optional. Substitute with barbecue sauce, teriyaki glaze, or honey-sriracha after baking — toss briefly to coat and serve immediately.
Tools & Equipment Needed
Use the right tools and this recipe becomes almost foolproof.
- Oven that holds 425°F reliably. An oven thermometer is a good investment if your oven runs hot or cold.
- Baking sheet and foil — foil makes cleanup easy and protects the sheet from drips.
- Wire rack that fits inside the baking sheet — essential for airflow and even crisping.
- Non-stick cooking spray — to prevent sticking to the wire rack.
- Paper towels for drying wings — drying is a non-negotiable step for crisp skin.
- Tongs or clean hands for tossing and flipping — tongs let you flip without piercing the skin.
- Small bowl for mixing the dry seasoning — quick and tidy.
Frequent Missteps to Avoid
Small mistakes undermine crispness. Here are the ones I see most often.
- Skipping the dry step: If you don’t pat wings fully dry, the skin steams instead of browns. Use clean paper towels and press firmly.
- Overcrowding the rack: Put space between wings. Crowding creates steam pockets and soft skin.
- Using the wrong powder: Regular baking soda will make the wings taste odd and brown differently. Use aluminum-free baking powder as listed.
- Underbaking or skipping the flip: The 20-minute flip ensures both sides crisp and brown evenly. Don’t skip it.
- Tossing in sauce too early: If you coat wings in a wet sauce and then bake, you risk losing crispness. Toss only after the rest period unless you want a sticky finish and are willing to broil briefly.
Customize for Your Needs
Want to adapt these wings for a crowd, a low-sodium diet, or bold flavor? Here’s how I change things without breaking the method.
- For a crowd: Bake in batches on multiple racks or use two baking sheets. Don’t stack wings on one tray; crispness requires space and airflow.
- Lower sodium: Reduce the salt slightly in the seasoning mix and rely on a sauce at the table for people who want more. Taste the first batch and sprinkle lightly if needed.
- Glazed wings: If you want a sticky glaze, bake fully, rest 5 minutes, then toss in sauce and quickly broil 1–2 minutes to set the glaze. Watch closely under the broiler.
- Make-ahead: Bake wings fully, cool, and refrigerate. Reheat in a hot oven (about 400°F for 8–10 minutes) to re-crisp before serving.
What Could Go Wrong
Anticipate these problems so you can fix them quickly.
- Wings are limp after baking: Usually from excess moisture or overcrowding. For leftovers, reheat in a hot oven on a rack to restore crispness.
- Uneven browning: Check rack placement. Upper-middle gives good browning; make sure your oven rack isn’t too low. Rotate the pan if your oven has hot spots.
- Metallic or bitter taste: Often from using baking powder with aluminum. Replace it with an aluminum-free version.
- Soggy underside: If the underside sits in rendered fat, the rack might be too low or the tray collecting fat could allow steam. Ensure the rack raises the wings above the sheet and leave space around each piece.
Storage & Reheat Guide
Wings store and reheat well if you handle them right.
- Refrigerate: Cool wings to room temperature for no more than two hours, then store in an airtight container for up to 3–4 days.
- Freeze: Flash-freeze on a tray until solid, then transfer to freezer bags for up to 2 months. Thaw overnight in the fridge before reheating.
- Reheat for crispness: Reheat in a preheated oven at 400–425°F on a wire rack over a baking sheet for 8–12 minutes, until heated through and skin crisps. Avoid the microwave if you want texture preserved.
- Sauced wings: If wings were sauced when stored, face them toward a gentler reheat: 350°F until warm, then finish under a hot broiler for a minute or two to refresh the exterior.
Common Questions
Here are answers to the questions readers ask most often.
- Can I use other cuts? Yes, but adjust time. Thicker pieces like thighs need longer; check internal temp for safety.
- Do I have to flip the wings? Yes. The flip at 20 minutes ensures both sides crisp and brown evenly.
- Why baking powder? It raises surface pH and helps moisture evaporate faster, promoting blistering and browning of the skin.
- Can I skip the wire rack? You can, but expect less even crisping. Placing wings directly on foil means they’ll sit in their rendered fat and soften on the bottom.
- Can I make them ahead for a party? Bake them fully, cool, refrigerate, then reheat in a hot oven on a rack to regain crispness. Alternatively, warm and toss in sauce just before serving.
See You at the Table
These wings are a dependable go-to: simple to make, easy to scale, and flexible enough for whatever finish you prefer. Follow the drying, the baking powder, and the flipping rule, and you’ll have crispy, golden wings every time. Serve with napkins, a bowl for bones, and your favorite dip or hot sauce on the side.
Tell me how you finish them — classic hot sauce, sticky barbecue, or something bold and unexpected. I love hearing what works on your table, and tweaks you discover along the way. Now, preheat that oven and enjoy the crackle.
Chicken Wings
Ingredients
Ingredients
- 4 poundschicken wingshalved at joints wingtips discarded
- 2 tablespoonsbaking powderaluminum-free
- 3/4 teaspoonsalt
- 1/2 teaspoonground black pepper
- 1 teaspoonpaprika
- 1 teaspoongarlic powder
- Hot sauce for tossingoptional
Instructions
Instructions
- Preheat the oven to 425°F and move the oven rack to the upper-middle position.
- Line a baking sheet with foil, place a wire rack on top of the foil, and spray the wire rack with non-stick cooking spray.
- If the wings are not already halved, cut each wing at the joints into pieces and discard the wingtips. Pat the 4 pounds of chicken wings dry with paper towels until surface moisture is removed.
- In a small bowl, combine 2 tablespoons aluminum-free baking powder, 3/4 teaspoon salt, 1/2 teaspoon ground black pepper, 1 teaspoon paprika, and 1 teaspoon garlic powder.
- Sprinkle the seasoning mixture evenly over the dry wings and toss (with tongs or clean hands) until all pieces are evenly coated.
- Arrange the wings in a single layer on the prepared wire rack with the skin-side up, leaving space between pieces so air can circulate.
- Bake for 40 minutes total: after 20 minutes, use tongs to flip each wing so the other side faces up, then continue baking the remaining 20 minutes, until the wings are crisp and browned.
- Remove the wings from the oven and let them rest on the rack for 5 minutes. Toss with hot sauce if desired, then serve.
Equipment
- Oven
- Baking Sheet
- Aluminum Foil
- Wire Rack
- non-stick cooking spray
- Paper Towels
- Small Bowl
- Tongs