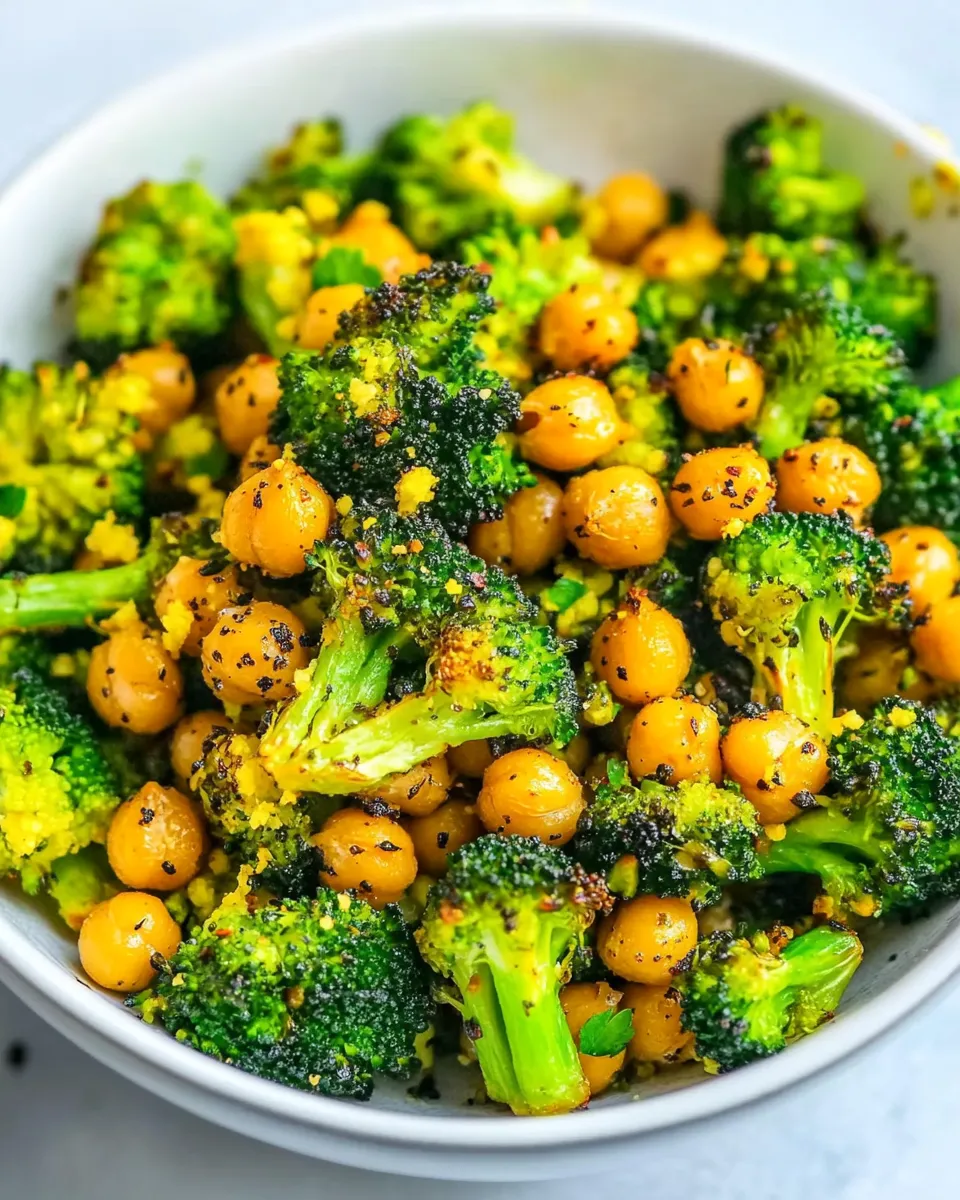
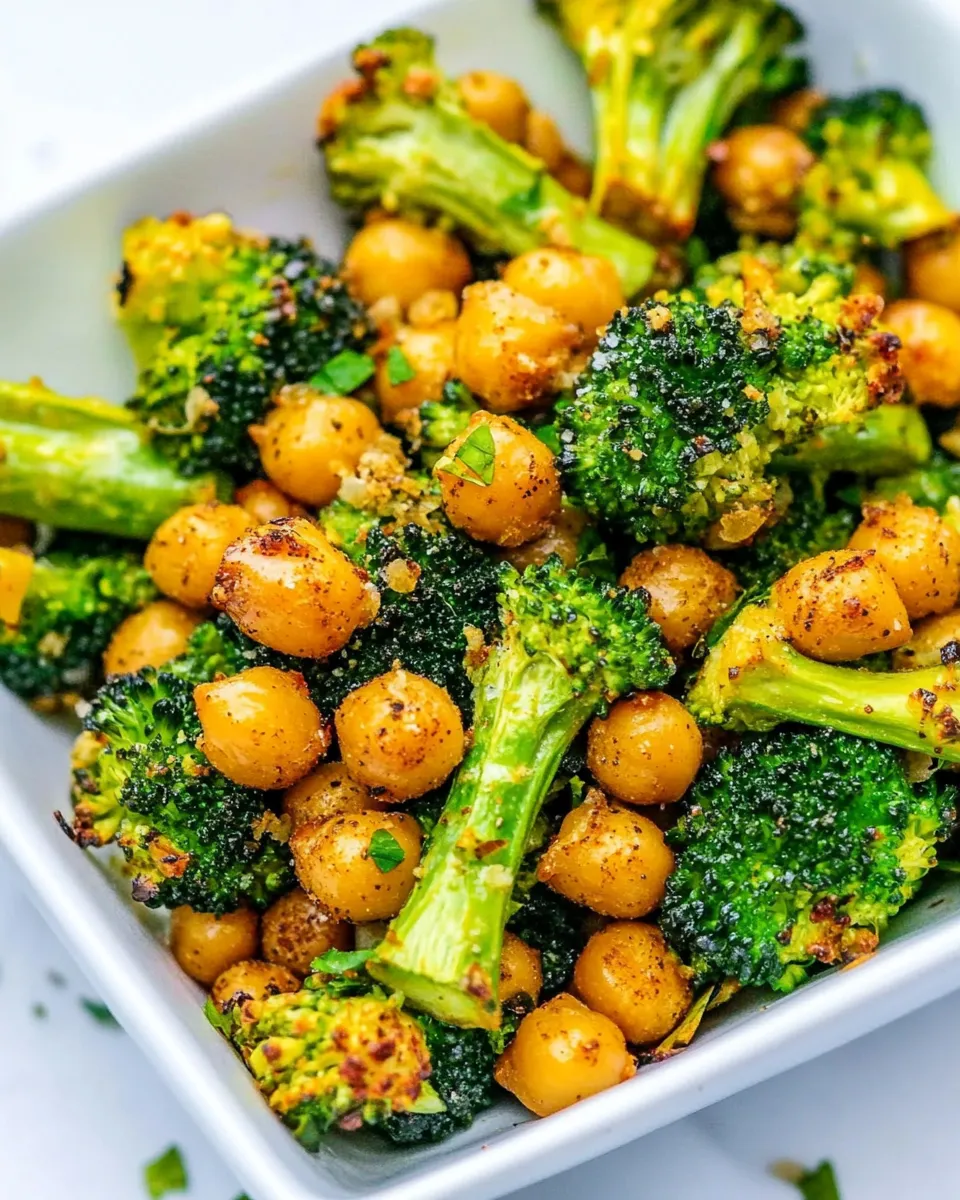
Cheesy Roasted Chickpeas and Broccoli
I love food that feels both indulgent and sensible, and this Cheesy Roasted Chickpeas and Broccoli hits that sweet spot. It’s an easy sheet-pan recipe that turns pantry staples into a satisfying, textural side or a light main. You get crispy, toasty chickpeas, bright-tender broccoli, and that nutty, cheesy lift from nutritional yeast—without having to fry or babysit a pan.
What I appreciate most is how forgiving it is. The steps are straightforward, the timing is flexible depending on how you like your broccoli, and the chickpeas only need a little drying and heat to go from soft to pleasantly firm. It’s the kind of recipe you can scale up or down, tweak for crunch or softness, and still end the oven session with something reliably delicious.
Below I walk through the ingredients, the exact cooking steps, the small gear that makes the job easier, and practical tips from the test kitchen so you don’t waste time. Ready? Let’s get to it.
Ingredient Rundown

Ingredients
- one 15-ounce can chickpeas, garbanzo beans, drained, rinsed, and patted dry (I use no salt added or low salt versions) — The base: provides protein, texture, and browning potential; drying well is key for crisper results.
- olive oil cooking spray, or a tiny bit of olive oil may be substituted — Helps the chickpeas start to crisp and prevents sticking; use spray for even, light coverage.
- 3 to 4 cups broccoli florets — The green component; size matters—bite-sized florets cook evenly and match the chickpea texture.
- 1 to 2 cups sugar snap peas — Adds snap and freshness; sugar snap peas roast quickly so keep them near the smaller end of the pan if you like them crisper.
- 2 to 3 tablespoons olive oil — Used for finishing the pan before seasoning; provides carry for the nutritional yeast and seasonings.
- ¼ to ⅓ cup nutritional yeast — The “cheesy” element—nutty, savory, and dairy-free; amount adjusts the boost of umami.
- ¾ teaspoon kosher salt, or to taste — Balances and seasons; adjust based on the chickpeas’ salt content.
- ¾ teaspoon freshly ground black pepper, or to taste — Adds bright heat and depth; freshly ground is more flavorful than pre-ground.
- fresh parsley, optional for garnishing — A finishing touch: brightens the dish and adds color if you have it on hand.
Cheesy Roasted Chickpeas and Broccoli Cooking Guide
- Preheat the oven to 400°F. Line a sheet pan with foil for easier cleanup.
- Drain and rinse the 15-ounce can of chickpeas, then pat them dry with paper towels until most surface moisture is gone.
- Spread the chickpeas in a single even layer on the prepared sheet pan. Lightly coat them with olive oil cooking spray (or toss them with a tiny bit of olive oil).
- Bake the chickpeas for about 15 minutes.
- Remove the sheet pan from the oven. Add 3 to 4 cups broccoli florets and 1 to 2 cups sugar snap peas to the pan, arranging everything in an even layer.
- Evenly drizzle 2 to 3 tablespoons olive oil over the chickpeas and vegetables. Sprinkle 1/4 to 1/3 cup nutritional yeast, 3/4 teaspoon kosher salt (or to taste), and 3/4 teaspoon freshly ground black pepper (or to taste) over the pan.
- Using tongs or clean hands, gently toss and turn the chickpeas and vegetables on the pan so they are evenly coated with oil and seasonings.
- Return the sheet pan to the oven and bake for about 10 minutes, or until the broccoli is cooked to your preference (about crisp-tender for a shorter time, longer if you prefer softer broccoli).
- Optionally garnish with fresh parsley before serving. Note: the chickpeas will firm up and crisp more as they cool; if you prefer a crisper texture, let the pan sit for an additional 15 minutes before serving.
Why Cheesy Roasted Chickpeas and Broccoli is Worth Your Time
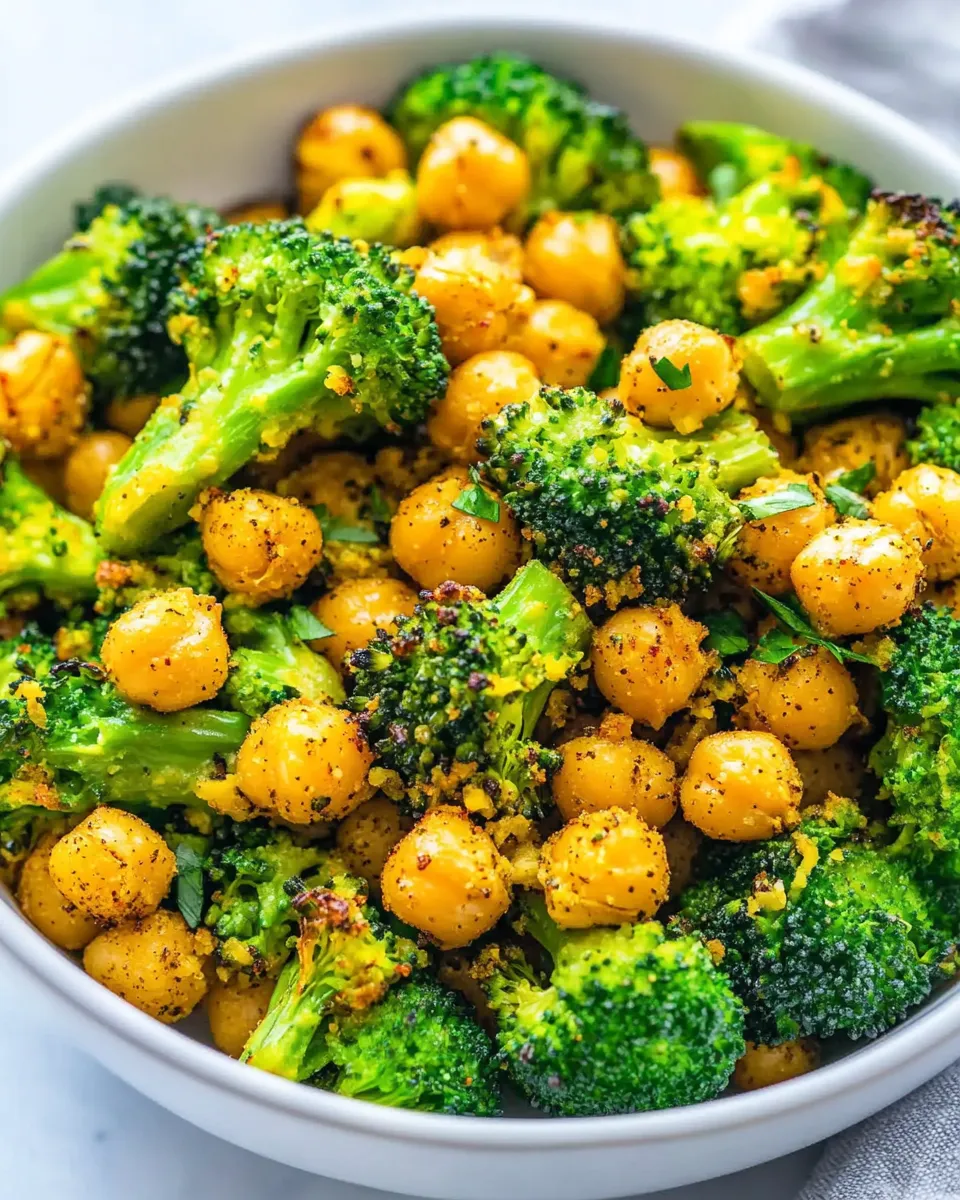
This recipe delivers on texture contrast and straightforward flavor with minimal fuss. Chickpeas bring satisfying heft and a toasted nuttiness after a short bake; broccoli and snap peas add color, crunch, and freshness. The nutritional yeast gives that cheesy, savory lift without dairy—so the dish becomes a reliable option for plant-forward meals or weeknight sides.
It’s efficient: most of the work is passive oven time. You don’t need to stand over a stove or master a complicated technique. The overall cook time is short, the method scales easily, and clean-up is simple when you line the sheet pan. For busy nights or a quick batch to pack into lunches, it checks almost every practical box.
Flavor-Forward Alternatives
- Push the “cheesy” note: use the upper measurement of nutritional yeast (⅓ cup) for a stronger umami hit and slightly more pronounced buttery flavor.
- Play with textures: if you want extra crunch, let the pan sit for the additional 15 minutes after baking so the chickpeas dry and crisp further before serving.
- Adjust the oil: use 2 tablespoons for a lighter finish, 3 tablespoons if you want the seasonings to cling more and the vegetables to blister a bit.
- Broccoli doneness: for crisp-tender, check at about 8–9 minutes during the second bake; for softer florets, leave in closer to 12–15 minutes.
Gear Checklist
- Sheet pan — wide, rimmed for even roasting and to catch any juices.
- Aluminum foil — lines the pan for easier cleanup and helps prevent sticking.
- Paper towels — for patting chickpeas dry, which is crucial for texture.
- Measuring spoons and small cups — to portion oil, yeast, salt, and pepper accurately.
- Tongs or clean hands — for gentle tossing so the chickpeas and vegetables coat evenly.
- Oven thermometer (optional) — handy if your oven runs hot or cool and you want exact control.
Errors to Dodge
- Skipping the drying step: wet chickpeas steam instead of crisp, so pat them thoroughly before the first bake.
- Overcrowding the pan: if chickpeas and vegetables pile up, they steam and lose browning. Use a large sheet pan or two pans if needed.
- Adding oil and seasonings too early: that first 15-minute bake is meant to start crisping chickpeas. Adding the oil/seasonings after that prevents burning of the nutritional yeast and ensures even coating.
- Not letting it rest: chickpeas firm up as they cool; serving immediately can mean a softer texture than intended. Give them a short rest if you want crunch.
Fit It to Your Goals
Weeknight dinner: Serve this alongside a grain (rice, quinoa) or toss with cooked pasta for a quick vegetarian main. The chickpeas add protein and the veggies provide fiber, making it balanced enough for a light meal.
Meal prep: Roast a double batch, cool completely, and portion into containers with a small fresh herb garnish. Chill; the texture holds up well and reheats nicely (see storage notes below).
Snack or side: Use the smaller measures for oil and keep the broccoli chunkier; cooled chickpeas are great for snacking. If you want a more indulgent side, stick to the higher olive oil measure and use the full nutritional yeast amount for a richer finish.
Notes from the Test Kitchen
A few concrete observations from trial runs: drying the chickpeas is consistently the most important step. Pat them until the towels stop picking up wet sheen; you’ll see much better browning. The two-stage bake—first the chickpeas, then add the veg and seasonings—keeps the nutritional yeast from burning and lets the veggies finish at the doneness you prefer.
When testing, I found that placing the broccoli florets with smaller stems cooks them evenly; large stems stay firmer and may need more time. If your oven has hot spots, rotate the pan once during the second bake for uniform color. And a final 10–15 minute rest off the heat will make the chickpeas noticeably firmer and more satisfying.
Refrigerate, Freeze, Reheat
- Refrigerate: Store cooled leftovers in an airtight container in the fridge for up to 4 days. The textures soften over time but remain tasty.
- Freeze: Not ideal to freeze after roasting because the vegetables lose texture; if you must, freeze only the chickpeas in a single layer on a tray, then transfer to a bag for up to 1 month. Thaw and crisp in the oven.
- Reheat: For best texture, reheat on a sheet pan in a 375°F oven for 8–12 minutes until warmed through and the chickpeas re-crisp. Microwaving will warm quickly but soften the chickpeas and veggies.
Quick Q&A
- Can I use dried chickpeas? — Yes, if you cook them first until tender, but the recipe timings will change; drained canned chickpeas are the fastest option.
- How do I make it crispier? — Dry chickpeas well, use a single layer, let the pan rest after baking, and use the higher end of olive oil measures to aid in browning.
- Is nutritional yeast necessary? — It’s the main “cheesy” flavor here; omitting it makes the dish more plainly roasted rather than savory-cheesy.
- Can I swap the vegetables? — You can, but keep similar cooking times in mind: quick-roasting vegetables work best to match the chickpeas’ bake.
Before You Go
Cheesy Roasted Chickpeas and Broccoli is one of those dishes that feels polished without demanding technique or exotic ingredients. It’s easy to adapt, forgiving of small timing variations, and reliably tasty for lunches, sides, or a simple dinner. If you try it, give it the small ritual of patting the chickpeas dry and letting the pan rest at the end—you’ll notice the difference in texture.
If you liked this approach, save the recipe, and try doubling it next time for lunches. And if you have a tweak that worked especially well—share it in the comments so others can try. Happy roasting!

Cheesy Roasted Chickpeas and Broccoli
Ingredients
Ingredients
- one 15-ounce can chickpeas garbanzo beans, drained, rinsed, and patted dry (I use no salt added or low salt versions)
- olive oil cooking spray or a tiny bit of olive oil may be substituted
- 3 to 4 cupsbroccoli florets
- 1 to 2 cupssugar snap peas
- 2 to 3 tablespoonsolive oil
- 1/4 to 1/3 cupnutritional yeast
- 3/4 teaspoonkosher salt or to taste
- 3/4 teaspoonfreshly ground black pepper or to taste
- fresh parsley optional for garnishing
Instructions
Instructions
- Preheat the oven to 400°F. Line a sheet pan with foil for easier cleanup.
- Drain and rinse the 15-ounce can of chickpeas, then pat them dry with paper towels until most surface moisture is gone.
- Spread the chickpeas in a single even layer on the prepared sheet pan. Lightly coat them with olive oil cooking spray (or toss them with a tiny bit of olive oil).
- Bake the chickpeas for about 15 minutes.
- Remove the sheet pan from the oven. Add 3 to 4 cups broccoli florets and 1 to 2 cups sugar snap peas to the pan, arranging everything in an even layer.
- Evenly drizzle 2 to 3 tablespoons olive oil over the chickpeas and vegetables. Sprinkle 1/4 to 1/3 cup nutritional yeast, 3/4 teaspoon kosher salt (or to taste), and 3/4 teaspoon freshly ground black pepper (or to taste) over the pan.
- Using tongs or clean hands, gently toss and turn the chickpeas and vegetables on the pan so they are evenly coated with oil and seasonings.
- Return the sheet pan to the oven and bake for about 10 minutes, or until the broccoli is cooked to your preference (about crisp-tender for a shorter time, longer if you prefer softer broccoli).
- Optionally garnish with fresh parsley before serving. Note: the chickpeas will firm up and crisp more as they cool; if you prefer a crisper texture, let the pan sit for an additional 15 minutes before serving.