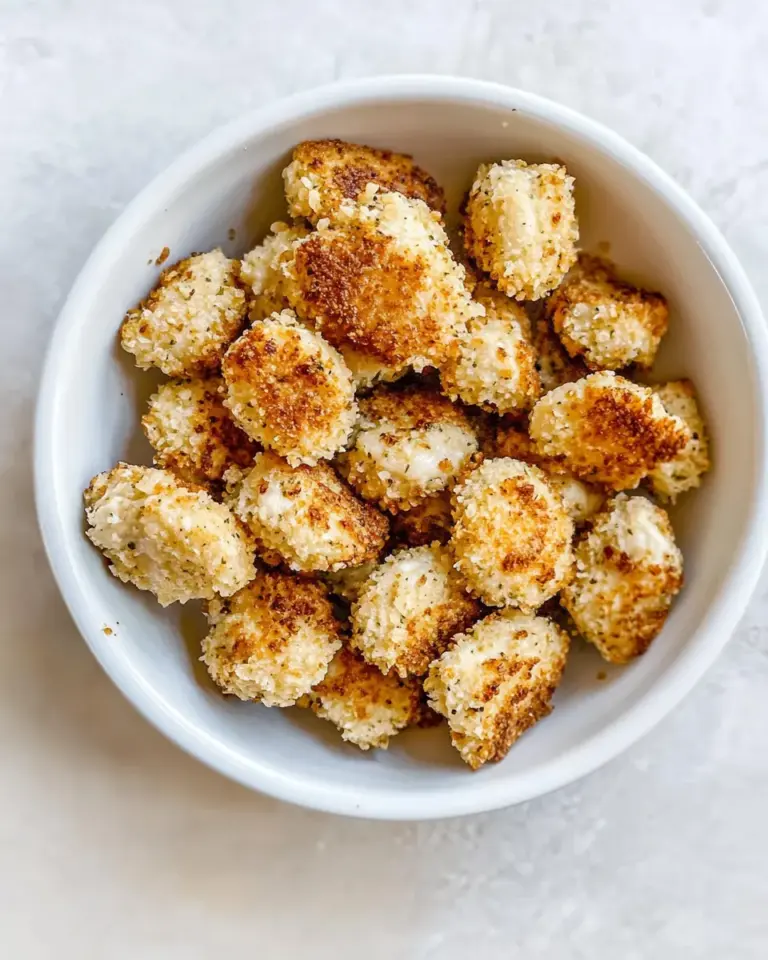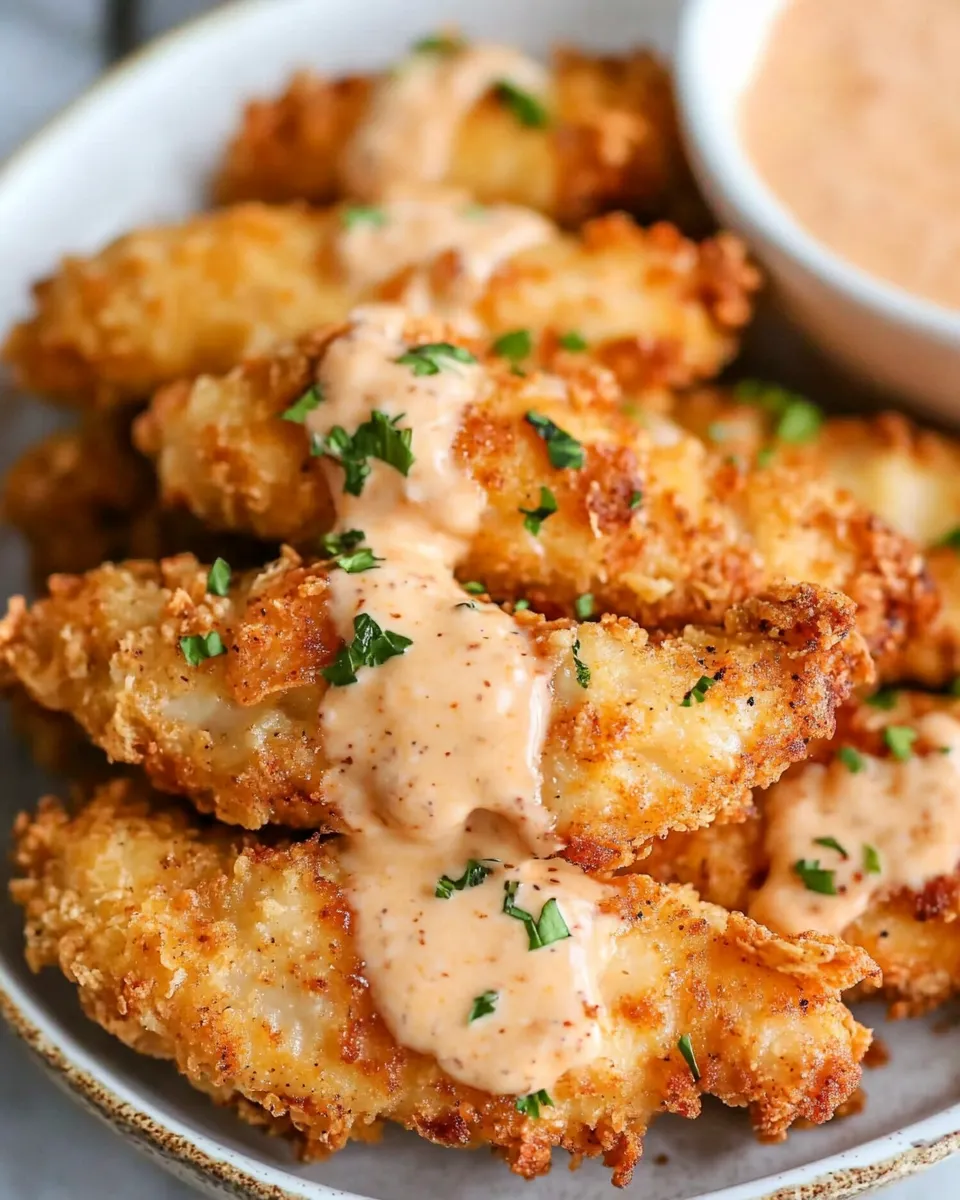
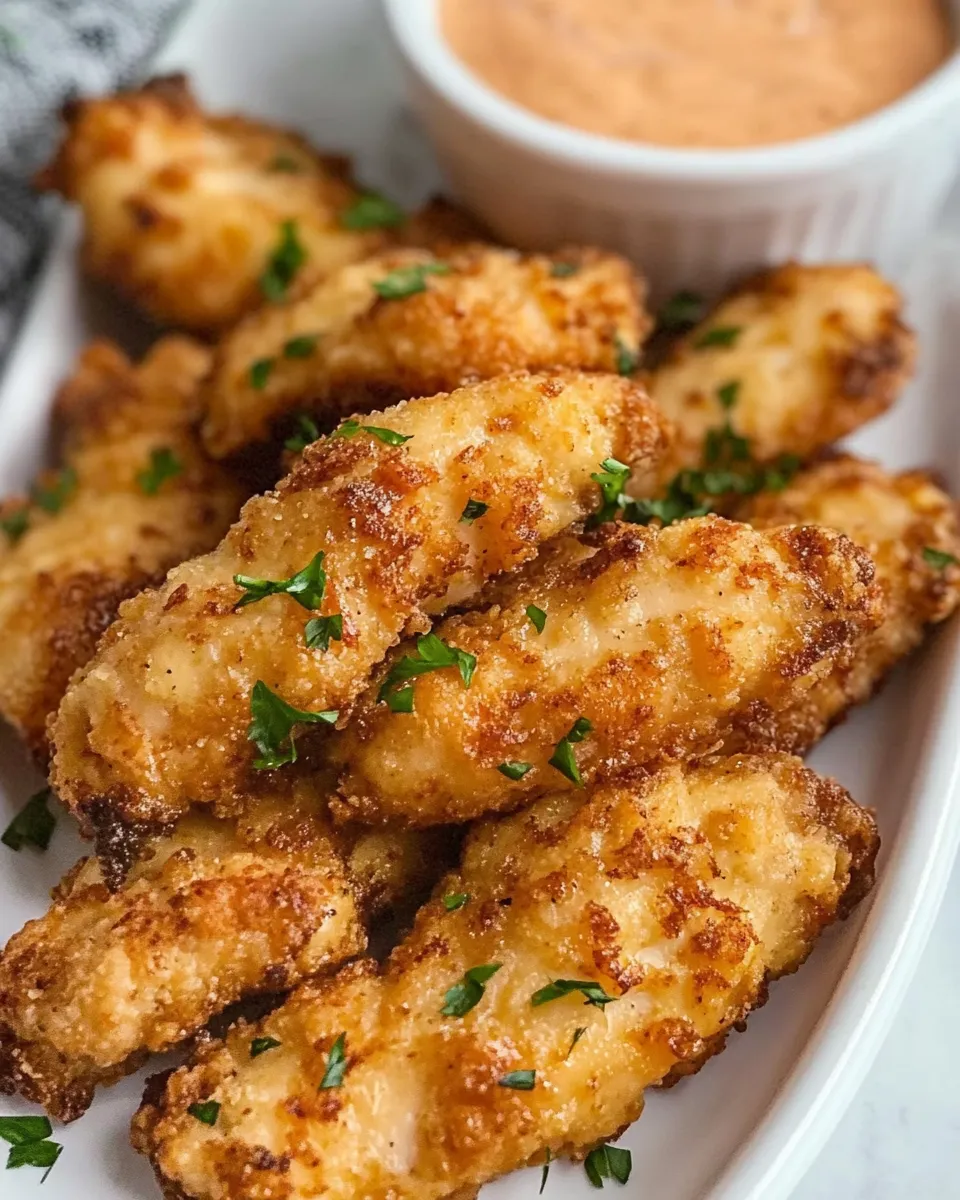
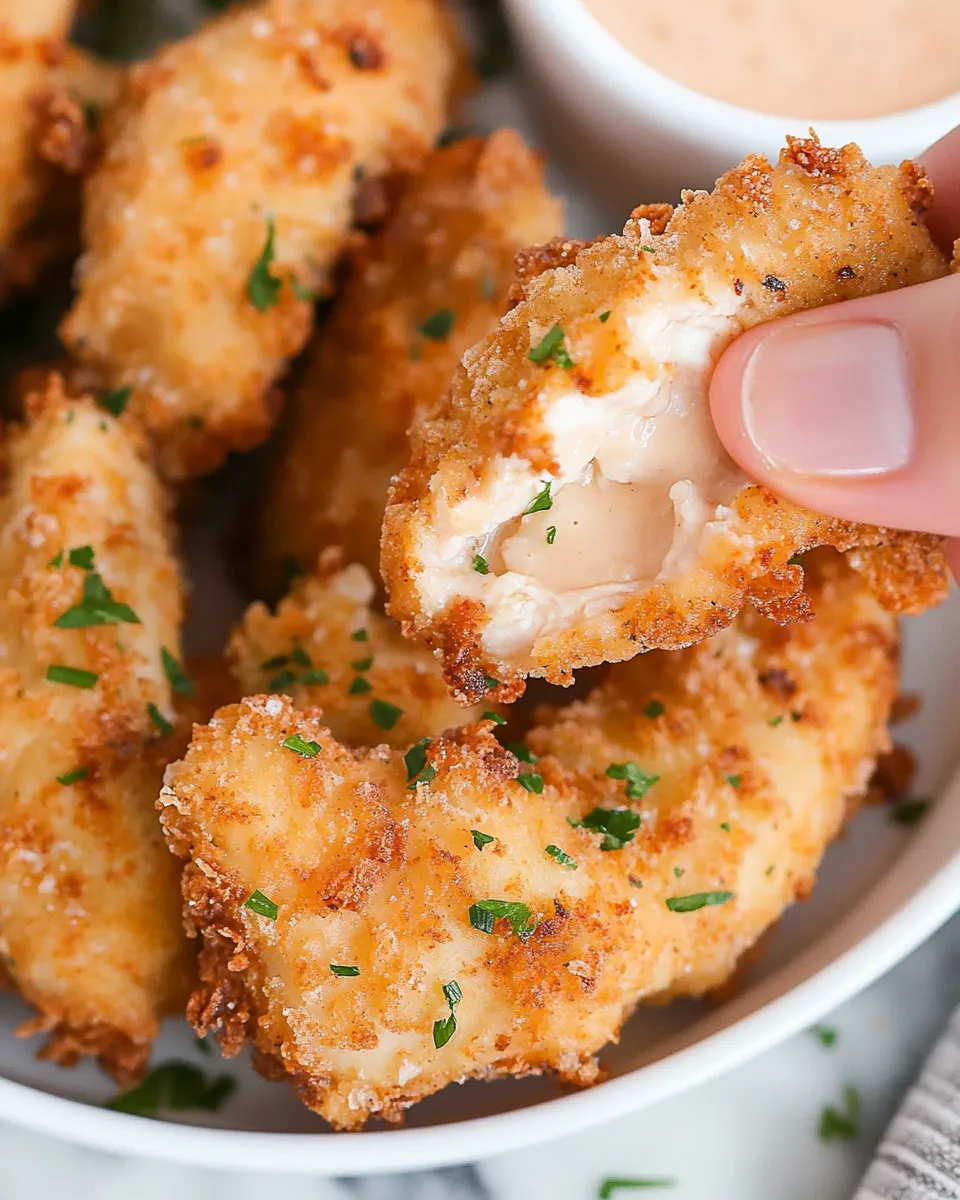
Buttermilk Chicken Tenders
These buttermilk chicken tenders are exactly the sort of recipe I reach for when I want something that feels special but actually comes together without drama. The buttermilk gives the chicken a subtle tang and helps keep the meat tender; the panko + flour crust crisps up beautifully in hot oil. You get crunchy, juicy tenders every time if you follow the rhythm of the method.
There’s no fluff here — just a handful of pantry staples and a straightforward frying routine. I’ll walk you through the why behind the ingredients, the gear that makes the job easier, and the common mistakes to avoid so your tenders are golden and cooked through, not greasy or underdone.
If you want to tweak these to fit a weeknight or a weekend cookout, I’ll give simple, realistic options so you can adapt without losing what makes this recipe great. Read the steps once, prep your station, and you’ll have hot tenders on the table in under an hour from start to finish.
What We’re Using

Ingredients
- 2 pounds chicken tenderloins — about 18 in total, they’re called mini chicken fillets in the UK; this is the main protein amount the recipe is built around.
- oil — for frying; use a neutral, high-smoke oil such as vegetable, canola, or peanut.
- 1 cup buttermilk — used to marinate and tenderize the chicken.
- 1 teaspoon salt — used in the buttermilk to season the meat while it marinates.
- ¼ teaspoon ground black pepper — in the marinade for a touch of seasoning.
- 1 cup all-purpose flour — part of the dry dredge to give structure to the crust.
- 1 cup panko breadcrumbs — for extra crispness; mixed with the flour for texture.
- 1 teaspoon salt — used in the coating mix to season the crust.
- ½ teaspoon ground black pepper — in the coating for balanced spice.
- 1 teaspoon garlic powder — savory backbone of the coating.
- 1 teaspoon paprika — adds color and a subtle smoky-sweet note.
Step-by-Step: Buttermilk Chicken Tenders
- In a large bowl, whisk the 1 cup buttermilk with 1 teaspoon salt and 1/4 teaspoon ground black pepper until combined.
- Add the 2 pounds chicken tenderloins to the buttermilk, toss to coat, cover with plastic wrap, and refrigerate for 30 minutes up to 2 hours.
- In a shallow dish, combine 1 cup all-purpose flour, 1 cup panko breadcrumbs, 1 teaspoon salt, 1/2 teaspoon ground black pepper, 1 teaspoon garlic powder, and 1 teaspoon paprika; mix thoroughly.
- Prepare a place to rest the coated tenders (a wire rack set over a baking sheet or a plate lined with paper towels).
- Pour about 3 inches of oil into a Dutch oven and heat over medium-high heat until it reaches 350°F (180°C). Use a thermometer to check the temperature.
- Remove one chicken tender from the buttermilk, let excess drip off (or gently shake), then dredge it in the flour-panko mixture, pressing lightly so the coating adheres. Place the coated tender on the prepared rack or plate. Repeat with remaining tenders, working in single layers so the coating stays dry and even.
- Fry the tenders in batches so they do not overcrowd the pot. Carefully lower the tenders into the hot oil away from you (use tongs or a slotted spoon) and fry 5–6 minutes per batch, until golden brown and the internal temperature of the thickest piece reads 165°F (74°C).
- Remove cooked tenders to the wire rack or paper towels to drain. Let the oil return to 350°F (180°C) between batches before frying the next batch.
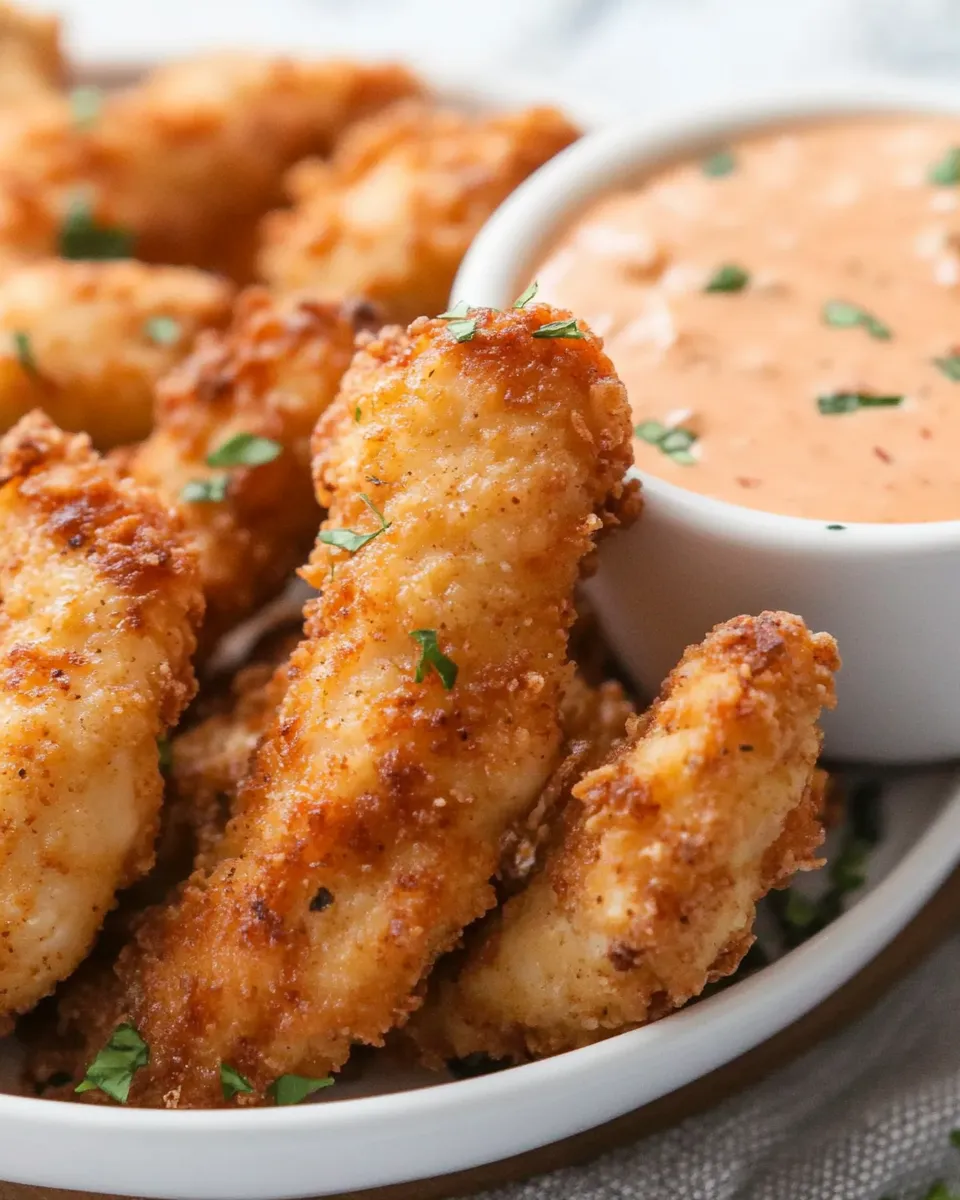
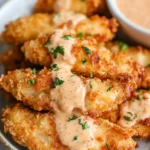
- Serve the buttermilk chicken tenders hot with your preferred dipping sauce and fries.
Why This Recipe is a Keeper

It hits three practical goals at once: easy prep, reliable texture, and familiar, crowd-pleasing flavor. Buttermilk tenderizes and flavors the chicken without extra steps. The flour-panko mixture gives you a crust that’s light and flaky rather than dense. And frying at a controlled 350°F (180°C) yields crisp exteriors and juicy interiors.
This recipe is forgiving. If you can’t marinate for the full two hours, 30 minutes still imparts tenderness and tang. If your oil temperature dips slightly, the crust will brown more slowly but the internal doneness goal (165°F / 74°C) keeps you safe. That reliability makes it a go-to for feeding family, friends, or a hungry weeknight crew.
Substitutions by Category
Protein
If you don’t have tenderloins, thinly sliced boneless skinless chicken breasts work — just trim to similar thickness so pieces cook evenly.
Marinade
Buttermilk is ideal, but you can use plain yogurt thinned slightly with a splash of milk or a milk soured briefly with a small splash of lemon or vinegar. Keep the acidity similar so the tenderizing effect remains.
Coating
Panko gives the best crunch. If panko isn’t available, regular breadcrumbs will do but the crust will be finer and less flaky. You can swap some or all of the flour for cornstarch for ultra-crisp results, but don’t change the overall dry-to-wet ratio drastically.
Frying Oil
Use a neutral oil with a high smoke point: vegetable, canola, peanut. Olive oil isn’t ideal here because it can smoke and flavor the oil at high heat.
Setup & Equipment
Good setup speeds the process and keeps the coating dry and the fry time consistent.
- Dutch oven or heavy pot — deep enough for 3 inches of oil and steady heat distribution.
- Instant-read thermometer — for checking both oil temperature (or a thermometer clip for a candy/deep-fry) and chicken doneness.
- Wire rack and baking sheet — essential for draining so crust stays crisp; paper towels work in a pinch but will steam the underside if layered.
- Shallow dish — for the flour-panko mix; wide enough to dredge comfortably.
- Tongs or slotted spoon — for safe, controlled lowering and removal from the oil.
- Large bowl and plastic wrap — for the buttermilk marinade.
Mistakes Even Pros Make
1) Overcrowding the pot. It drops the oil temperature and leads to greasy tenders. Fry in batches and let the oil return to 350°F (180°C) between batches.
2) Skipping the rack. Laying fried tenders directly on paper towels or a plate causes steam to soften the crust. A wire rack keeps them crisp all over.
3) Pressing the coating too hard. You want the coating to stick, but pressing too firmly compacts the panko and creates a heavier crust. A light press is enough.
4) Guessing temperatures. Use a thermometer. The oil temperature and internal chicken temperature are the two controls that determine crispness and food safety.
Make It Fit Your Plan
Weeknight dinner
Trim the tenders and marinate the minimum 30 minutes. Make a quick slaw or a bagged salad and oven-bake fries to keep things moving. One pot for frying, one sheet pan for fries — minimal cleanup.
Meal prep
Fry as directed, cool completely on a wire rack, then store in the fridge in a shallow airtight container. Re-crisp under a 400°F (200°C) oven for a few minutes before serving.
Party or feed-a-crowd
Fry several batches and keep finished tenders warm on a rack set inside a low oven (around 200–225°F / 95–110°C) for short periods. Serve with an array of dipping sauces so guests can mix flavors.
Flavor Logic
Buttermilk: adds mild acidity that breaks down muscle fibers for tender meat and contributes subtle tang.
Flour + panko: flour creates a base layer that adheres; panko provides the airy, flakey texture that fries up especially crisp.
Salt + pepper: salt seasons the interior and crust; pepper gives a gentle backbone of spice without overpowering other elements.
Garlic powder + paprika: these are straightforward flavor builders — garlic brings savory depth, paprika adds color and a smoky-sweet note that reads well next to dipping sauces.
Oil at 350°F (180°C): hot enough to quickly set the crust and seal juices but not so hot the exterior burns before the inside cooks. The 5–6 minute fry time per batch matches the thickness of tenderloins and the specified temperature.
Keep It Fresh: Storage Guide
- Refrigerator: Store cooked tenders in an airtight container for 3–4 days. Arrange in a single layer if possible to preserve crust texture.
- Freezer: Cool completely, flash-freeze on a tray, then transfer to a freezer-safe bag for up to 1–2 months. Reheat from frozen in a hot oven to avoid sogginess.
- Reheating: Avoid the microwave if you want crispness. Reheat in a preheated 400°F (200°C) oven on a wire rack for 8–12 minutes, or until heated through. A quick finish under the broiler for 30–60 seconds can refresh the crust.
Buttermilk Chicken Tenders Q&A
Can I bake these instead of frying?
You can, but the texture will differ. Bake on a wire rack at a high temperature (425°F / 220°C) and spritz with oil for better browning. Expect a slightly drier, less crunchy finish than frying provides.
How long can the chicken marinate in buttermilk?
The recipe specifies 30 minutes up to 2 hours. Short marinating gives tenderness and flavor; extended beyond a few hours risks an overly soft exterior. Stick to the window provided for best texture.
Why two amounts of salt and pepper appear in the ingredients?
One set of salt and pepper seasons the marinade so the meat absorbs flavor; the second set seasons the coating so the crust is flavorful. Both are needed for balanced seasoning.
How do I know when the oil is back up to temperature between batches?
Use a thermometer to confirm 350°F (180°C). If you don’t have one, drop a small pinch of the flour-panko mix into the oil: it should bubble steadily and begin to brown within a few seconds. That’s a rough cue, but a thermometer is much more reliable.
Save & Share
If you try these tenders, take note of any small changes you make — a different oil, a touch more paprika, or a swap to yogurt — and jot them down. That’s how your version becomes your go-to. Sharing photos and tips helps others too, so pin, post, or send this to a friend who needs a weekend project or a solid weeknight dinner.
Happy frying — and remember: stay organized, keep the oil at 350°F (180°C), and let the wire rack do the final work of keeping the crust crisp. These buttermilk chicken tenders reward a little patience and a straightforward process.
Buttermilk Chicken Tenders
Ingredients
Ingredients
- ?2 poundschicken tenderloinsabout 18 in total they're called mini chicken fillets in the UK
- ?oilfor frying
- ?1 cupbuttermilk
- ?1 teaspoonsalt
- ?1/4 teaspoonground black pepper
- ?1 cupall-purpose flour
- ?1 cuppanko breadcrumbs
- ?1 teaspoonsalt
- ?1/2 teaspoonground black pepper
- ?1 teaspoongarlic powder
- ?1 teaspoonpaprika
Instructions
Instructions
- In a large bowl, whisk the 1 cup buttermilk with 1 teaspoon salt and 1/4 teaspoon ground black pepper until combined.
- Add the 2 pounds chicken tenderloins to the buttermilk, toss to coat, cover with plastic wrap, and refrigerate for 30 minutes up to 2 hours.
- In a shallow dish, combine 1 cup all-purpose flour, 1 cup panko breadcrumbs, 1 teaspoon salt, 1/2 teaspoon ground black pepper, 1 teaspoon garlic powder, and 1 teaspoon paprika; mix thoroughly.
- Prepare a place to rest the coated tenders (a wire rack set over a baking sheet or a plate lined with paper towels).
- Pour about 3 inches of oil into a Dutch oven and heat over medium-high heat until it reaches 350°F (180°C). Use a thermometer to check the temperature.
- Remove one chicken tender from the buttermilk, let excess drip off (or gently shake), then dredge it in the flour-panko mixture, pressing lightly so the coating adheres. Place the coated tender on the prepared rack or plate. Repeat with remaining tenders, working in single layers so the coating stays dry and even.
- Fry the tenders in batches so they do not overcrowd the pot. Carefully lower the tenders into the hot oil away from you (use tongs or a slotted spoon) and fry 5–6 minutes per batch, until golden brown and the internal temperature of the thickest piece reads 165°F (74°C).
- Remove cooked tenders to the wire rack or paper towels to drain. Let the oil return to 350°F (180°C) between batches before frying the next batch.
- Serve the buttermilk chicken tenders hot with your preferred dipping sauce and fries.
Equipment
- Dutch Oven
- Thermometer
- Wire Rack
- Baking Sheet
- Tongs
- Slotted Spoon
- Paper Towels
Notes
You really need to soak the chicken in buttermilk for at least 30 minutes and up to 2 hours for tender and moist chicken.
If you like hot chicken, add about 1 tablespoon of hot sauce to the buttermilk mixture.
When you add chicken in the hot oil, the temperature will drop a little, that’s why I recommend frying chicken in small batches. You also don’t want it to rise too much as the chicken will become too brown and still be raw on the inside. I recommend using a kitchen thermometer to check the temperature of the oil and doneness of the chicken (must reach 165°F/74°C).
Freezing.Cook the chicken tenders as directed in the recipe, allow them to cool down completely then place in a freezer bag and freeze for up to 3 months.