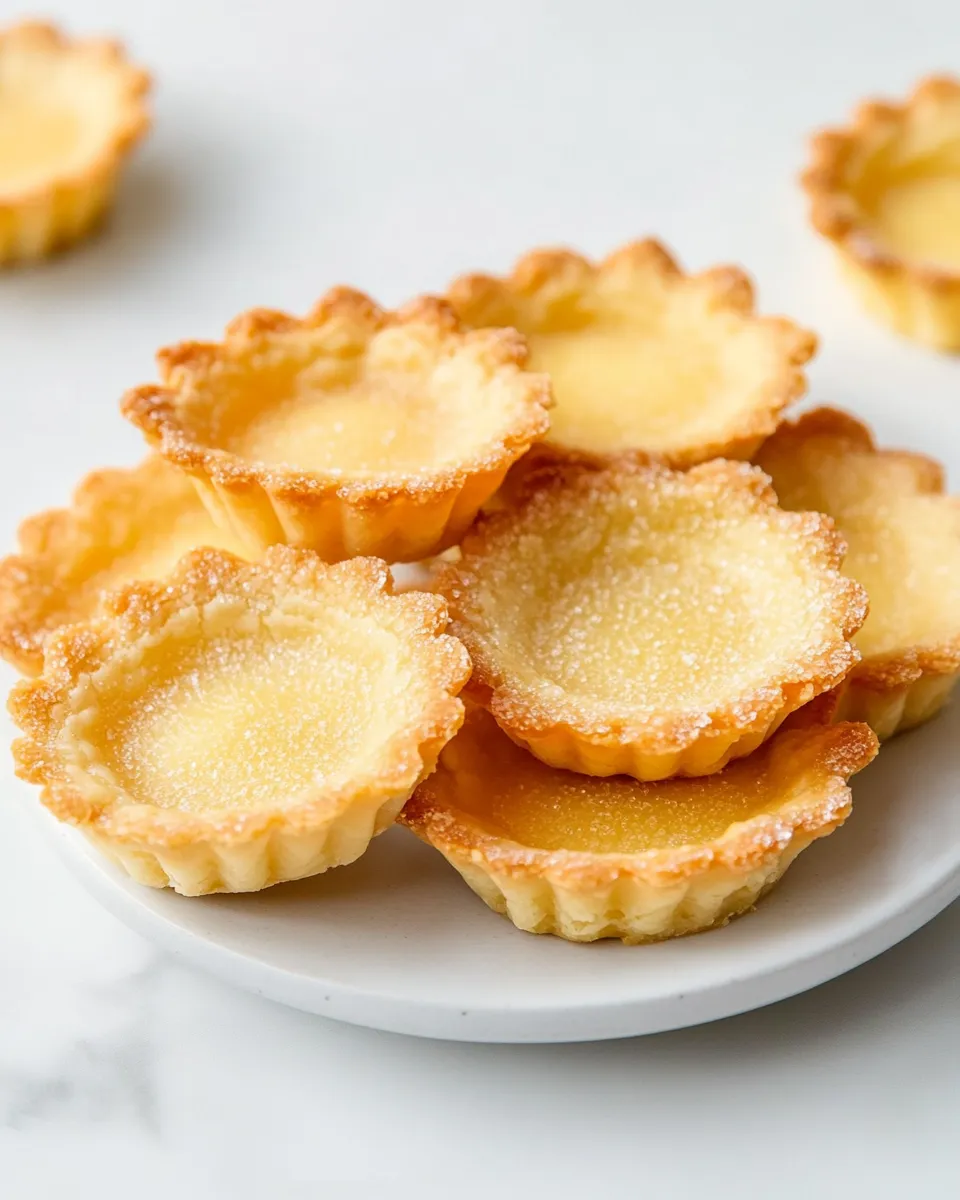
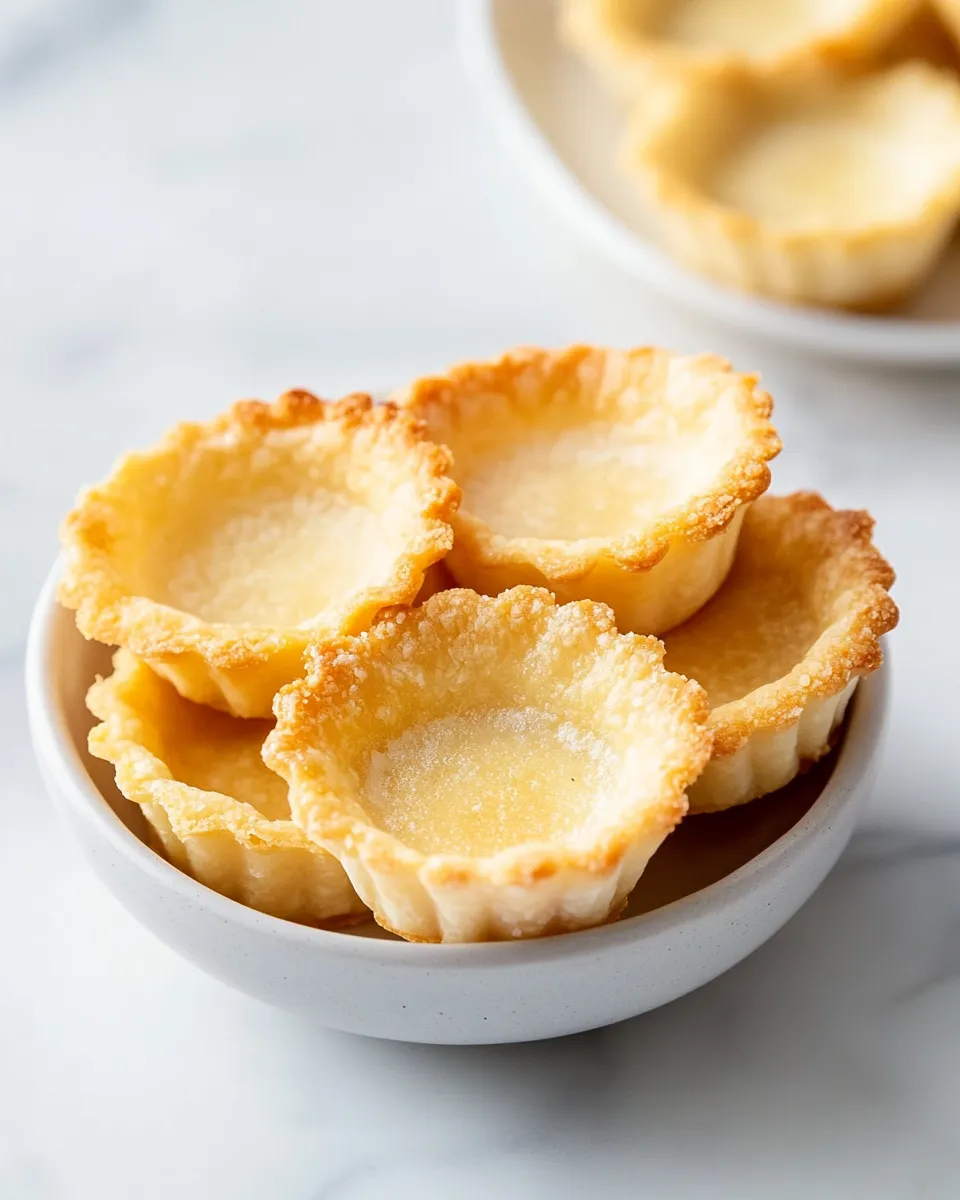
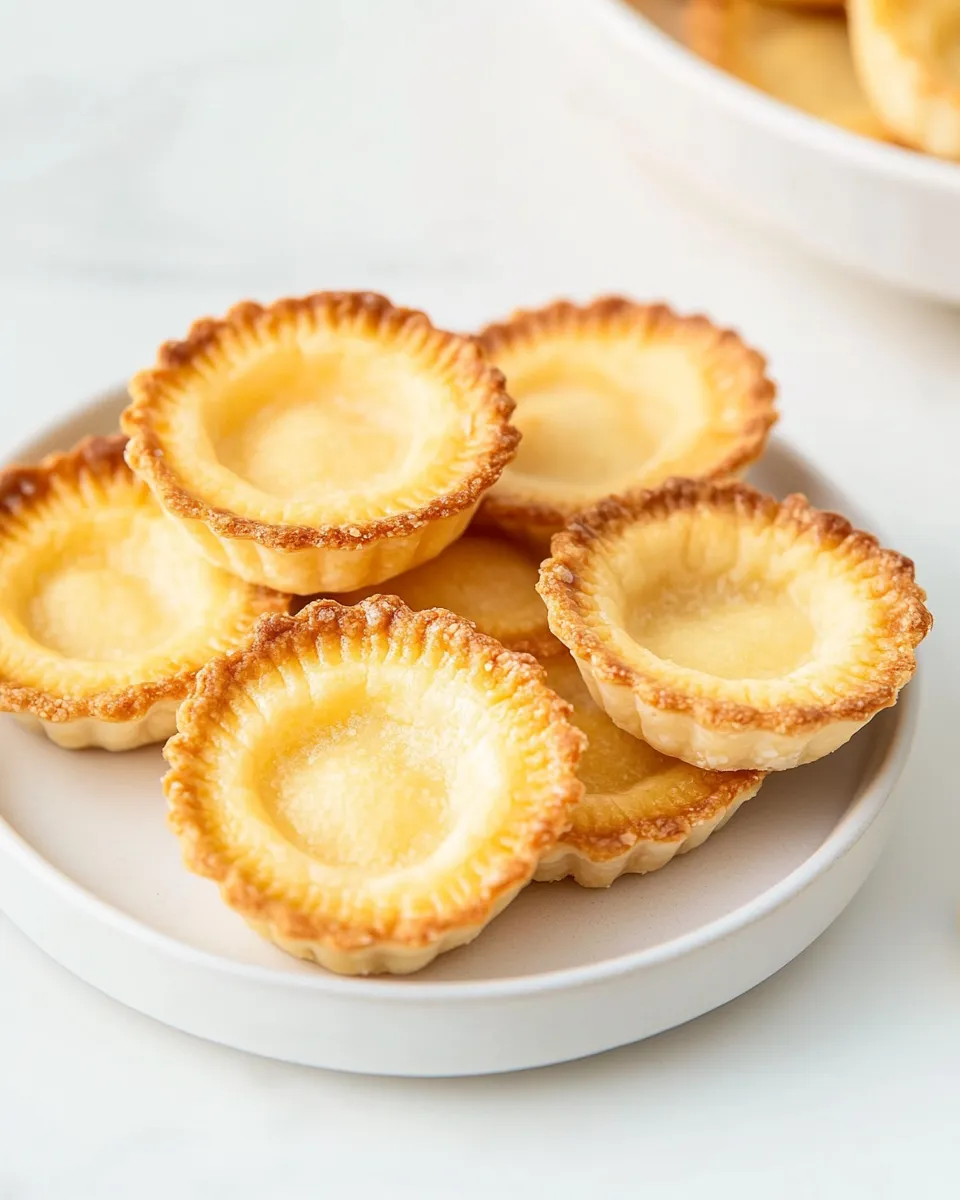
Mini Tart Shells
There is something endlessly satisfying about tiny, buttery tart shells. They’re the perfect vehicle for everything from lemon curd and chocolate ganache to fresh fruit and light custard. This recipe yields crisp, delicate mini shells made from a tender, slightly sweet dough that holds its shape and bakes up with beautiful edges. I tested these several times to get the texture right—flaky but not crumbly, rich but not heavy—and the result is a simple dough that’s forgiving and very quick to work with.
Before we dive in, a quick note about the recipe format: the ingredient list below is the exact source of truth for amounts and names. The directions have been rewritten into clear step-by-step instructions that follow the same order as the original method, and they use those exact ingredient names and quantities. This keeps things consistent and easy to follow when you’re ready to bake.
Why these mini tart shells work

Three things make these Mini Tart Shells stand out: the balance of dry to fat, the addition of both granulated and powdered sugar, and the use of egg yolks plus a touch of whole milk and vanilla. The butter provides flavor and flakiness; the combination of sugars gives a hint of sweetness without becoming cake-like; and the yolks add richness and help the dough bind so it can be rolled thin and shaped into mini pans. Because the recipe uses only yolks, the shells remain tender and slightly short, which is ideal for bite-sized tarts.
Ingredients
- 3 cups all-purpose flour
- 1 pinch kosher salt
- 1 cup unsalted butter, room temperature
- 1/4 cup granulated sugar
- 1 cup powdered sugar
- 3 egg yolks
- 1 teaspoon whole milk
- 1 1/2 teaspoons vanilla extract
Equipment you’ll need
- Mini tart pans or a mini muffin tin (about 24 shells depending on size)
- Stand mixer with paddle attachment or a bowl and hand mixer
- Rolling pin
- Plastic wrap or reusable dough cover
- Baking sheet
- Fork or tart weights (if blind baking)
Flavor and filling ideas
These mini shells are incredibly versatile. Once baked and cooled, fill them with:
- Lemon curd and a dollop of whipped topping
- Chocolate ganache and a sprinkle of sea salt
- Pastry cream and fresh berries
- Caramel and toasted nuts
Because the shells are slightly sweet, they complement both bright, tangy fillings and rich, decadent ones.
Step-by-step directions
The following directions are organized into clear steps. Read through the full set once before you start so you know what’s coming. The ingredients above are the authoritative list for names and amounts.
-
Prepare your workspace and equipment.
Set your oven to 350°F (175°C). If you plan to blind-bake the shells before filling, now is a good time to arrange your mini tart pans or mini muffin tin on a baking sheet. Make sure your unsalted butter is at room temperature so it will cream smoothly with the sugars.
-
Combine the dry ingredients.
In a medium bowl, whisk together 3 cups all-purpose flour and 1 pinch kosher salt. Set this bowl nearby—you’ll add the dry ingredients to the creamed butter mixture in a later step.
-
Cream the butter and sugars.
In the bowl of a stand mixer fitted with the paddle attachment, or in a large bowl with a hand mixer, add 1 cup unsalted butter (room temperature), 1/4 cup granulated sugar, and 1 cup powdered sugar. Beat on medium speed until the mixture is light, pale, and slightly fluffy, about 2 to 3 minutes. Scrape down the sides of the bowl as needed to ensure even mixing.
-
Add the egg yolks and liquids.
With the mixer on low, add 3 egg yolks, 1 teaspoon whole milk, and 1 1/2 teaspoons vanilla extract to the creamed butter and sugars. Mix until the yolks and liquids are fully incorporated and the mixture is smooth. Avoid overmixing once the yolks are added; you want a cohesive dough but not excessive gluten development.
-
Incorporate the dry ingredients into the wet.
Gradually add the flour and salt mixture to the butter mixture in two or three additions. Mix on low speed just until the dough comes together and there are no large streaks of flour. The dough should be soft and slightly tacky but not sticky; if it feels too dry, you can add the tiniest additional splash of whole milk, but the listed amounts should be sufficient.
-
Form and chill the dough.
Turn the dough out onto a lightly floured surface. Gently knead it a few times to bring it together, then divide it into portions that are easy to work with. Flatten each portion into a disk about 1/2-inch thick, wrap tightly in plastic wrap, and chill in the refrigerator for at least 30 minutes. Chilling firms up the butter and makes rolling much easier.
-
Roll out and cut the dough.
Lightly flour your work surface and rolling pin. Roll each disk of dough to about 1/8-inch thickness. Use a round cutter slightly larger than the diameter of your mini tart pan or muffin cup to cut circles. Re-roll scraps as needed until all dough is used. For neat edges, try to minimize re-rolling the same dough piece multiple times.
-
Line the mini pans.
Gently press each dough circle into a tart pan or muffin cup, pushing the dough up the sides to form an even shell and trimming any excess from the edges. Use your fingers to press the dough into any flutes for a decorative edge, or keep the edges smooth for a classic look.
-
Optional: Chill again before baking.
For the best shape retention and a flakier texture, place the lined tart pans on a baking sheet and chill in the refrigerator for 15 minutes just before baking. This step helps prevent shrinkage during baking by firming the butter again.
-
Bake the shells.
If you prefer to bake the shells plain (for soft-shelled tarts that will be filled with no-bake fillings), bake at 350°F (175°C) for about 12 to 15 minutes, or until the edges are lightly golden and set. If you need a sturdier shell for very wet fillings, blind-bake: line each shell with parchment and fill with pie weights or dried beans, bake for 8 minutes, then remove weights and bake an additional 5 to 7 minutes until golden. Keep an eye on them so they don’t overbrown.
-
Cool and unmold.
Remove the tart shells from the oven and let them cool in the pans on a wire rack for 10 minutes. Then carefully invert each pan or gently lift the mini tarts out with a thin offset spatula. Allow the shells to cool completely before filling; warm shells may soften or break when filled.
Storage and make-ahead tips
You can make the dough up to 48 hours ahead and keep it wrapped in the refrigerator. For longer storage, freeze the dough disks for up to 3 months; thaw in the refrigerator overnight before rolling. Fully baked shells will keep in an airtight container at room temperature for 2 to 3 days, or in the freezer for up to 1 month. If frozen, let the shells come to room temperature before filling so they don’t sweat.
Common troubleshooting
- If your dough cracks when you roll it: let it sit at room temperature for 5 to 10 minutes, then press the cracks together with your fingers and continue rolling. Over-chilled dough will crack; under-chilled dough will be sticky.
- If your shells shrink during baking: make sure you chill them after lining the pans and avoid stretching the dough when pressing it into the pans. Blind-baking with weights also helps maintain shape.
- If the shells are too crumbly when baked: ensure you mixed the yolks fully into the dough; yolks help bind. Also avoid overbaking, which can dry them out.
Recipe yield and serving
This batch will make about 20–24 mini tart shells depending on the size of your pans. They are perfectly sized for bite-sized desserts at parties, or you can make a dozen for an elegant dessert platter when paired with a few different fillings.
Notes on ingredient choices
Using both granulated and powdered sugar gives the dough a subtle sweetness and a fine texture—powdered sugar melts into the butter, creating a slightly different crumb than granulated sugar alone. Egg yolks enrich and tenderize the dough while keeping the structure strong enough for shaped shells. Whole milk adds just a touch of moisture to bind the dough; only a teaspoon is needed because the yolks supply most of the liquid.
Final thoughts
Mini pastry shells are one of those small baking wins that elevate any dessert table. They make it easy to offer a variety of flavors without committing to a single large tart. The dough in this recipe is straightforward to make, forgiving for home bakers, and produces consistently beautiful, tasty shells. Crank up your favorite playlist, roll out the dough, and enjoy the satisfaction of tiny, perfect tarts.
Printable recap
Ingredients: 3 cups all-purpose flour, 1 pinch kosher salt, 1 cup unsalted butter room temperature, 1/4 cup granulated sugar, 1 cup powdered sugar, 3 egg yolks, 1 teaspoon whole milk, 1 1/2 teaspoons vanilla extract.
Step-by-step directions recap:
- Preheat oven to 350°F (175°C) and prepare mini tart pans on a baking sheet.
- Whisk together 3 cups all-purpose flour and 1 pinch kosher salt.
- Cream 1 cup unsalted butter, 1/4 cup granulated sugar, and 1 cup powdered sugar until light and fluffy.
- Mix in 3 egg yolks, 1 teaspoon whole milk, and 1 1/2 teaspoons vanilla extract until smooth.
- Add the flour mixture in batches and mix until the dough comes together.
- Form dough into disks, wrap, and chill at least 30 minutes.
- Roll dough to 1/8-inch thickness, cut rounds, and line mini pans.
- Chill lined pans 15 minutes (optional), then bake 12–15 minutes for unfilled shells; blind-bake with weights for sturdier shells.
- Cool in pans 10 minutes, then unmold and cool completely before filling.
Enjoy filling your Mini Tart Shells with whatever flavors you love. These little pastries are as versatile as they are delicious—perfect for celebrations, tea time, or a beautiful finish to a dinner party.

Mini Tart Shells
Ingredients
- 3 cups all-purpose flour
- 1 pinch kosher salt
- 1 cup unsalted butter room temperature
- 1/4 cup granulated sugar
- 1 cup powdered sugar
- 3 egg yolks
- 1 teaspoon whole milk
- 1 1/2 teaspoons vanilla extract
Instructions
- Sift together the all-purpose flour and kosher salt into a bowl and set aside.
- In a stand mixer fitted with the paddle attachment, beat the room-temperature unsalted butter with the granulated sugar and powdered sugar until smooth and creamy.
- In a small bowl, whisk the egg yolks with the whole milk and vanilla extract, then gradually add this mixture to the creamed butter, scraping the bowl as needed.
- On low speed, slowly add the flour and salt mixture to the butter mixture and mix until the dough begins to come together; if it seems dry, add additional milk 1/2 teaspoon at a time until it holds.
- Gather the dough into a disk, wrap tightly in plastic wrap, and chill in the refrigerator for 1 hour.
- Preheat the oven to 350°F (175°C).
- On a lightly floured surface, roll the chilled dough to an even thickness and cut rounds to fit mini tart pans; press each round into the molds and prick the bottoms with a fork.
- Chill the formed tart shells in the refrigerator for 15 minutes, then bake on a baking sheet for 12–15 minutes, or until the edges are golden brown.
- Remove from the oven and let the mini tart shells cool in the pans before removing.
Equipment
- stand mixer with paddle attachment
- Mixing Bowls
- Rolling Pin
- mini tart pans or mini tart molds
- Fork
- Plastic Wrap
- Baking Sheet
Notes
- Chill the dough well to prevent shrinking during baking.
- If dough is too crumbly, add milk 1/2 teaspoon at a time.
- Use powdered sugar for a more tender crust.