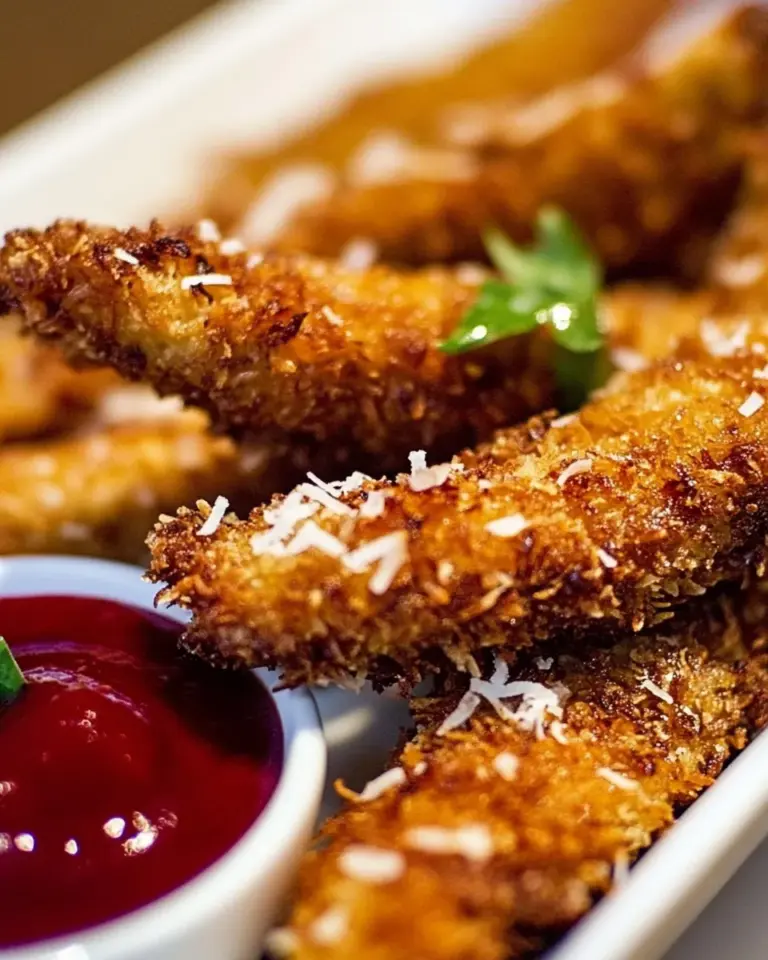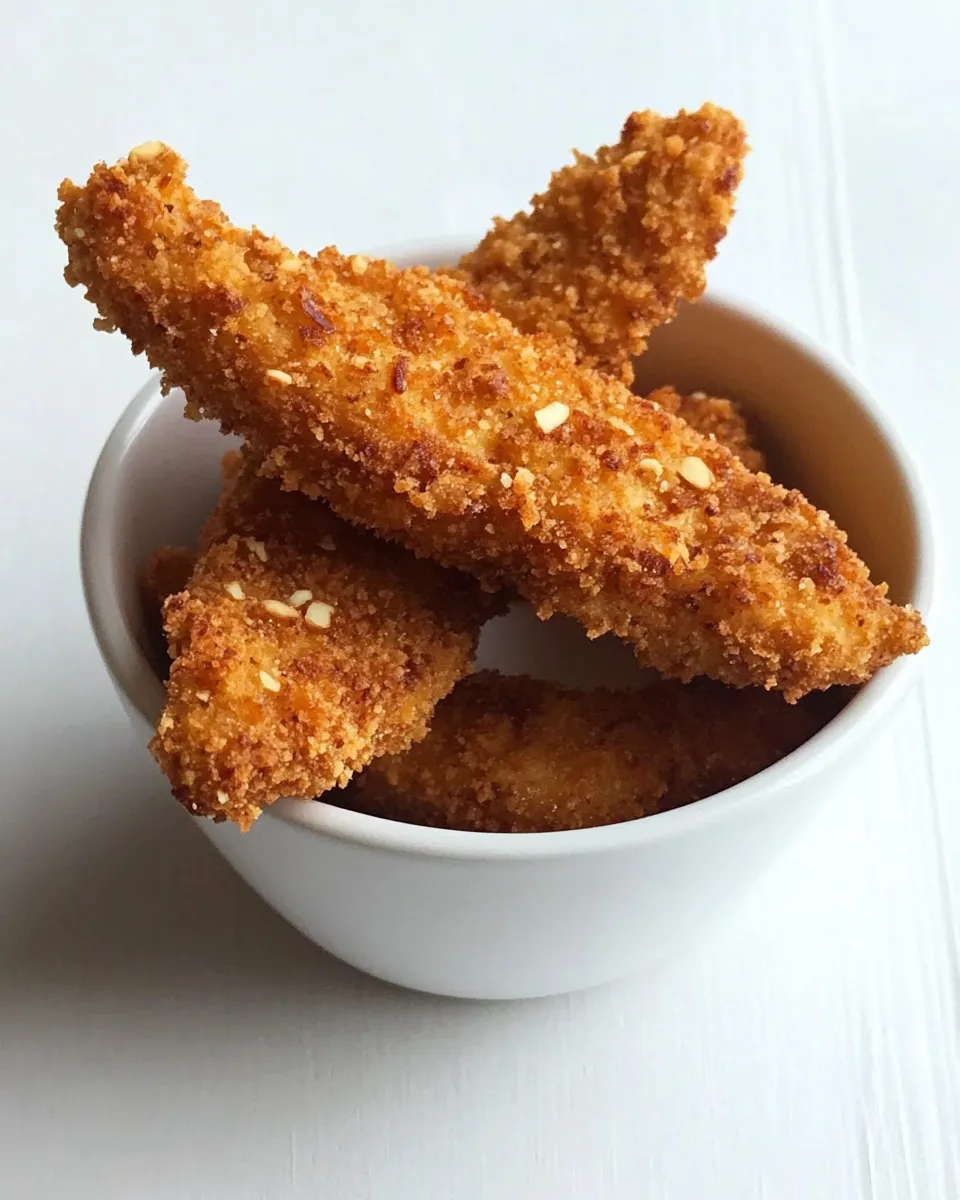
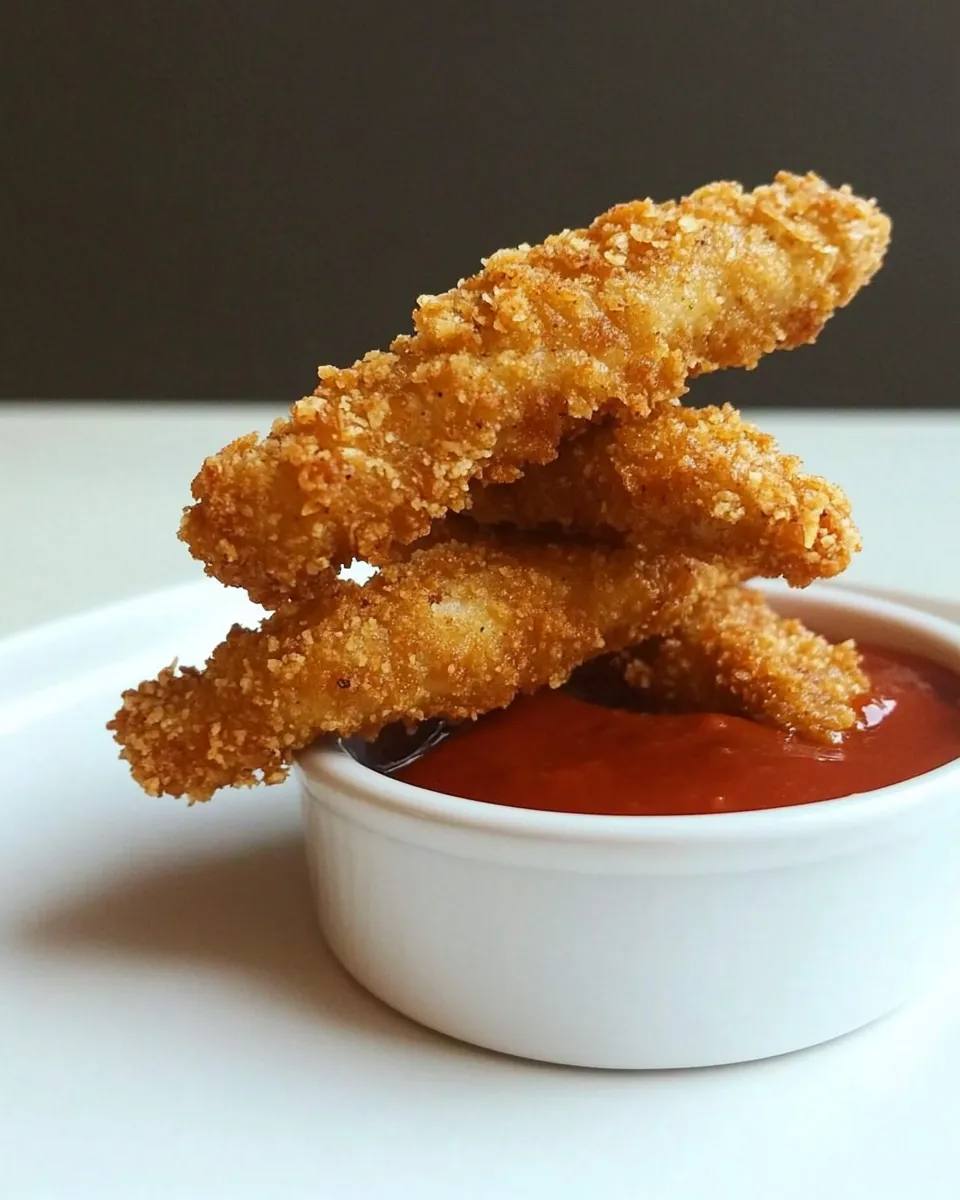
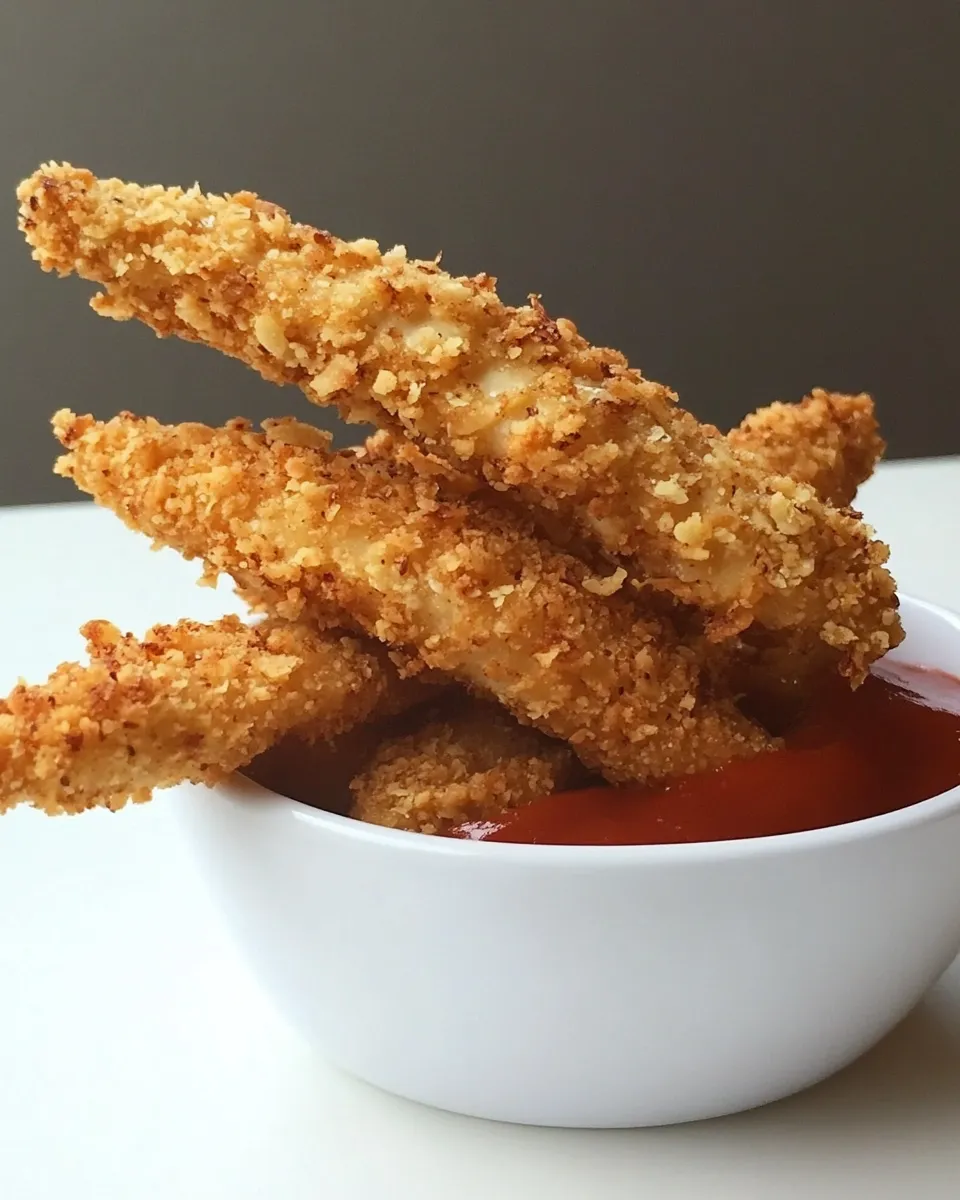
Buttermilk Almond Crusted Chicken Fingers.
These Buttermilk Almond Crusted Chicken Fingers are crispy, tender, and naturally nutty thanks to almond meal and whole wheat panko. They strike the perfect balance between crunchy coating and juicy interior, plus the buttermilk soak keeps the tenders supremely moist. I love serving them with a bright dipping sauce and a simple salad for a weeknight meal that feels special.
Why this recipe works: the buttermilk does the heavy lifting, gently tenderizing the chicken and helping the crust cling. Almond meal adds a toasty flavor and a slightly coarse texture that contrasts beautifully with whole wheat panko breadcrumbs. A touch of smoked paprika gives the crust a warm, smoky note without overpowering the chicken.
Ingredients

- 1 pound boneless, skinless chicken tenders
- 2 1/2 cups buttermilk
- 1 cup almond meal
- 3/4 cup whole wheat panko breadcrumbs
- 1/4 cup whole wheat pastry flour, or all purpose
- 1/2 teaspoon salt
- 1/2 teaspoon pepper
- 1/2 teaspoon smoked paprika
Equipment
- Large bowl for the buttermilk soak
- Shallow dish or pie plate for dredging
- Baking sheet lined with parchment, or a skillet if frying
- Wire rack (optional, for baking)
- Tongs or two forks for handling the chicken
Taste and texture notes
Expect a crunchy exterior from the almond meal and panko, with a tender, juicy inside thanks to the buttermilk soak. The whole wheat elements add a hint of earthiness and a more complex crumb than plain white breadcrumbs. Smoked paprika gives a faint, comforting warmth that plays nicely with the nuttiness of the almond meal.
Make-ahead and storage
You can soak the chicken in buttermilk up to 24 hours ahead—keep it covered in the fridge. Once assembled and baked or cooked, store leftovers in an airtight container in the refrigerator for up to 3 days. Reheat in a 375°F oven for 8–10 minutes to restore crispness.
Step-by-step Instructions
The directions below are rewritten for clarity and follow the ingredient amounts listed above. Read through once before beginning and set up your workspace so everything is within easy reach.
- Prepare the buttermilk soak. Pour 2 1/2 cups of buttermilk into a large bowl. Add the raw chicken tenders to the buttermilk, making sure they are fully submerged. Cover the bowl and refrigerate for at least 30 minutes, or up to 24 hours for extra tenderness. The buttermilk will gently tenderize the chicken and help the coating stick.
- Mix the dry coating. In a shallow dish or pie plate, combine 1 cup almond meal, 3/4 cup whole wheat panko breadcrumbs, 1/4 cup whole wheat pastry flour (or all-purpose flour), 1/2 teaspoon salt, 1/2 teaspoon pepper, and 1/2 teaspoon smoked paprika. Stir the mixture with a fork until the seasonings are evenly distributed and the texture is uniform. This will be your dredging station for coating the tenders.
- Heat your cooking surface (if pan-frying). If you plan to pan-fry the chicken fingers, heat a thin layer of neutral oil in a skillet over medium heat until shimmering. Use enough oil to coat the bottom of the pan and allow the coating to brown evenly. If baking, preheat the oven to 425°F and line a baking sheet with parchment paper; place a wire rack on the sheet if you have one to allow hot air to circulate for crisper results.
- Dredge the chicken. Working one piece at a time, remove a chicken tender from the buttermilk, letting excess drip back into the bowl. Press the wet tender into the dry coating, turning and pressing so the almond-panko mixture adheres to all sides. Shake off any loose crumbs. Place the coated tender on the prepared baking sheet or set aside on a plate if frying immediately. Repeat until all tenders are coated.
- Cook the tenders. For baking: Arrange the coated tenders in a single layer on the rack-lined baking sheet, leaving a little space between each piece. Lightly spray or brush the tops with a bit of oil for better browning. Bake at 425°F for 12–15 minutes, flipping once halfway through, until the coating is golden and an instant-read thermometer inserted into the thickest part reads 165°F. For pan-frying: Carefully add the coated tenders to the hot skillet without overcrowding. Fry 3–4 minutes per side over medium heat, turning once, until the crust is deep golden brown and the internal temperature reaches 165°F. Transfer cooked tenders to a paper-towel-lined plate to drain briefly.
- Rest and serve. Let the chicken fingers rest for a couple of minutes so juices redistribute and the coating firms up. Serve warm with your favorite dipping sauces—think tangy yogurt-based dips, honey-mustard, or a bright lemon aioli—and a simple green salad or roasted veggies.
Serving suggestions
- Simple yogurt dip: Mix plain yogurt with a squeeze of lemon juice, a pinch of salt, and chopped fresh herbs.
- Spicy honey-mustard: Combine mustard, honey, and a splash of hot sauce to taste.
- Light slaw: Shredded cabbage, carrot, apple, a splash of apple cider vinegar, and a touch of olive oil make a crisp side.
Recipe tips and troubleshooting
- If the coating slides off while cooking, the tenders were either too wet or the coating wasn’t pressed on firmly enough. Pat the chicken lightly to remove excessive buttermilk before dredging and press crumbs into the surface when coating.
- To speed up prep, set up an assembly line: buttermilk bowl, dredging plate, and the baking sheet or pan ready to receive each coated tender.
- For extra crunch, pulse the almond meal and panko briefly in a food processor to make a coarser, crumbly texture, but avoid turning it into flour.
- If baking, using a wire rack lifts the chicken off the sheet and allows hot air to crisp all sides; if you don’t have a rack, flip the tenders once during baking for even browning.
Nutrition note
These chicken fingers use almond meal and whole wheat products to add protein and fiber while keeping the exterior crisp. Buttermilk adds moisture with a touch of tang without adding a lot of fat. Calories and macronutrients will vary based on cooking method—pan-frying will add more oil-based calories than baking.
Why I love this version
It feels like an elevated comfort food: simple ingredients, big flavors, and a crunchy texture that keeps every bite interesting. The almond meal brings a subtle nuttiness that makes these chicken fingers stand out from typical breadcrumb-only coatings. They’re approachable enough for weeknights and pretty enough for casual entertaining.
Frequently asked questions
Can I use whole chicken breasts instead of tenders? Yes. If using whole breasts, slice them into 1-inch strips so they cook quickly and evenly, and maintain the same soaking and coating steps.
Do I need to rinse the buttermilk off before coating? No—just let excess drip off. The remaining buttermilk helps the coating adhere and creates a better crust.
Can I freeze these? Yes. Freeze baked or fried tenders in a single layer on a sheet until solid, then transfer to a freezer bag. Reheat from frozen in a 400°F oven for 12–18 minutes, flipping halfway, until heated through and crisp.
Final thoughts
These Buttermilk Almond Crusted Chicken Fingers are a simple twist on a classic that brings in whole grains and almond meal for texture and flavor. The method is forgiving: soak, dredge, and cook. Whether you bake or pan-fry, you end up with golden, juicy tenders that are perfect for dipping and sharing.
Make a double batch if you expect hungry hands—these always disappear fast.

Buttermilk Almond Crusted Chicken Fingers.
Ingredients
- 1 pound boneless skinless chicken tenders
- 2 1/2 cups buttermilk
- 1 cup almond meal
- 3/4 cup whole wheat panko breadcrumbs
- 1/4 cup whole wheat pastry flour or all-purpose flour
- 1/2 teaspoon salt
- 1/2 teaspoon black pepper
- 1/2 teaspoon smoked paprika
Instructions
- Place the chicken tenders in a baking dish and pour the buttermilk over them to fully coat; refrigerate and soak for 4–6 hours or overnight.
- Preheat the oven to 450°F (230°C). Line a baking sheet with foil and set a wire rack on top, then lightly spray the rack with nonstick spray.
- In a large bowl, mix together the almond meal, whole wheat panko, flour, salt, pepper, and smoked paprika until evenly combined.
- Remove each chicken tender from the buttermilk, allowing excess to drip off, then press into the almond-panko mixture to coat thoroughly. Place coated tenders on the prepared wire rack.
- Lightly mist each coated chicken tender with olive oil or nonstick spray to promote browning.
- Bake for 12 minutes, then carefully flip each tender, mist again, and bake for an additional 12–13 minutes until the crust is golden and the chicken reaches 165°F (74°C).
- Let the chicken rest for a few minutes before serving to help the crust set.
Equipment
- Baking Sheet
- Wire Rack
- Large Bowl
- Baking Dish
- Measuring Cups and Spoons
- nonstick spray or oil mister
Notes
- Soaking in buttermilk tenderizes the chicken and helps the coating adhere.
- A wire rack keeps the crust crispy on all sides.
- Light oil misting encourages even browning.