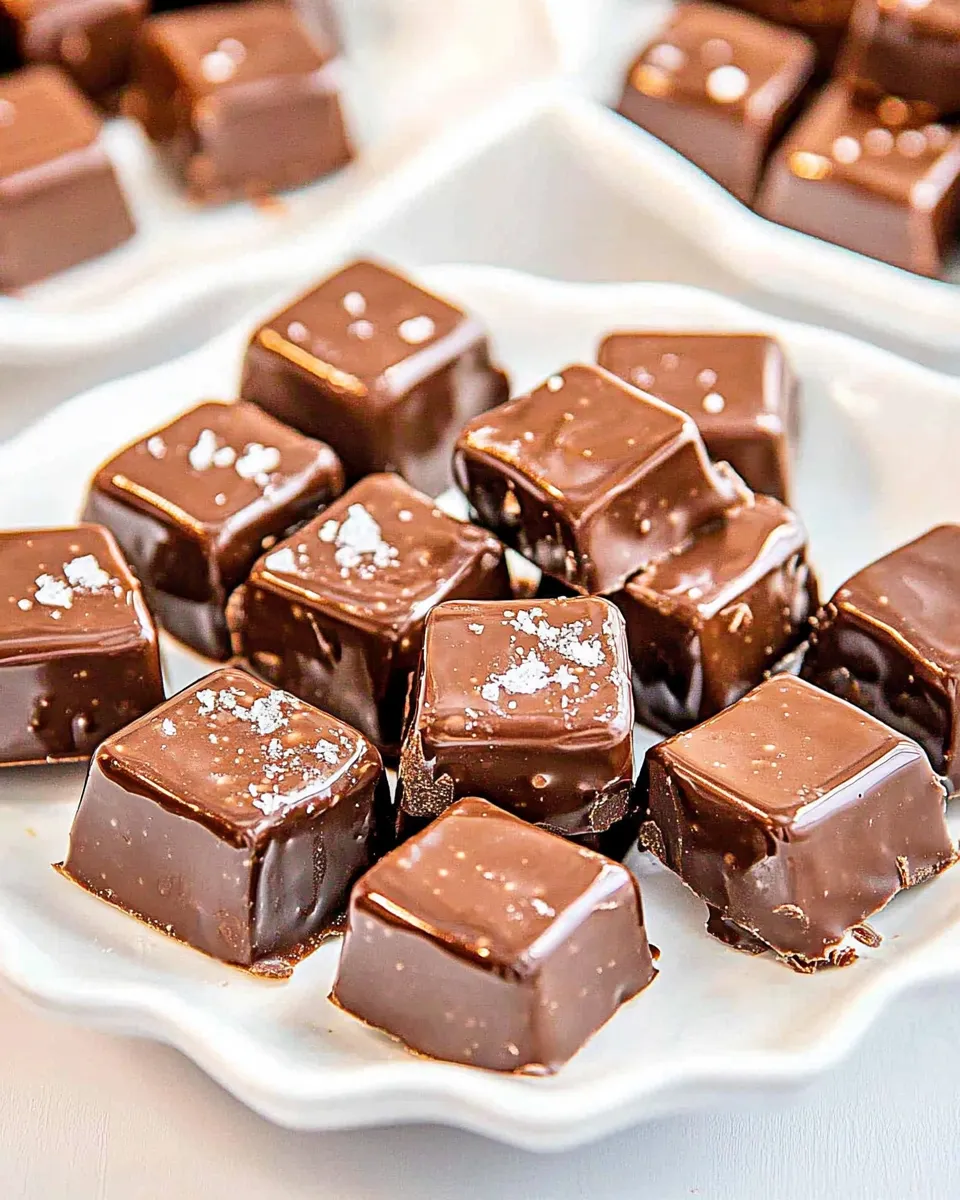
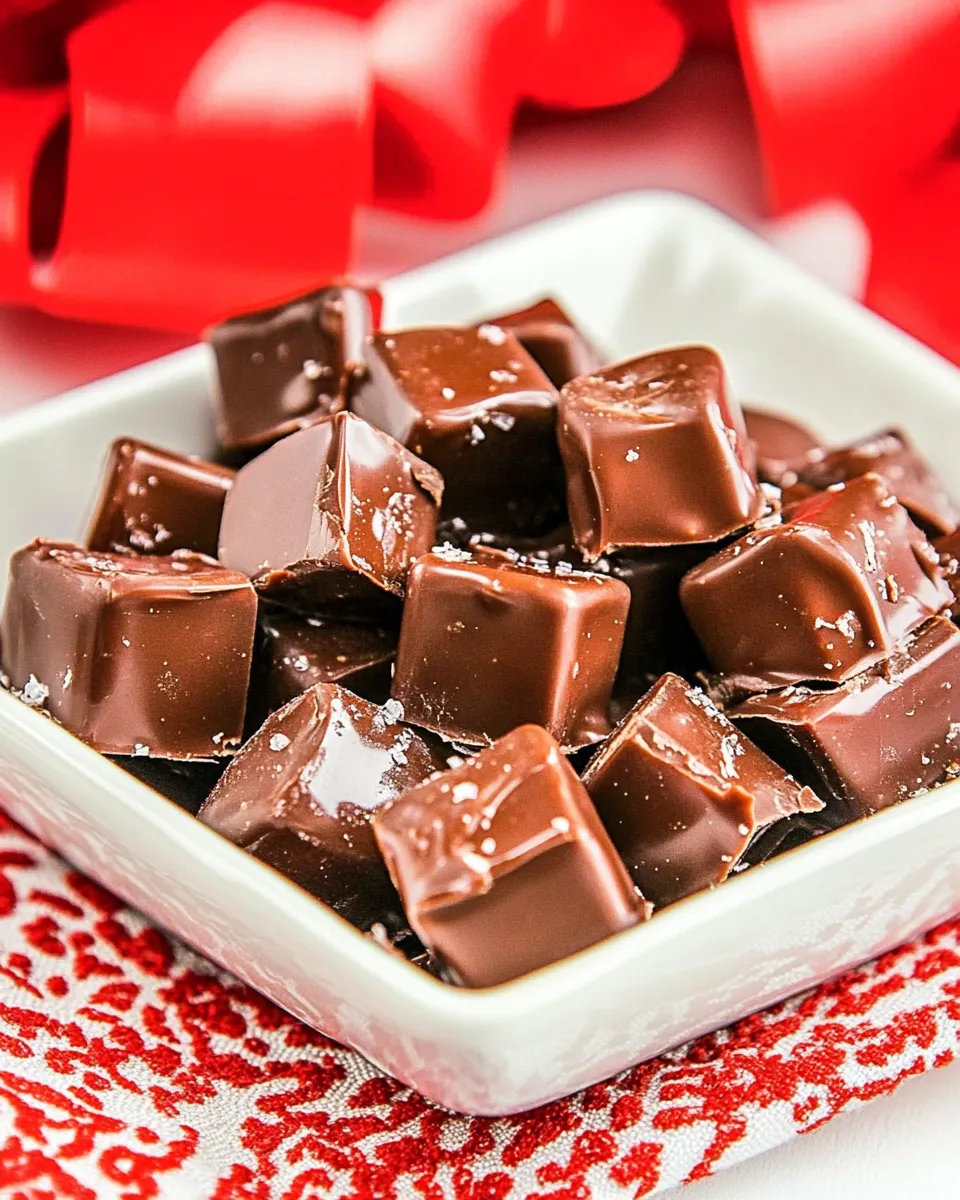
Chocolate Caramels
This is the caramel recipe I turn to when I want something dense, chewy, and edged with a little chocolate depth. It’s not a quick candy — it’s a careful one — but it rewards patience with a texture that holds its shape and a chocolate note that lifts the usual sweetness. I tested it until the caramel behaved consistently, and that exact temperature makes all the difference.
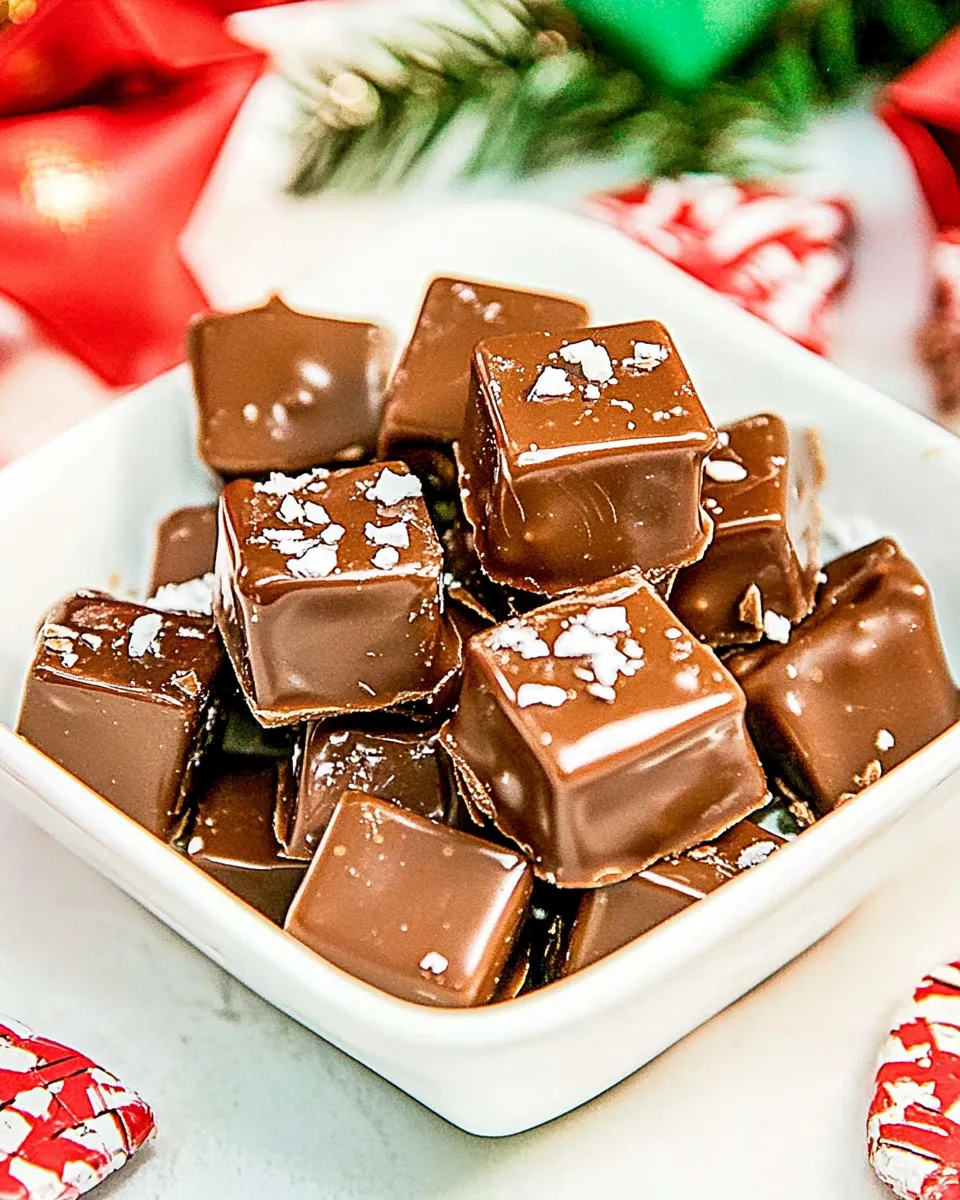
Make time in your afternoon, set out your tools, and focus on the process. The steps are straightforward, but the timing matters. Read through the guide first so nothing surprises you while the sugar is boiling. Once you cut the pieces and wrap them, these keep at room temperature and make excellent gifts.
I like to keep a small jar of flaky sea salt nearby for finishing; a light sprinkle changes everything. If you love a stronger chocolate hit, serve with a short espresso or a crisp cookie. These caramels sit confidently next to a cup of tea or after-dinner coffee.
Gather These Ingredients

- 1 cup heavy cream — do not use whole milk nor half-and‑half; this gives the fat needed for proper texture.
- ½ cup unsalted butter — unsalted controls salt; if using salted butter, omit extra salt later.
- ½ cup unsweetened cocoa powder — provides chocolate flavor without added sugar or oil.
- 1 tablespoon instant espresso powder — do not use regular ground espresso; instant dissolves cleanly and deepens the chocolate note.
- 1 teaspoon pure vanilla extract — rounds and brightens the caramel flavors.
- 1 cup granulated sugar — the primary sweetener and structure for the caramel.
- 1 cup corn syrup — cannot be substituted; it prevents crystallization and keeps the caramels smooth.
- Flaky sea salt — optional and to taste; adds contrast when sprinkled after the boil has calmed.
Chocolate Caramels Cooking Guide
- Line an 8 x 8-inch baking pan with parchment paper, leaving a 2–3 inch overhang on two opposite sides for lifting. Spray the parchment lightly with cooking spray. Set the pan aside.
- In a small saucepan combine the 1 cup heavy cream (do not substitute whole milk or half‑and‑half), ½ cup unsalted butter, ½ cup unsweetened cocoa powder, and 1 tablespoon instant espresso powder (do not use regular ground espresso). Heat over medium‑high, stirring nearly constantly, until the butter has fully melted and the mixture is smooth.
- Remove the small saucepan from the heat, stir in 1 teaspoon pure vanilla extract, then set this chocolate‑cream mixture aside.
- In a separate high‑sided saucepan (nonstick preferred; it must be high‑sided to prevent boiling over) combine 1 cup granulated sugar and 1 cup corn syrup (do not substitute). Cook over medium‑high heat, stirring constantly, until the sugar has dissolved.
- With the sugar/corn syrup bubbling but the heat still on, slowly pour the reserved chocolate‑cream mixture into the sugar mixture while stirring constantly to combine.
- Attach a clip‑on digital candy thermometer to the side of the saucepan and bring the mixture to a boil. Continue to cook until the mixture reaches exactly 245°F. This can take 20–30 minutes; do not leave the pan unattended. Monitor the boil and stir as needed to prevent scorching.
- When the mixture reaches 245°F, remove the pan from the heat. Using potholders and extreme caution, pour the hot caramel into the prepared parchment‑lined pan.
- Let the caramel sit undisturbed for about 7 minutes, then, if desired, sprinkle flaky sea salt on top to taste (do not add the salt while the caramel is still very hot or it will dissolve).
- Allow the caramel to set at room temperature for 5‑6 hours (do not refrigerate or freeze, as that can negatively affect texture).
- When set, lift the caramel slab from the pan using the parchment overhang and place it on a cutting board. Use a very sharp knife (grease the blade with a little butter if you like) to cut into pieces of your preferred size.
- Wrap individual caramels in wax paper or decorative wrappers (parchment can be used but does not seal as well). Store airtight at room temperature for up to 1 month; refrigeration is not recommended.
Why This Recipe is a Keeper
These caramels balance chew and snap. They’re firm enough to hold a clean edge when cut, yet soft enough to yield pleasantly in the mouth. The addition of unsweetened cocoa and a touch of espresso gives depth; the cocoa keeps things chocolatey without adding more sugar, and the espresso intensifies the chocolate without making the candy taste like coffee.
The method is forgiving in concept: dissolve, boil to temperature, cool. But small details—like the height of the saucepan and the precise temperature—determine success. If you follow the sequence and respect the instructions that flag “do not substitute,” the outcome is consistent. Once you make them once, you’ll understand the rhythm: steady stirring, careful thermometer watching, and a calm patience while the caramel sets.
Allergy-Friendly Substitutes
I’ll be upfront: this recipe relies on a few ingredients that are hard to swap without changing texture or results. Corn syrup and heavy cream are particularly important for the classic chewy texture.
Notes on key constraints
- Corn syrup — cannot be substituted if you want the same texture; it prevents crystallization and keeps the caramel smooth.
- Heavy cream — the recipe warnings are deliberate: whole milk or half‑and‑half won’t provide enough fat and will change set and mouthfeel.
- Instant espresso powder — do not replace with ground espresso; it will not dissolve properly and can add grit.
That said, for true dairy allergies, a full‑fat coconut cream can be tried, but expect a coconut flavor and a shift in texture. Use high‑quality canned coconut cream and proceed with caution. The caramel will likely set differently and may be softer. If you need to avoid cow’s milk entirely and want to experiment, make a small test batch first.
If salt is the issue, omit the flaky sea salt finish; it’s optional and purely for contrast.
Tools of the Trade
- 8 x 8-inch baking pan — the recipe uses this size for predictable depth.
- Parchment paper — with a 2–3 inch overhang for easy lifting.
- Two saucepans — one small for the chocolate‑cream, one high‑sided for the sugar/corn syrup boil.
- Nonstick high‑sided saucepan — prevents boiling over and makes cleanup easier.
- Clip‑on digital candy thermometer — attach to the side of the pan and watch for 245°F exactly.
- Spoon or heatproof spatula — for stirring and combining.
- Sharp knife — a very sharp blade for clean cuts; grease lightly if desired.
- Wax paper or wrappers — for individually wrapping caramels.
Troubles You Can Avoid
Boiling sugar is intimidating, but most problems are preventable:
- Sugar crystallizes: Use a clean pan and avoid splashing sugar crystals on the sides. Corn syrup helps prevent this, so don’t omit it.
- Boil over: Use a high‑sided pan and monitor the boil. The mixture will bubble vigorously; a higher pan keeps it contained.
- Caramel too hard or too soft: Temperature is everything. Aim for exactly 245°F. If it cools and is too hard, you likely overshot; if too soft, you were under temp or didn’t allow enough time to set at room temperature.
- Gritty texture: Ensure the espresso is instant powder, not ground, and stir to dissolve the chocolate mixture fully before adding it to the sugar.
- Salt dissolves: Don’t add flaky sea salt while the caramel is still steaming hot. Let it cool slightly so the flakes sit on the surface.
Smart Substitutions
Within the limits the recipe sets, you can tweak small things without breaking the candy:
- Vanilla extract: Use a high‑quality pure vanilla for the cleanest flavor; strength matters here more than brand.
- Cocoa powder: Dutch‑processed or natural both work; Dutch‑processed will be a touch mellower. The texture won’t change.
- Finishing salts: Try different flaky salts for varied intensity. Keep amounts light—these are accenting flavors.
- Presentation: Use decorative wrappers or a small dusting of cocoa on the cut pieces for a finished look.
Behind the Recipe
At its core this is a sugar‑based inversion: sugar and corn syrup heat until they reach a precise temperature and, when combined with dairy and fats, form a stable network that gives caramel its chew. Corn syrup inhibits sugar crystallization, which keeps the texture smooth. Heavy cream and butter add fat that tenderizes the candy and helps it hold a soft yet firm chew. Chocolate components (cocoa and espresso) don’t alter the chemistry dramatically; they provide flavor depth and color.
I developed this after several batches that either set too hard or remained tacky. The fixes were straightforward: use a taller pan, trust the thermometer, and let the slab sit at room temperature for the full 5–6 hours. Minor changes in altitude and humidity will affect timing, so the thermometer is the non‑negotiable tool here.
Meal Prep & Storage Notes
Plan ahead: these take time to set. You’ll want a 5–6 hour window at room temperature after pouring. Don’t rush by refrigerating or freezing; both will negatively affect texture.
Once cut and wrapped, store in an airtight container at room temperature for up to 1 month. If you live in a very warm climate (above ~75°F), keep them in the coolest part of the house, as heat will soften them. If a piece gets sticky, a short rest in a cool pantry spot will firm it up again; avoid prolonged refrigeration.
Frequently Asked Questions
Can I substitute whole milk or half‑and‑half for the heavy cream?
No. The recipe specifically requires 1 cup heavy cream. Lower‑fat dairy will change the texture and prevent the caramels from setting properly.
Why must I use corn syrup?
Corn syrup prevents sugar crystallization. Without it, the caramel can become grainy or crystalize during the long boil. The recipe requires 1 cup corn syrup and it cannot be substituted for the stated texture.
Is the thermometer really necessary?
Yes. The difference between chewy and hard candy is small. The target here is exactly 245°F. An accurate clip‑on candy thermometer removes guessing and gives consistent results.
Can I speed up cooling in the fridge?
Don’t. The recipe warns not to refrigerate or freeze during setting. Rapid cooling can change texture and moisture balance. Allow the caramel to set at room temperature for 5–6 hours.
How do I get clean cuts?
Use a very sharp knife and, if you prefer, grease the blade lightly with butter before cutting. Heat the knife briefly under hot water and dry it before slicing for smoother cuts, wiping between cuts as needed.
Hungry for More?
If you like these, try pairing a single caramel with a short espresso or a sharp, nutty cookie to balance the chew and sweetness. They also make thoughtful homemade gifts—wrap in wax paper and tie with twine. Once you’re comfortable with the method, consider experimenting with tiny flavor additions in small test batches (a few drops of orange extract or a pinch of cinnamon) but remember: major swaps to core ingredients will change texture.
Make one batch. Learn the boil. Then make ten for friends. These caramels become a quiet, dependable treat you’ll reach for again and again.

Chocolate Caramels
Ingredients
Ingredients
- 1 cupheavy cream do not use whole milk nor half-and-half
- 1/2 cupunsalted butter
- 1/2 cupunsweetened cocoa powder
- 1 tablespooninstant espresso powder
- 1 teaspoonpure vanilla extract
- 1 cupgranulated sugar
- 1 cupcorn syrup cannot be substituted
- Flaky sea salt optional and to taste
Instructions
Instructions
- Line an 8 x 8-inch baking pan with parchment paper, leaving a 2–3 inch overhang on two opposite sides for lifting. Spray the parchment lightly with cooking spray. Set the pan aside.
- In a small saucepan combine the 1 cup heavy cream (do not substitute whole milk or half‑and‑half), ½ cup unsalted butter, ½ cup unsweetened cocoa powder, and 1 tablespoon instant espresso powder (do not use regular ground espresso). Heat over medium‑high, stirring nearly constantly, until the butter has fully melted and the mixture is smooth.
- Remove the small saucepan from the heat, stir in 1 teaspoon pure vanilla extract, then set this chocolate‑cream mixture aside.
- In a separate high‑sided saucepan (nonstick preferred; it must be high‑sided to prevent boiling over) combine 1 cup granulated sugar and 1 cup corn syrup (do not substitute). Cook over medium‑high heat, stirring constantly, until the sugar has dissolved.
- With the sugar/corn syrup bubbling but the heat still on, slowly pour the reserved chocolate‑cream mixture into the sugar mixture while stirring constantly to combine.
- Attach a clip‑on digital candy thermometer to the side of the saucepan and bring the mixture to a boil. Continue to cook until the mixture reaches exactly 245°F. This can take 20–30 minutes; do not leave the pan unattended. Monitor the boil and stir as needed to prevent scorching.
- When the mixture reaches 245°F, remove the pan from the heat. Using potholders and extreme caution, pour the hot caramel into the prepared parchment‑lined pan.
- Let the caramel sit undisturbed for about 7 minutes, then, if desired, sprinkle flaky sea salt on top to taste (do not add the salt while the caramel is still very hot or it will dissolve).
- Allow the caramel to set at room temperature for 5–6 hours (do not refrigerate or freeze, as that can negatively affect texture).
- When set, lift the caramel slab from the pan using the parchment overhang and place it on a cutting board. Use a very sharp knife (grease the blade with a little butter if you like) to cut into pieces of your preferred size.
- Wrap individual caramels in wax paper or decorative wrappers (parchment can be used but does not seal as well). Store airtight at room temperature for up to 1 month; refrigeration is not recommended.
Equipment
- 8 x 8-inch baking pan
- Parchment Paper
- Cooking Spray
- Small Saucepan
- high-sided saucepan
- digital candy thermometer
- potholders
- Cutting Board
- very sharp knife
- wax paper or wrappers