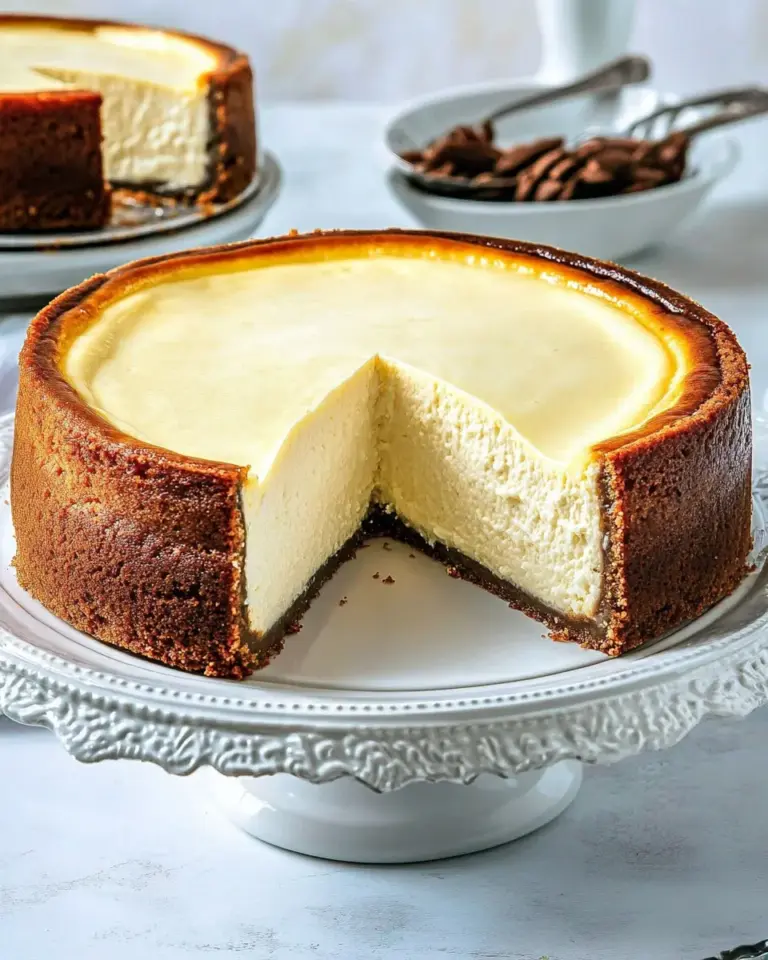
The BEST Brownie Pie
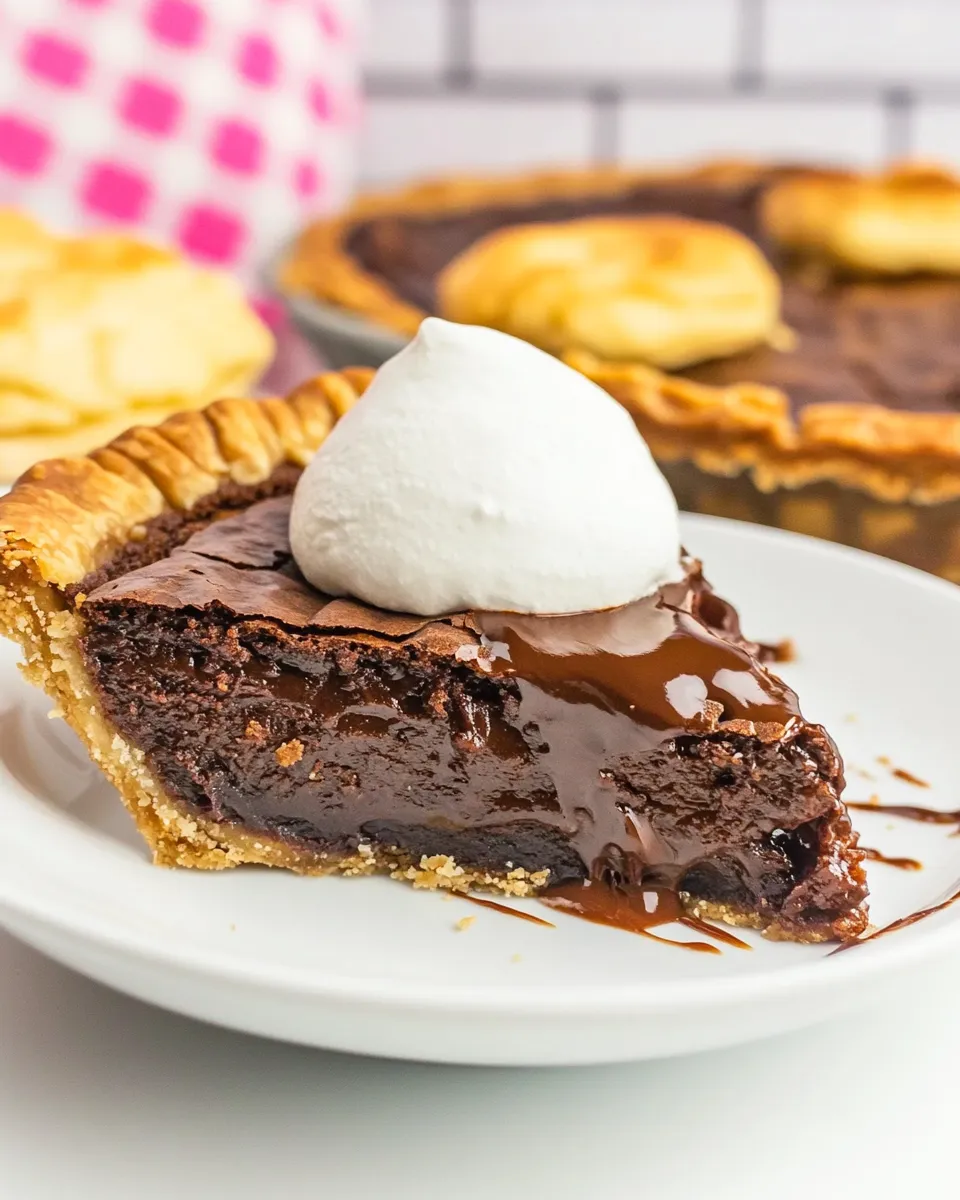
This is the brownie I make when people ask for chocolate and comfort in one slice. It sits in a butter crust, bakes up with a deeply fudgy center and a crackled, brownie-like top — the kind that makes you go back for a second forkful. It’s straightforward, forgiving, and pure chocolate pleasure without drama.
I developed this version after testing timing and temperatures until the center hit the sweet spot: set but gooey, not raw. The recipe uses both unsweetened and semi-sweet baking chocolate for depth, a simple all-butter crust for the butter-forward base, and just a handful of pantry staples. No frills, just a reliably delicious pie that behaves in my oven and will in yours.
Below I lay out everything: ingredients, exact step-by-step baking directions, practical swaps, equipment that matters, and the small moves that make a big difference. Read the notes, follow the method, and you’ll get the same results I do at home — every time.
What You’ll Need

Ingredients
- 1 recipe All Butter Pie Crust (or one refrigerated crust from a pack of 2) — provides a flaky, buttery base that complements the dense chocolate filling; chill it before filling.
- 2 ounces unsweetened baking chocolate — adds deep cocoa intensity and less sweetness, balancing the semi-sweet chocolate.
- 2 ounces semi-sweet baking chocolate — brings sweetness and melt-in-your-mouth texture to the filling.
- 3/4 cup unsalted butter — melts with the chocolate for a glossy, rich batter; unsalted lets you control seasoning.
- 1 3/4 cups granulated sugar — sweetens and helps create the signature crackly top on the brownie filling.
- 3 eggs — provide structure and richness; add them one at a time for a smooth mixture.
- 1 tablespoon vanilla extract — lifts and rounds the chocolate flavor.
- 1/2 teaspoon salt — balances sweetness and brightens chocolate notes.
- 2 tablespoons unsweetened cocoa powder — intensifies chocolate flavor and adds color.
- 1 cup all purpose flour — gives the filling structure; fold just until incorporated for a moist, tender crumb.
Mastering Brownie Pie: How-To
- Preheat oven to 350°F (175°C). Prepare the pie crust (your 1 recipe All Butter Pie Crust or one refrigerated crust from a pack of 2) as directed and press it into a 9-inch pie plate. Place the crust in the refrigerator to chill while you make the filling.
- (Optional — for a crunchier bottom) If you want a partially baked crust, preheat oven to 425°F. Line the crust with parchment and add pie weights or dry beans. Blind-bake 15–20 minutes, remove parchment and weights, then reduce oven temperature to 350°F and return the crust to the refrigerator while you finish the filling.
- Combine 2 ounces unsweetened baking chocolate, 2 ounces semi-sweet baking chocolate, and 3/4 cup unsalted butter in a large microwave-safe bowl. Microwave in 30-second increments, stirring between each, until the chocolate and butter are melted and smooth (about 2 minutes total depending on your microwave).
- Let the melted chocolate mixture cool for 1–2 minutes until warm but not hot (this helps prevent the eggs from scrambling).
- Stir 1 3/4 cups granulated sugar into the melted chocolate until combined.
- Add the 3 eggs, one at a time, stirring or whisking after each addition until the mixture is smooth and uniform.
- Stir in 1 tablespoon vanilla extract, 2 tablespoons unsweetened cocoa powder, and 1/2 teaspoon salt until smooth.
- Gently fold in 1 cup all-purpose flour until just incorporated and no streaks remain. Do not overmix.
- Pour the batter into the prepared pie crust. Set the filled pie on a rimmed baking sheet to catch any drips. Protect the crust edge with a pie shield or strips of foil.
- Bake at 350°F for 38–48 minutes. Remove the foil or pie shield after 20–25 minutes so the crust edge can brown. The top should be cracked when done. For a fudgier center, bake toward the shorter time (a toothpick may come out wet); for a more set center, bake longer until fewer wet crumbs cling to the toothpick.
- Cool the pie completely on a wire rack before slicing to allow the filling to set. Serve with ice cream or whipped cream if desired.
- Store the cooled pie covered at room temperature for up to 3 days, or freeze slices for up to one month.
Why This Brownie Pie Stands Out
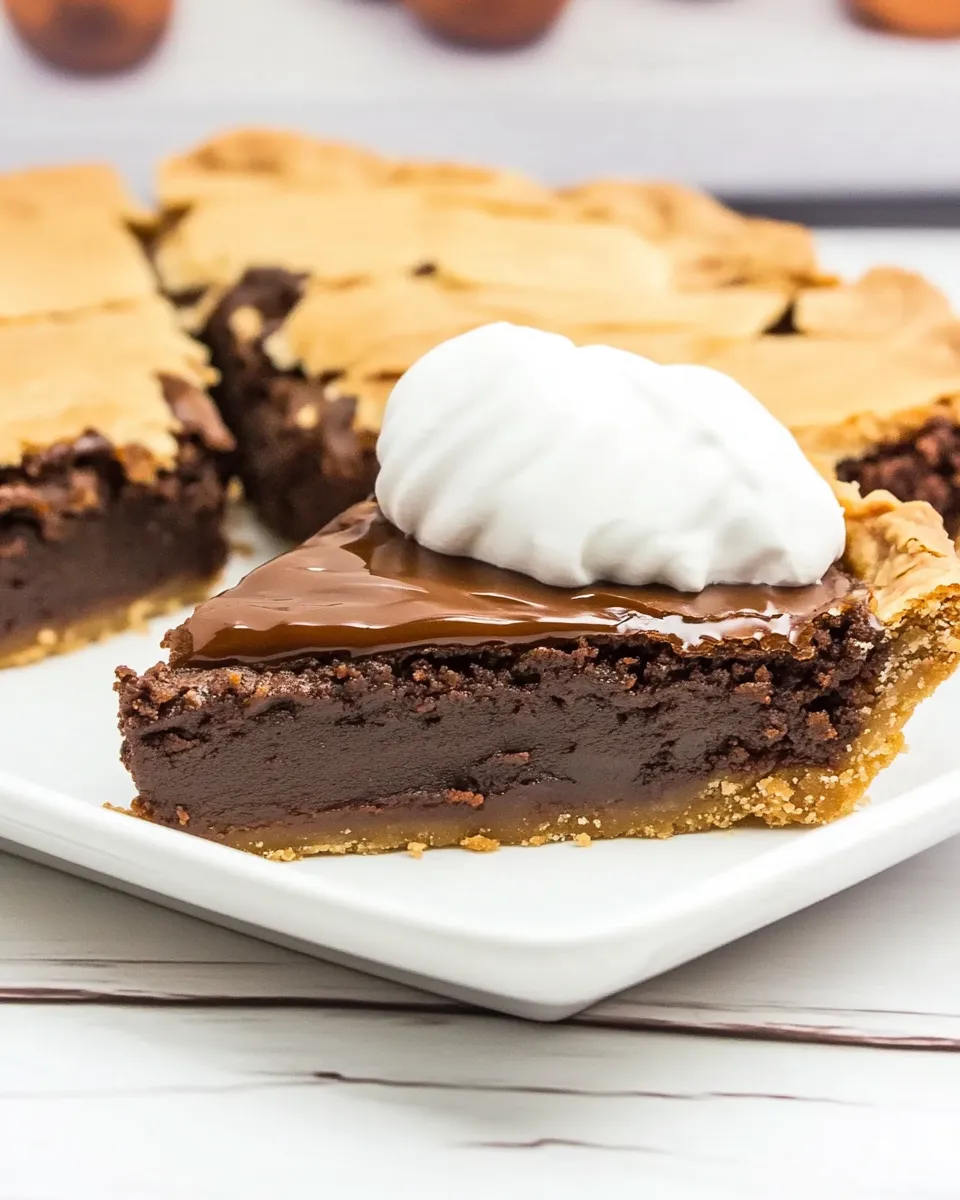
This pie lives halfway between a classic bar brownie and a chocolate tart. Using both unsweetened and semi-sweet chocolate gives the filling depth and complexity — not overly sweet, but undeniably chocolatey. The melted butter-chocolate base results in a glossy batter that bakes into a crackled top and dense, fudgy interior.
The all-butter crust is intentional. It adds flavor and a tender, flaky edge that contrasts the dense center. Blind-baking is optional; when you need a crisp bottom for extra texture, it works. When you skip it, you get a softer edge that still supports the filling well.
Finally, the method is forgiving: a slightly shorter bake produces a luscious, gooey center, while a longer bake sets the pie more firmly. That flexibility means you can tailor it to your audience — my family prefers the gooey version; I bring the more set pies to potlucks where transport is a concern.
Ingredient Swaps & Substitutions
- Unsweetened baking chocolate — you can substitute with an equal weight of a higher-percentage dark chocolate if you prefer less bitterness and a smoother melting behavior.
- Semi-sweet baking chocolate — swap for milk or bittersweet to adjust sweetness and intensity. Keep proportions equal by weight, not volume.
- Unsalted butter — if you only have salted butter, use it but reduce or omit the added salt; taste the batter conceptually since you won’t eat it raw.
- Granulated sugar — superfine or caster sugar will work if you want a slightly finer texture; brown sugar will change flavor and moisture and isn’t recommended as a straight swap here.
- All-purpose flour — for a slightly more tender crumb, you can try half all-purpose and half cake flour, but results will be subtly different.
Must-Have Equipment
- 9-inch pie plate — essential for the correct depth and baking time.
- Microwave-safe bowl (or heatproof bowl for a double boiler) — to melt chocolate and butter smoothly.
- Rimmed baking sheet — catches drips and makes moving the pie in and out of the oven easier.
- Wire rack — for cooling the pie completely before slicing.
- Pie shield or strips of foil — protects the crust edge while the filling finishes baking.
- Parchment paper and pie weights or dry beans — only if you choose to blind-bake the crust.
- Mixing spoon or whisk and rubber spatula — for combining and folding without overworking the batter.
Steer Clear of These
- Overmixing the batter after adding flour — it will develop gluten and make the filling cakier instead of dense and fudgy.
- Adding hot chocolate directly to eggs — that will scramble them. Cool the chocolate mixture for 1–2 minutes before adding eggs, as instructed.
- Skipping the rimmed baking sheet — pies can bubble over; the sheet protects your oven and makes cleanup trivial.
- Baking at too high a temperature for the entire time — follow the optional blind-bake temperature only for crust prebake, then bake the filling at 350°F to avoid overbrowning the top while the center stays underdone.
Fresh Seasonal Changes
Brownie Pie is a great canvas for small seasonal tweaks. In winter, a pinch of instant espresso powder folded into the melted chocolate amplifies real chocolate flavor without imparting coffee taste. In spring, serve slices with a spoonful of macerated berries or a bright citrus-curd dollop to cut the richness. For fall, a light dusting of cinnamon or a scattering of toasted pecans on top before serving adds warmth and texture.
Remember: the filling is rich, so small seasonal accents are often better than heavy-handed add-ins. Let the chocolate remain the star and use seasonal flavors to complement rather than compete.
Insider Tips

Before Baking
- Chill the crust while you prepare the batter. A cold crust helps prevent shrinking and yields a better edge.
- When melting chocolate and butter, stop microwaving and stir often. Residual heat finishes the job and reduces the risk of overheating the chocolate.
- Add eggs one at a time and whisk fully after each. That creates a smoother emulsion and a more consistent bake.
During & After Baking
- Start checking for doneness at 38 minutes. For a fudgier center, err on the shorter side. For company or longer transport, bake closer to 48 minutes.
- Remove the pie from the oven and cool completely on a wire rack before slicing. Cooling allows the filling to set so you get neat slices.
- If your crust edge browns too quickly, tent it with foil earlier in the bake cycle; remove the tent for the last 5–10 minutes so the crust can finish crisping.
Store, Freeze & Reheat
- Room temperature: Store the cooled pie covered (a pie carrier or cake dome works) for up to 3 days. This keeps the top from drying out and maintains texture.
- Freezing: Freeze individual slices wrapped tightly in plastic and placed in an airtight container for up to one month. Thaw in the refrigerator overnight or at room temperature for a couple hours before serving.
- Reheating: Warm slices briefly in a 325°F oven (10–12 minutes) or in the microwave for 10–20 seconds for a just-warm, gooey center. Watch the microwave carefully so the filling doesn’t overcook and become grainy.
Brownie Pie FAQs
- Can I make the pie a day ahead? Yes. Bake and cool completely, then keep covered at room temperature for up to 3 days. Bring to room temp before serving if you prefer softer filling.
- Why did my center sink? The most common reasons are underbaking or opening the oven too often during baking. Also ensure eggs were fully incorporated and the batter wasn’t overmixed late in the process.
- My crust got soggy — what went wrong? A partially baked crust prevents sogginess. If you skip blind-baking, the center’s moisture can soften the bottom slightly; blind-bake for a firmer, crisper base.
- How do I get a perfect crackled top? The combination of sugar and the baking method creates the shiny, crackled surface. Don’t overbake; the top should crack while the center remains fudgy.
- Can I double the recipe for a larger crowd? You can, but use multiple pie plates rather than a single oversized pan to keep baking times manageable and results consistent.
Save & Share
If this recipe becomes a favorite, save it where you keep weeknight staples and special-occasion desserts. It’s one I make when I want a chocolate dessert that feels homemade but elevated. Share a slice with a neighbor or bring a whole pie to a potluck — it travels well if you let it set a bit before moving it.
If you try the pie, take a photo and note whether you prefer the gooey or more set center. The timing is the only real variable here, and once you find your oven’s sweet spot, this Brownie Pie will be in your regular rotation.
The BEST Brownie Pie
Ingredients
Ingredients
- 1 recipeAll Butter Pie Crust or one refrigerated crust from a pack of 2
- 2 ouncesunsweetened baking chocolate
- 2 ouncessemi-sweet baking chocolate
- 3/4 cupunsalted butter
- 1 3/4 cupsgranulated sugar
- 3 eggs
- 1 tablespoonvanilla extract
- 1/2 teaspoonsalt
- 2 tablespoonsunsweetened cocoa powder
- 1 cupall purpose flour
Instructions
Instructions
- Preheat oven to 350°F (175°C). Prepare the pie crust (your 1 recipe All Butter Pie Crust or one refrigerated crust from a pack of 2) as directed and press it into a 9-inch pie plate. Place the crust in the refrigerator to chill while you make the filling.
- (Optional — for a crunchier bottom) If you want a partially baked crust, preheat oven to 425°F. Line the crust with parchment and add pie weights or dry beans. Blind-bake 15–20 minutes, remove parchment and weights, then reduce oven temperature to 350°F and return the crust to the refrigerator while you finish the filling.
- Combine 2 ounces unsweetened baking chocolate, 2 ounces semi-sweet baking chocolate, and 3/4 cup unsalted butter in a large microwave-safe bowl. Microwave in 30-second increments, stirring between each, until the chocolate and butter are melted and smooth (about 2 minutes total depending on your microwave).
- Let the melted chocolate mixture cool for 1–2 minutes until warm but not hot (this helps prevent the eggs from scrambling).
- Stir 1 3/4 cups granulated sugar into the melted chocolate until combined.
- Add the 3 eggs, one at a time, stirring or whisking after each addition until the mixture is smooth and uniform.
- Stir in 1 tablespoon vanilla extract, 2 tablespoons unsweetened cocoa powder, and 1/2 teaspoon salt until smooth.
- Gently fold in 1 cup all-purpose flour until just incorporated and no streaks remain. Do not overmix.
- Pour the batter into the prepared pie crust. Set the filled pie on a rimmed baking sheet to catch any drips. Protect the crust edge with a pie shield or strips of foil.
- Bake at 350°F for 38–48 minutes. Remove the foil or pie shield after 20–25 minutes so the crust edge can brown. The top should be cracked when done. For a fudgier center, bake toward the shorter time (a toothpick may come out wet); for a more set center, bake longer until fewer wet crumbs cling to the toothpick.
- Cool the pie completely on a wire rack before slicing to allow the filling to set. Serve with ice cream or whipped cream if desired.
- Store the cooled pie covered at room temperature for up to 3 days, or freeze slices for up to one month.
Equipment
- 9-inch pie plate
- Microwave-safe bowl
- Whisk or Spoon
- Parchment Paper
- pie weights or dry beans
- Rimmed Baking Sheet
- Wire Rack
- pie shield or aluminum foil