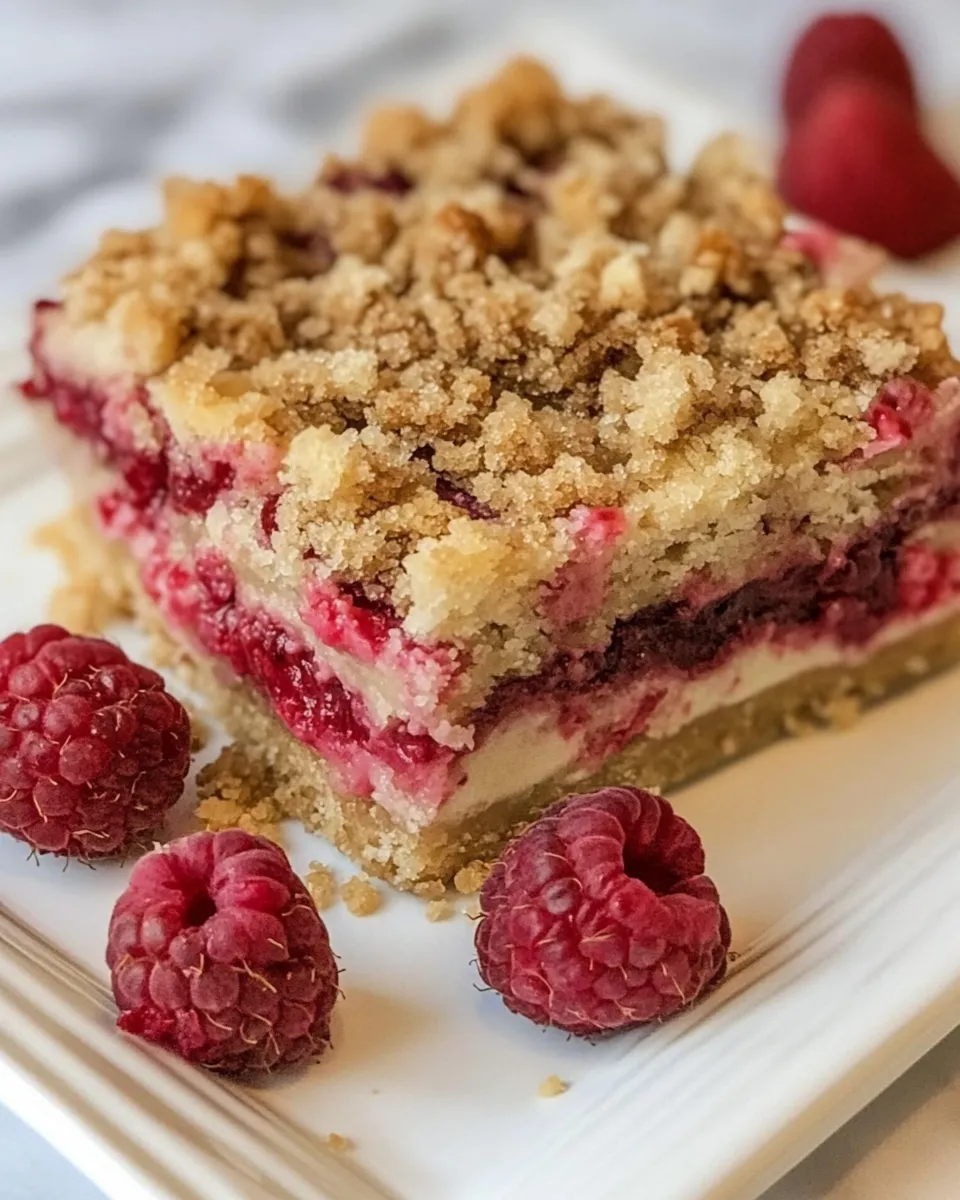
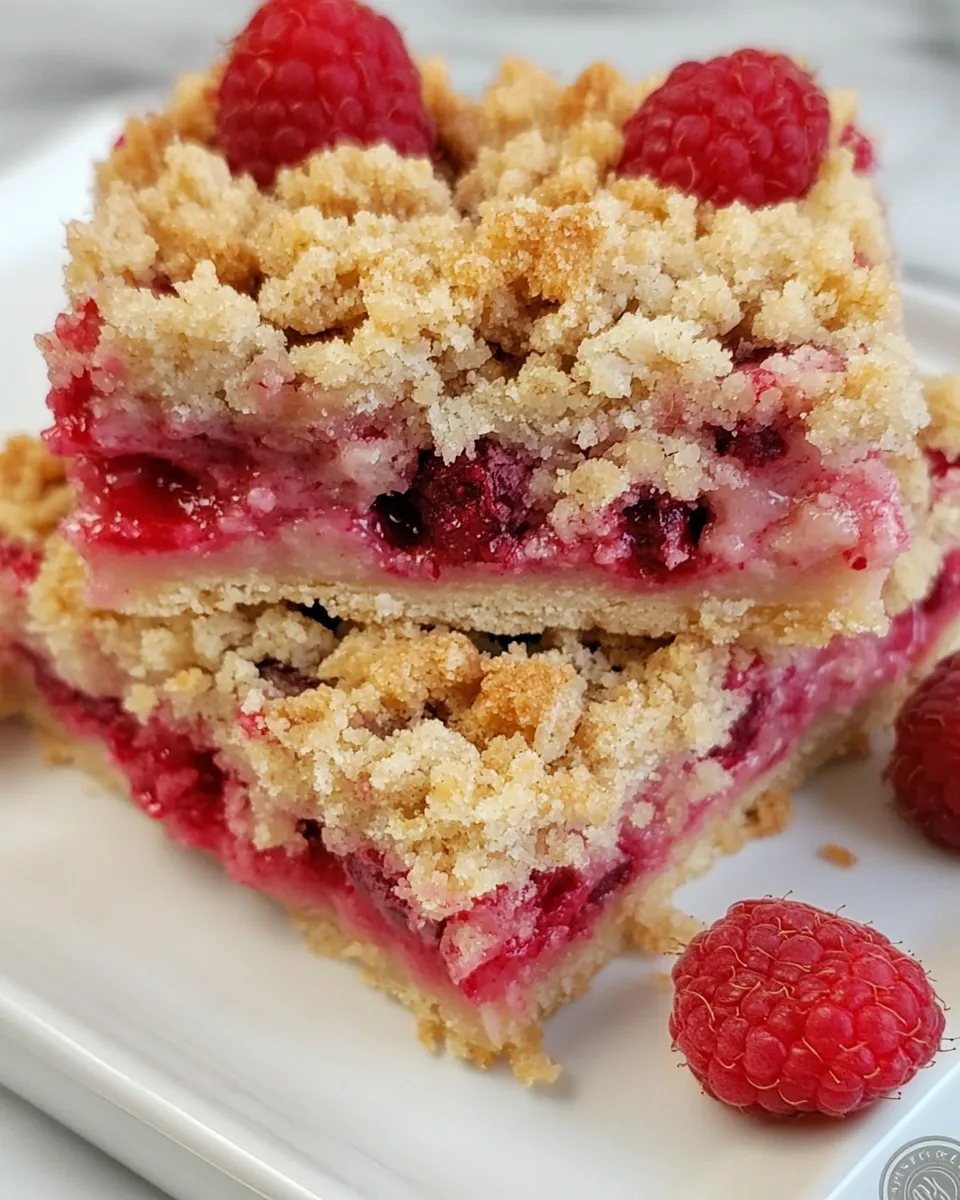
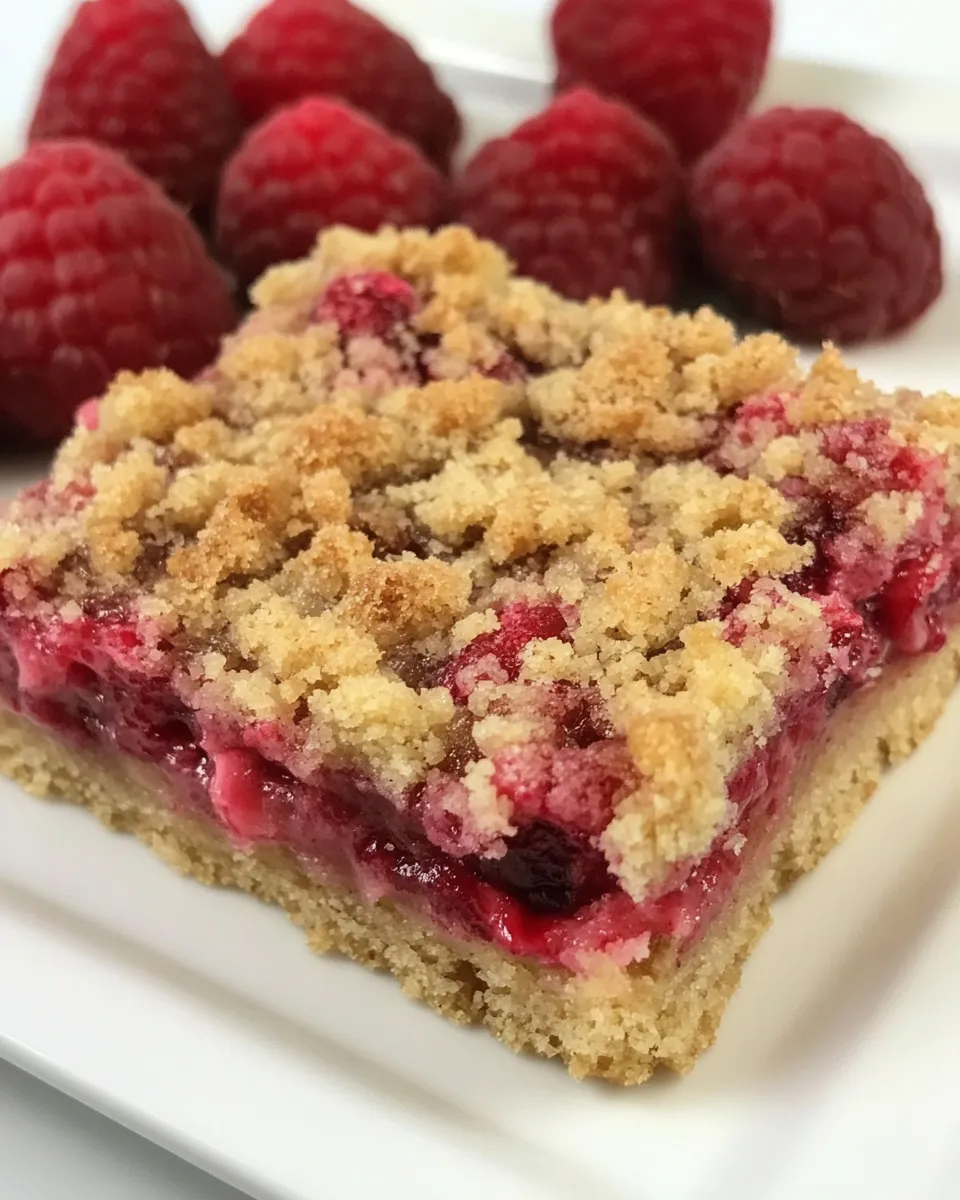
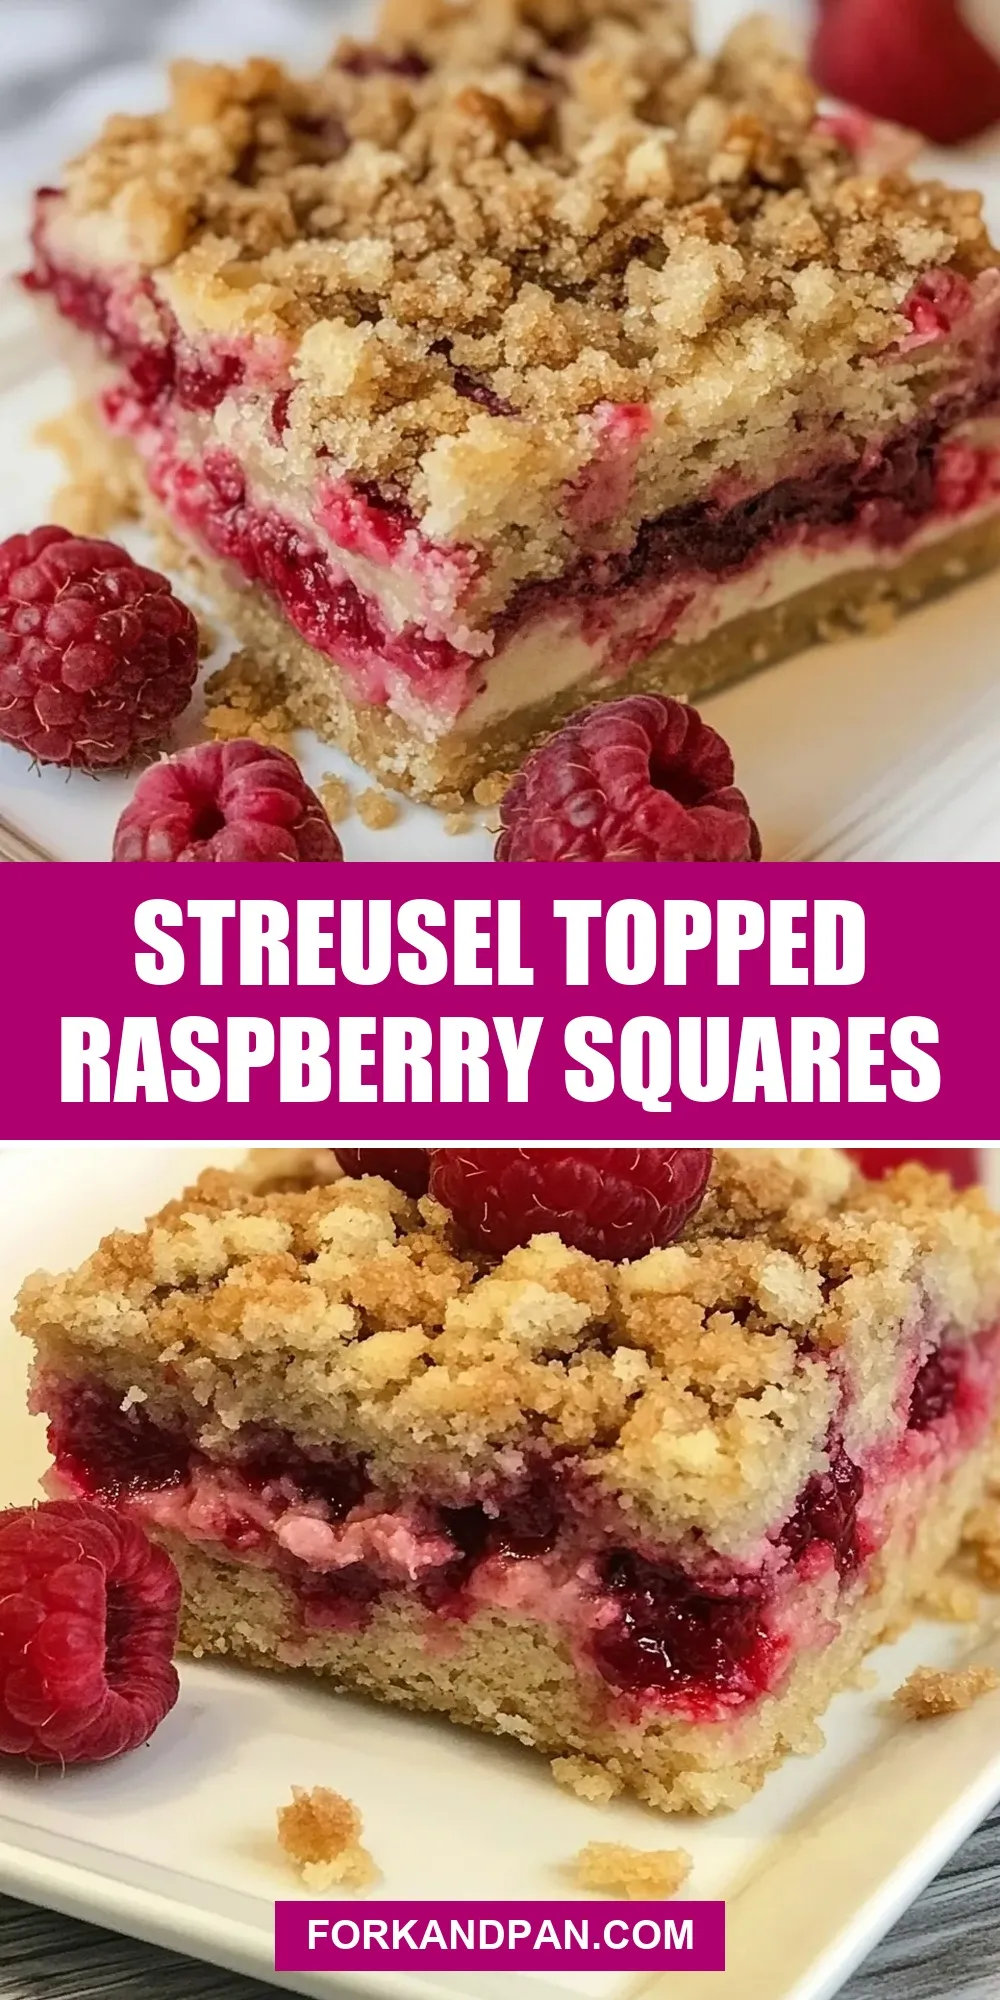
Streusel Topped Raspberry Squares
These streusel topped squares are one of those simple, unfussy recipes that earn their place in the rotation. The base is a compact, buttery crust and the top is a crisp, golden streusel — straightforward, reliable, and perfect for afternoons when you want something homemade without fuss. I keep this version on hand when I need a neutral canvas that pairs beautifully with fresh berries or a smear of jam at the table.
I’ll be honest: this is a recipe that thrives on technique more than fancy ingredients. Cold butter, quick handling, and a hot oven are what make the texture sing. The method is short and repeatable; once you get the rhythm of pressing the crust and finishing with the streusel, you’ll have a dependable tray of squares every time.
Below you’ll find a clear ingredient breakdown, the exact step-by-step process, and practical notes for swaps, equipment, storage, and common mistakes to avoid. No fluff — just what you need to make neat, buttery bars with a satisfyingly crumbly top.
Ingredient Breakdown

- ¾ cup flour — the structure for both crust and streusel; all-purpose flour works as the backbone.
- ¼ cup powdered sugar — adds a subtle sweetness and keeps the streusel tender; it blends smoothly into the flour.
- Dash of salt — balances the sweetness and brightens the butter flavor.
- 6 tablespoons butter, cold and cut into pieces — provides richness and creates the pea-sized crumbs when cut into the dry ingredients.
Cooking (Streusel Topped Raspberry Squares): The Process
- Preheat oven to 375°F (190°C). Line an 8 x 8-inch pan with aluminum foil, leaving an overhang for easy removal, or lightly grease the pan.
- Make the crust: In a medium bowl combine 1/2 cup of the flour, 2 tablespoons of the powdered sugar, and a dash of salt. Add 4 tablespoons of the cold butter (cut into pieces). Cut the butter into the dry ingredients with a pastry blender, two forks, or a food processor until the mixture resembles coarse crumbs with pea-sized pieces.
- Press the crust mixture evenly into the bottom of the prepared 8 x 8-inch pan. Use your hands or the bottom of a measuring cup to compact it firmly and evenly.
- Bake the crust for 10–12 minutes, or until it is just starting to brown at the edges. Remove from the oven and leave the oven on.
- While the crust bakes, make the streusel: In a small bowl combine the remaining 1/4 cup flour and the remaining 2 tablespoons powdered sugar. Add the remaining 2 tablespoons cold butter (cut into pieces) and cut it in with a pastry blender, forks, or a few quick pulses in a food processor until the mixture is crumbly.
- When the crust is done, evenly sprinkle the streusel mixture over the hot crust.
- Return the pan to the oven and bake an additional 25–30 minutes, or until the streusel topping is golden brown and set.
- Remove from the oven and cool completely in the pan on a wire rack. Use the foil overhang (if used) to lift the bars from the pan and cut into squares once fully cooled.
Why This Recipe is a Keeper
There’s real joy in a recipe that does a single thing extremely well. This formula gives you a tender, compact base and a crunchy, buttery topping with a minimal ingredient list and straightforward steps. That makes it easy to pull out at short notice and trust the outcome.
It’s also forgiving in timing. The crust gets a short bake to firm up, and the streusel finishes it with a golden crunch. You don’t need precise layering or fiddly techniques. If you keep the butter cold and don’t overwork the dough, you’ll get a pleasing contrast between the dense bottom and the crumbly top.
Finally, these bars are versatile. They’re plain enough to be served with sliced fruit or jam, yet rich enough to stand on their own with a cup of tea. For weekday baking or an easy potluck contribution, they’re a practical, crowd-pleasing choice.
Budget & Availability Swaps
Ingredients here are pantry-friendly. If you’re short on anything, consider these practical swaps and workarounds:
- Butter: If you only have salted butter, use it and omit or reduce the dash of salt in the crust. The bars will still be buttery and delicious.
- Powdered sugar: Confectioners’ sugar is the same thing; use what you have in the pantry. It dissolves into the flour easily and keeps the streusel tender.
- Flour: Standard all-purpose flour is the right choice here. If you have a self-rising flour on hand, don’t substitute it directly — the recipe expects plain flour for texture and control.
- Tools: No pastry blender? Two forks or a couple of quick pulses in a food processor work just fine. A chilled knife can also help to cut butter into the flour.
Setup & Equipment
Having the right tools makes this recipe smoother and more consistent. You don’t need anything fancy, but these items are helpful:
- 8 x 8-inch square baking pan — the recipe is sized for this pan; using a significantly larger or smaller pan will change texture and bake times.
- Aluminum foil (optional) — for lining the pan and creating an overhang to lift the bars out cleanly.
- Pastry blender, two forks, or a food processor — for cutting cold butter into the dry ingredients to form pea-sized crumbs.
- Measuring cups and spoons — accurate measuring keeps the crust-streusel balance right.
- Wire rack — for cooling the pan completely before slicing.
Errors to Dodge
Small mistakes are easy to make but avoidable. Watch for these common pitfalls:
- Warm butter: If the butter softens too much, the mixture won’t form proper crumbs and the topping will spread instead of staying crumbly. Keep the butter cold until you’re ready to cut it in.
- Under-pressed crust: If you don’t compact the crust firmly, it can crumble when you cut the squares. Press evenly and firmly into the pan before the first bake.
- Removing too soon: Cutting before the pan is fully cooled leads to messy edges. Wait until completely cool for clean squares.
- Overbrowning the streusel: The topping should be golden and set. If it’s getting too dark before the time is up, tent the pan loosely with foil for the remaining minutes.
Fresh Seasonal Changes
Though this recipe is minimal, it’s a great platform for seasonal touches at the table. Serve warm with a handful of fresh berries on the side in summer, or offer a spoonful of jam in cooler months. A light dusting of powdered sugar just before serving adds a pretty finish without changing the bake.
If you want to highlight raspberries (in keeping with the title), serve these squares with fresh raspberries or a small ramekin of raspberry jam. Place the jam on the side so guests can add as much as they like — that keeps the original bars intact while giving the bright fruit flavor the spotlight.
Cook’s Commentary
I love this recipe for its simplicity. It’s the kind of thing I bake when I want something homey and easy to transport. The crust is denser than a shortbread, which holds up well if you slide a thin layer of jam on the finished squares at the table. I often double this recipe when I’m baking for a crowd — two 8 x 8 pans bake consistently and store well.
One technique I emphasize: chill your butter and work quickly. That snap between cold butter and hot oven is what creates the light pockets in the streusel. Also, use the foil overhang trick. Lifting the cooled slab from the pan makes slicing neater and removes the risk of dragging crumbs against the pan edge.
Save for Later: Storage Tips
These bars store and travel well if you follow a couple of simple rules:
- Room temperature: Once completely cooled, keep in an airtight container at room temperature for up to 2 days.
- Refrigeration: If you prefer, refrigerate for up to 5 days. Bring to room temperature before serving for the best texture.
- Freezing: Wrap cooled bars tightly and freeze for up to 1 month. Thaw in the refrigerator or at room temperature, then let sit for a short while before serving.
Streusel Topped Raspberry Squares FAQs
Q: Can I use salted butter instead of unsalted?
A: Yes. If you use salted butter, reduce or omit the dash of salt in the crust to avoid over-salting.
Q: How do I get clean slices?
A: Chill the pan until fully cool. Use a sharp knife and wipe the blade between cuts. Lifting the slab from the pan with foil overhang before slicing helps greatly.
Q: Can I add a fruit layer before the streusel?
A: The instructions here do not include adding fruit during the bake. If you choose to add jam or berries, do it cautiously — thicker or wet fillings can change baking time and texture. A safer approach is to add fruit at the table as a garnish.
Q: Why is my streusel not crisp?
A: The main culprits are warm butter when cutting in or insufficient bake time. Make sure the streusel is golden and set before removing from the oven.
Q: Can I double the recipe?
A: Yes. Use two pans or a larger pan, but watch baking time. The recipe as written is calibrated for an 8 x 8-inch pan, so a larger single pan will change the thickness and require time adjustments.
Ready to Cook?
Grab the cold butter, preheat your oven to 375°F (190°C), and line an 8 x 8-inch pan. Follow the process above and keep the butter cold, press the crust firmly, and let the bars cool completely before slicing. It’s a short, reliable bake that rewards a little patience with a crisp, buttery finish. Happy baking — and if you try serving them with fresh raspberries or a spoonful of jam on the side, tell me how it went.

Streusel Topped Raspberry Squares
Ingredients
Ingredients
- 3/4 cup flour
- 1/4 cup powdered sugar
- Dash of salt
- 6 tablespoons butter cold and cut into pieces
Instructions
Instructions
- Preheat oven to 375°F (190°C). Line an 8 x 8-inch pan with aluminum foil, leaving an overhang for easy removal, or lightly grease the pan.
- Make the crust: In a medium bowl combine 1/2 cup of the flour, 2 tablespoons of the powdered sugar, and a dash of salt. Add 4 tablespoons of the cold butter (cut into pieces). Cut the butter into the dry ingredients with a pastry blender, two forks, or a food processor until the mixture resembles coarse crumbs with pea-sized pieces.
- Press the crust mixture evenly into the bottom of the prepared 8 x 8-inch pan. Use your hands or the bottom of a measuring cup to compact it firmly and evenly.
- Bake the crust for 10–12 minutes, or until it is just starting to brown at the edges. Remove from the oven and leave the oven on.
- While the crust bakes, make the streusel: In a small bowl combine the remaining 1/4 cup flour and the remaining 2 tablespoons powdered sugar. Add the remaining 2 tablespoons cold butter (cut into pieces) and cut it in with a pastry blender, forks, or a few quick pulses in a food processor until the mixture is crumbly.
- When the crust is done, evenly sprinkle the streusel mixture over the hot crust.
- Return the pan to the oven and bake an additional 25–30 minutes, or until the streusel topping is golden brown and set.
- Remove from the oven and cool completely in the pan on a wire rack. Use the foil overhang (if used) to lift the bars from the pan and cut into squares once fully cooled.
Equipment
- 8 x 8-inch pan
- Aluminum Foil
- Mixing Bowls
- Measuring cup
- pastry blender
- Forks
- Food Processor
- Wire Rack
- Oven