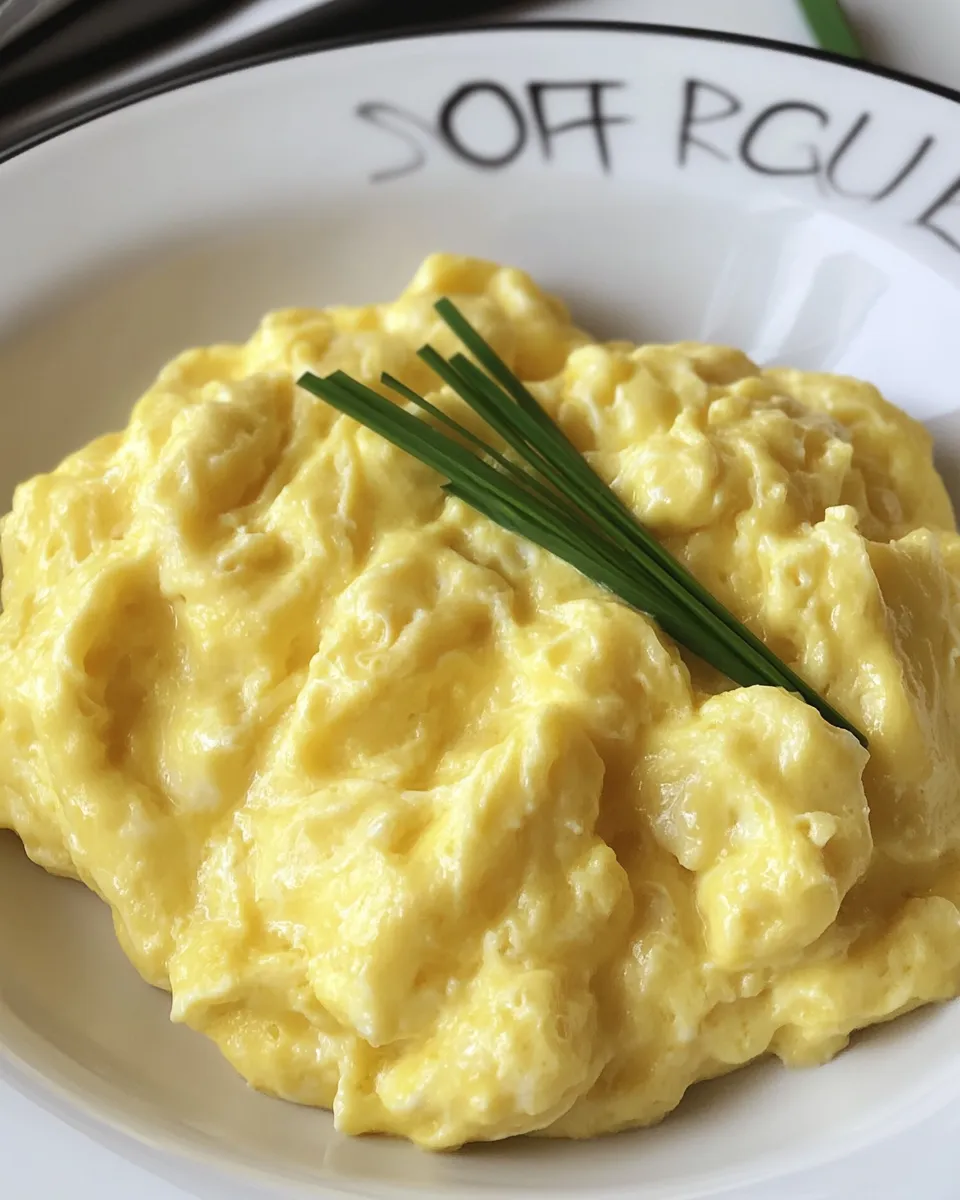
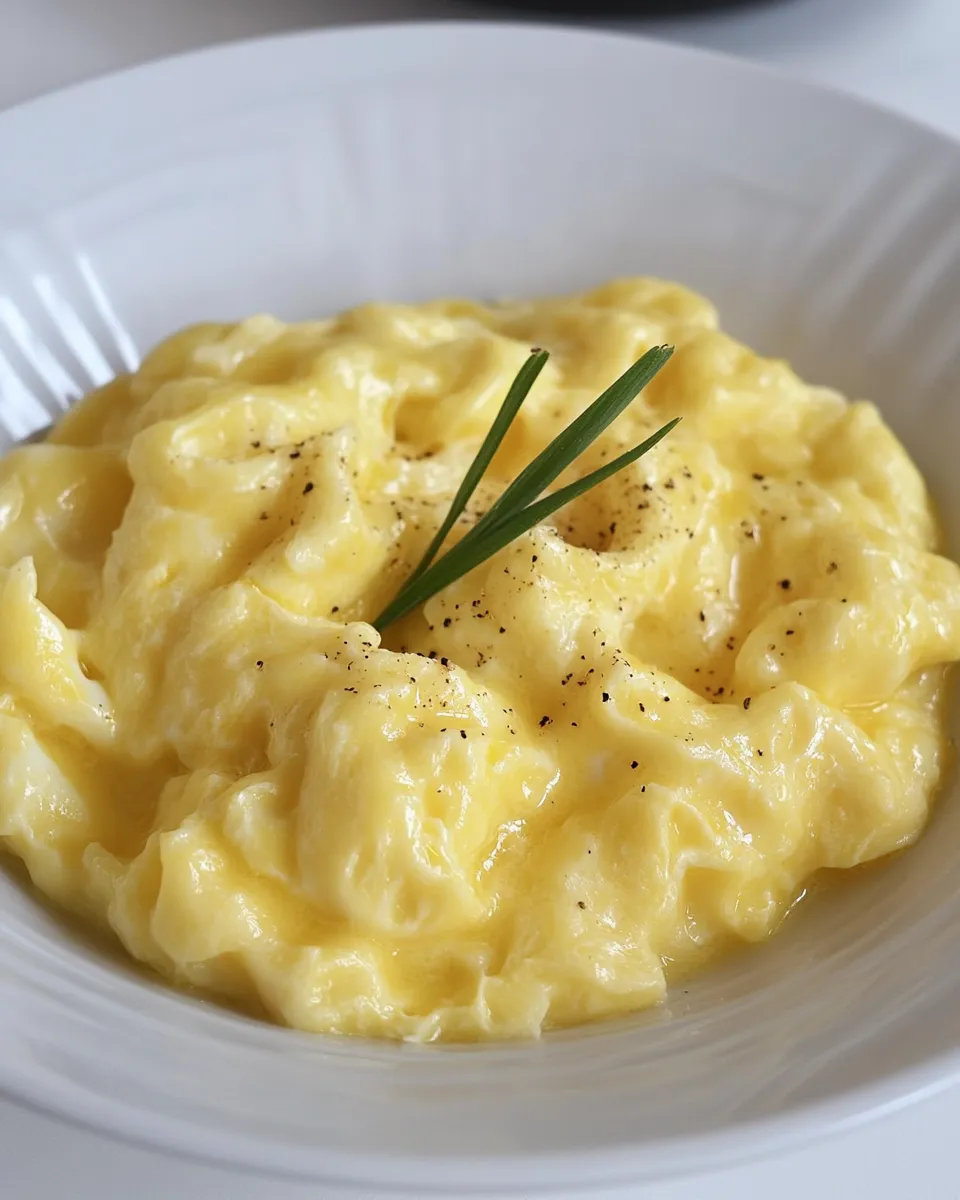
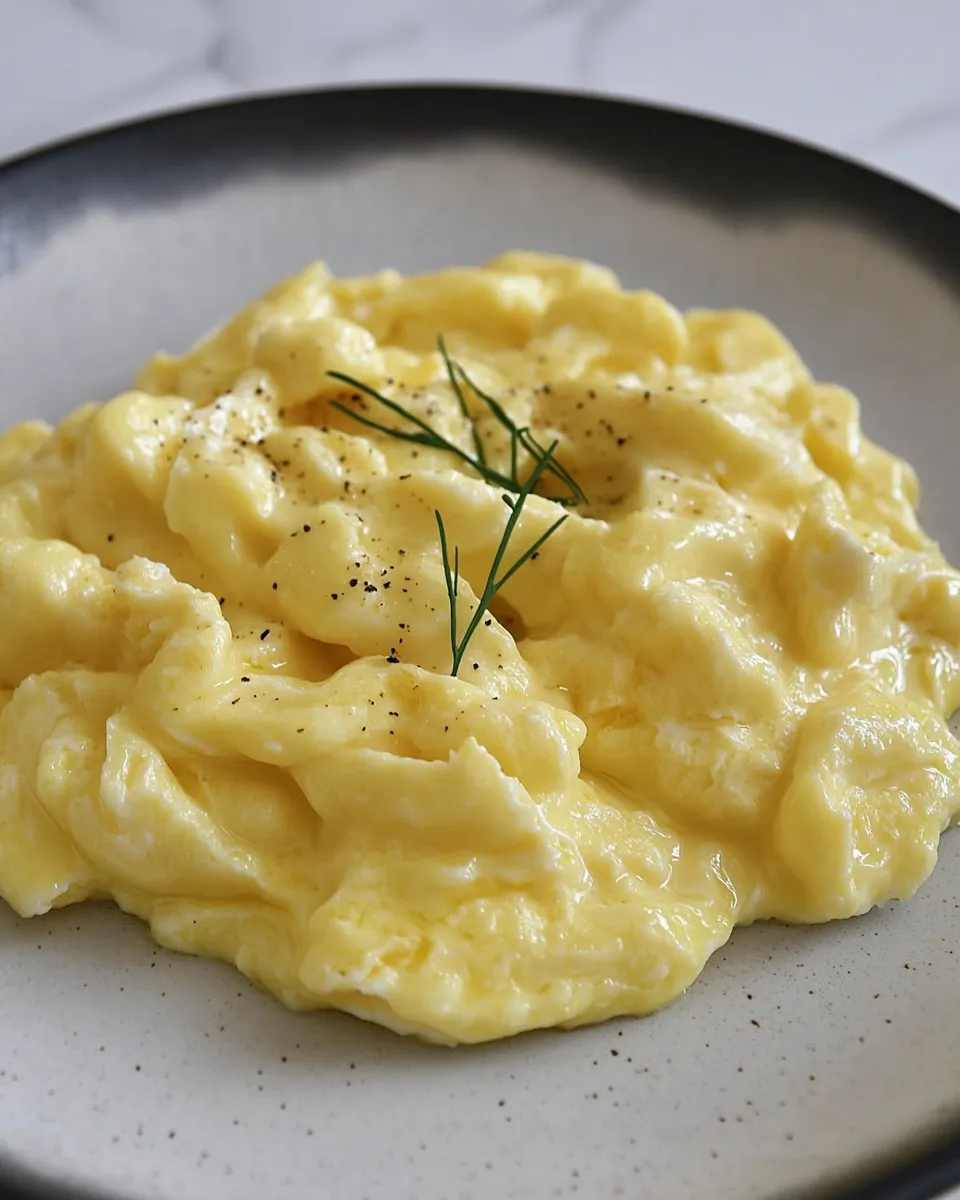
Soft Scrambled Eggs Recipe
Soft scrambled eggs are one of those small, quiet breakfasts that feel luxurious and manageable at the same time. They don’t need fancy ingredients or complicated technique—just a little patience and a low, steady heat. When done right, the curds are tender, silky, and slightly glossy, the kind of eggs you spoon onto buttered toast and savor slowly.
In this post I’ll walk you through the exact, no-nonsense method I use when I want silky, delicate eggs at home. I’ll cover the ingredients, the step-by-step method, common problems and how to fix them, plus a few flavor options so you can adapt the eggs to your mood.
This recipe is short on fuss and long on payoff. It suits lazy weekend mornings and busy weekday starts alike. Read through the tips, keep your heat low, and enjoy the payoff: egg yolks cooked just enough to be gentle and creamy.
What You’ll Need

Ingredients
- 4 fresh organic eggs — the foundation: fresh eggs give a brighter flavor and better texture.
- ½ tablespoon salted butter — adds richness and helps control the cooking surface; salted butter also seasons the eggs.
- 1 pinch sea salt — enhances the eggs’ natural flavor; add sparingly and adjust to taste.
How to Prepare Soft Scrambled Eggs
- Crack all 4 fresh organic eggs into a bowl.
- Add 1 pinch sea salt to the bowl.
- Use a fork to whisk the eggs and salt together until the yolks are broken and the mixture is uniform.
- Place a nonstick pan over low heat and let it warm for about 30 seconds.
- Add ½ tablespoon salted butter to the pan and let it fully melt, then tilt the pan to coat the surface with butter.
- Pour the whisked eggs into the pan. Wait about 10–20 seconds for a thin layer to set on the bottom.
- Using a spatula, gently push the set edges toward the center so uncooked egg flows to the sides. Repeat this gentle folding every few seconds until the eggs are mostly set but still soft and slightly glossy.
- Remove the pan from the heat when the eggs are nearly done (they will finish cooking from residual heat), then transfer the soft scrambled eggs to a plate and serve immediately.
Why I Love This Recipe
It’s forgiving and consistent. The low-heat approach removes the anxiety of watching the pan and waiting for the “perfect moment.” You can step away for a beat and know the eggs won’t overcook instantly. That residual-heat finish—pulling the pan off the burner while the eggs are still slightly glossy—creates a tender texture that high-heat scrambling rarely achieves.
There’s also pure versatility. These eggs are a gentle canvas: they pair as happily with a simple slice of buttered toast as they do with sharper cheeses or herb-forward toppings. The recipe is quick, uses pantry basics, and rewards attention rather than technique. Little adjustments—adding a sprinkle of herbs at the end or a swipe of cream—let you change the character without disrupting the simplicity.
Flavor-Forward Alternatives
- Herbs at the end — fold in chopped chives, parsley, or dill right after you take the pan off the heat to keep the aroma fresh.
- Cheese finish — grate a little sharp cheddar, aged gouda, or a soft goat cheese over the eggs after plating so it melts slightly from residual warmth.
- Umami boost — a few drops of soy sauce or a tiny smear of miso on the plate before the eggs adds depth; use sparingly to avoid overpowering.
- Spiced kick — finish with a pinch of smoked paprika or a crack of black pepper for warmth and contrast.
- Richness option — a splash of cream or a small pat of unsalted butter folded in off the heat will make the eggs even silkier (add after removing the pan).
Tools & Equipment Needed
- Nonstick skillet — a small 8–10 inch pan works well for 4 eggs and prevents sticking while keeping the surface even.
- Heatproof spatula — silicone or soft-edge spatula makes gentle folding easy without tearing the curds.
- Mixing bowl and fork — for whisking the eggs; you don’t need a whisk, a fork gives control.
- Stove with reliable low setting — consistent low heat is key to the texture; if your burner runs hot, dial it back.
- Plate and serving spoon — for transferring the eggs quickly so residual heat doesn’t overcook them in the pan.
Problems & Prevention
Common issues and how to fix them
- Eggs too dry or rubbery — this is almost always heat-related. Lower the flame and remove the pan a touch early; the eggs will finish cooking off the heat.
- Eggs undercooked or runny — if you prefer firmer eggs, either cook an extra few seconds in the pan on very low heat or let them sit for a minute after plating; they’ll carryover cook slightly.
- Uneven curds — if curds form too quickly in one spot, the pan is too hot. Reset: take the pan off the heat, let it cool a few moments, then continue on a lower setting.
- Sticking in the pan — make sure the butter fully coats the surface before adding eggs. If your nonstick coating is worn, consider a fresh pan; older pans can cause tearing.
- Salty or bland — season gently at the start with the pinch of sea salt as this recipe indicates; you can adjust with a small final pinch after plating, but adding huge amounts during cooking can change texture.
Warm & Cool Weather Spins
In warm months, keep the meal light. Serve the soft scrambled eggs over a bed of lightly dressed arugula or with sliced tomatoes and a squeeze of lemon. Fresh herbs like basil or chives feel bright and seasonal. A slice of sourdough or toasted country bread and a little olive oil on the side complements this fresh setup.
When it’s cooler, lean into warmth and comfort. Add a smear of roasted garlic or caramelized onions to the toast, or fold in a spoonful of crème fraîche or ricotta right before serving for extra creaminess. A side of sautéed mushrooms or wilted spinach adds heartiness without overpowering the delicate egg texture.
Chef’s Rationale
Low and slow keeps proteins tender. Eggs coagulate at relatively low temperatures; cooking them fast with high heat causes tight, dry curds. By maintaining a low heat and using frequent, gentle folding, you encourage many small, tender curds rather than a single dense mass. Removing the pan before the eggs reach firm doneness uses residual heat to bring them the rest of the way — this retains moisture and the soft, glossy finish that defines soft scrambled eggs.
Butter does two important things: it brings fat for mouthfeel and helps transmit gentle heat across the pan so the eggs cook evenly. Salt added at the beginning distributes flavor, and whisking until uniform breaks the yolks and incorporates some air, which helps texture without making the eggs foamy.
Meal Prep & Storage Notes
Soft scrambled eggs are best eaten immediately. Their texture changes quickly as they cool; the glossy silkiness becomes firmer and drier. If you need to prepare ahead for a short window (an hour or so), undercook the eggs slightly and keep them covered at room temperature; finish them briefly in a low pan just before serving.
For longer storage, cool cooked eggs quickly, store in an airtight container in the refrigerator for up to 24 hours, and reheat gently over low heat with a splash of water or milk, stirring until warmed through. Expect a texture change: reheated eggs will be more set than freshly made soft scrambles, so plan accordingly.
Your Questions, Answered
Q: Can I use a higher heat to speed things up?
A: Not if you want soft curds. Higher heat speeds coagulation and makes the eggs dry. Low heat is the quick method that actually yields better results because you avoid rescuing overcooked eggs.
Q: Should I add milk or cream?
A: It’s optional. A small splash of cream or milk can add richness but can also make the eggs more fragile; if you use dairy, add it sparingly and consider folding it in after the pan is off the heat.
Q: How do I season for serving?
A: Taste a small bite and adjust. Finish with a final pinch of flaky salt or a grind of black pepper. If you like herbs, add them off the heat to preserve brightness.
Q: Can I double this recipe?
A: You can, but use a slightly larger pan and be mindful that more eggs hold heat differently. Cook on the same low setting and use the same gentle folding technique; you may need a moment longer for the eggs to set.
Ready to Cook?
Turn on your smallest, most reliable burner to low. Gather the eggs, a bowl, a fork, a nonstick pan, a spatula, and your butter and salt. Follow the steps faithfully: whisk, low heat, melt butter, pour, wait, fold gently, and pull the pan early. Plate right away and enjoy that first spoonful of tender, glossy eggs.
If you try this method, come back and tell me how they turned out and what variations you loved. Simple breakfasts like this deserve a little ritual—and the payoff is worth it.

Soft Scrambled Eggs Recipe
Ingredients
Ingredients
- 4 fresh organic eggs
- 1/2 tablespoonsalted butter
- 1 pinchsea salt
Instructions
Instructions
- Crack all 4 fresh organic eggs into a bowl.
- Add 1 pinch sea salt to the bowl.
- Use a fork to whisk the eggs and salt together until the yolks are broken and the mixture is uniform.
- Place a nonstick pan over low heat and let it warm for about 30 seconds.
- Add ½ tablespoon salted butter to the pan and let it fully melt, then tilt the pan to coat the surface with butter.
- Pour the whisked eggs into the pan. Wait about 10–20 seconds for a thin layer to set on the bottom.
- Using a spatula, gently push the set edges toward the center so uncooked egg flows to the sides. Repeat this gentle folding every few seconds until the eggs are mostly set but still soft and slightly glossy.
- Remove the pan from the heat when the eggs are nearly done (they will finish cooking from residual heat), then transfer the soft scrambled eggs to a plate and serve immediately.
Equipment
- Bowl
- Fork
- nonstick pan
- Spatula