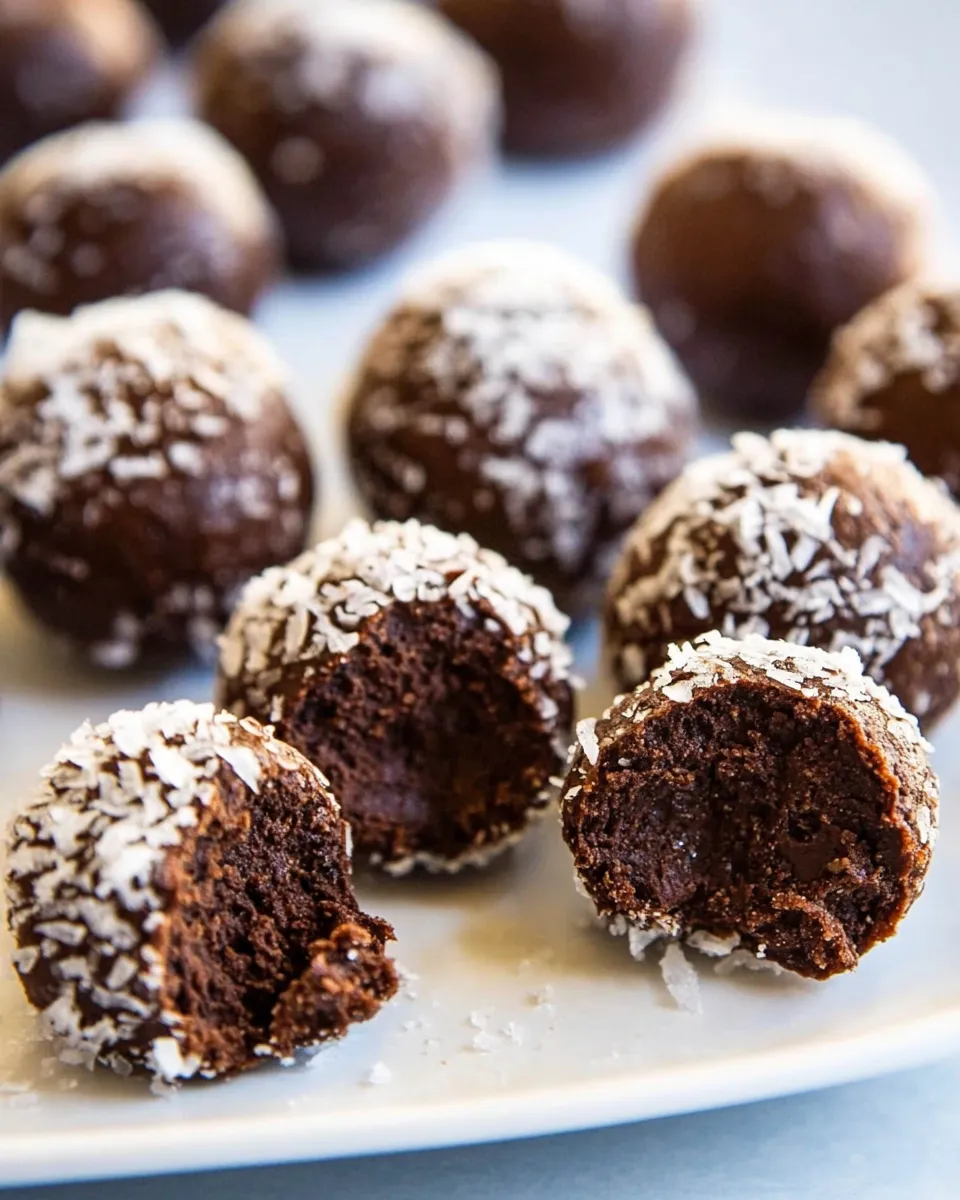
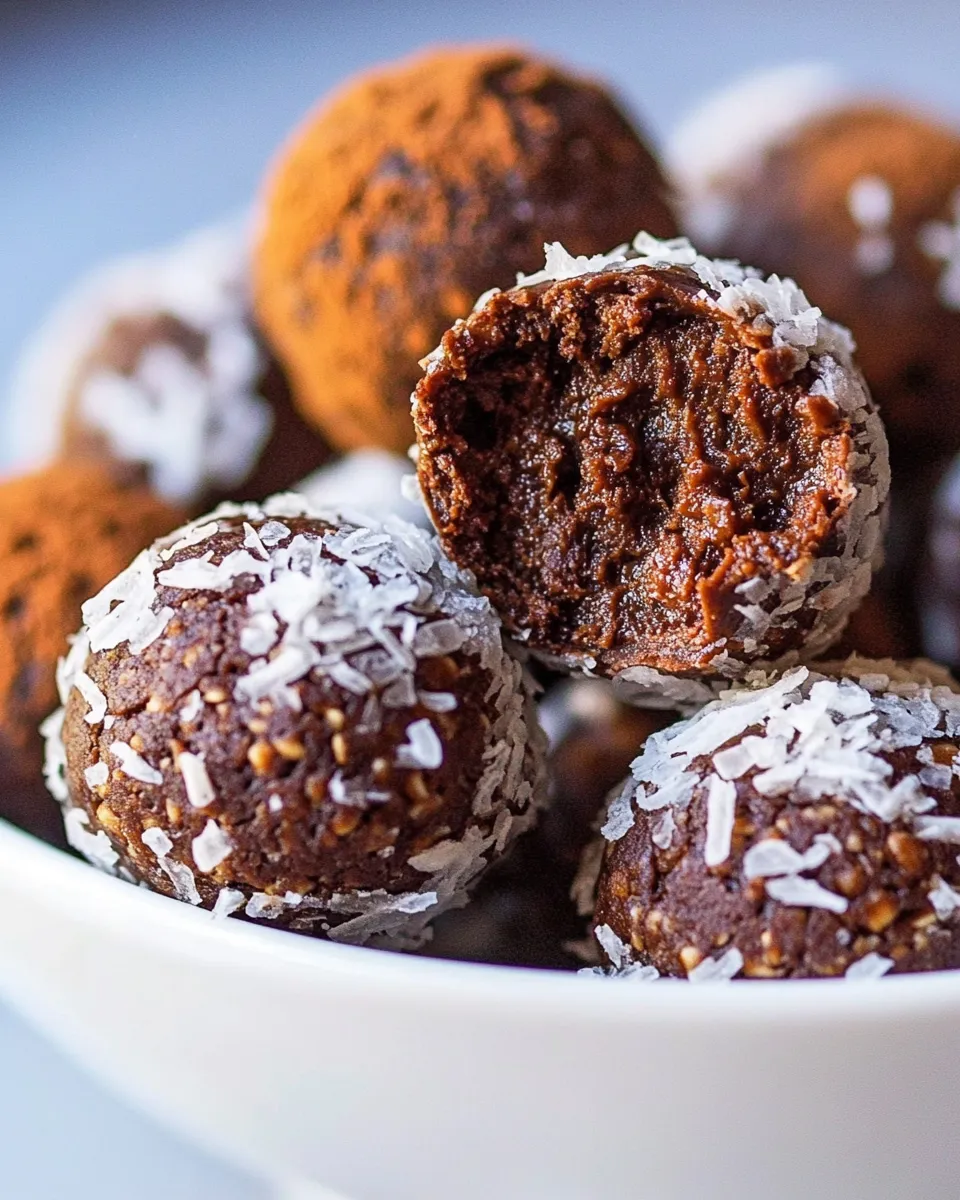
Raw Chocolate Fudge Balls
These little bites are my go-to when I want dense, chocolatey satisfaction without turning on the oven. They’re raw, naturally sweet, and come together in minutes with a food processor and a freezer. I make a big batch on Sundays and keep them handy for afternoon pick-me-ups or a quick dessert after dinner.
I like them plain for a chewy, fudgy center, or rolled in shredded coconut when I want a bit of contrast. The recipe is forgiving: the dates do the heavy lifting for sweetness and texture, cocoa brings the chocolate, and a pinch of salt wakes everything up.
Below I’ll walk you through exactly what to use, how to make them step by step, what to watch out for, and how to store them so they stay perfectly firm. No fluff—just practical tips from my test kitchen so you get consistent results.
What Goes In

Ingredients
- 1 1/2 cups pitted dates — the main binder and sweetener; look for soft, sticky dates like Medjool.
- 1 1/2 tablespoons cocoa or cacao powder — provides chocolate flavor; sift out lumps if needed for a smoother mix.
- 1/8 teaspoon salt — balances sweetness and enhances chocolate notes.
- small handful mini chocolate chips, optional — for little chocolate pockets and texture; add if you want flecks of chocolate.
- optional cocoa, shredded coconut, melted chocolate, etc. — coatings or drizzles to finish the balls; choose one or a combination.
Cooking Raw Chocolate Fudge Balls: The Process
- Place 1 1/2 cups pitted dates, 1 1/2 tablespoons cocoa or cacao powder, and 1/8 teaspoon salt into a strong food processor or high-speed blender.
- Process until the mixture is completely smooth, stopping to scrape down the sides as needed.
- If using mini chocolate chips, add a small handful and pulse a few times to distribute them without fully pulverizing (or blend them in if you prefer a uniform texture).
- Transfer the sticky dough to a bowl, cover, and freeze for about 30 minutes, or until firm enough to scoop and roll.
- Using a mini cookie scoop or your hands, scoop or roll the chilled dough into bite-sized balls.
- If desired, roll the balls in optional coatings (cocoa, shredded coconut, or drizzle with melted chocolate) or leave plain.
- Store leftovers in an airtight container in the freezer to keep the balls as firm as possible.
What Makes This Recipe Special

It’s the texture and simplicity. These fudge balls rely entirely on whole, simple ingredients—no added oils, syrups, or refined sugars. Dates act as the sweetener and binder, so the balls end up chewy and dense, like a small piece of fudge. Cocoa powder gives a true chocolate depth without needing extra chocolate bars.
They’re fast. From start to finish you’re looking at under an hour, most of it passive chill time. The freezer step is key: it firms the mix so you can roll neat, tidy balls instead of a sticky mess. Lastly, the recipe is modular. Add-ins and coatings change the experience dramatically, so you can adapt them for different moods—nutty, tropical, or ultra-chocolate.
If You’re Out Of…
If you don’t have soft dates, the texture will be the biggest issue. You can try soaking firm dried dates in warm water for 10–15 minutes, drain well, and proceed, but results vary. If you’re out of cocoa powder, you’ll lose the concentrated chocolate flavor—cacao nibs or melted chocolate would change the raw status or texture, so I recommend waiting until you can get cocoa or cacao powder.
Out of mini chocolate chips? No problem. The balls are fully chocolatey from the cocoa powder alone. If you want pockets of chocolate but have only a chocolate bar, chop it finely and add a small amount at step three—just know that a high-speed processor will quickly turn it into a chocolate paste.
Equipment Breakdown
- Strong food processor or high-speed blender — you need power to get dates silky smooth.
- Mini cookie scoop or tablespoon — for consistent, bite-sized portions.
- Bowl and spatula — to transfer and chill the dough.
- Freezer — chills and firms the dough quickly; an essential step.
- Small tray or baking sheet (optional) — to set the balls on when freezing.
- Parchment or silicone mat (optional) — prevents sticking while you roll and chill.
- Small saucepan or microwave-safe bowl (optional) — to melt chocolate for drizzling.
Pitfalls & How to Prevent Them
- Sticky, unrollable dough: If the mixture is too soft to form balls, chill it longer in the freezer in a covered bowl. A firmer mix is much easier to handle.
- Grainy texture from under-processed dates: Stop and scrape the sides often while processing. A few extra pulses make a significant difference.
- Overheating in a blender: High-speed blenders can heat the mixture if run too long. Pulse in short bursts and give it brief rests between pulses.
- Coating won’t stick: Slightly dampen the surface by rolling the ball between your palms for a second, then immediately roll in the coating. For melted chocolate coatings, chill the balls first so the melt sets quickly.
- Too sweet or not sweet enough: The sweetness depends on the dates. Taste the raw mix (it’s safe) and adjust by adding another date if needed, or a touch more cocoa if it feels too sweet.
In-Season Swaps
Because the base is dates and cocoa, seasonal swaps tend to be about coatings and add-ins. In late summer, a dusting of freeze-dried raspberry powder gives a bright fruit note. In winter, roll the balls in toasted chopped nuts or crushed gingerbread crumbs for warmth and crunch.
Spring and early summer call for lighter touches—grated citrus zest in the mix (a little goes a long way) or rolling in finely chopped pistachios. Keep additions dry and finely chopped so they incorporate cleanly with the sticky dough.
Notes from the Test Kitchen
I make these with Medjool dates for the best texture. When I tried smaller, drier dates, I soaked them briefly and drained really well; they worked but the sweetness and chew changed. Processing time varies by machine—my older food processor took a few more pulses than my newer high-speed blender.
If you like a uniform texture, process everything until fully smooth and skip the mini chips. If you prefer textural contrast, add the chips and pulse just enough to distribute them. When coating in melted chocolate, tempering isn’t necessary for home use; simply melt slowly and set the balls in the freezer immediately so the coating snaps quickly.
For portion control, a mini cookie scoop gives consistent sizes and looks tidy in a storage container. I also recommend labeling the container with the date; although they keep indefinitely frozen, flavor is best within a few months.
How to Store & Reheat
Store the balls in an airtight container in the freezer to keep them as firm as possible. Separate layers with parchment so they don’t stick together. For immediate serving, remove a few and sit them on the counter for 5–10 minutes to soften slightly—longer if you prefer a chewier texture.
Do not refrigerate for long-term storage; refrigeration will soften them and reduce their shelf-life quality. If you prefer a softer, room-temperature bite, thaw in the fridge for 20–30 minutes, or on the counter for 10–15 minutes depending on room temperature.
Handy Q&A
- Can I make these nut-free? Yes—the base has no nuts. Just avoid nutty toppings.
- How long do they keep? Properly stored in the freezer, they keep well for several months. Taste and texture are best within 2–3 months.
- Are they vegan? Yes, with the listed ingredients they are vegan.
- Can I double the recipe? Yes, but process in batches if your food processor is small to ensure an even, smooth texture.
- Why freeze them? Freezing firms the dough so you can roll them; it also gives the finished bite a denser, fudge-like quality.
That’s a Wrap
These Raw Chocolate Fudge Balls are simple, forgiving, and endlessly adaptable. They require minimal hands-on time and reward you with chewy, chocolate-rich bites you can keep on hand for whenever chocolate calls. Follow the process steps carefully, chill the dough, and pick coatings that match your mood. That’s it—quick, tidy, and reliably delicious.
Raw Chocolate Fudge Balls
Ingredients
Ingredients
- 1 1/2 cupspitted dates
- 1 1/2 tbspcocoa or cacao powder
- 1/8 tspsalt
- small handful mini chocolate chips optional
- optional cocoa shredded coconut, melted chocolate, etc.
Instructions
Instructions
- Place 1 1/2 cups pitted dates, 1 1/2 tablespoons cocoa or cacao powder, and 1/8 teaspoon salt into a strong food processor or high-speed blender.
- Process until the mixture is completely smooth, stopping to scrape down the sides as needed.
- If using mini chocolate chips, add a small handful and pulse a few times to distribute them without fully pulverizing (or blend them in if you prefer a uniform texture).
- Transfer the sticky dough to a bowl, cover, and freeze for about 30 minutes, or until firm enough to scoop and roll.
- Using a mini cookie scoop or your hands, scoop or roll the chilled dough into bite-sized balls.
- If desired, roll the balls in optional coatings (cocoa, shredded coconut, or drizzle with melted chocolate) or leave plain.
- Store leftovers in an airtight container in the freezer to keep the balls as firm as possible.
Equipment
- Food Processor
- High-Speed Blender
- Bowl
- freezer
- mini cookie scoop
Notes
For a low carb version, try these
Keto Brownie Bombs
.