Pickle Chicken
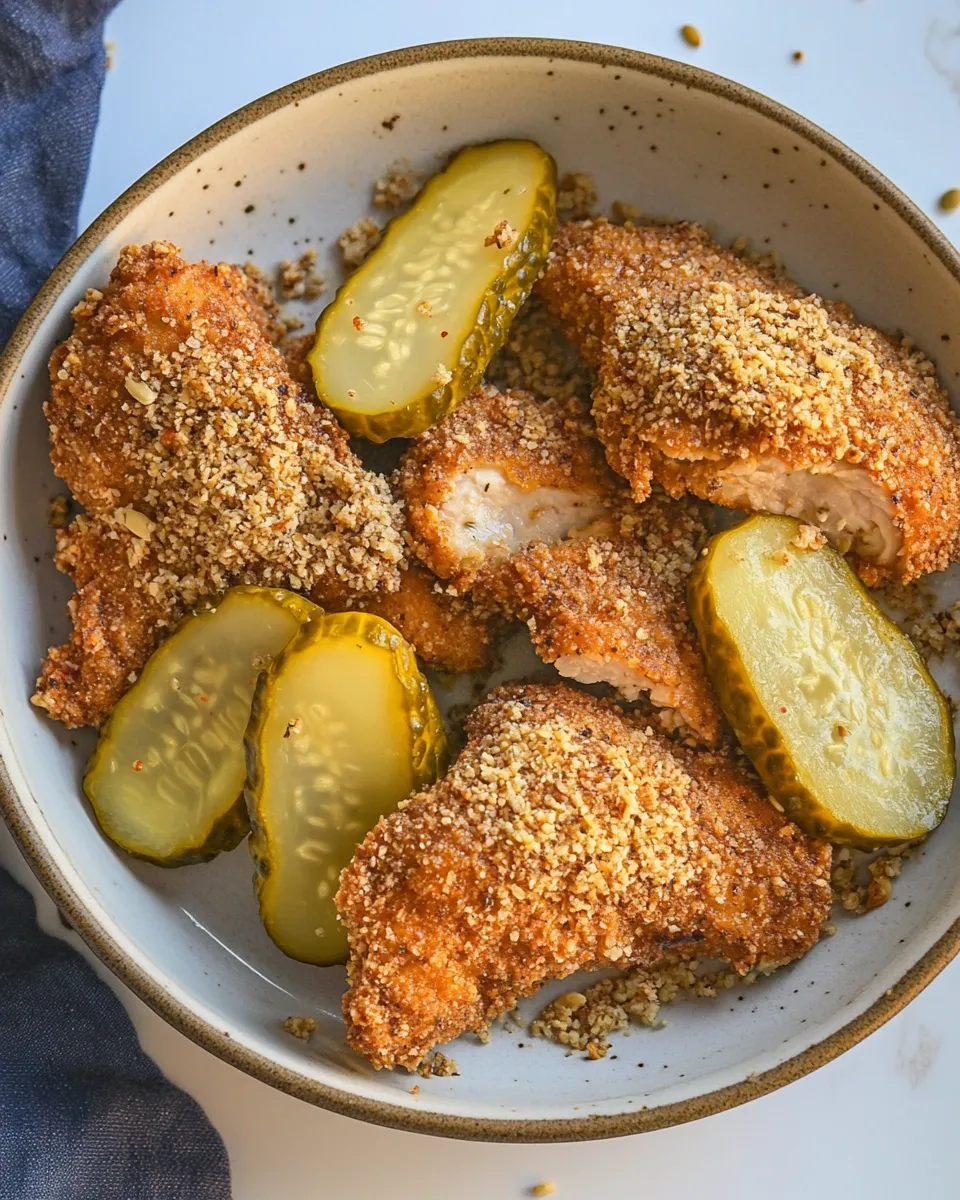
There’s something wildly satisfying about a crunchy, tangy, and slightly sweet bite of chicken that reminds you of summer picnics and diner counters. This Pickle Chicken recipe takes juicy boneless, skinless chicken tenderloins and amplifies them with dill pickle juice, brown sugar, and a crisp Panko coating. It’s simple, pantry-friendly, and full of bright flavor. Below you’ll find a friendly write-up, tips for success, and a clear, step-by-step recipe that yields golden, irresistible chicken perfect for sandwiches, salads, or straight off the plate with extra pickles for serving.
Why this Pickle Chicken works

We’re starting with 2 pounds of boneless, skinless chicken tenderloins — these cook quickly and stay moist. The chicken brines briefly in 1½ cups of dill pickle juice from a pickle jar, with 1 tablespoon of brown sugar and 2 teaspoons of kosher salt added. That brine balances tang, sweet, and savory notes while seasoning the meat deeply.
For texture, a classic three-stage dredge creates a deep, crunchy crust: first a flour base, then an egg wash, and finally a Panko breadcrumb coating. Panko gives more pronounced crunch than regular crumbs, while the seasoning blend in the flour—1 teaspoon salt, 1 teaspoon garlic powder, and 1 teaspoon chili powder—makes the crust sing. Two large eggs bind everything together so the crumbs adhere during frying or baking.
Ingredients
- 2 lbs boneless skinless chicken tenderloins
- 1½ cups dill pickle juice from a pickle jar (extra pickles for serving)
- 1 tablespoon brown sugar
- 2 teaspoons kosher salt
- 1½ cups Panko bread crumbs
- 1 cup all-purpose flour
- 1 teaspoon salt
- 1 teaspoon garlic powder
- 1 teaspoon chili powder
- 2 large eggs
Equipment and prep notes
- Shallow bowls or pie plates for the flour, egg, and Panko stations.
- A shallow dish or resealable bag for the pickle brine.
- Wire rack set over a baking sheet (for resting before and after cooking).
- Large skillet and neutral oil with a high smoke point, or an oven preheated to 425°F (220°C) if you prefer baking.
- Instant-read thermometer for checking doneness (165°F / 74°C target internal temp).
Taste and serving ideas
This chicken has a crisp exterior and a tangy, seasoned interior. Serve it three easy ways:
- In a sandwich: toast a soft bun, smear on your favorite mayo-based sauce, pile on the chicken, and add extra pickle slices for crunch.
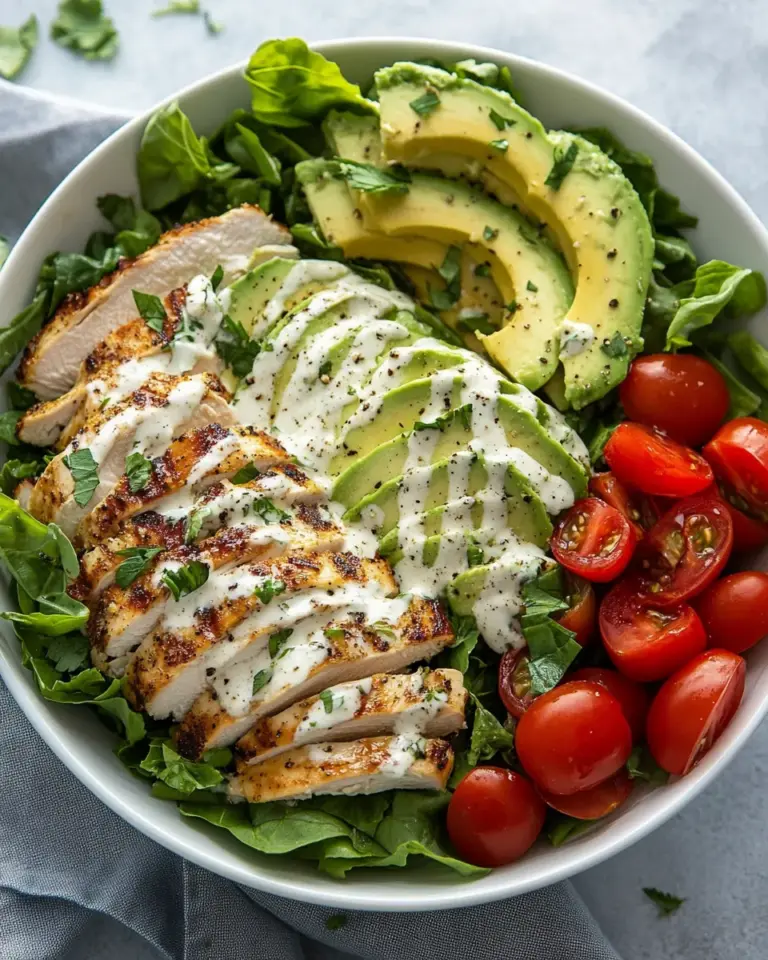
- On a salad: slice the tenders and add them to a bowl of greens, cherry tomatoes, cucumbers, and a light vinaigrette.
- As a snack or appetizer: cut the cooked tenders into strips and serve with ranch, honey mustard, or a dill-yogurt dip alongside extra pickles.
Step-by-step instructions
Follow these steps closely. The ingredient amounts are unchanged and are the source of truth for measurements and seasoning. The order of steps matches the original approach, but each step is rewritten for clarity and consistency.
- Make the pickle brine. In a shallow dish or resealable bag, combine 1½ cups dill pickle juice, 1 tablespoon brown sugar, and 2 teaspoons kosher salt. Stir or shake until the brown sugar and salt are dissolved.
- Brine the chicken. Add 2 pounds boneless skinless chicken tenderloins to the pickle brine, ensuring each piece is submerged or well-coated. Cover the dish or seal the bag and refrigerate for at least 30 minutes and up to 2 hours. Do not over-brine, as tenderloins are thin and can become too soft if brined too long.
- Prepare the dredging stations. While the chicken brines, set up three shallow bowls or plates. In the first, pour 1 cup all-purpose flour and mix in 1 teaspoon salt, 1 teaspoon garlic powder, and 1 teaspoon chili powder until evenly combined. In the second, crack and whisk 2 large eggs until smooth. In the third, spread out 1½ cups Panko bread crumbs so they’re ready for coating.
- Drain and pat dry. When the brining time is up, remove the tenderloins from the pickle brine and place them on a wire rack or paper towels. Pat each piece dry with paper towels. A bit of surface moisture is okay, but the chicken should not be dripping wet before dredging.
- Dredge the tenderloins. Working with one piece at a time, dredge each tenderloin in the seasoned flour, coating it completely and shaking off any excess. Next, dip the floured chicken into the whisked eggs, allowing the excess egg to drip off. Finally, press the chicken into the Panko breadcrumbs, ensuring an even and well-adhered crust. Place the coated tenderloins on a wire rack while you finish the rest.
- Choose your cooking method. You can pan-fry or bake the breaded tenderloins. Both methods are outlined below so you can pick what suits your kitchen and time.
-
Pan-fry method (for extra-crispy results):
- Heat a large skillet over medium heat and add enough neutral oil (such as vegetable or canola) to reach about 1/8–1/4 inch deep.
- When the oil shimmers and is hot but not smoking, carefully add the breaded tenderloins in a single layer without crowding. Fry for 3–4 minutes per side, or until the crust is golden brown and an instant-read thermometer inserted into the thickest part reads 165°F (74°C).
- Transfer cooked pieces to a wire rack set over a baking sheet to drain and keep crisp. If frying in batches, maintain oil temperature between batches for even browning.
-
Bake method (lighter option):
- Preheat the oven to 425°F (220°C). Place a wire rack on a baking sheet and lightly spray the rack with oil to prevent sticking.
- Arrange the breaded tenderloins in a single layer on the rack. Lightly spray the tops with cooking spray to promote browning.
- Bake for 12–15 minutes, flipping once halfway through, until the coating is golden and the internal temperature reaches 165°F (74°C).
- Remove from the oven and let rest briefly on the rack before serving to keep the crust crisp.
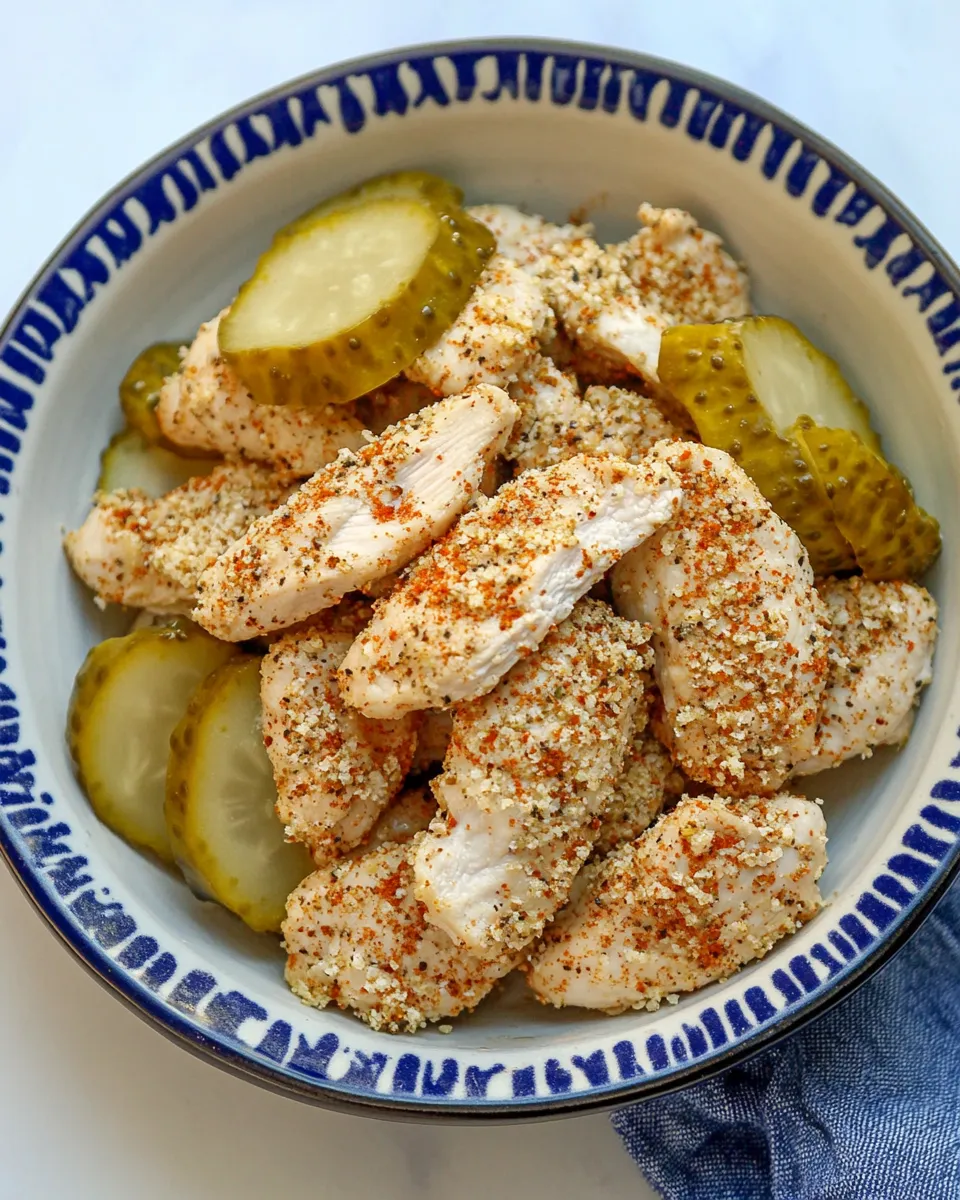
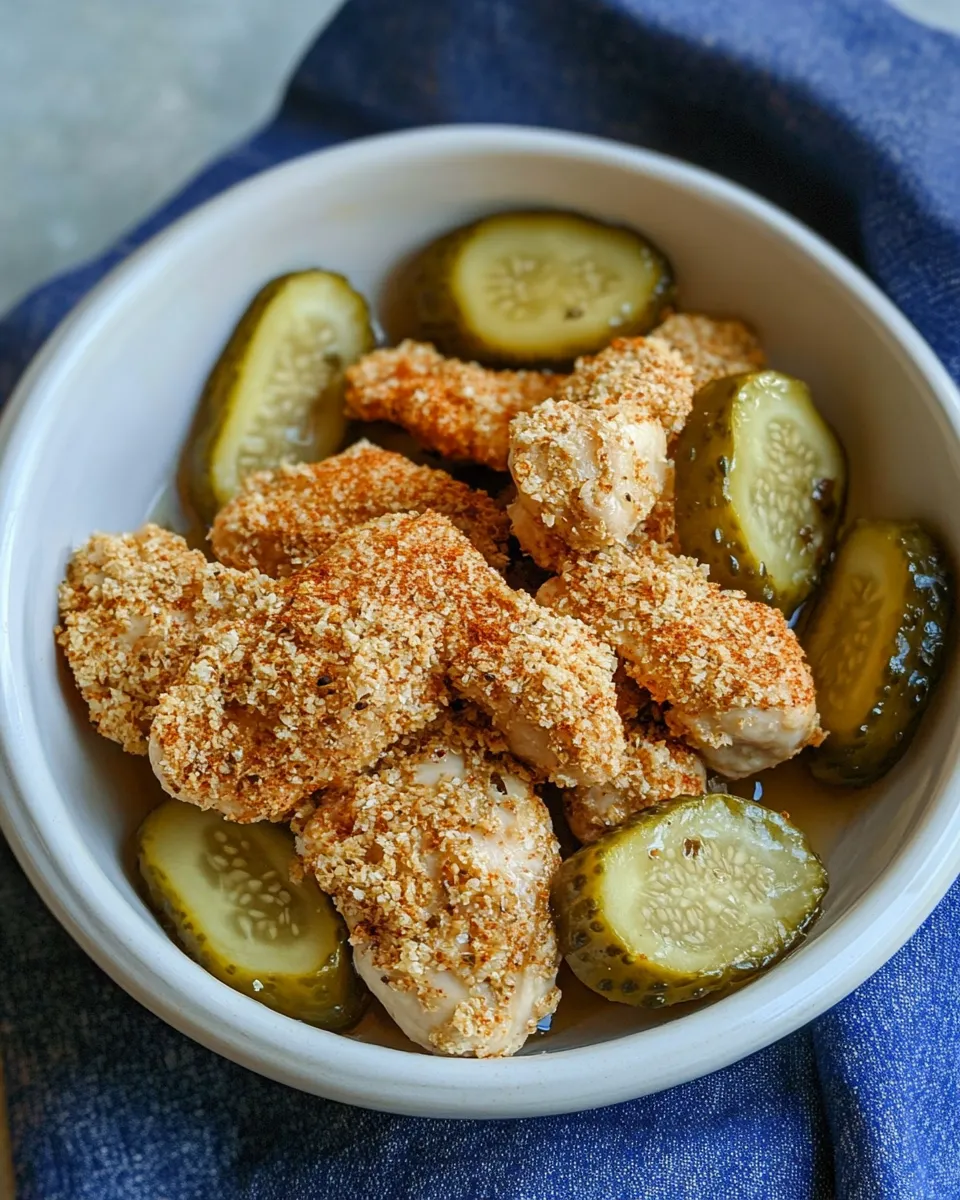
- Rest and serve. Let the cooked tenderloins rest for 3–5 minutes. Serve warm with extra pickle slices from the jar alongside your favorite dipping sauce, or build sandwiches and salads as desired.
Timing and yield
This recipe serves 4 as an entrée or more as a sandwich or appetizer component. Active prep time is about 20–30 minutes, plus 30–120 minutes for brining and 15–25 minutes for cooking depending on your method and batch size.
Troubleshooting & tips
- Do not over-brine: Tenderloins are thin and brine quickly. Keep the brining window between 30 minutes and 2 hours to avoid a mushy texture.
- Dry before dredging: Patting the chicken dry helps the flour and egg adhere and creates a more even crust.
- Keep oil temperature steady: If pan-frying, maintain medium heat. If the oil is too cool, the coating will absorb oil and become greasy. Too hot and the outside burns before the inside cooks.
- Use a wire rack: Letting the finished tenders rest on a wire rack keeps the crust crispier than piling them on a plate.
- Make-ahead option: Brine and coat the tenderloins up to the point of cooking, then refrigerate for a few hours. When ready, fry or bake straight from the fridge, adding a minute or two to the cooking time if needed.
Variations
- Spicy crunch: Add 1/2 teaspoon cayenne to the seasoned flour for an extra kick.
- Herbed Panko: Mix 1 tablespoon chopped fresh parsley into the Panko before coating for bright herbal notes.
- Oven-fryer style: For a crispier baked result, spray the Panko with a little oil before coating or use an air fryer at 400°F for 8–10 minutes, flipping once.
Nutrition snapshot (approximate per serving)
Values vary with cooking method and portion sizes. Expect a moderate protein content from the tenderloins and calories from the breading and cooking oil. Baking reduces overall fat compared with pan-frying.
Final thoughts
Pickle Chicken is a delightful flip of classic comfort-food techniques: brining for flavor and moisture, and a triple-dredge for satisfying crunch. The tang of the pickle juice and the subtle sweetness from the brown sugar create an unexpectedly bright, balanced bite that’s equally at home in a picnic spread or a cozy dinner. Keep extra pickle slices nearby—this is one recipe where more is merrier.
Pickle Chicken
Ingredients
- 2 lb boneless skinless chicken tenderloins
- 1.5 cups dill pickle juice from a pickle jar (extra pickles for serving)
- 1 tbsp brown sugar
- 2 tsp kosher salt for the marinade
- 1.5 cups panko bread crumbs
- 1 cup all-purpose flour
- 1 tsp salt
- 1 tsp garlic powder
- 1 tsp chili powder
- 2 large eggs
- 2 tbsp water for whisking with eggs
Instructions
- In a large bowl or resealable plastic bag, combine the chicken, dill pickle juice, brown sugar, and 2 teaspoons kosher salt. Refrigerate and marinate for 1 to 24 hours.
- When ready to cook, preheat the oven to 425°F (220°C). Spread the panko crumbs in an even layer on a baking sheet and toast in the oven 5–7 minutes until golden, watching carefully so they do not burn. Transfer toasted panko to a shallow bowl and line the baking sheet with parchment paper.
- In a shallow bowl, mix the flour, 1 teaspoon salt, garlic powder, and chili powder.
- In a second shallow bowl, whisk the eggs with 2 tablespoons water until combined.
- Remove a piece of chicken from the marinade, letting excess drip off. Dredge the chicken in the seasoned flour, then dip into the egg mixture, and finally press into the toasted panko to coat thoroughly. Place coated tenders on the prepared baking sheet.
- Bake the chicken at 425°F for 18–25 minutes, until the coating is golden and the internal temperature reaches 165°F (74°C).
- Serve the hot chicken immediately with extra pickles and optional sauce.
Equipment
- large bowl or resealable plastic bag
- Measuring Cups and Spoons
- Baking Sheet
- Parchment Paper
- shallow bowls (3)
- Whisk or fork
- Meat Thermometer
Notes
- We love serving this with a knock-off Raising Cane's sauce: 3/4 cup mayo, 1/4 cup ketchup, 1 tsp garlic powder, 1 tsp Worcestershire, 1/2 tsp black pepper.