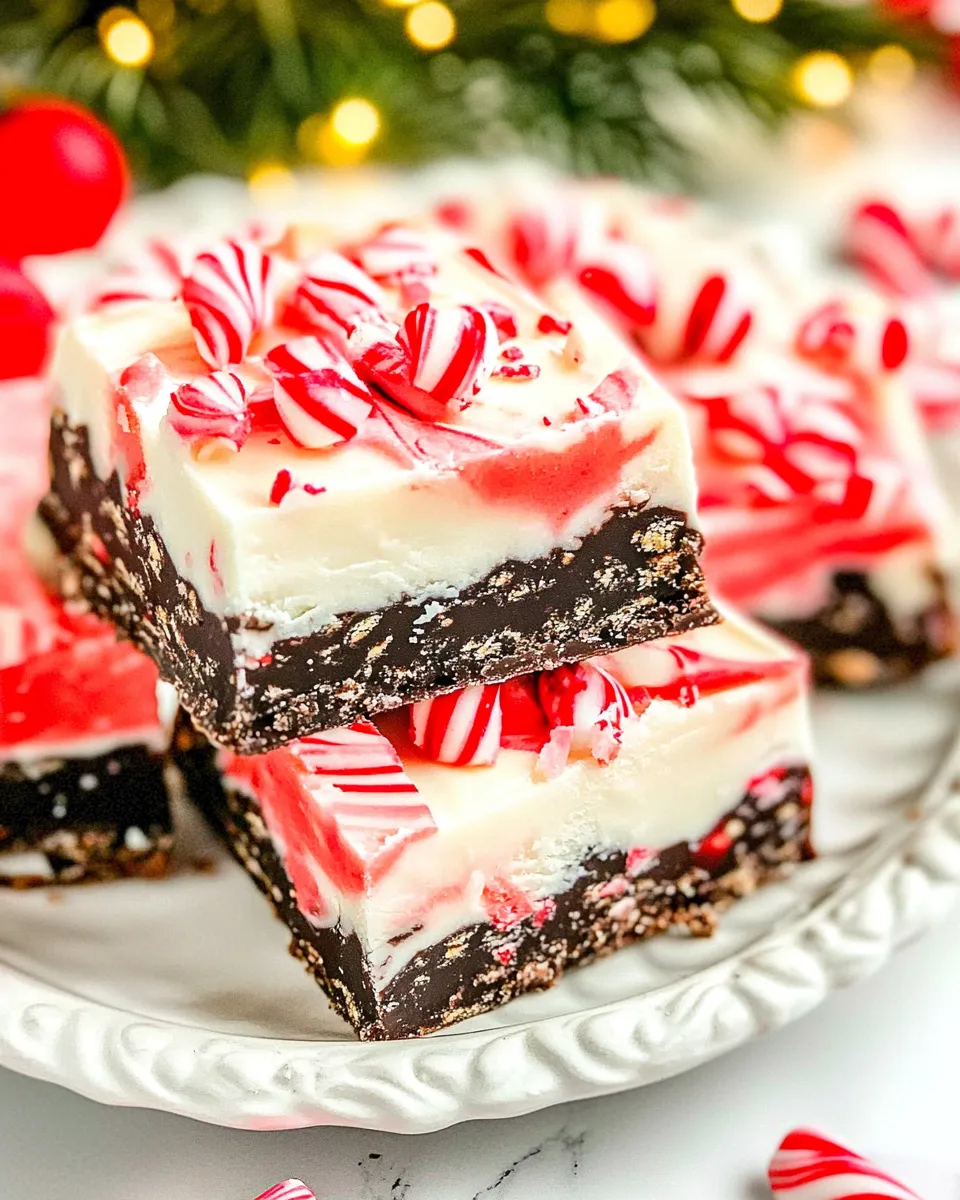
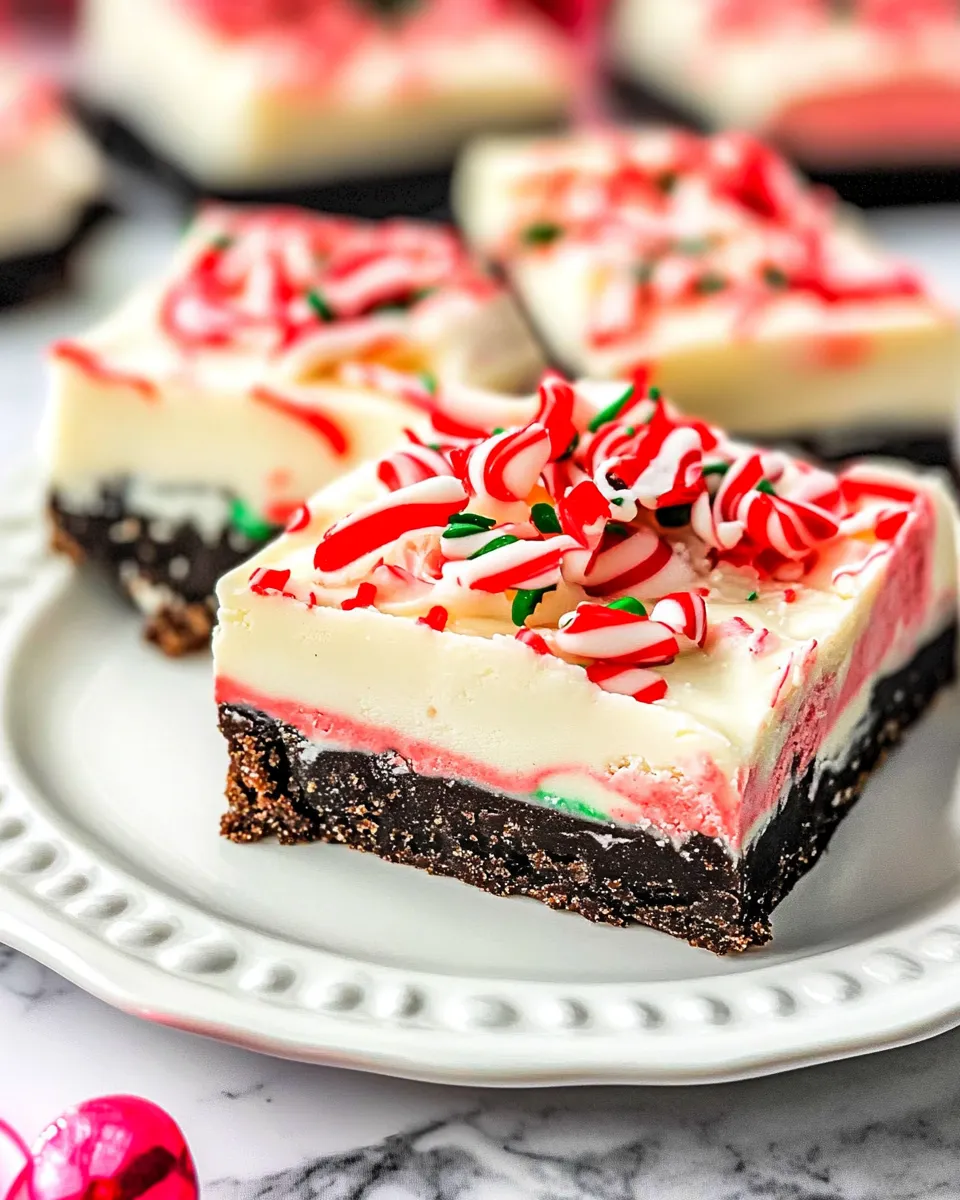
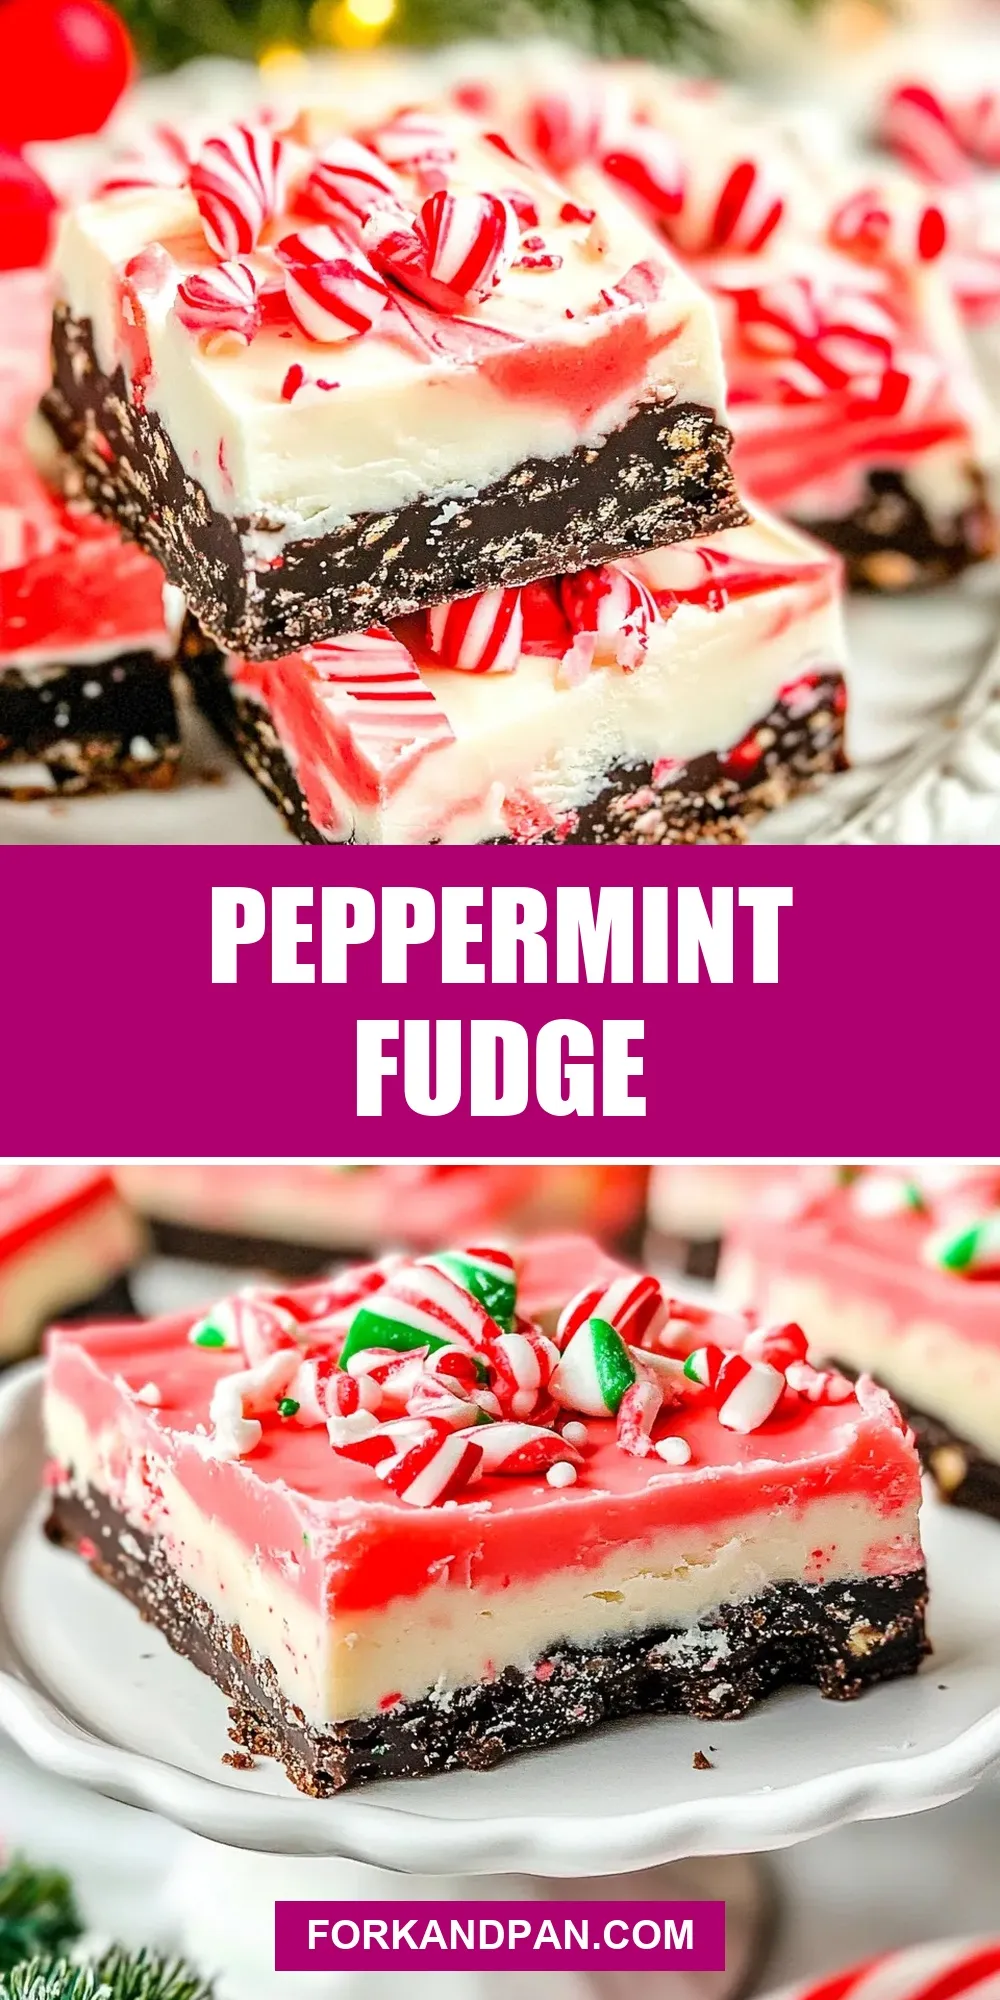
Peppermint Fudge
This peppermint fudge recipe is one I reach for when I want an easy, festive sweet that travels well and disappears fast. The flavor is straightforward: sweet, minty, and creamy, with a little crunch from crushed peppermint candies. It comes together in minutes and sets into bite-sized pieces that are perfect for gifting or a holiday cookie tray.
I like this version because it uses just a handful of reliable pantry ingredients, and the technique is forgiving: gentle melting, quick stir, and a brief chill are all that separate you from a glossy tray of fudge. There’s no candy thermometer, no tempering, and no long stove-top simmer. If you can stir and press, you can make this.
Below you’ll find a clear ingredient breakdown, the exact step-by-step method I follow every time, and practical notes on swaps, common mistakes, storage, and serving ideas. Read once, then get the bowl out—this really is a do-able holiday treat.
Ingredient Breakdown

Ingredients
- 3 cup white chocolate chips — The base of the fudge; use good-quality chips for a smoother, more stable finish.
- 14 ounces sweetened condensed milk — Provides sweetness, body, and a fudgy texture when combined with the melted chocolate.
- 1 teaspoon peppermint extract — Adds the mint flavor; start with the listed amount and adjust slightly if you prefer a stronger mint punch.
- 1/4 teaspoon sea salt — Balances sweetness and rounds the flavor; don’t skip it.
- 1/3 cup crushed peppermint candies — Gives a festive crunch and color contrast; crush to small pieces so they press into the surface without breaking the fudge apart.
Peppermint Fudge: Step-by-Step Guide
- Grease an 8×8-inch baking pan and line it with parchment paper, leaving an overhang on two opposite sides for easy removal.
- Place the white chocolate chips and sweetened condensed milk in a large microwave-safe bowl.
- Microwave in 15–20 second intervals, stirring well after each interval, until the chocolate is completely melted and the mixture is smooth and fully combined (total time will vary by microwave).
- Stir in the peppermint extract and the sea salt until evenly incorporated.
- Pour the mixture into the prepared pan and spread it into an even layer. Sprinkle the crushed peppermint candies evenly over the top and press lightly so they adhere.
- Allow the fudge to cool completely at room temperature, then chill in the refrigerator if needed until fully set.
- Use the parchment overhang to lift the fudge from the pan and cut into 1-inch pieces.
What You’ll Love About This Recipe
First, it’s fast. From start to finish, active work time is under 15 minutes. That makes it ideal for last-minute hostess gifts or when you want a holiday treat without committing a whole afternoon. The microwave method is efficient: short bursts of heat and a few stirs yield smooth, glossy fudge every time.
Second, the texture is reliably creamy thanks to the sweetened condensed milk. There’s body and density, but the pieces still feel velvety rather than chalky. The crushed peppermint candies on top provide contrast—small, refreshing crunches that brighten each bite.
Finally, it’s wonderfully flexible. The flavor profile leans minty and sweet, and you can dress the top with more or fewer candies, or swap flavors for chocolate-mint variations. It also slices cleanly when fully chilled, which makes it a neat choice for gift boxes and platters.
Dairy-Free/Gluten-Free Swaps
This recipe is naturally free of gluten in its base ingredients, but always check any packaged candies for cross-contamination or added gluten-containing ingredients. For dairy-free options, use dairy-free white chocolate chips designed for baking and a dairy-free sweetened condensed milk alternative—there are coconut-based condensed milk products and other plant-based options available at many stores. Taste and texture will vary slightly, so start by tasting the melted mixture before adding peppermint extract and salt.
For gluten-free peppermint candies, look for candies explicitly labeled gluten-free. Many peppermint disks and canes are gluten-free, but some flavored or colored varieties can include additives that contain gluten, so read labels.
Cook’s Kit
- 8×8-inch baking pan — the specified size keeps the pieces the right thickness.
- Parchment paper — for easy removal and clean cuts.
- Large microwave-safe bowl — big enough to stir without splashing.
- Rubber spatula or heatproof spoon — for scraping the bowl and smoothing the surface.
- Measuring cups and spoons — accurate amounts matter with sweetened condensed milk and extract.
- Small bag and rolling pin (or a lightweight mallet) — to crush the peppermint candies evenly.
- Sharp knife — to cut clean 1-inch pieces after chilling.
Don’t Do This
- Don’t overheat the chocolate. Microwave in short intervals and stir between bursts. Overheating causes the chocolate to seize or become grainy.
- Don’t skip the salt. The small amount balances the extreme sweetness and brings out the peppermint notes.
- Don’t press the candies into the fudge aggressively. Press lightly so they adhere without embedding large air pockets or cracking the surface.
- Don’t try to cut the fudge before it’s fully set. Warm or partially chilled fudge will smear and produce ragged edges.
- Don’t substitute heavy liquids. Adding cream or milk will change the set and can prevent the fudge from firming up properly.
Allergy-Friendly Swaps
For nut allergies, ensure your white chocolate chips and crushed candies were produced in nut-free facilities; many brands state this on the package. If you need soy-free, look for soy-free white chocolate chips—ingredient labels vary, so check carefully.
If peppermint extract is an issue, substitute with a few drops of naturally flavored mint oil designed for baking, but do so cautiously: oils are more concentrated. Alternatively, omit the peppermint extract and use crushed candy on top to impart mint notes without the concentrated extract.
Cook’s Commentary
I make this fudge every winter. My preference is to use a good-quality white chocolate chip rather than cheap melts. The higher cocoa butter content melts smoother and yields a silkier mouthfeel. When heating, keep the bowl’s exterior cool enough to touch between intervals—if the bowl is very hot, reduce the interval time.
Stirring is your friend. After each microwave burst, stir vigorously and scrape the sides. That not only helps distribute heat but also finishes the melt through residual warmth. Stirring until fully smooth prevents hot spots and uneven texture.
When you press the crushed candies into the top, do so gently. I usually sprinkle all the pieces, then use the back of a spatula to press down lightly. That keeps the surface intact and leaves attractive, lightly embedded candy pieces. If the candies are too large, crush them a little finer so each bite has a mix of smooth fudge and small shards of peppermint.
If you live in a very warm climate, chilling in the refrigerator will be necessary to set the fudge. In cooler, dry conditions, room temperature may be enough. Either way, allow the fudge to return to room temperature briefly before serving for the best texture—this softens the bite and releases flavor.
Freezer-Friendly Notes
Fudge freezes very well. To freeze, cut into 1-inch pieces first and arrange them in a single layer on a parchment-lined tray; freeze until solid, then transfer to an airtight container or heavy-duty freezer bag with layers separated by parchment. Properly stored, the pieces keep for up to 3 months.
Thaw in the refrigerator overnight or at room temperature for an hour or two, depending on the chunk size. Avoid repeated thawing and refreezing. If you need to ship or transport fudge long distances in winter, frozen fudge packed with insulation and cold packs will hold for a day or more.
Ask & Learn
- Can I use white chocolate bars instead of chips? Yes. Chop bars into small, even pieces so they melt uniformly with the condensed milk.
- My chocolate looks grainy after melting. What happened? It was likely overheated or came into contact with moisture. Lower the heat next time and stir more frequently. If it seizes, adding a small amount of vegetable oil can sometimes smooth it, but that changes texture.
- How long does the fudge keep at room temperature? Stored in an airtight container, it keeps 5–7 days at cool room temperature. In warmer homes, refrigerate to prevent softening.
- Can I add mix-ins like nuts or cookie pieces? Yes—fold them in after the melted mixture is smooth. Keep in mind that adding a lot of dry mix-ins can change the texture and make cutting messier.
- What if I don’t have a microwave? Use a double boiler: combine chocolate chips and sweetened condensed milk in the top of a double boiler and stir over low heat until smooth. Remove from heat before stirring in extract and salt.
Bring It to the Table
Serve these square pieces on a festive platter lined with parchment or doilies. They pair nicely with strong coffee or unsweetened tea to balance the confection’s sweetness. For gifting, stack them in small boxes layered with parchment, or arrange them in clear cello bags tied with ribbon.
For a holiday platter, combine these with simple shortbread, chocolate-dipped pretzels, and some plain dark chocolate squares—the flavors play nicely off each other and the mint adds a classic winter note. If you want a showier presentation, sprinkle a few larger candy cane shards on top of several pieces right before serving so they look seasonal and fresh.
Keep extras chilled if your home gets warm. Cut small, uniform pieces for elegant serving and pack extras airtight for neighbors and friends. This fudge is a dependable, straightforward recipe that rewards careful melting and a light hand on the topping. Make a batch when you need a quick gift or a no-fuss holiday sweet, and you’ll see why it keeps coming back to my holiday rotation.

Peppermint Fudge
Ingredients
Ingredients
- 3 cupwhite chocolate chips
- 14 ouncesweetened condensed milk
- 1 teaspoonpeppermint extract
- 1/4 teaspoonsea salt
- 1/3 cupcrushed peppermint candies
Instructions
Instructions
- Grease an 8×8-inch baking pan and line it with parchment paper, leaving an overhang on two opposite sides for easy removal.
- Place the white chocolate chips and sweetened condensed milk in a large microwave-safe bowl.
- Microwave in 15–20 second intervals, stirring well after each interval, until the chocolate is completely melted and the mixture is smooth and fully combined (total time will vary by microwave).
- Stir in the peppermint extract and the sea salt until evenly incorporated.
- Pour the mixture into the prepared pan and spread it into an even layer. Sprinkle the crushed peppermint candies evenly over the top and press lightly so they adhere.
- Allow the fudge to cool completely at room temperature, then chill in the refrigerator if needed until fully set.
- Use the parchment overhang to lift the fudge from the pan and cut into 1-inch pieces.
Equipment
- 8x8-inch baking pan
- Parchment Paper
- Microwave-safe bowl
- Microwave