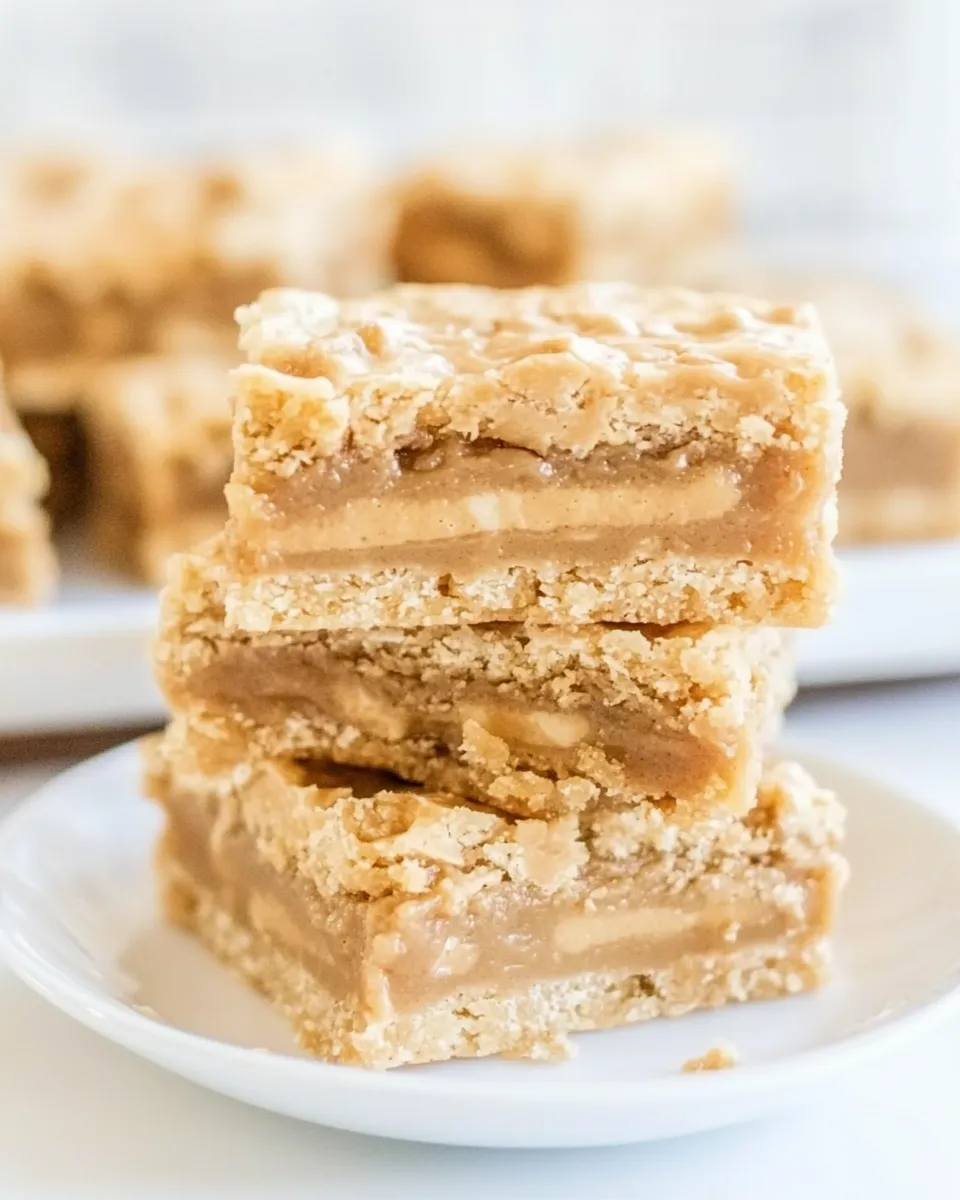
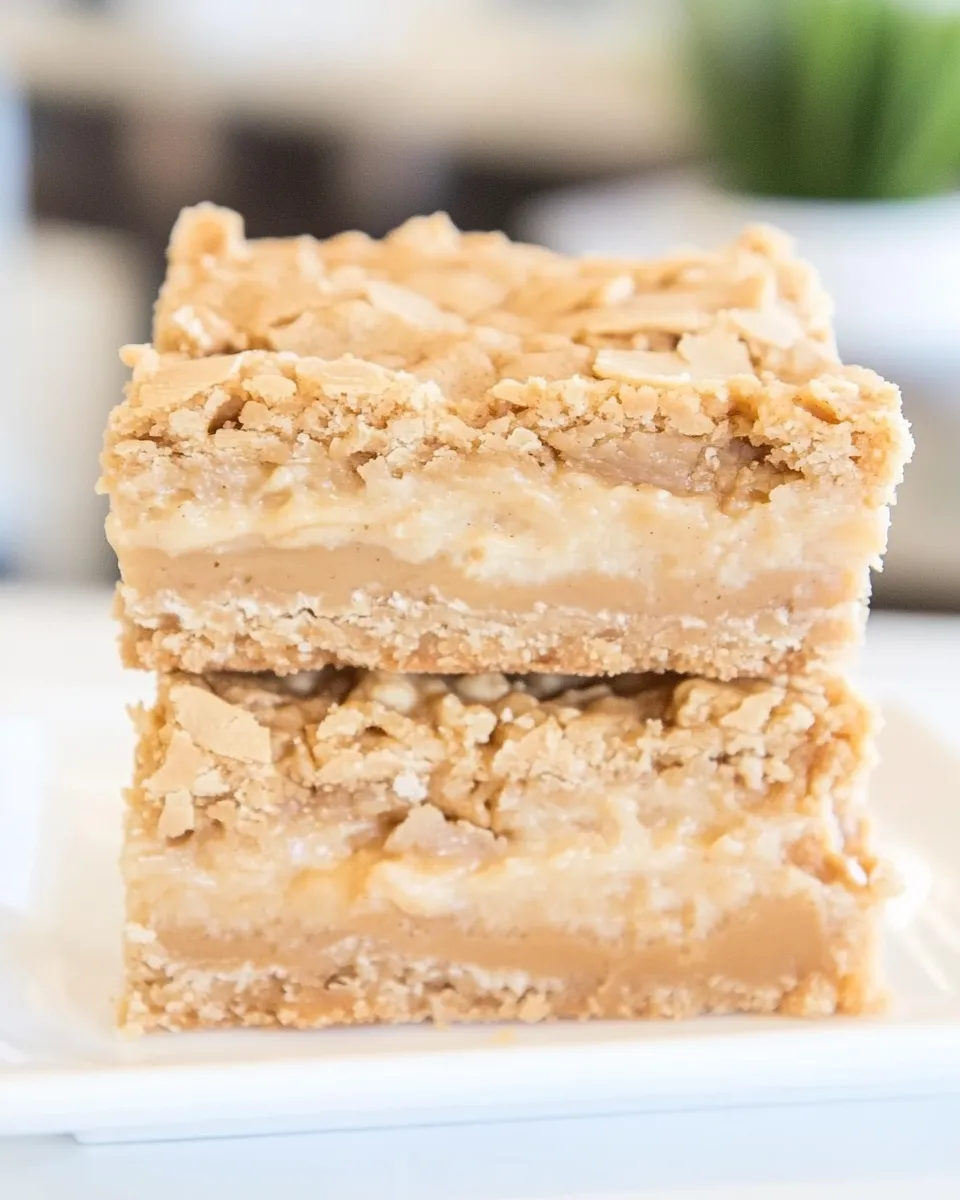
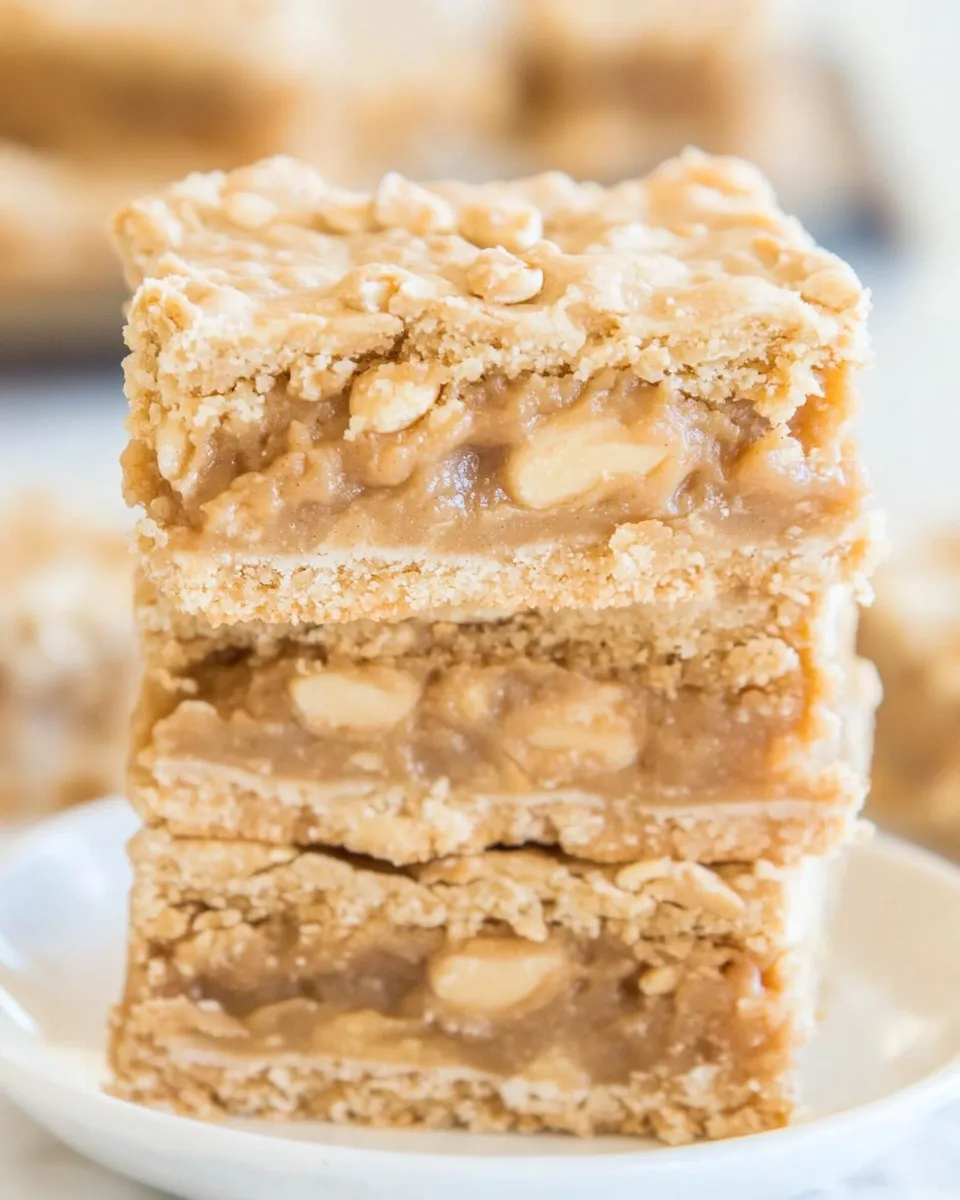
Peanut Butter Sandwich Cookie Bars
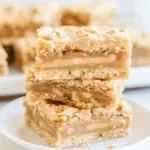
These Peanut Butter Sandwich Cookie Bars are one of those reliably comforting bakes that show up at potlucks, bake sales, and in my kitchen when I’m short on patience but craving something substantial. They’re a layered bar: a tender, peanut-butter-forward cookie base, a gooey melted peanut butter and sweetened condensed milk filling, and a crumbly top that bakes into something soft but holdable. They’re not fancy. They’re honest, quick, and exactly what you want with a glass of milk.
I make these when I want something transportable and crowd-pleasing. The recipe requires a short list of pantry staples and a single bowl for most of the work, so cleanup is straightforward. The method relies on melting a portion of the chips with sweetened condensed milk to create that plush middle layer—no tempering, no chocolate fountain drama—just gentle microwaving and stirring.
Below you’ll find everything you need: the exact ingredients, step-by-step directions (followed precisely), sensible substitutions, troubleshooting notes, and storage advice so the bars stay great for days. If you like peanut butter desserts that are more about texture and nostalgia than flashy decorations, these will be a new staple.
What’s in the Bowl

Ingredients
- ½ cup unsalted butter, 1 stick, melted — provides fat for tender texture and helps the dough bind when combined with the egg.
- 1 large egg — adds structure and moisture; temper it slightly by adding to warm (not hot) butter so it blends uniformly.
- 1 cup light brown sugar, packed — keeps the bars soft and adds a caramel note; packing it measures the molasses content consistently.
- heaping 1/3 cup creamy peanut butter — gives concentrated peanut flavor and chew; creamy keeps the texture uniform.
- 1 tablespoon vanilla extract — rounds and brightens the peanut butter’s flavor.
- 1 ¼ cups all-purpose flour — the dry framework; measure by spooning into the cup and leveling for accuracy.
- pinch salt, optional and to taste — enhances flavor; essential if you use unsalted butter or unsweetened peanut butter.
- one 10-ounce bag peanut butter chips, divided (3/4 cup stirred in and 1 cup melted) — divided use gives pockets of peanut-chip texture and a smooth filling when melted; don’t substitute too loosely because both amounts are part of the structure.
- half of one 14-ounce can sweetened condensed milk, just eyeball it — creates the gooey, sweet middle layer; it also helps the melted chips set into a creamy blanket.
Step-by-Step: Peanut Butter Sandwich Cookie Bars
- Preheat oven to 350°F. Line an 8×8-inch baking pan with aluminum foil and spray the foil with cooking spray; set the prepared pan aside.
- In a large, microwave-safe bowl, melt ½ cup (1 stick) unsalted butter on high for about 1 minute. Let the butter sit 20–30 seconds so it cools slightly.
- Add 1 large egg to the warm (not hot) butter, then add 1 cup packed light brown sugar, heaping 1/3 cup creamy peanut butter, and 1 tablespoon vanilla extract. Whisk until smooth and well combined.
- Add 1 ¼ cups all-purpose flour and a pinch of salt (optional). Stir with a spatula until just combined; do not overmix.
- Stir in 3/4 cup peanut butter chips until evenly distributed. Mix just until incorporated so the chips keep their shape.
- Turn about two-thirds to three-quarters of the dough into the prepared pan and use a spatula to spread and press it evenly into a crust that reaches the edges. Reserve the remaining dough in the bowl.
- In a medium, microwave-safe bowl, add the remaining 1 cup peanut butter chips and pour half of one 14-ounce can of sweetened condensed milk over the chips. Microwave on high in 30-second intervals, stirring between intervals, until the chips have melted and the mixture is smooth (about 1–2 minutes total). Stop and stir every 30 seconds to prevent scorching.
- Immediately pour the melted peanut butter mixture evenly over the pressed crust and smooth the top lightly with a spatula. Work quickly—the mixture begins to set after a few minutes.
- Crumble the reserved dough over the top of the peanut butter layer. Use heaping 1-tablespoon-sized blobs and then gently press and smooth them together with a spatula so the surface is mostly covered (it’s okay if there are some small gaps).
- Bake in the preheated oven for 27–29 minutes, or until the top is just set and very pale in color. A darker top will yield firmer, crumblier bars; for soft bars, keep the color pale.
- Allow the bars to cool in the pan for at least 1 hour before lifting out on the foil and slicing. Store bars airtight at room temperature for up to 1 week or freeze for up to 6 months.
Why This Recipe Belongs in Your Rotation
If you want something that’s fast, forgiving, and appeals to a broad range of tastes, these bars fit the bill. The technique is straightforward: you mostly mix in one bowl, press a crust, pour a melted filling, and crumble more dough on top. There’s minimal measuring drama and no chilling required.
Texturally they’re interesting: soft, slightly chewy base; creamy, almost caramel-like center; and a tender crumb on top. They travel well and slice neatly when chilled briefly after cooling. For weeknight baking or last-minute dessert needs, these are practical without feeling cheap.
Substitutions by Category
- Butter — You can’t swap into the recipe blindly. If you must, use salted butter and skip or reduce the optional pinch of salt. The amount and state (melted) are important for texture.
- Peanut butter — Use creamy peanut butter only here; natural (oil-separated) versions will change texture unless you stir them very smooth first. Chunky will alter the crumb.
- Chips — Stick to peanut butter chips if you want the same flavor dynamic. Substituting chocolate chips will work but the melted middle will taste different—still good, just not the same peanut sandwich effect.
- Sweetened condensed milk — This is the key to the gooey filling. There isn’t a simple 1:1 pantry swap that gives the same set and texture unless you use a commercially similar condensed dairy product.
- Flour — All-purpose is called for. If you need gluten-free, use a 1:1 gluten-free blend that contains xanthan or another binder and expect slightly different texture.
Gear Checklist
- 8×8-inch baking pan, lined with aluminum foil
- Cooking spray
- Large microwave-safe bowl for mixing dough
- Medium microwave-safe bowl for melting chips and condensed milk
- Spatula (for spreading and smoothing)
- Whisk (for initial wet mixing)
- Measuring cups and spoons
- Oven preheated to 350°F
Things That Go Wrong
Underbaked, gooey center
If the bars are too gooey after cooling, you likely didn’t bake long enough. The recipe times call for 27–29 minutes; oven temperatures vary. Look for the top to be pale and just set. If it still seems wet after cooling for an hour, return to the oven for 3–5 minutes.
Top gets too dark or firm
A browned top yields a firmer, crumblier bar—fine if you like that, but if you want soft bars, remove them at the pale-set stage. Position your oven rack in the center to avoid over-browning.
Filling separates or scorches while melting
Stop microwaving in 30-second intervals and stir. Chips and sweetened condensed milk can scorch quickly if left unattended. If you see signs of burning (smell, dark specks), discard and re-melt with a lower interval and more stirring.
Bars are dry
Overmixing the dough or baking beyond the recommended time can dry them out. Stir just until combined and watch the bake closely at the end of the time range.
Better-for-You Options
These bars are indulgent by design, but small adjustments can make them feel lighter without changing the experience dramatically:
- Trim the portion size—cut into smaller squares so each serving is more manageable.
- Use light brown sugar as the recipe calls; swapping for less sugar will change texture. You may reduce by a small amount (2–3 tablespoons) but expect a firmer bar.
- Choose a natural-style peanut butter that’s lower in added sugar, but stir thoroughly and accept a slightly different texture.
Flavor Logic
The recipe is built around a peanut butter duet: chips folded into the dough and chips melted with condensed milk for the center. The chips in the dough give little pops of concentrated flavor and a textural contrast to the velvety center. Light brown sugar brings caramel notes that complement peanut butter rather than compete with it. A touch of vanilla lifts all the flavors so the bars feel rounded rather than one-note sweet.
Salt (even a pinch) is important. If you use unsalted butter or low-salt peanut butter, add the pinch called for. It sharpens sweetness and prevents the bars from tasting flat.
Save for Later: Storage Tips
- Room temperature: Store airtight at room temperature for up to 1 week. Keep them in a single layer or separated by parchment to avoid sticking.
- Refrigeration: Not necessary for short-term storage but helpful if your kitchen is warm. Bring to room temperature before serving for softer texture.
- Freezing: Freeze for up to 6 months. Wrap tightly in foil and place in a freezer-safe container. Thaw overnight in the fridge or for a few hours at room temperature.
- Slicing tip: For clean slices, chill until firm, lift out on foil, and use a sharp knife. Wipe the knife between cuts to avoid smearing.
Top Questions & Answers
- Can I make these in a larger pan? Yes, but adjust baking time. A larger pan yields thinner bars and will need less time—start checking 5–10 minutes earlier.
- Can I use natural peanut butter? You can, but stir it well to reincorporate the oil. It will slightly alter texture and may make the dough softer.
- Why divide the peanut butter chips? Dividing them gives both pockets of bite-sized chips in the dough and a smooth, cohesive melted filling. If you melt all the chips, the dough loses some texture; if you add them all to the dough, the filling won’t have the same silkiness.
- Do I have to use sweetened condensed milk? It’s central to the filling’s texture. Omit it and the middle won’t be the same gooey, set layer.
- How do I prevent the filling from seeping into the crust? Press the base evenly and to the edges to create a continuous barrier. Work quickly when pouring the melted mixture so the crust isn’t overly warm and absorbent.
Before You Go
These Peanut Butter Sandwich Cookie Bars are deliberately simple: comforting, quick to assemble, and dependable. Follow the method and you’ll get a soft, peanut-forward treat with a satisfying contrast between the crumbly top and the creamy heart. Make an extra pan if you’re sharing—these disappear fast.
If you try them, tell me what you paired them with. Coffee? Cold milk? A scoop of vanilla ice cream? Small details make recipes personal, and I love hearing which tweaks become your go-to. Happy baking—and don’t forget to cool them long enough before slicing for the best texture.
Peanut Butter Sandwich Cookie Bars
Ingredients
Ingredients
- 1/2 cupunsalted butter 1 stick, melted
- 1 large egg
- 1 cuplight brown sugar packed
- heaping 1/3 cup creamy peanut butter
- 1 tablespoonvanilla extract
- 1 1/4 cupsall-purpose flour
- pinchsalt optional and to taste
- one 10-ounce bag peanut butter chips divided (3/4 cup stirred in and 1 cup melted)
- half of one 14-ounce can sweetened condensed milk just eyeball it
Instructions
Instructions
- Preheat oven to 350°F. Line an 8x8-inch baking pan with aluminum foil and spray the foil with cooking spray; set the prepared pan aside.
- In a large, microwave-safe bowl, melt ½ cup (1 stick) unsalted butter on high for about 1 minute. Let the butter sit 20–30 seconds so it cools slightly.
- Add 1 large egg to the warm (not hot) butter, then add 1 cup packed light brown sugar, heaping 1/3 cup creamy peanut butter, and 1 tablespoon vanilla extract. Whisk until smooth and well combined.
- Add 1 ¼ cups all-purpose flour and a pinch of salt (optional). Stir with a spatula until just combined; do not overmix.
- Stir in 3/4 cup peanut butter chips until evenly distributed. Mix just until incorporated so the chips keep their shape.
- Turn about two-thirds to three-quarters of the dough into the prepared pan and use a spatula to spread and press it evenly into a crust that reaches the edges. Reserve the remaining dough in the bowl.
- In a medium, microwave-safe bowl, add the remaining 1 cup peanut butter chips and pour half of one 14-ounce can of sweetened condensed milk over the chips. Microwave on high in 30-second intervals, stirring between intervals, until the chips have melted and the mixture is smooth (about 1–2 minutes total). Stop and stir every 30 seconds to prevent scorching.
- Immediately pour the melted peanut butter mixture evenly over the pressed crust and smooth the top lightly with a spatula. Work quickly—the mixture begins to set after a few minutes.
- Crumble the reserved dough over the top of the peanut butter layer. Use heaping 1-tablespoon-sized blobs and then gently press and smooth them together with a spatula so the surface is mostly covered (it’s okay if there are some small gaps).
- Bake in the preheated oven for 27–29 minutes, or until the top is just set and very pale in color. A darker top will yield firmer, crumblier bars; for soft bars, keep the color pale.
- Allow the bars to cool in the pan for at least 1 hour before lifting out on the foil and slicing. Store bars airtight at room temperature for up to 1 week or freeze for up to 6 months.
Equipment
- 8x8-inch baking pan
- Aluminum Foil
- Cooking Spray
- large microwave-safe bowl
- medium microwave-safe bowl
- Spatula
- Oven
- Microwave