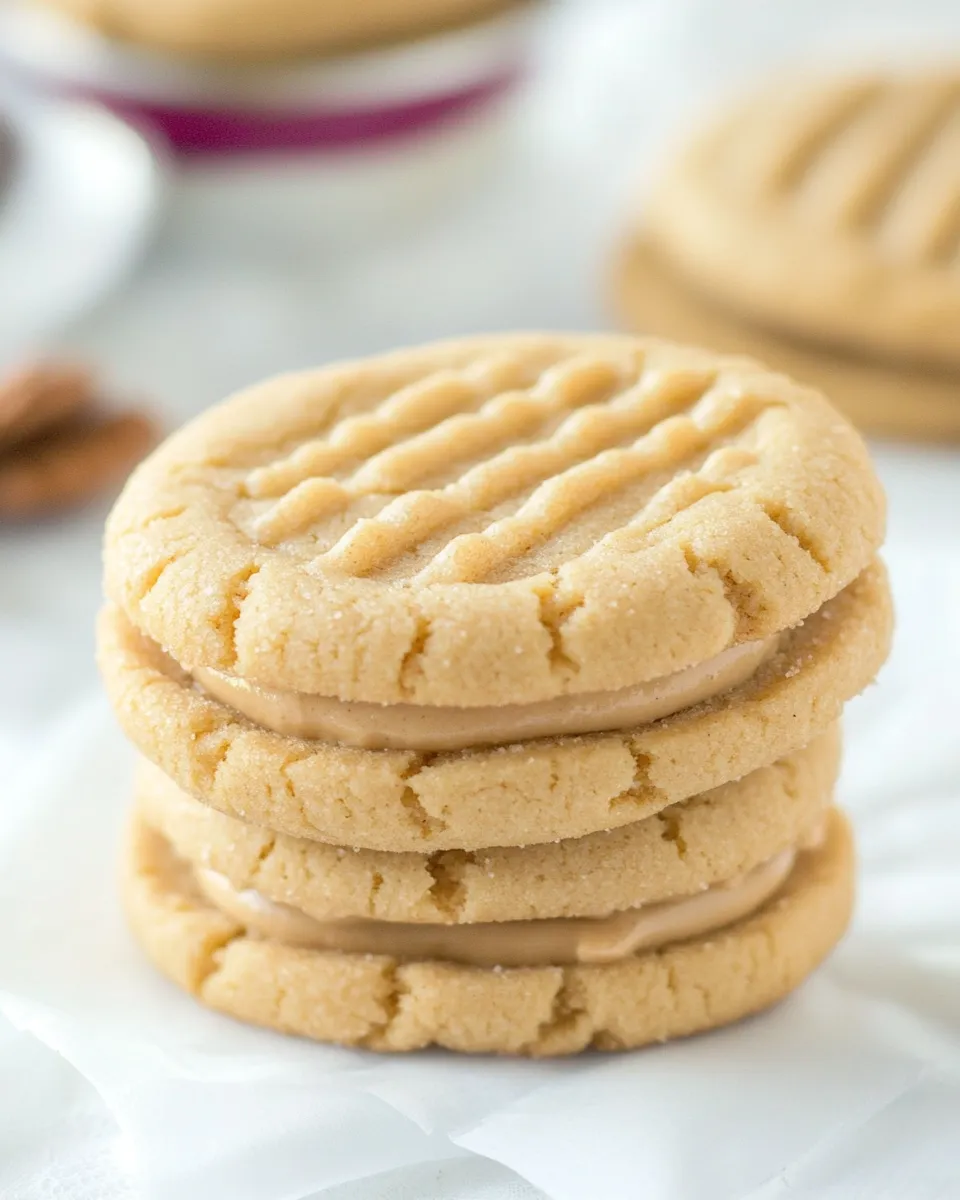
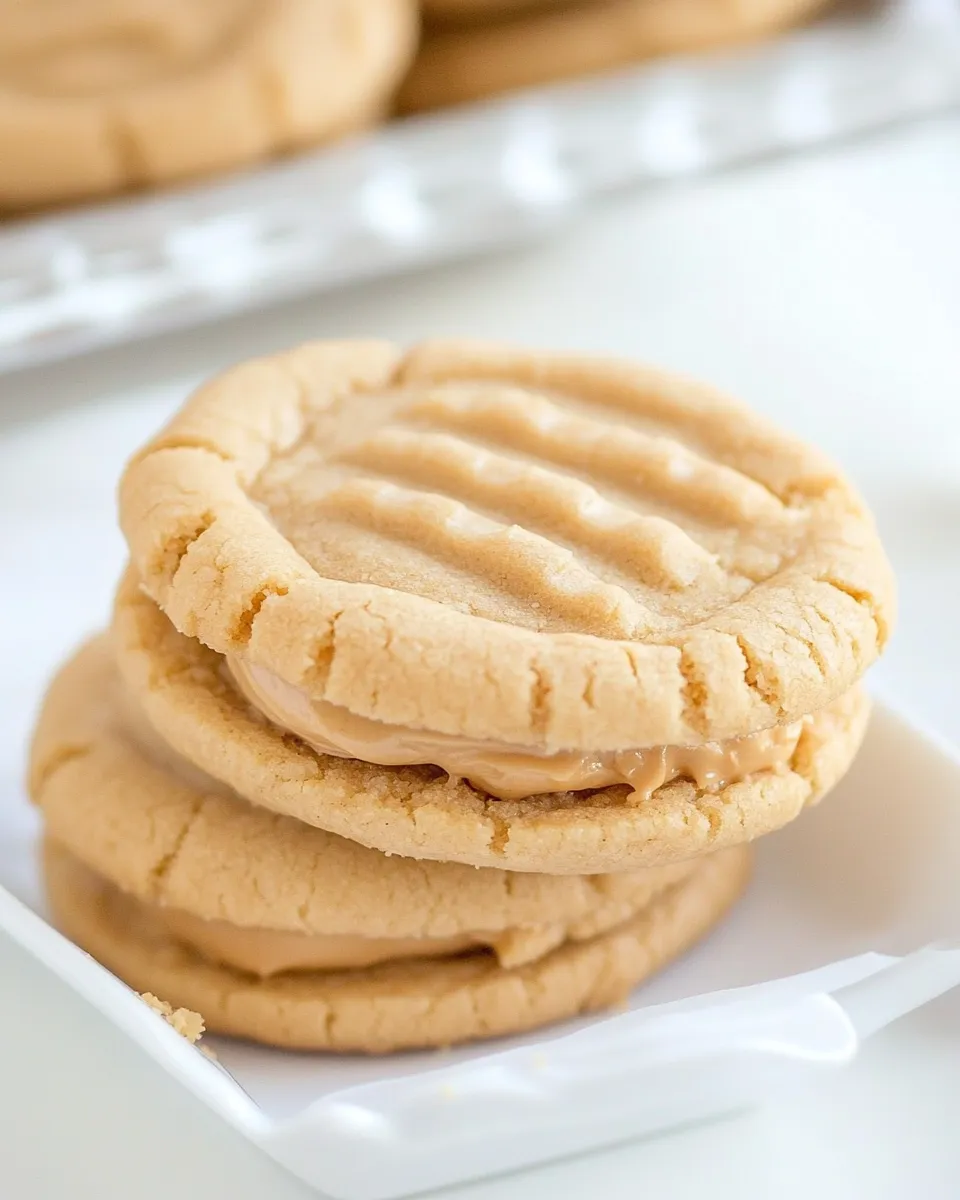
Peanut Butter Maple Cream Sandwich Cookies
I make these Peanut Butter Maple Cream Sandwich Cookies whenever I need a quick crowd-pleaser that’s not fussy but still feels special. They’re buttery, a little salty, and stuffed with a maple-kissed peanut butter cream that’s smooth and perfectly spreadable. You can pull them together on a weeknight and still have something you’d be proud to bring to a potluck the next day.
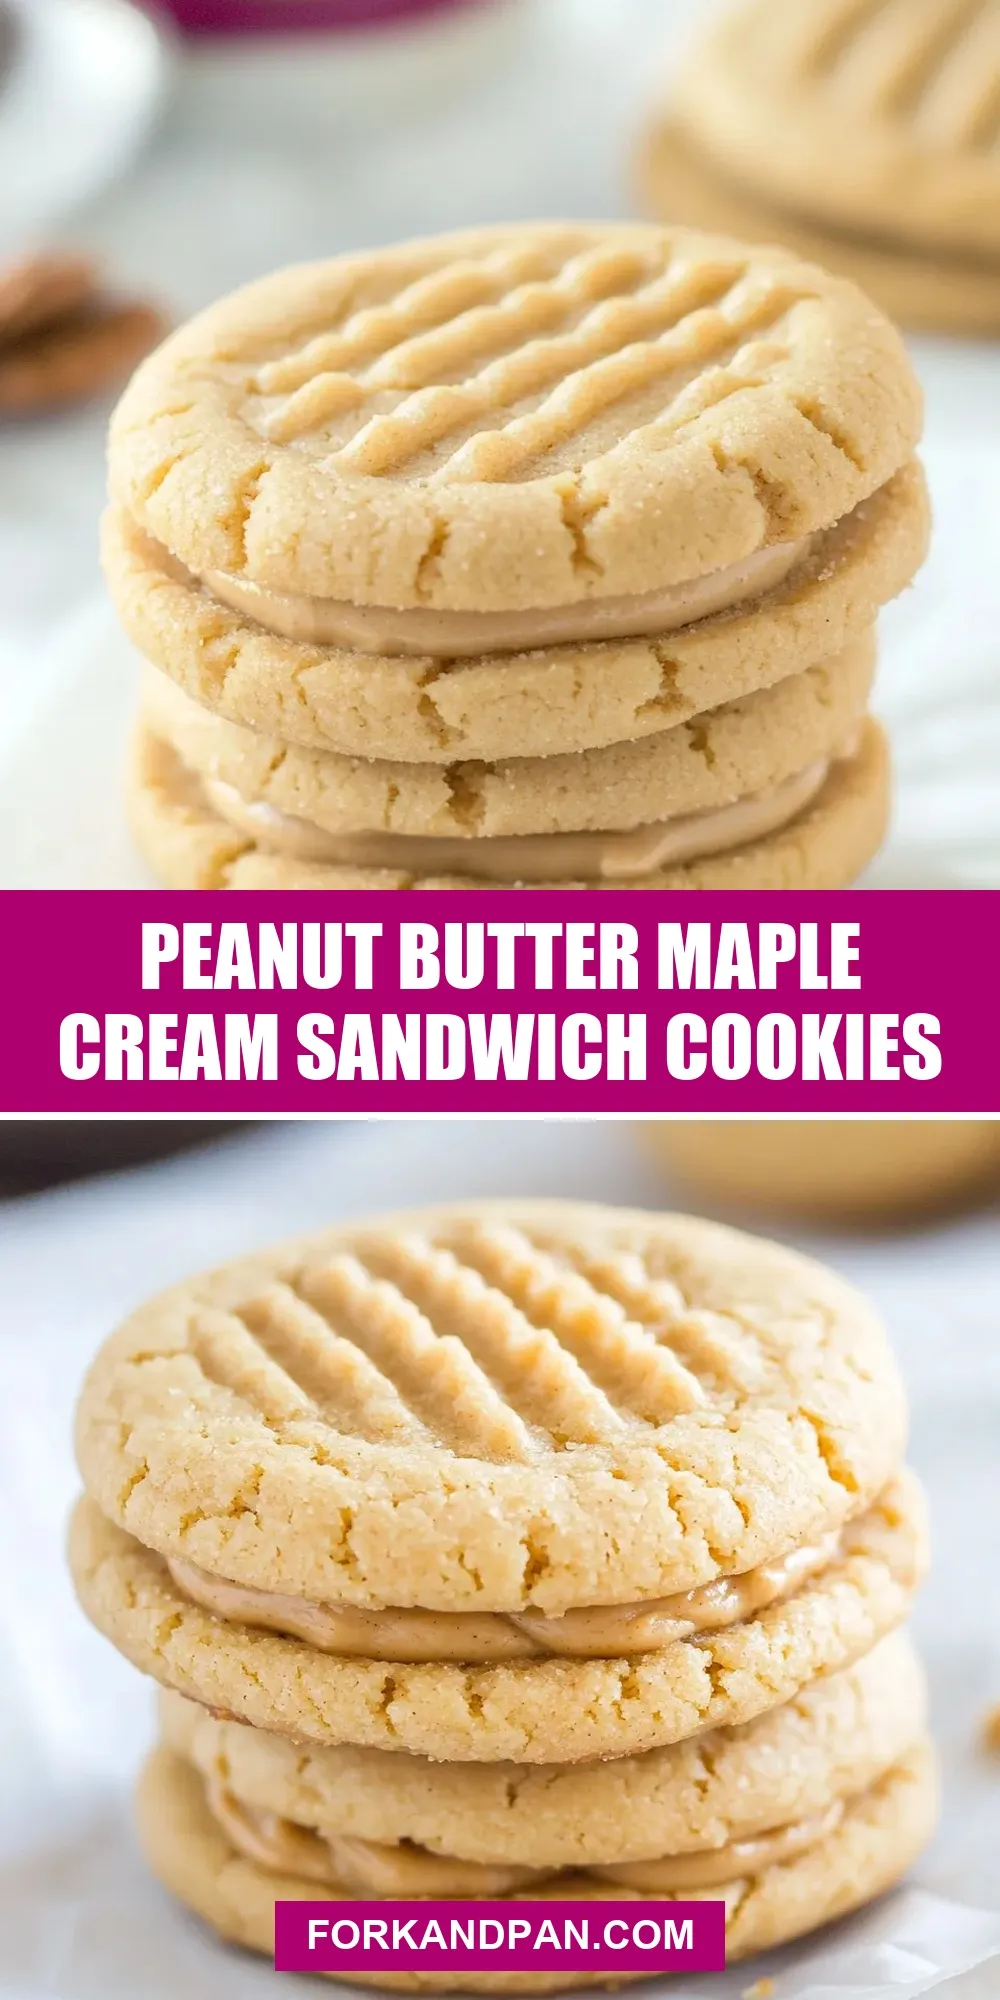
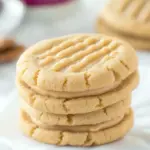
The cookies are classic peanut butter rounds with that iconic fork-crisscross, and the filling lifts them into sandwich-cookie territory with maple extract and extra creaminess. The dough is straightforward and forgiving, and the filling can be adjusted if you prefer a stiffer or softer bite.
This post will walk you through everything: the ingredients, the exact step-by-step method, equipment that makes the job easier, troubleshooting common issues, quick swaps, and storage tips so your batch stays fresh. Let’s get hands-on.
What You’ll Gather

Ingredients
- 1/2 cup butter, softened — adds richness and structure to the cookie dough.
- 3/4 cup peanut butter — provides peanut flavor and tenderizes the dough; use creamy or your preferred style.
- 3/4 cup packed brown sugar — gives moisture and a deep caramel note to the cookie.
- 1/4 cup granulated sugar — helps with spreading and a bit of crisp edge.
- 1 large egg — binds the dough and adds lift.
- 1 teaspoon vanilla — rounds and balances the peanut butter’s savory notes.
- 1 tablespoon milk — adds a touch of moisture for a softer crumb.
- 1/4 teaspoon salt — enhances overall flavor; adjust if your peanut butter is already salty.
- 1/2 teaspoon baking soda — gives a light rise and tender texture.
- 1 3/4 cups all-purpose flour — forms the cookie’s structure; measure by spooning into the cup and leveling for consistency.
- 4 tablespoons unsalted butter, softened — for the filling; use unsalted so you can control the salt level.
- 1/2 cup creamy peanut butter — adds peanut flavor and smoothness to the filling.
- 2 cups powdered sugar — sweetens and thickens the filling to sandwich-ready consistency.
- 2 teaspoons vanilla extract — bridge between peanut and maple flavors.
- 1 teaspoon maple extract — gives that distinct maple note without thinning the filling like real syrup might.
- 3–5 tablespoons heavy whipping cream — adjusts the filling’s spreadability; start with 3 and add more by the tablespoon if you need it looser.
Build Peanut Butter Maple Cream Sandwich Cookies Step by Step
- Preheat oven to 350°F (177°C). Line two cookie sheets with parchment paper or silicone baking mats.
- In the bowl of an electric mixer fitted with the paddle attachment, cream 1/2 cup softened butter, 3/4 cup peanut butter, 3/4 cup packed brown sugar, and 1/4 cup granulated sugar until light and combined.
- Add 1 large egg, 1 teaspoon vanilla, 1 tablespoon milk, 1/4 teaspoon salt, and 1/2 teaspoon baking soda to the mixer. Mix until fully incorporated.
- With the mixer on low speed, gradually add 1 3/4 cups all-purpose flour and mix until the dough comes together and no dry flour remains.
- Using a tablespoon or a 1-Tbsp cookie scoop, portion the dough into 1-tablespoon-sized balls and place them about 2 inches apart on the prepared cookie sheets.
- Flatten each dough ball with the tines of a fork to create a crisscross pattern.
- Bake one sheet at a time (or both if your oven allows even baking) for 8–10 minutes, until the edges are set and the bottoms just begin to brown.
- Let the cookies cool on the baking sheet for 2–3 minutes, then transfer them to a wire rack to cool completely.
- Make the filling: in a medium bowl, beat 4 tablespoons softened unsalted butter and 1/2 cup creamy peanut butter until smooth.
- Gradually add 2 cups powdered sugar and beat until incorporated and the mixture is thick. Add 2 teaspoons vanilla extract and 1 teaspoon maple extract and beat to combine.
- Add 3 tablespoons heavy whipping cream to the filling and beat. If the filling is too stiff, add additional heavy cream 1 tablespoon at a time (up to a total of 5 tablespoons) until you reach a spreadable consistency.
- Turn half of the cooled cookies upside down, spread an even layer of filling on each, and top with the remaining cookies to form sandwiches.
- Store the sandwich cookies in an airtight container at room temperature for up to 3 days.
Why This Recipe Belongs in Your Rotation
These cookies are fast to mix, forgiving to bake, and delightfully nostalgic. The base dough is familiar, but the maple-peanut filling gives them a grown-up twist that still reads as comfort food. If you need something for a last-minute dessert box, a weekend coffee break, or a holiday platter, these deliver on texture and flavor without elaborate technique.
They also travel well. The sandwich format protects the cookies a bit more than single layers, and the filling keeps them from sticking together if you separate layers with parchment. Plus, the ingredients are pantry-friendly — chances are you already have most of them on hand.
Quick Replacement Ideas
- Peanut butter (3/4 cup or 1/2 cup in filling) — swap for almond or sunbutter if you need a different nut profile or a nut-free option, though the flavor will change.
- Maple extract (1 teaspoon) — replace with 1 teaspoon of maple syrup for a more natural note, but reduce heavy cream slightly since syrup adds moisture.
- Powdered sugar (2 cups) — for a less sweet filling, reduce by 1/4 cup; filling will be softer, so adjust heavy cream carefully.
- All-purpose flour (1 3/4 cups) — if you need a gluten-free version, use a 1:1 gluten-free flour blend and watch the texture—some blends absorb more liquid.
Before You Start: Equipment
- Electric mixer with paddle attachment — speeds creaming and gives a smooth filling; you can use a hand mixer if needed.
- Cookie sheets and parchment paper or silicone mats — ensure even baking and easy cleanup.
- 1-Tablespoon cookie scoop or tablespoon — for uniform cookies that bake evenly.
- Fork — to make the classic crisscross pattern quickly.
- Wire cooling rack — cools cookies completely so filling doesn’t melt.
- Medium mixing bowl — for the filling; a stand mixer bowl or a large bowl with a hand mixer works fine.
Troubles You Can Avoid
Cookies spreading too thin
If your cookies flatten excessively, double-check that your butter and peanut butter aren’t overly soft or warm. Chill the dough for 15–20 minutes before scooping if your kitchen is hot. Also measure flour accurately — too little flour encourages spreading.
Filling too runny or too stiff
The filling starts with 3 tablespoons of heavy cream and can go up to 5 tablespoons. Add the cream slowly. If it’s too stiff, add 1 tablespoon at a time. If it’s too loose, add a little powdered sugar, 1 tablespoon at a time, until you reach the right texture.
Cookies too hard
Don’t overbake. The cookies should have set edges and barely browned bottoms. They’ll continue to firm slightly as they cool. Pull them out at the lower end of the 8–10 minute window for softer cookies.
Holiday & Seasonal Touches
For a fall or winter mash-up, stir 1/4 teaspoon ground cinnamon into the dough or filling for warmth. Top each sandwich with a light dusting of cinnamon-sugar or finely chopped roasted peanuts for crunch.
For a festive look, dip half of each sandwich in melted dark or milk chocolate and drizzle with white chocolate. Add a little sea salt on top while the chocolate is still wet to elevate the sweet-salty balance.
Method to the Madness
This recipe relies on two straightforward textures working together: the crisper peanut butter cookie and the soft, creamy maple-peanut filling. Creaming the butter and sugars traps air and yields a lighter cookie. The baking soda gives a modest lift without making the cookie cakey. For the filling, beating softened butter with peanut butter first gives you a smooth base that incorporates powdered sugar cleanly. The maple extract is concentrated, so a teaspoon goes a long way.
Work in stages. Get the cookies baked and cooling before you make the filling. That way the filling won’t melt and you have a steady assembly line: flip, fill, sandwich, and stack.
Make-Ahead & Storage
You can bake the cookie rounds ahead of time and store them in an airtight container for up to 3 days before filling. If you need to make them further in advance, freeze the cooled cookie rounds in a single layer on a sheet pan until firm, then transfer to a sealed freezer bag for up to 1 month. Thaw at room temperature before assembling.
Once assembled, store the sandwich cookies in an airtight container at room temperature for up to 3 days. If you prefer, refrigerate them for a slightly firmer filling; bring to room temperature before serving for the best texture.
Questions People Ask
Can I use chunky peanut butter? Yes. Chunky will add texture to both cookie and filling. If you want a smoother sandwich, use creamy in the filling and chunky in the dough for contrast.
What if I don’t have maple extract? Use maple syrup (start with 1/2 teaspoon and taste), but reduce the heavy cream a touch to compensate for the extra liquid.
How do I make the cookies less sweet? Cut the powdered sugar in the filling by up to 1/4 cup and compensate with a touch more butter or an extra tablespoon of peanut butter so the filling keeps its body.
Can I double the recipe? Yes. The dough and filling both scale well. Bake the cookies in batches and keep the baked rounds on a sheet pan in the fridge if you need to assemble a large batch later.
See You at the Table
These Peanut Butter Maple Cream Sandwich Cookies are simple enough for a weekday bake and pretty enough for company. The maple-peanut filling makes them feel a touch more thoughtful than plain peanut butter cookies, without adding fuss. Make a batch, share them, and notice how quickly the jar empties. If you try a tweak—a chocolate dip, chopped peanuts, or a sprinkle of flaky salt—tell me which one became your favorite.
Happy baking, and enjoy every sandwich.
Peanut Butter Maple Cream Sandwich Cookies
Ingredients
Ingredients
- 1/2 cupbuttersoftened
- 3/4 cuppeanut butter
- 3/4 cuppacked brown sugar
- 1/4 cupgranulated sugar
- 1 large egg
- 1 teaspoonvanilla
- 1 tablespoonmilk
- 1/4 teaspoonsalt
- 1/2 teaspoonbaking soda
- 1 3/4 cupsall purpose flour
- 4 tablespoonsunsalted buttersoftened
- 1/2 cupcreamy peanut butter
- 2 cupspowdered sugar
- 2 teaspoonsvanilla extract
- 1 teaspoonmaple extract
- 3-5 tablespoonsheavy whipping cream
Instructions
Instructions
- Preheat oven to 350°F (177°C). Line two cookie sheets with parchment paper or silicone baking mats.
- In the bowl of an electric mixer fitted with the paddle attachment, cream 1/2 cup softened butter, 3/4 cup peanut butter, 3/4 cup packed brown sugar, and 1/4 cup granulated sugar until light and combined.
- Add 1 large egg, 1 teaspoon vanilla, 1 tablespoon milk, 1/4 teaspoon salt, and 1/2 teaspoon baking soda to the mixer. Mix until fully incorporated.
- With the mixer on low speed, gradually add 1 3/4 cups all-purpose flour and mix until the dough comes together and no dry flour remains.
- Using a tablespoon or a 1-Tbsp cookie scoop, portion the dough into 1-tablespoon-sized balls and place them about 2 inches apart on the prepared cookie sheets.
- Flatten each dough ball with the tines of a fork to create a crisscross pattern.
- Bake one sheet at a time (or both if your oven allows even baking) for 8–10 minutes, until the edges are set and the bottoms just begin to brown.
- Let the cookies cool on the baking sheet for 2–3 minutes, then transfer them to a wire rack to cool completely.
- Make the filling: in a medium bowl, beat 4 tablespoons softened unsalted butter and 1/2 cup creamy peanut butter until smooth.
- Gradually add 2 cups powdered sugar and beat until incorporated and the mixture is thick. Add 2 teaspoons vanilla extract and 1 teaspoon maple extract and beat to combine.
- Add 3 tablespoons heavy whipping cream to the filling and beat. If the filling is too stiff, add additional heavy cream 1 tablespoon at a time (up to a total of 5 tablespoons) until you reach a spreadable consistency.
- Turn half of the cooled cookies upside down, spread an even layer of filling on each, and top with the remaining cookies to form sandwiches.
- Store the sandwich cookies in an airtight container at room temperature for up to 3 days.
Equipment
- Oven
- Electric Mixer
- Paddle Attachment
- Mixing Bowl
- Cookie Sheet
- Parchment paper or silicone baking mat
- Wire Rack
- tablespoon or 1-Tbsp cookie scoop
- Fork
Notes
Store in an airtight container at room temperature for up to 3 days.