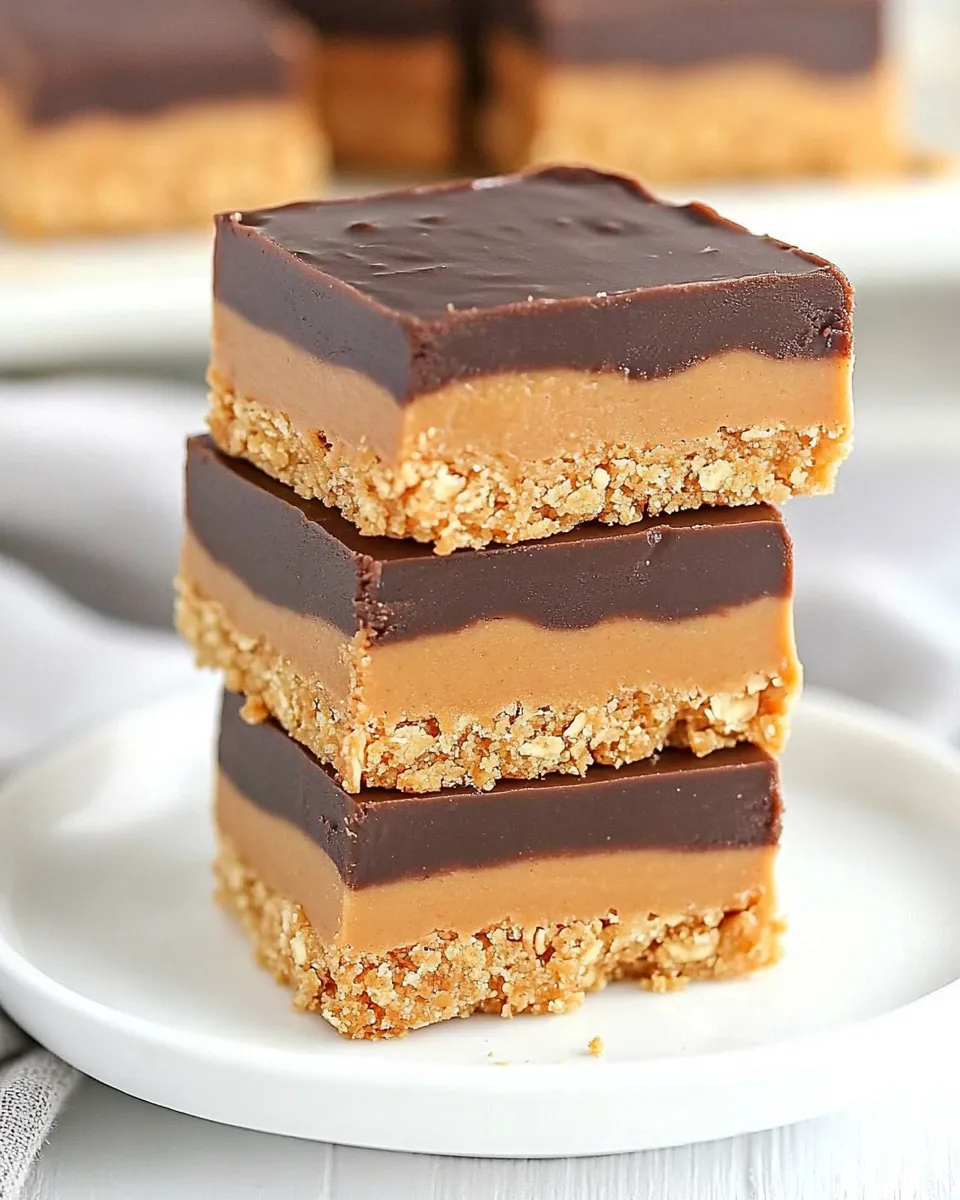
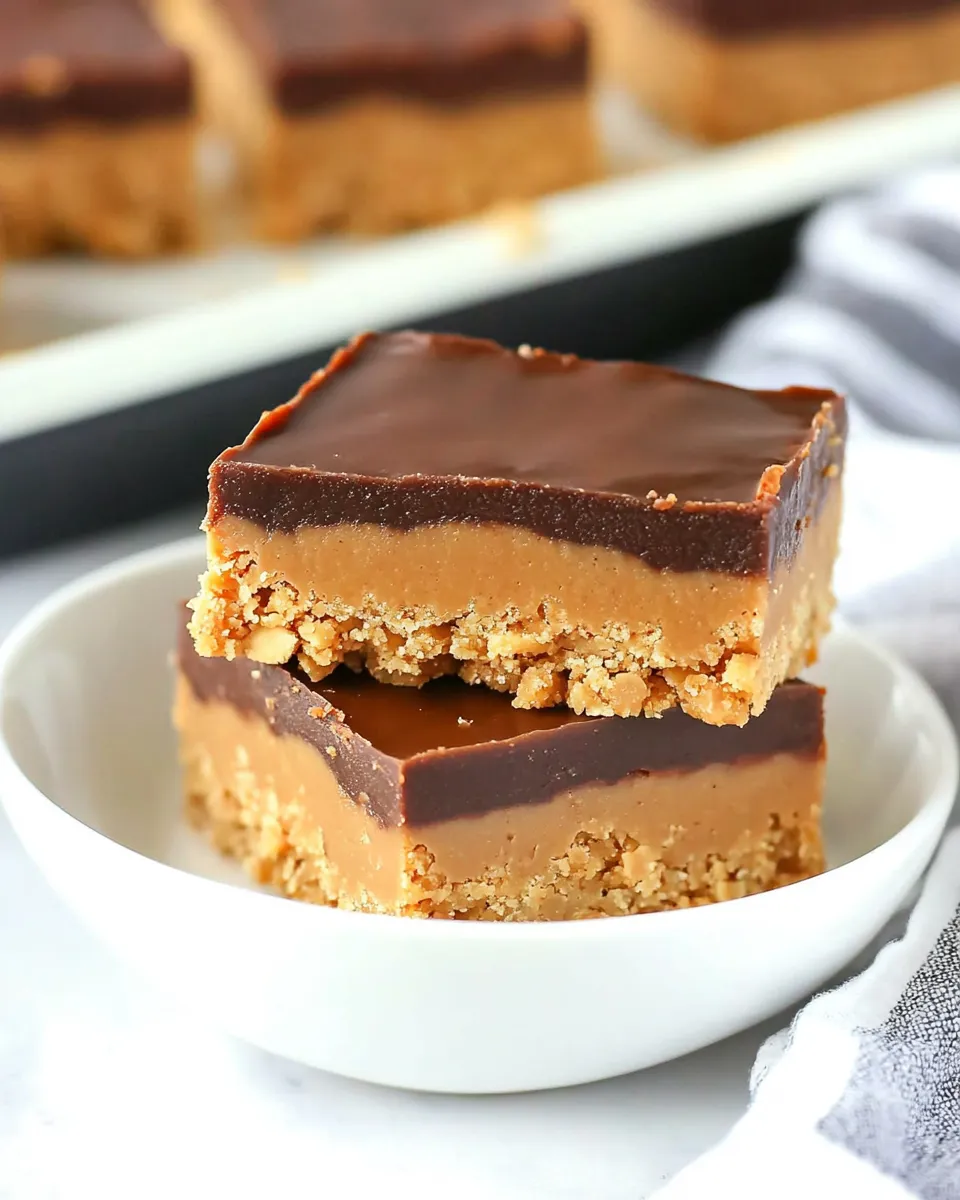
Peanut Butter Bars Recipe
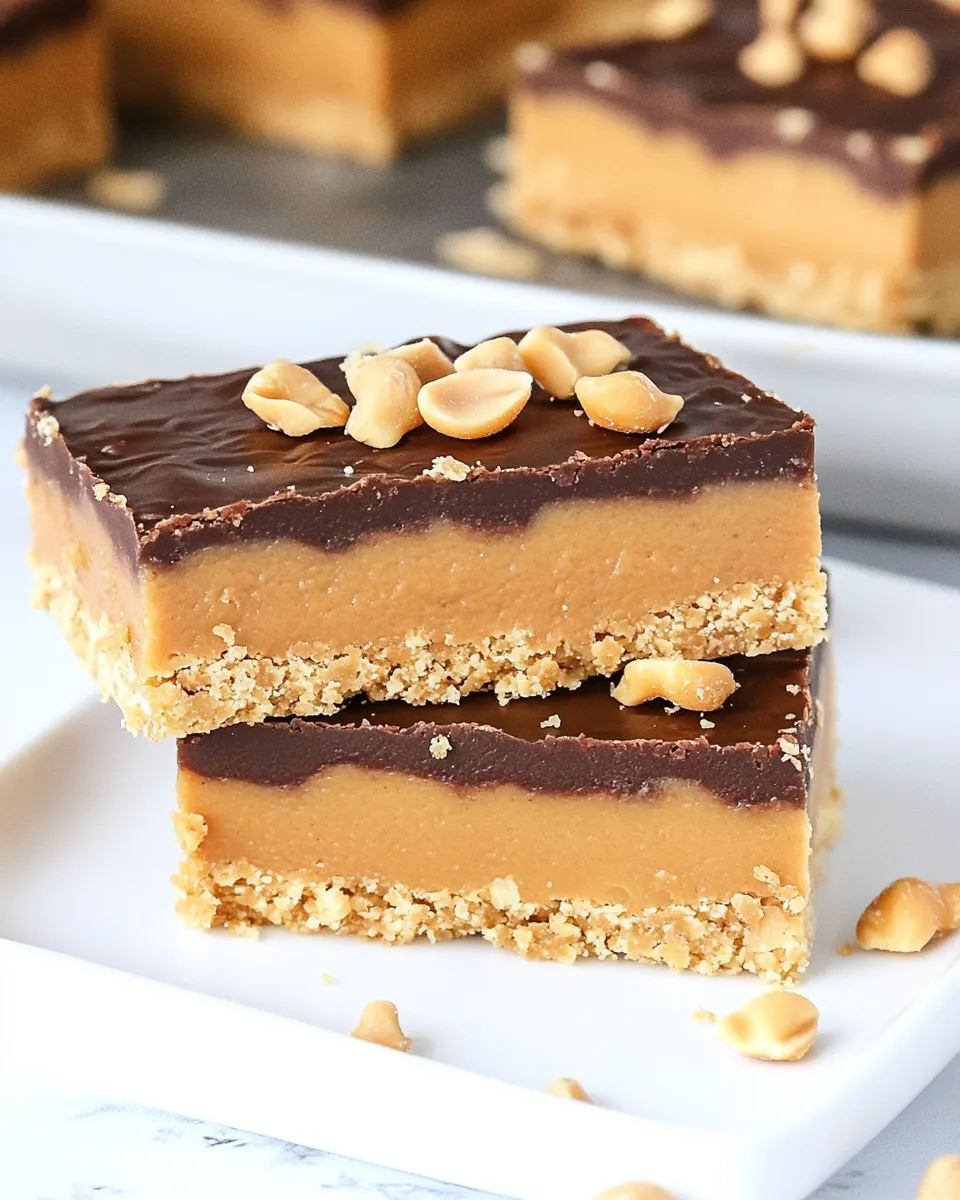
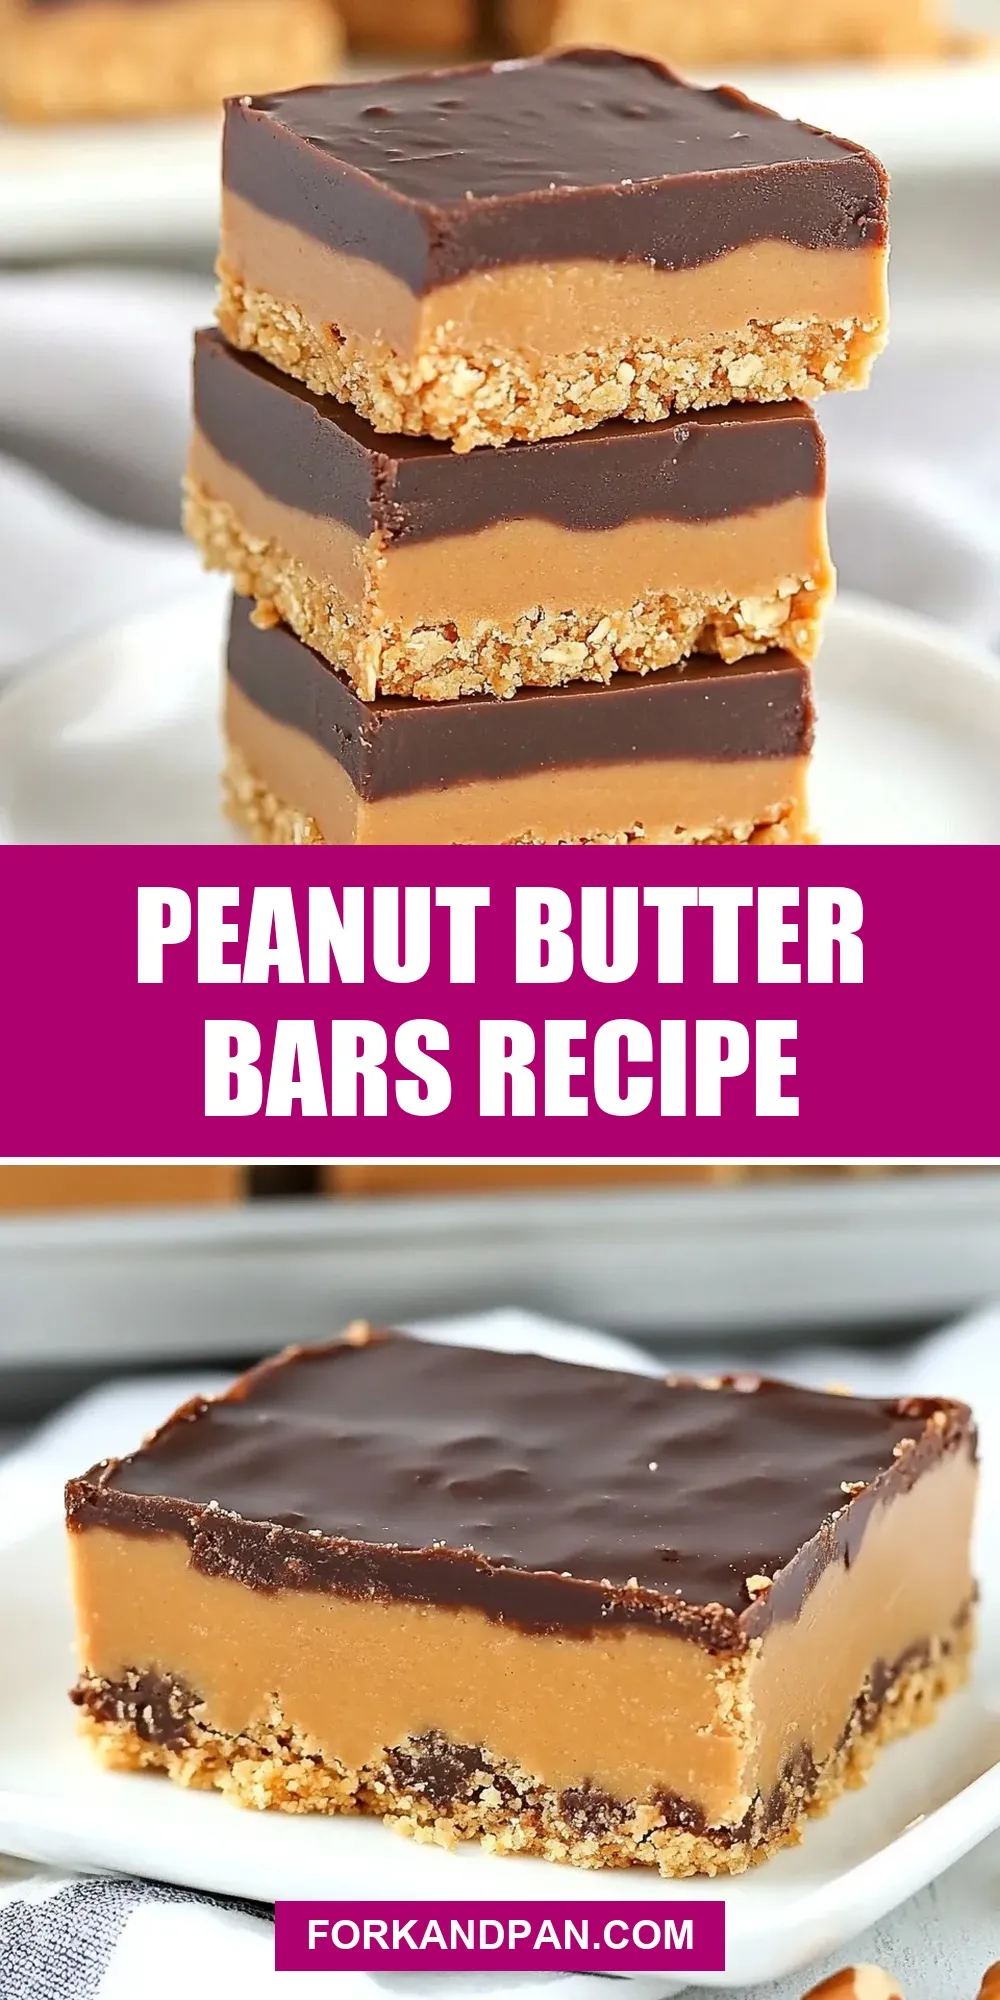
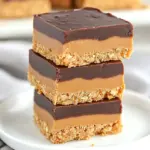
These peanut butter bars are one of those reliable desserts that come together quickly, travel well, and disappear faster than you expect. They have a dense, slightly crunchy base and a glossy chocolate-peanut butter topping that sets into a perfect sliceable slab. I make a batch whenever I need something simple to bring to a gathering or just want a no-fuss sweet to nibble on with coffee.
What I love about this recipe is how forgiving it is. The base mixes by hand in one bowl, and the topping melts in minutes. No special skills. No tempering chocolate. Just melt, spread, chill, and cut. Below you’ll find the exact ingredients and step-by-step directions, plus practical tips for pressing the base evenly, melting the chocolate without seizing, and storing the bars so they stay fresh.
Ingredients at a Glance

- 1 cup unsalted butter — melted and slightly cooled; provides richness and helps the base hold together.
- 1 1/2 cups creamy peanut butter — the main flavor in the base; use a well-stirred jar for best texture.
- 1 1/2 cups powdered sugar — sweetens and firms the base; sift if you want an ultra-smooth mix.
- 2 cups graham cracker crumbs — the dry structure of the base; pulse crackers to fine crumbs for even texture.
- 1 1/2 cups chopped chocolate — for the glossy topping; chop evenly for predictable melting.
- 1/4 cup creamy peanut butter — added to the chocolate for flavor and gloss; stir in while warm.
- 1/4 cup roasted peanuts — chopped; scattered on top for crunch and visual contrast.
Peanut Butter Bars in Steps
- Line an 8×8 or 9×9 pan with parchment paper, leaving excess on two opposite sides to act as handles for easy removal.
- In a large bowl, combine 1 cup melted and slightly cooled unsalted butter and 1 1/2 cups creamy peanut butter. Stir or beat until smooth and uniform.
- Add 1 1/2 cups powdered sugar to the butter–peanut butter mixture and mix until incorporated. Add 2 cups graham cracker crumbs and stir until the mixture is evenly combined and holds together.
- Transfer the mixture to the prepared pan. Press it firmly and evenly into the bottom of the pan with the back of a spatula or your hands, then smooth the top.
- Place 1 1/2 cups chopped chocolate and 1/4 cup creamy peanut butter in a microwave-safe bowl. Microwave in 20–30 second intervals, stirring well between each interval, until the chocolate and peanut butter are completely melted and the mixture is smooth. (Alternatively, melt together in a double boiler, stirring until smooth.)
- Pour the melted chocolate–peanut butter mixture over the pressed base and spread evenly with a spatula. Sprinkle 1/4 cup chopped roasted peanuts over the top.
- Chill the bars in the refrigerator for at least 2 hours, or until firm. Use the parchment handles to lift the slab from the pan and cut into bars before serving.
What Makes This Recipe Special
There’s an elegant simplicity to these bars. The base is more cookie-like than cakey, made with pantry staples and no baking required. The ratio of peanut butter to graham crumbs and powdered sugar creates a firm, buttery slab that won’t crumble under a glossy chocolate layer. Adding a small amount of peanut butter to the melted chocolate improves texture and flavor—think of it as the glue that keeps the topping velvety and sliceable.
Two more things that set this version apart: the chopped roasted peanuts on top add texture and a toasty note, and pressing the base firmly into the pan keeps the bars tidy when you slice them. The result is approachable, nostalgic, and reliably good—perfect for lunchboxes, potlucks, or a quick sweet fix.
Vegan & Vegetarian Swaps
For vegetarians, this recipe is already suitable as written. If you want to make a vegan version, swap a few items thoughtfully:
- Butter: replace the 1 cup unsalted butter with a plant-based margarine that melts similarly. Choose brands labeled vegan and with a neutral flavor.
- Chocolate: use dairy-free dark chocolate or vegan chocolate chips for the 1 1/2 cups chopped chocolate called for in the topping.
- Peanut butter: most creamy peanut butters are vegan already; just double-check the label to avoid added milk solids.
Notes: Powdered sugar can sometimes be processed with bone char; if that matters to you, buy certified vegan powdered sugar. The texture can differ slightly with vegan butter—press the base firmly and chill a little longer so it sets well.
Kitchen Gear Checklist
- 8×8 or 9×9 baking pan — for shaping the bars.
- Parchment paper — for easy removal and clean edges.
- Large mixing bowl — to mix the base ingredients.
- Spatula or back of a spoon — to press the base evenly.
- Microwave-safe bowl or double boiler — for melting chocolate and peanut butter.
- Sharp knife — to slice clean bars after chilling.
- Measuring cups — to follow the recipe amounts exactly.
Avoid These Mistakes
Here are common slip-ups and how I avoid them:
- Pressing the base too lightly — if the base isn’t compacted the bars will crumble. Use the back of a spatula and apply firm, even pressure.
- Pouring hot chocolate over a warm base — let the base cool at room temperature for a few minutes if it’s warm from handling. Hot topping can soften the base and cause separation.
- Heating chocolate too quickly — microwaving in long bursts causes chocolate to seize. Use 20–30 second intervals and stir between each burst.
- Skipping parchment handles — without them lifting and cutting becomes messy. Leave extra paper on two sides for easy removal.
Better Choices & Swaps
Small adjustments can improve results or tailor the bars to your pantry and taste:
- Graham cracker crumbs: use finely processed crumbs for a smoother base, or mix in a few crushed digestive biscuits for a slightly different flavor.
- Unsalted butter: using unsalted gives you control over salt. If you only have salted butter, omit any extra salt elsewhere.
- Chopped chocolate: pick good-quality chocolate for a glossy, flavorful topping. Even a mid-range chocolate will beat low-quality chips for texture.
- Chunky peanut butter can add more texture in the base, but it will change the mouthfeel. If you love crunch, use chunky for the base and keep the creamy peanut butter for the topping.
Author’s Commentary
As someone who writes about food for a living and tests recipes in a small but efficient home kitchen, I appreciate desserts that respect both time and taste. These bars check both boxes. They were one of my go-to fixes during busier weeks when I wanted homemade treats without turning on the oven. Friends ask for them at picnics and the recipe has become a simple crowd-pleaser at school bake sales.
My favorite moment is cutting into the chilled slab. A steady chef’s knife warmed under hot water and dried first gives the cleanest slices. I also like a tiny pinch of flaky salt on top if I’m serving them to adults—salt elevates the chocolate and peanut butter without adding complexity.
Prep Ahead & Store
These bars are excellent for prepping in advance. After chilling fully (at least 2 hours), lift the slab from the pan with the parchment handles and set it on a cutting board. Cut into bars and transfer them to an airtight container.
Refrigeration
Store in the refrigerator for up to one week. Keep bars in a single layer or separate layers with parchment to prevent sticking. Chilled bars are firm and slice cleanly.
Freezing
To freeze, wrap individual bars in plastic wrap and place them in a sealed freezer bag or container. They keep well for up to 2 months. Thaw in the refrigerator overnight before serving for best texture.
Helpful Q&A
Q: Can I use peanut butter powder instead of creamy peanut butter?
A: Not directly—this recipe depends on the oil and texture of creamy peanut butter. You could reconstitute peanut butter powder with oil to match, but measurements vary by brand. For reliable results, use creamy peanut butter as listed.
Q: Can I substitute the graham cracker crumbs?
A: Yes. Finely crushed plain cookies or digestive biscuits are a close match. Keep the same volume (2 cups) and pulse to a fine crumb.
Q: My chocolate seized while melting. What went wrong?
A: Chocolate seizes when moisture or too-high heat is introduced. Use the microwave in short intervals and stir often, or melt gently over simmering water. If it seizes, stirring in a small spoon of neutral oil or a bit more peanut butter can sometimes smooth it out.
Q: Why does the topping sometimes slide off the base?
A: If the base is too warm or not pressed firmly, the topping can shift. Chill the base briefly if needed before pouring the topping, and press the base firmly into the pan to compact it.
Before You Go
These peanut butter bars are a dependable, crowd-pleasing treat that reward a little planning and careful pressing. The formula is straightforward and forgiving: a buttery, peanut-laced base, a silky chocolate layer, and a sprinkle of toasted peanuts. Make a batch, note what you like about the texture, and adjust minor elements next time—maybe a flake of salt on top, or a switch to dark chocolate. Either way, keep the parchment long enough for easy removal, chill well, and slice with a warm knife for beautiful bars every time.
If you make them, I’d love to hear how you adapted the recipe or what your favorite chocolate-to-peanut ratio ended up being. Happy baking—and happy snacking.
Peanut Butter Bars Recipe
Ingredients
Ingredients
- 1 cupunsalted buttermelted and slightly cooled
- 1 1/2 cupscreamy peanut butter
- 1 1/2 cupspowdered sugar
- 2 cupsgraham cracker crumbs
- 1 1/2 cupschopped chocolate
- 1/4 cupcreamy peanut butter
- 1/4 cuproasted peanutschopped
Instructions
Instructions
- Line an 8x8 or 9x9 pan with parchment paper, leaving excess on two opposite sides to act as handles for easy removal.
- In a large bowl, combine 1 cup melted and slightly cooled unsalted butter and 1 1/2 cups creamy peanut butter. Stir or beat until smooth and uniform.
- Add 1 1/2 cups powdered sugar to the butter–peanut butter mixture and mix until incorporated. Add 2 cups graham cracker crumbs and stir until the mixture is evenly combined and holds together.
- Transfer the mixture to the prepared pan. Press it firmly and evenly into the bottom of the pan with the back of a spatula or your hands, then smooth the top.
- Place 1 1/2 cups chopped chocolate and 1/4 cup creamy peanut butter in a microwave-safe bowl. Microwave in 20–30 second intervals, stirring well between each interval, until the chocolate and peanut butter are completely melted and the mixture is smooth. (Alternatively, melt together in a double boiler, stirring until smooth.)
- Pour the melted chocolate–peanut butter mixture over the pressed base and spread evenly with a spatula. Sprinkle 1/4 cup chopped roasted peanuts over the top.
- Chill the bars in the refrigerator for at least 2 hours, or until firm. Use the parchment handles to lift the slab from the pan and cut into bars before serving.
Equipment
- 8x8 or 9x9 pan
- Parchment Paper
- Large Bowl
- Spatula
- Microwave-safe bowl
- double boiler (optional)
- Refrigerator