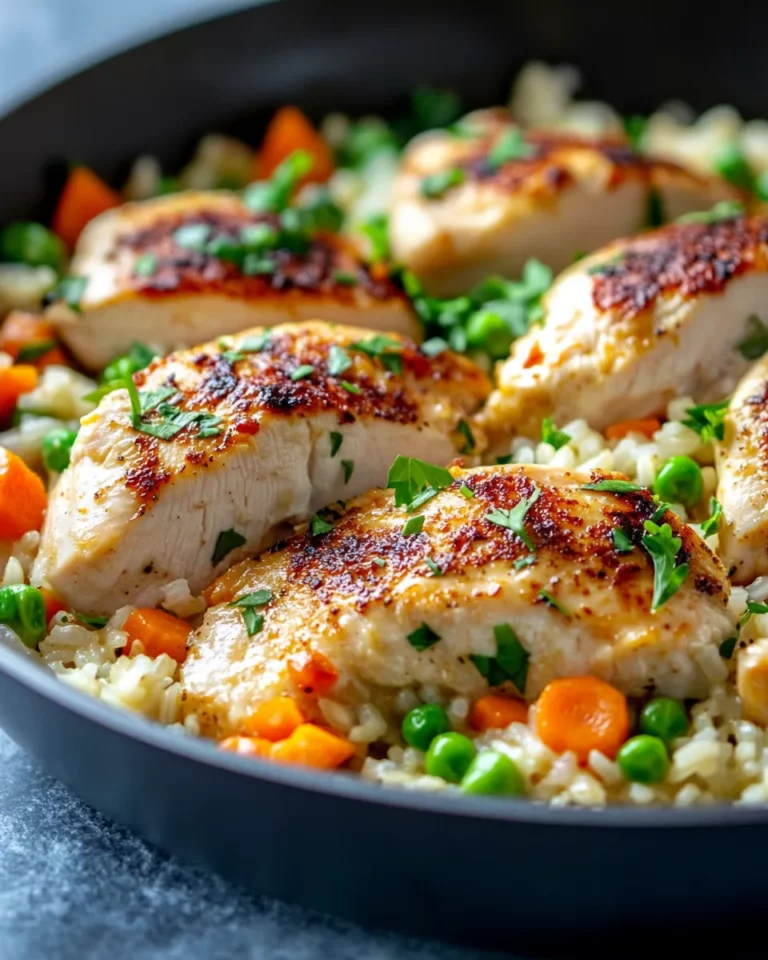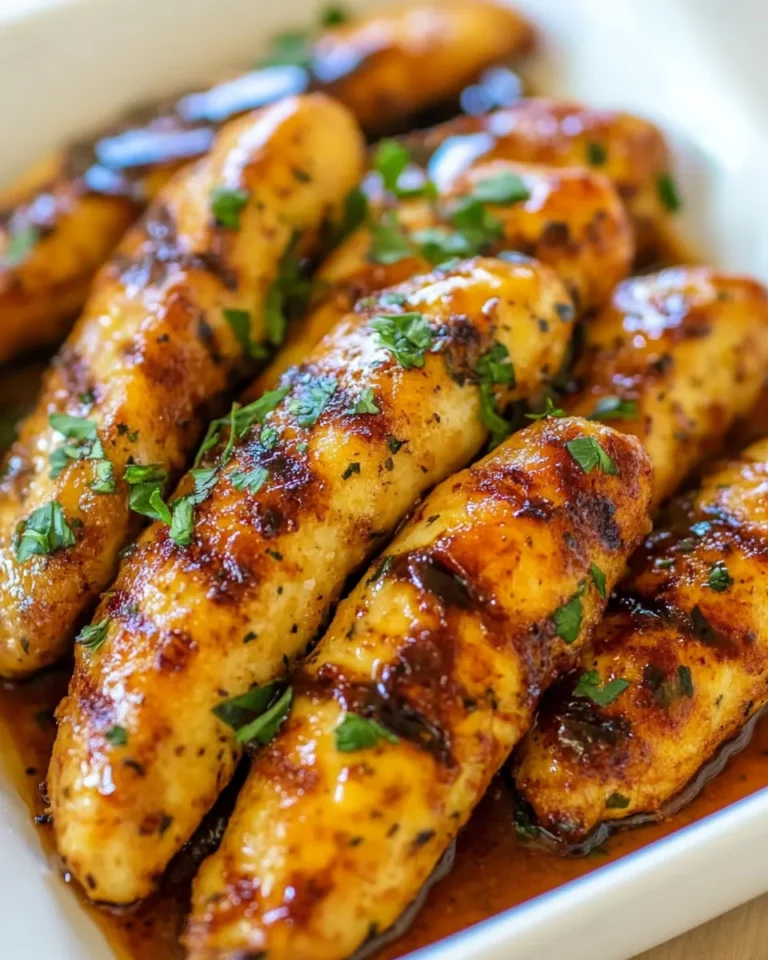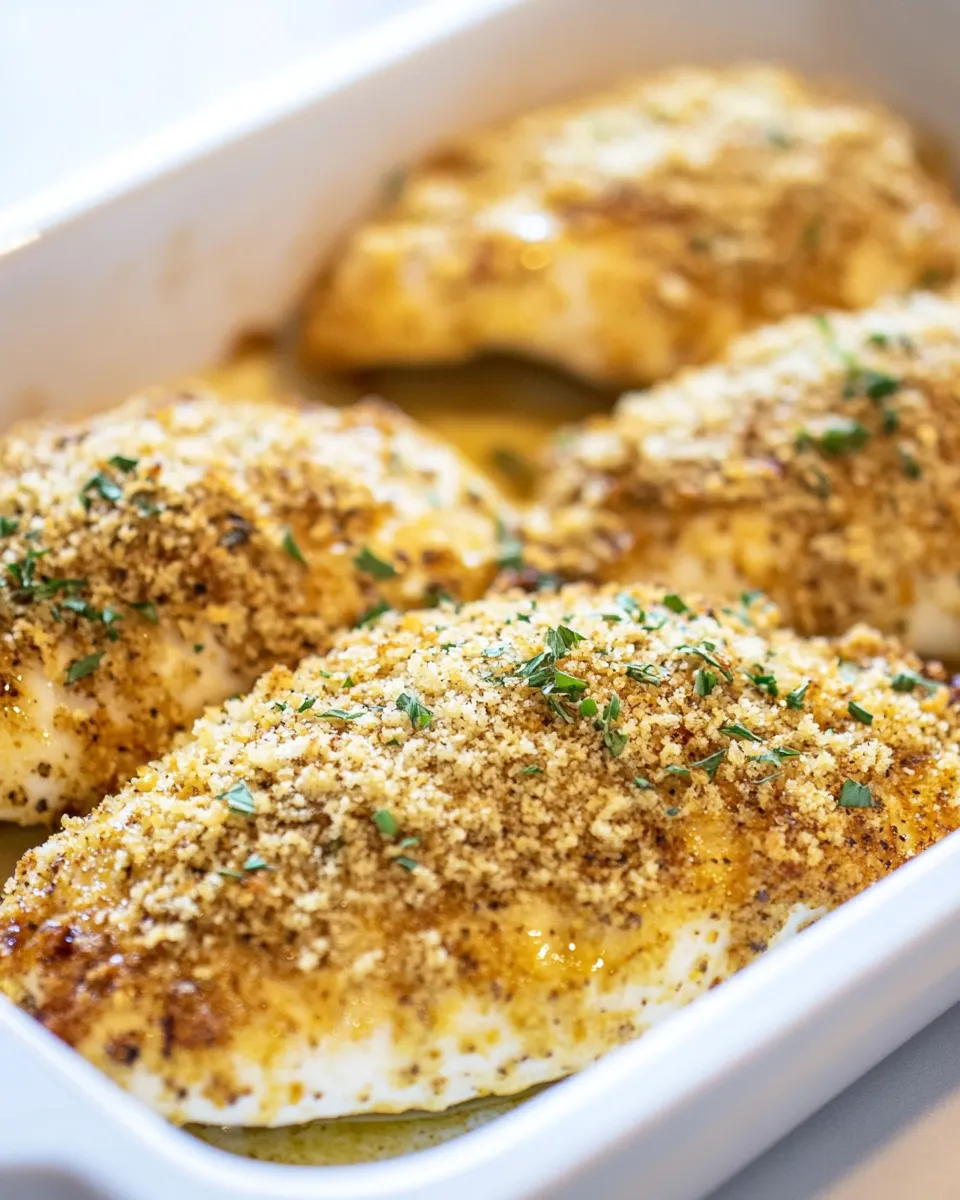
Parmesan Ranch Chicken
This Parmesan Ranch Chicken is one of those dependable weeknight mains that hits all the marks: crisp, cheesy, savory, and fast to assemble. It doesn’t require fancy prep or a long ingredient list, yet it looks and tastes like you put in more effort than you did. The breadcrumb coating gets golden in the oven while the ranch and Parmesan build flavor from the outside in.
I make this when I want a satisfying meal with minimal fuss. It pairs beautifully with a simple salad or roasted vegetables and, if you like, a scoop of mashed potatoes or buttered pasta. The method is forgiving — you’ll get a crunchy crust and juicy interior with a standard oven and a little attention.
Below you’ll find the exact ingredients and steps, clear troubleshooting tips, and sensible make-ahead and storage advice. Read through once, then get right to it: this dish comes together quickly and reliably.
What Goes Into Parmesan Ranch Chicken

- 1 cup Panko breadcrumbs — provides a light, crispy crust that browns nicely in the oven; Panko is less dense than regular crumbs.
- ½ cup freshly grated Parmesan cheese — adds salty, savory flavor and helps the crust crisp and brown; grate from a wedge for the best texture.
- 1 ounce ranch seasoning mix (1 envelope) — the concentrated flavor component; it seasons the breadcrumb mix so the crust is flavorful throughout.
- ½ cup unsalted butter (1 stick, melted) — helps the crumbs adhere and promotes even browning; melted butter also adds richness without frying.
- 4 (8-ounce) boneless, skinless chicken breasts — the recipe assumes larger, evenly sized breasts; pat dry before coating for best adhesion.
Parmesan Ranch Chicken: From Prep to Plate
- Preheat the oven to 350°F. Spray a 9×13-inch baking dish with nonstick spray and set aside.
- In a large shallow bowl, combine 1 cup Panko breadcrumbs, ½ cup freshly grated Parmesan cheese, and 1 ounce ranch seasoning mix.
- In a second shallow bowl, pour ½ cup melted unsalted butter.
- Pat the 4 (8-ounce) boneless, skinless chicken breasts dry with paper towels.
- Working one at a time, dip a chicken breast into the melted butter, coating both sides, and let excess butter drip back into the bowl.
- Roll the butter-coated chicken breast in the breadcrumb mixture, pressing gently so the crumbs adhere and the breast is evenly coated on all sides. Place the coated breast in the prepared baking dish. Repeat with the remaining breasts, spacing them evenly in the dish.
- Bake uncovered for 40–45 minutes, or until the chicken is fully cooked, the juices run clear, and the internal temperature at the thickest part reaches at least 165°F.
- Remove from the oven and let the chicken rest 3–5 minutes before serving.
Why I Love This Recipe
This recipe wins because it balances texture and flavor with almost zero babysitting. The Panko and Parmesan create a crust that’s satisfyingly crunchy, while the melted butter ensures the coating browns and doesn’t dry out. That ranch seasoning is a shortcut to layered flavor — garlic, herbs, and a touch of tang — without needing several pantry staples.
It’s also forgiving. If your breasts are slightly uneven in thickness, they still come out juicy if you check the temperature at the thickest part. The method scales up or down, and you can make everything ahead and finish in the oven when guests arrive. For busy nights or casual dinners, this is the sort of recipe you can rely on.
Quick Replacement Ideas

- Panko breadcrumbs — swap for regular breadcrumbs or crushed crackers if you don’t have Panko. Expect a slightly denser crust.
- Freshly grated Parmesan — pre-grated Parmesan works in a pinch, though it may not melt and brown the same way.
- Ranch seasoning mix — if you prefer a milder or homemade profile, use a teaspoon each of dried parsley and garlic powder plus ½ teaspoon onion powder and salt to taste; adjust to preference.
- Unsalted butter — clarified butter or a neutral oil like avocado oil will help the crumbs brown, though butter adds the best flavor.
- Boneless, skinless chicken breasts — chicken thighs can be used, but cook time and internal temperature checks will differ; thighs stay juicy but may need longer to reach safe temperature.
Appliances & Accessories

- Standard oven — accurate temperature is important for even cooking and browning.
- 9×13-inch baking dish — fits four 8-ounce breasts comfortably; a rimmed sheet pan can work if lined to contain juices.
- Two shallow bowls — one for the breadcrumb mixture and one for the melted butter; shallow dishes make coating easier.
- Meat thermometer — the fastest way to know the chicken reached at least 165°F at the thickest point.
- Paper towels and tongs — for patting chicken dry and handling coated breasts without knocking off the crust.
Problems & Prevention
Crust not crisping: That usually means too much moisture on the chicken or the oven temperature is low. Pat the breasts dry before dipping and make sure the butter isn’t ice-cold when you use it. If your oven runs cool, increase the temperature by 10–15°F and monitor browning.
Uneven cooking: Thickness variance causes this. If breasts are unequal, pound them to an even thickness or slice very large breasts in half horizontally. A probe thermometer is the simplest fix — check the thickest point and pull at 165°F.
Coating falls off: Press the crumbs firmly when you coat and let excess butter drip back into the bowl between dips. Work gently when placing coated breasts into the dish so the crust can set before baking.
Variations for Dietary Needs
Gluten-free: Use gluten-free Panko and ensure your ranch seasoning mix is labeled gluten-free. The method stays the same.
Dairy-free: Replace butter with a plant-based melted spread and omit or substitute the Parmesan with a dairy-free grated alternative or nutritional yeast for a savory note. Keep in mind the flavor and browning will change.
Lower sodium: Use a low-sodium or reduced-salt ranch mix if available, or cut the packet in half and supplement with your own dried herbs and garlic powder. Freshly grated Parmesan is salty; you can reduce that amount slightly to control sodium.
Pro Perspective
Season the outside, not just the inside. Because the flavor in this recipe lives in the crust, mixing the Parmesan and ranch evenly into the Panko ensures every bite is seasoned. Freshly grate the Parmesan for better melting and flavor intensity; pre-grated cheeses often contain anti-caking agents that affect texture.
Use a thermometer and trust it. Oven times vary, and thickness varies. The safe target is 165°F at the thickest point. Remove the chicken promptly when it hits temperature; carryover heat will keep it moist while the coating stays crisp if you let it rest briefly.
Make-Ahead & Storage

Make-ahead options: You can assemble the coated breasts and cover them in the refrigerator for up to 24 hours before baking. Keep them in a single layer on a plate or shallow pan so the crumbs don’t steam and lose crispness. If you assemble and refrigerate, let them sit at room temperature for 15–20 minutes before baking so the chill doesn’t prolong bake time.
Storing leftovers: Cool to room temperature for no more than two hours, then refrigerate in an airtight container for 3–4 days. Reheat in a 350°F oven on a rack set over a sheet pan to help the crust regain some crispness — microwave will warm the meat but make the crust soggy.
Freezing: Freeze fully cooled, individually wrapped portions for up to 2 months. Reheat from frozen in a 375°F oven, covered for the first part to prevent over-browning, then uncovered to crisp the outside, and verify internal temperature reaches 165°F.
FAQ
Can I use frozen chicken breasts? Yes, if thawed completely and patted dry first. If still partially frozen they won’t cook evenly and the crust won’t adhere properly.
Is it safe to make this without butter? Yes. Use oil with a high smoke point or a neutral oil for browning. Butter gives the best flavor, but oil will do the job if dairy is an issue.
How do I get extra-crispy crust? Press the crumb mixture firmly when coating and avoid overcrowding the baking dish. Finish under the broiler for 1–2 minutes at the end of cooking if you want extra color — watch closely so it doesn’t burn.
Can I cut the recipe in half? Absolutely. Maintain ratios and use a smaller baking dish. Keep an eye on baking time; smaller pieces may cook a bit faster.
What if I don’t have a meat thermometer? Check that juices run clear and cut into the thickest part; the meat should be opaque with no pink. A thermometer is still the most reliable way to ensure doneness.
Next Steps
Make the dish the night you need dinner solved without fuss. Serve with a crisp green salad or roasted broccoli to keep things balanced. Leftovers work well sliced over a bed of greens or tucked into a sandwich with a smear of mayo or extra ranch dressing.
If you enjoyed this recipe, bookmark or print the steps — they’re straightforward and dependable. Come back for more practical, no-fuss dinner ideas that give you maximum flavor with minimal work.

Parmesan Ranch Chicken
Ingredients
Ingredients
- 1 cupPanko breadcrumbs
- 1/2 cupfreshly grated Parmesan cheese *
- 1 ounceranch seasoning mix 1 envelope
- 1/2 cupunsalted butter 1 stick, melted
- 4 8-ounceboneless, skinless chicken breasts(**)
Instructions
Instructions
- Preheat the oven to 350°F. Spray a 9×13-inch baking dish with nonstick spray and set aside.
- In a large shallow bowl, combine 1 cup Panko breadcrumbs, ½ cup freshly grated Parmesan cheese, and 1 ounce ranch seasoning mix.
- In a second shallow bowl, pour ½ cup melted unsalted butter.
- Pat the 4 (8-ounce) boneless, skinless chicken breasts dry with paper towels.
- Working one at a time, dip a chicken breast into the melted butter, coating both sides, and let excess butter drip back into the bowl.
- Roll the butter-coated chicken breast in the breadcrumb mixture, pressing gently so the crumbs adhere and the breast is evenly coated on all sides. Place the coated breast in the prepared baking dish. Repeat with the remaining breasts, spacing them evenly in the dish.
- Bake uncovered for 40–45 minutes, or until the chicken is fully cooked, the juices run clear, and the internal temperature at the thickest part reaches at least 165°F.
- Remove from the oven and let the chicken rest 3–5 minutes before serving.
Equipment
- 9×13 Baking Pan
Notes
Make sure to pat the chicken dry before dredging it in the butter and breadcrumbs to help everything adhere!
Baking time is approximate and will vary based on the size and thickness of your chicken breasts. I always recommend testing with an instant-read thermometer to know when they are done.
Broil your chicken for a minute or two at the end of cooking to get an even crispier crust. Just be sure you keep a close eye on it — you don’t want it to burn.
This yummy crunchy chicken tastes great the next day sliced up on aCaesarorcobb salad.