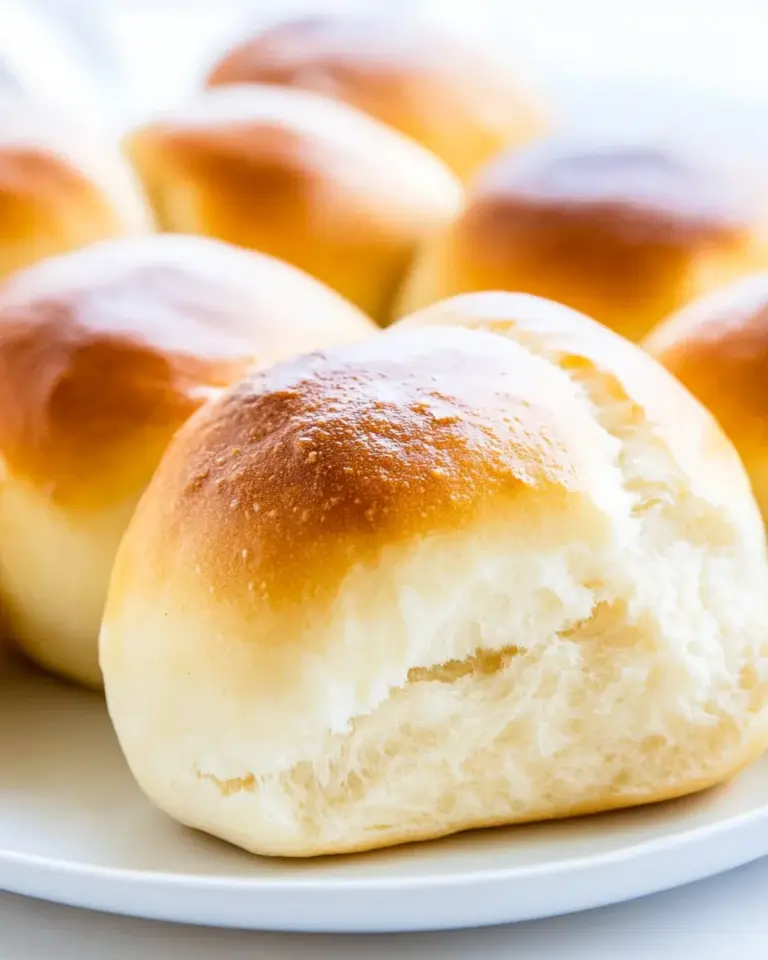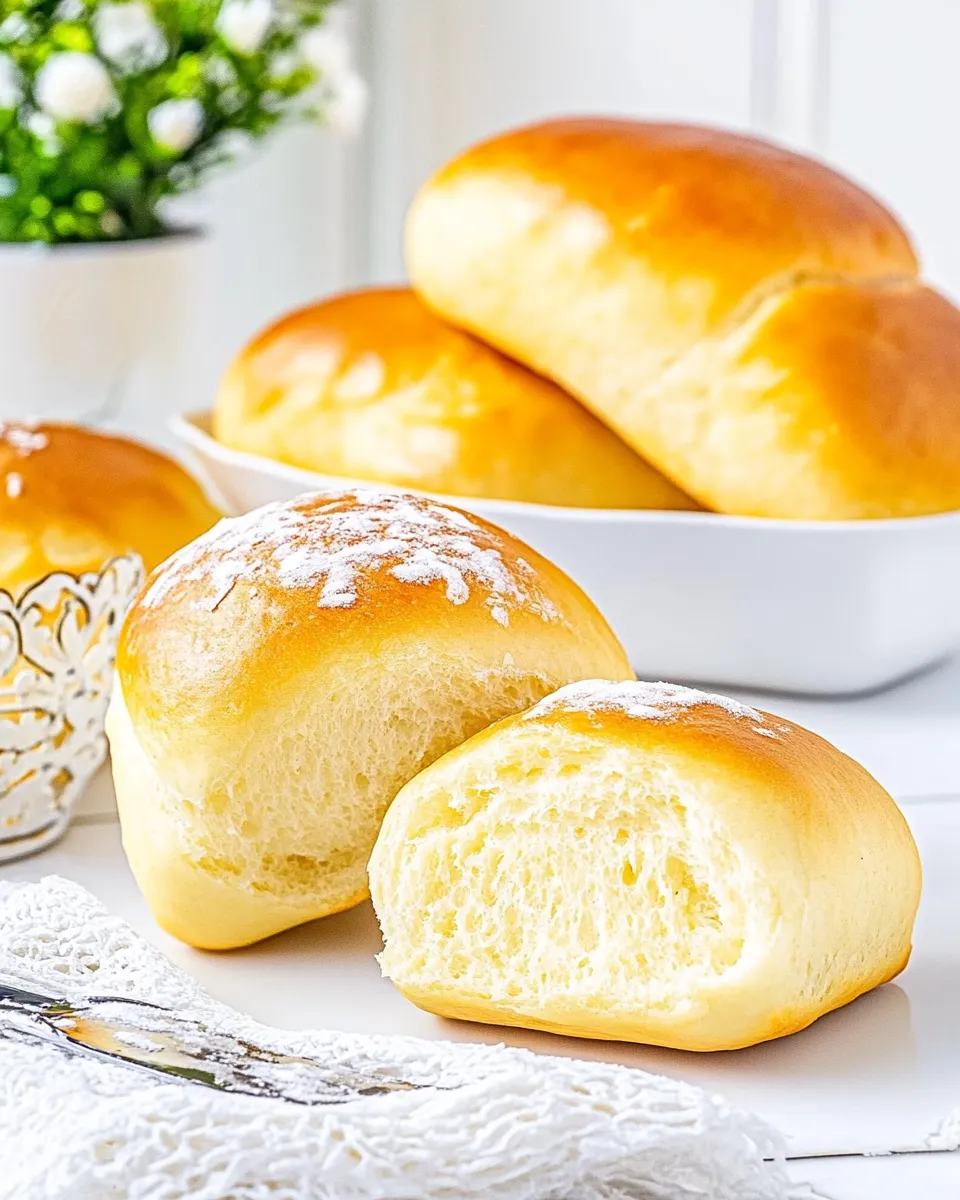
Pan Sobao / Sobado (Breakfast Bread Roll)
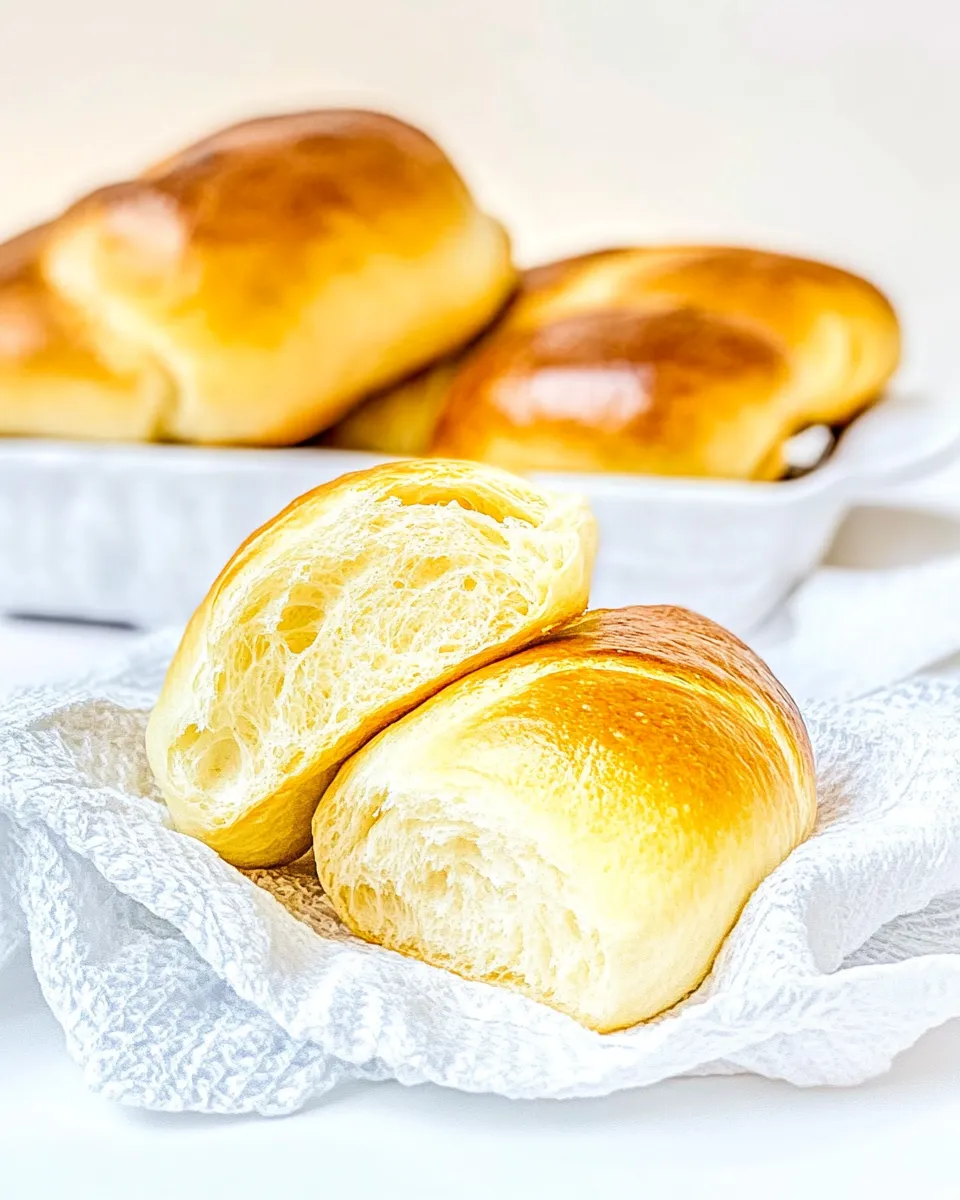
I make Pan Sobao on mornings when I want something soft, slightly sweet, and comforting without fuss. These breakfast rolls are pillowy, tender, and hold up well to butter, jam, or a simple slice of cheese. The dough is enriched with milk and egg, laminated a little with folds, and baked into round or elongated buns that brown beautifully.
This recipe uses straightforward ingredients and a reliable technique. It asks for a bit of attention: a short resting period, a few roll-and-fold turns in the dough, and a gentle final proof. None of it is hard. The result is tender crumb with a soft crust — the kind of roll that feels homemade and slightly indulgent.
Below you’ll find everything you need: the exact ingredient list provided, step-by-step directions that follow the tested method, equipment notes, common problems and fixes, and practical storage tips. Read through once, then get your hands in the dough.
What Goes In

- 1000 grams bread flour (1 kg or 8⅓ cup) — provides the strong gluten network for structure and chew.
- 10 grams salt (2 teaspoons) — balances sweetness and strengthens the dough.
- 10 grams instant yeast (1½ tablespoons) — fast, reliable rise without proofing in advance.
- 120 grams white sugar (1⅔ cup) — adds sweetness and tenderizes the crumb.
- 250 grams whole milk (1 cup) — enriches the dough and improves browning.
- 50 grams large egg (1 pc.) — adds richness and helps with binding.
- 350 grams cold water (1½ cup) — hydrates the dough; added gradually if needed.
- 100 grams butter (¼ cup + 3 tablespoons) — folded into the dough for tenderness and flavor.
Pan Sobao / Sobado (Breakfast Bread Roll): From Prep to Plate
- Combine the dry ingredients (bread flour, salt, instant yeast, and white sugar) in a large mixing bowl.
- In a separate bowl, beat the egg into the whole milk until blended.
- Add the milk-and-egg mixture to the dry ingredients. Add the cold water and mix until the dough ingredients are evenly hydrated (if needed, add the water gradually so the dough comes together).
- If using a mixer or stand mixer: start with the lyre/flat beater (or paddle) on low speed (speed 2) and mix for 3 minutes to incorporate. Switch to the dough hook and knead on medium-low (speed 2) for 5 minutes. Cover the bowl with a cloth and let the dough rest 3 minutes. Add the butter (100 g) and knead on medium-low (speed 2) for 5 minutes, until the dough is smooth and elastic.
- If kneading by hand: turn the dough onto a lightly floured work surface and knead until well incorporated and the dough feels smooth and silky (this may take up to 10 minutes). You may knead 5 minutes, cover and rest 5 minutes, then continue. When the dough is firm and no longer sticky, add the butter in pieces and knead until smooth and silky again, about 5–8 minutes.
- Shape the dough into a ball. Cover it with a cloth and let it rise in a cool, draft-free place until it doubles in size (about 30–90 minutes; times vary).
- Turn the risen dough onto a lightly floured surface and shape it into a rectangle. Place the rectangle on a tray, cover with plastic wrap, and refrigerate for 10 minutes.
- Remove the dough from the refrigerator. With a rolling pin, roll the dough into a rectangle about 1/4 inch (5 mm) thick. Fold the dough over itself, rotate it 90°, roll again, and fold again. Repeat this roll-and-fold sequence 2–3 more times (total 3–4 folds).
- Divide the dough into 10 equal portions (weigh portions if you want exact sizes).
- To make round loaves: flatten each portion and pull the edges toward the center to form a tight ball; place the seam side down and cup your hand around the dough to roll it into a smooth surface. To make elongated buns: flatten each portion into a rectangle and roll from the top edge to the bottom edge, pressing the seam to seal.
- Place the shaped buns on a baking tray with a small space between them. Cover with a clean towel and let them proof until doubled in size, about 20–45 minutes.
- When the buns are nearly doubled, preheat a conventional oven to 350°F (180°C).
- Once the loaves have doubled, bake in the preheated oven until golden brown, about 18–22 minutes.
- Remove the bread from the oven and cool for a few minutes on a rack.
- Serve warm. Store covered with a clean cloth to serve within a few hours, or refrigerate and reheat in a toaster to serve the next day.
What Sets This Recipe Apart
This Pan Sobao method balances a straightforward enriched dough with light laminations (roll-and-folds). The technique gives the rolls a soft, airy crumb without the complexity of full laminating like croissants. The use of cold water plus milk-and-egg brings tenderness and a clean, slightly sweet flavor that pairs with both sweet and savory toppings. The short refrigeration before rolling helps relax the gluten, making shaping easier and improving texture.
The combination of a moderate sugar amount and the butter folded in at the right time yields a tender crumb that still holds structure for slicing or toasting. It’s the kind of roll that’s forgiving for home bakers: timings can vary, but the process is repeatable and consistent.
International Equivalents
Pan Sobao shares characteristics with several breakfast rolls worldwide: it’s richer than a basic dinner roll but less layered than a brioche or croissant. Think of it as a hybrid between a soft milk roll and a slightly sweet enriched loaf typical in Latin American and Caribbean breakfasts. The crumb’s tenderness and mild sweetness make it universally adaptable across cultures — eat it plain, toasted, or split for sandwiches.
What You’ll Need (Gear)
- Large mixing bowl — for mixing dry ingredients and initial dough combining.
- Stand mixer with paddle and dough hook — optional but speeds the process; paddle to incorporate, dough hook to knead.
- Rolling pin — for the roll-and-fold stage to achieve thin, even layers.
- Kitchen scale — highly recommended for dividing into 10 equal portions accurately.
- Baking tray(s) — for proofing and baking; line or grease lightly as desired.
- Clean cloth or plastic wrap — to cover the dough during rests and proofs.
- Cooling rack — to cool the buns briefly after baking so steam escapes evenly.
Watch Outs & How to Fix
Problem: Dough too sticky or too dry
If the dough feels too sticky, you may have added water too quickly or measured wet ingredients loosely. Dust the work surface lightly and continue kneading; the dough will firm up as gluten develops. If it remains extremely sticky after active kneading, add a tablespoon of flour at a time, but sparingly — excess flour will make the rolls dense.
Problem: No rise or sluggish rise
Check yeast freshness and ambient temperature. Instant yeast is reliable, but if your kitchen is cold, proofing will take longer. Move the bowl to a warm spot, such as inside an oven with just the light on (oven off), or near a warm appliance. If after double time there’s little rise, you can try a gentle warm water bath under the covered bowl to encourage activity.
Problem: Heavy or dense crumb
Under-kneading leaves the dough without enough gluten strength. If you hand-kneaded and the crumb is tight, allow a longer first rise and make sure to develop the dough until it’s smooth and elastic. Over-measuring flour at the start also causes density; weigh ingredients for best results.
Problem: Rolls brown too quickly
If the oven gives too much top heat, tent loosely with foil for the last part of baking so the interior finishes without burning the crust. Also check that you’re baking at the correct temperature (350°F/180°C).
Fresh Seasonal Changes
This recipe is versatile across seasons because the base roll is neutral in flavor. In cooler months keep the dough in a slightly warmer spot to speed proofs. In warm months watch proofs closely; the dough can double faster. The only practical seasonal adjustment is timing the rise stages rather than changing ingredients.
Because the ingredients list is fixed here, I don’t recommend altering volumes. If you want to pair the rolls seasonally, think toppings and fillings: citrus marmalade in winter, fresh cheese in spring, but those are serving ideas rather than changes to the dough itself.
Chef’s Rationale
I follow this approach because it gives a reliable, tender roll without requiring long laminations or enriched-dough expertise. The initial mix hydrates the flour fully. A short rest before incorporating butter prevents tearing and makes the fat easier to knead in. The brief refrigeration before rolling relaxes the dough for clean folds and predictable shaping. These small choices add up to a soft interior and a clean, even crust.
The recipe’s balance between sugar, milk, egg, and butter aims for a breakfast roll that feels slightly indulgent but not overly sweet — versatile enough for coffee or for sandwich use. Each step is intentional to preserve that balance while keeping technique approachable.
Prep Ahead & Store

Short-term: After baking, cool the rolls briefly and store covered with a clean cloth for a few hours to retain softness. For the same-day plan, keep them at room temperature in a bread box or wrapped lightly.
Overnight: For the next day, refrigerate in an airtight container or wrapped well. Reheat in a toaster or oven to refresh the crumb and restore a little crust crispness.
Longer storage: Freeze cooled rolls in a sealed freezer bag for up to one month. Thaw at room temperature and reheat in a low oven or toaster before serving.
Quick Questions
- Can I use all-purpose flour? — Bread flour gives better chew and structure; AP will work but expect a slightly softer, less elastic dough.
- Do I have to use cold water? — The recipe calls for cold water; if you use warmer water, proofs will accelerate. Adjust proofing time accordingly.
- Can I skip the roll-and-fold? — You can, but the fold sequence contributes to a lighter texture. Skipping it will still produce good rolls, just slightly different in crumb.
- How to tell when rolls are done? — They should be golden brown and sound hollow when tapped on the bottom. Internal temperature around 190–200°F (88–93°C) is a reliable check.
Save & Share
If you try these Pan Sobao / Sobado rolls, save the method and share a photo of your batch. Note any timing adjustments you made for your kitchen climate — that helps next-batch consistency. Tag friends who love warm, soft rolls and keep a jar of butter or jam ready: these are happiest warm out of the oven.
Happy baking — simple steps, comforting results. These rolls perform well whether you need ten for a family breakfast or a few to keep on hand for easy, warm sandwiches.

Pan Sobao / Sobado (Breakfast Bread Roll)
Ingredients
Ingredients
- 1000 gramsbread flour (1 kg or 8 1/3 cup).
- 10 gramssalt (2 teaspoons)
- 10 gramsinstant yeast (1 1/2 tablespoons)
- 120 gramswhite sugar (1 2/3 cup).
- 250 gramswhole milk (1 cup)
- 50 gramslarge egg (1 pc.)
- 350 gramscold water (1 1/2 cup)
- 100 gramsbutter (1/4 cup + 3 tablespoons)
Instructions
Instructions
- Combine the dry ingredients (bread flour, salt, instant yeast, and white sugar) in a large mixing bowl.
- In a separate bowl, beat the egg into the whole milk until blended.
- Add the milk-and-egg mixture to the dry ingredients. Add the cold water and mix until the dough ingredients are evenly hydrated (if needed, add the water gradually so the dough comes together).
- If using a mixer or stand mixer: start with the lyre/flat beater (or paddle) on low speed (speed 2) and mix for 3 minutes to incorporate. Switch to the dough hook and knead on medium-low (speed 2) for 5 minutes. Cover the bowl with a cloth and let the dough rest 3 minutes. Add the butter (100 g) and knead on medium-low (speed 2) for 5 minutes, until the dough is smooth and elastic.
- If kneading by hand: turn the dough onto a lightly floured work surface and knead until well incorporated and the dough feels smooth and silky (this may take up to 10 minutes). You may knead 5 minutes, cover and rest 5 minutes, then continue. When the dough is firm and no longer sticky, add the butter in pieces and knead until smooth and silky again, about 5–8 minutes.
- Shape the dough into a ball. Cover it with a cloth and let it rise in a cool, draft-free place until it doubles in size (about 30–90 minutes; times vary).
- Turn the risen dough onto a lightly floured surface and shape it into a rectangle. Place the rectangle on a tray, cover with plastic wrap, and refrigerate for 10 minutes.
- Remove the dough from the refrigerator. With a rolling pin, roll the dough into a rectangle about 1/4 inch (5 mm) thick. Fold the dough over itself, rotate it 90°, roll again, and fold again. Repeat this roll-and-fold sequence 2–3 more times (total 3–4 folds).
- Divide the dough into 10 equal portions (weigh portions if you want exact sizes).
- To make round loaves: flatten each portion and pull the edges toward the center to form a tight ball; place the seam side down and cup your hand around the dough to roll it into a smooth surface. To make elongated buns: flatten each portion into a rectangle and roll from the top edge to the bottom edge, pressing the seam to seal.
- Place the shaped buns on a baking tray with a small space between them. Cover with a clean towel and let them proof until doubled in size, about 20–45 minutes.
- When the buns are nearly doubled, preheat a conventional oven to 350°F (180°C).
- Once the loaves have doubled, bake in the preheated oven until golden brown, about 18–22 minutes.
- Remove the bread from the oven and cool for a few minutes on a rack.
- Serve warm. Store covered with a clean cloth to serve within a few hours, or refrigerate and reheat in a toaster to serve the next day.
Equipment
- Large Mixing Bowl
- Small Bowl
- Stand mixer or hand mixer
- paddle (flat beater)
- dough hook
- cloth or clean towel
- Rolling Pin
- baking tray
- Plastic Wrap
- Oven
- Cooling Rack
- Toaster
Notes
If it is very hot, place the dough covered in the refrigerator during the resting times of the dough; this way, we prevent the dough from starting to ferment.