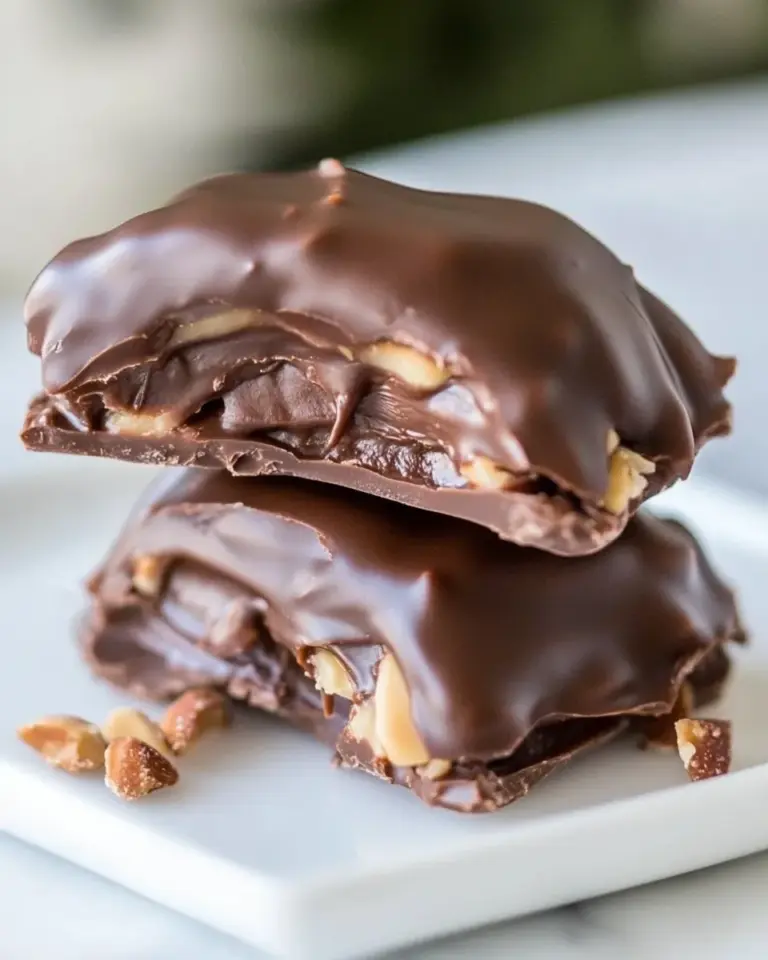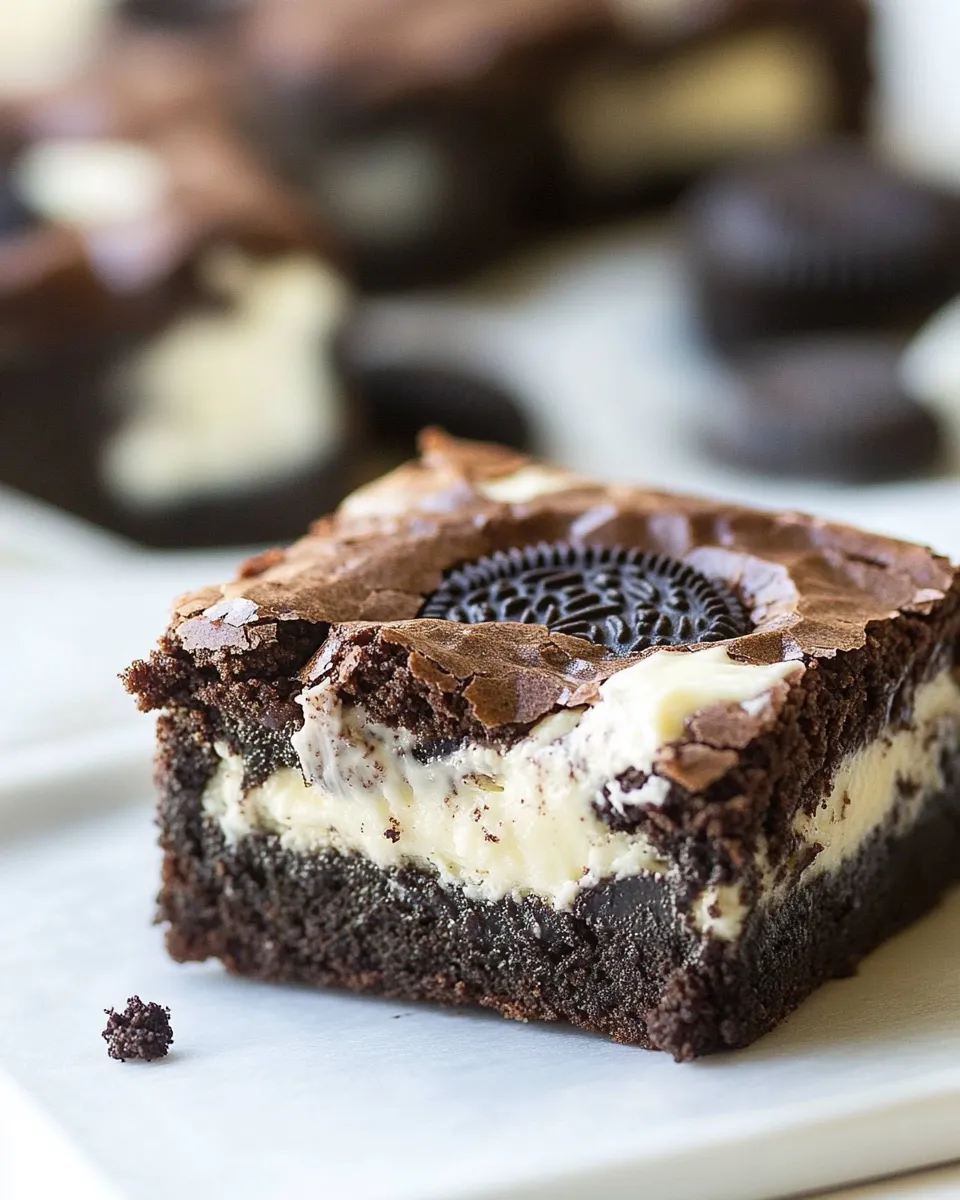
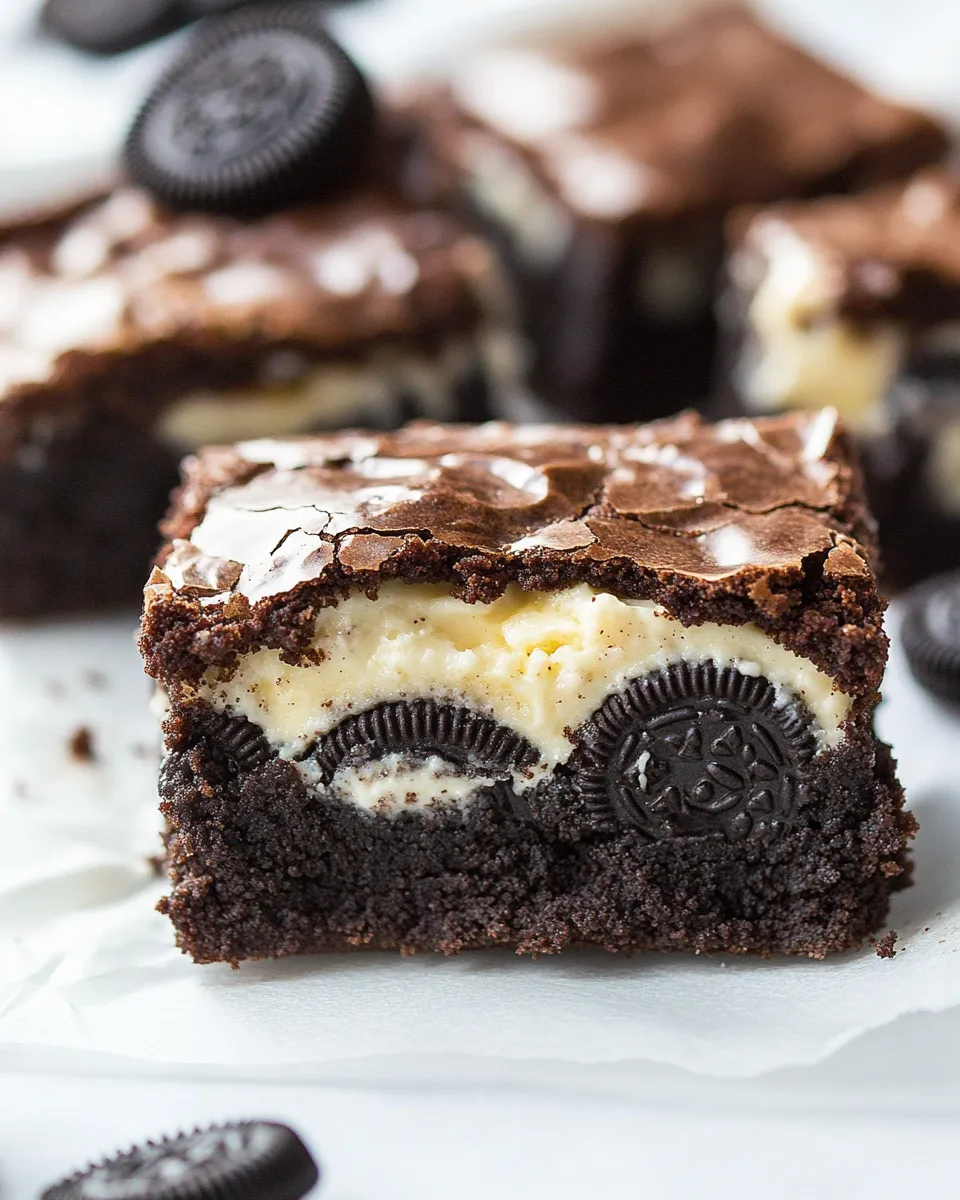
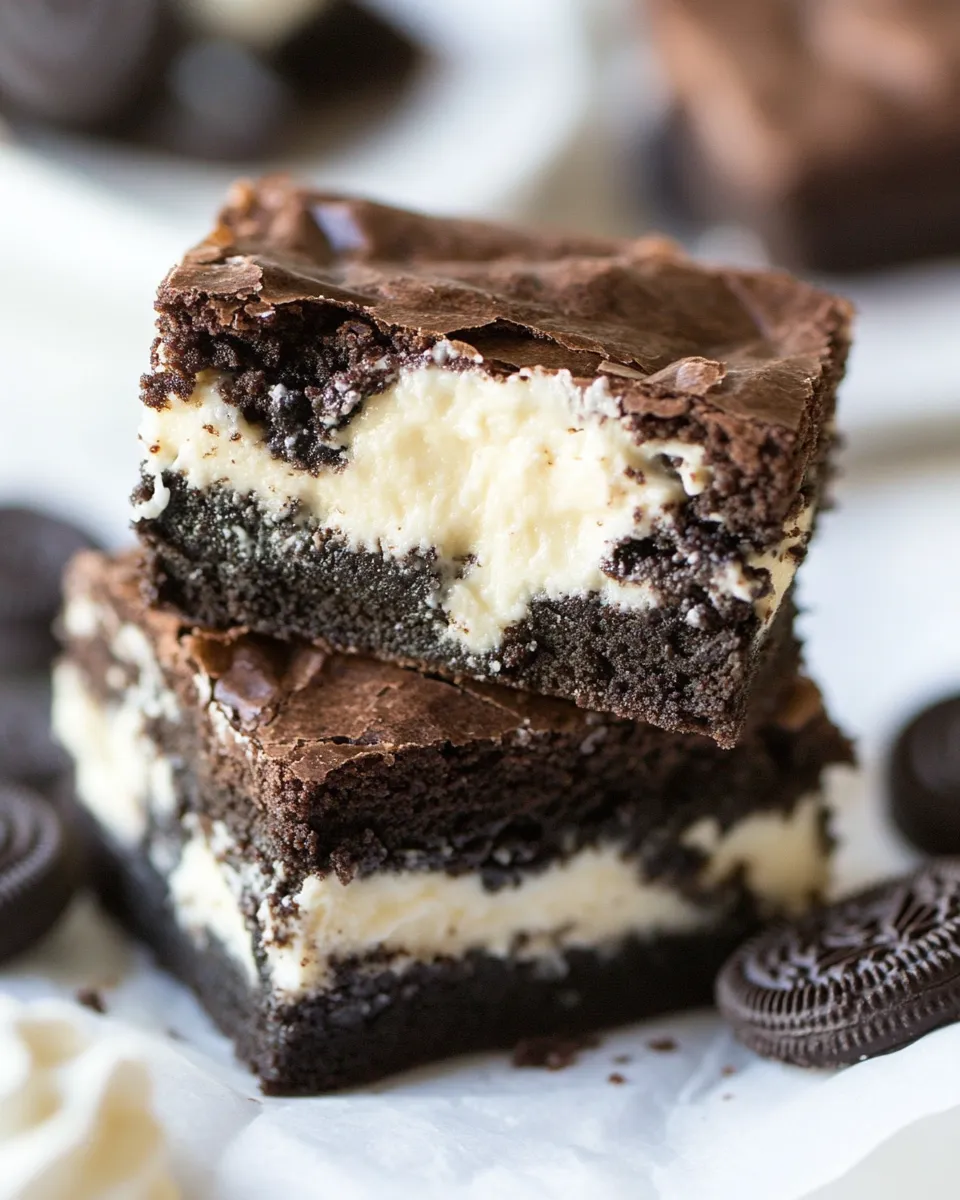
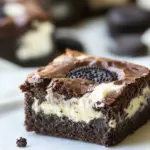
Oreo Cheesecake Brownies
If you love the fudgy satisfaction of a brownie and the tangy creaminess of cheesecake, these Oreo Cheesecake Brownies give you both in one confident, no-fuss bake. The layers are straightforward: a rich, chocolatey brownie folded with chunks of Oreos, and a sweet cream cheese ribbon that bakes into glossy swirls. The result is attention-grabbing but surprisingly easy to pull off on a weeknight or for a weekend bake sale.
I value recipes that behave the same way every time, and this one does. It uses simple pantry staples and one popular cookie. The technique is forgiving—no temperamental steps and no delicate folding that scrambles the textures. You’ll get clean, distinct layers with a marbled top that looks like you spent more time on it than you did.
Read through the ingredient list and the step-by-step directions once before you start. Give the butter and cream cheese the time they need to soften or cool at the right moments. Other than that, the bake itself is short and tidy, and these brownies hold up well for several days if stored properly.
Ingredient Rundown

- ½ cup unsalted butter — melts into the brownie base and provides a deep, glossy texture; unsalted lets you control the salt level.
- ¾ cup granulated sugar — sweetens and helps create a slightly crackled top; dissolves in the melted butter for even sweetness.
- 1 (8-ounce) package cream cheese, softened — the heart of the cheesecake layer; softening prevents lumps and makes it easy to beat smooth.
- ¾ cup powdered sugar — sweetens and stabilizes the cream cheese layer without graininess.
- 2 teaspoons vanilla extract — lifts both the cheesecake layer and the brownie base with warm, familiar flavor.
- 1 cup all-purpose flour — provides structure to the brownies; measure gently to avoid dense results.
- ½ cup unsweetened cocoa powder — delivers chocolate flavor without extra sweetness; sifted into the dry mix for smooth batter.
- ½ teaspoon salt — balances the sweetness and brightens chocolate notes.
- 2 large eggs — bind and add richness; whisked briefly so they incorporate evenly into the batter.
- 1 ⅓ cups coarsely chopped Oreo cookies — give texture and the signature cookie flavor; chop roughly so you get chunky pockets throughout.
From Start to Finish: Oreo Cheesecake Brownies
- Preheat oven to 350°F. Line an 8 x 8 x 2-inch pan with parchment paper and spray the parchment and pan lightly with cooking spray. Set aside.
- In a small saucepan over medium heat, melt ½ cup unsalted butter. Whisk in ¾ cup granulated sugar and continue whisking while bringing the mixture to a low boil for about 1 minute. Remove from heat and let cool for 5 minutes.
- While the butter cools, make the cream cheese layer: in a mixer bowl beat 1 (8-ounce) package cream cheese (softened) with ¾ cup powdered sugar and 2 teaspoons vanilla extract until smooth and creamy, about 1 minute. Transfer to a separate bowl and set aside.
- In a medium bowl sift together 1 cup all-purpose flour, ½ cup unsweetened cocoa powder, and ½ teaspoon salt. Set aside.
- In a large bowl whisk 2 large eggs until combined. Whisk in the cooled butter-and-sugar mixture until uniform.
- Add the sifted dry ingredients to the egg mixture and stir until just combined. Fold in 1 ⅓ cups coarsely chopped Oreo cookies.
- Spread half of the brownie batter evenly in the prepared pan.
- Spread the cream cheese mixture evenly over the first brownie layer.
- Drop the remaining brownie batter over the cream cheese in spoonfuls (dollops). Use a knife to gently swirl the brownie batter and cream cheese to create a marbled effect.
- Bake for 24–28 minutes, until the top is set and a toothpick inserted in the center comes out clean or with just a few moist crumbs.
- Remove the pan from the oven and place it on a wire rack. Let cool completely in the pan on the rack before lifting out using the parchment and slicing to serve.
Why This Recipe Is Reliable
Reliability comes from simple chemistry and modest technique. The brownies rely on melted butter whisked with sugar, which creates an even, glossy base. Whisking the eggs first and then adding the cooled butter-sugar mixture keeps the batter from curdling. Dry ingredients are sifted and folded in gently—this protects the tender crumb without overworking the gluten.
The cheesecake layer is straightforward: softened cream cheese, powdered sugar, and vanilla. It’s beaten just enough to be smooth and spreadable. Because you dollop the remaining brownie batter on top and swirl, you don’t need a perfect layering skill set to get professional-looking marbling. Bake time is short; remove when the center still has a couple of moist crumbs for fudgy brownies rather than a dry cake.
Ingredient Flex Options
- Butter — If you must, you can substitute salted butter but omit or reduce added salt elsewhere. Unsalted gives the cleanest control.
- Sugar — Granulated sugar is essential for the salted-butter step; you can use a slightly coarser caster sugar for faster dissolution but do not replace it entirely with brown sugar or the texture will change.
- Cocoa powder — Natural unsweetened cocoa is used here. Dutch-processed cocoa will deepen color and mellow acidity; expect slightly different flavor but the structure remains fine.
- Oreos — The recipe calls for coarsely chopped Oreo cookies. You can swap in another sandwich cookie if desired, but keep quantities the same and chop to similar size so they distribute evenly.
- Flour — All-purpose flour is the right choice. If you try a lower-protein flour, expect a softer, less structured brownie.
Equipment at a Glance
- 8 x 8 x 2-inch baking pan lined with parchment — ensures easy removal and clean edges.
- Small saucepan — for melting butter and sugar.
- Mixing bowls (large, medium, and one for cream cheese) — keeps stages separate and tidy.
- Electric mixer or hand mixer — speeds up smoothing the cream cheese, though you can whisk by hand if needed.
- Rubber spatula and a knife — spatula for spreading, knife for marbling.
- Wire rack — cool the pan completely before slicing for clean cuts.
Steer Clear of These
- Overbeating the cream cheese — that can warm it and make the layer too soft or airy; beat just until smooth.
- Adding hot butter to eggs — the butter-sugar mixture should be cooled for about 5 minutes; otherwise the eggs can scramble and you’ll get grainy texture.
- Overbaking — the brownies will continue to set as they cool. Pull them when a toothpick shows a few moist crumbs for best fudgy texture.
- Too-fine chopping of Oreos — if pieces are powdery they’ll vanish into the batter; keep them coarsely chopped for texture contrast.
Seasonal Ingredient Swaps
These brownies shine as written, but there are simple seasonal nudges you can make without changing technique.
- Fall: Add a pinch of cinnamon or an autumn spice blend to the dry ingredients for warmth. Keep the quantity small so the chocolate still sings.
- Winter holidays: Fold in a few crushed peppermint Oreos or press crushed candy canes on top after baking for festive crunch.
- Spring/Summer: Serve slightly chilled with a scoop of vanilla ice cream or a drizzle of salted caramel to brighten the finish.
If You’re Curious
Servings and texture
This 8 x 8 pan typically yields 9 generous squares or 16 smaller bites. The brownies are intentionally fudgy thanks to the melted-butter method and the short bake time. If you prefer cakier brownies, bake a few minutes longer until the center is completely set.
Flavor balance
Oreo chunks provide sweet, chocolatey crunch and a hint of cream. The cream cheese layer cuts the richness with tang, which keeps the overall flavor from feeling cloying. The finished marbling gives you bites that are more brownie-forward and bites that are more cheesecake-forward—both are good.
Make Ahead Like a Pro
Storing
Once cooled, you can store the whole pan loosely covered at room temperature for up to 2 days. For longer storage, wrap tightly and refrigerate for up to a week. Bring to room temperature before serving to let the textures soften and flavors open.
Freezing
Slice first for freezer convenience. Arrange slices in a single layer on a baking sheet and freeze until solid, then transfer to a freezer-safe container with parchment between layers. They’ll keep well for up to 2 months. Thaw in the refrigerator overnight and then bring to room temperature before serving, or warm briefly in the oven for a freshly-baked feel.
Reader Q&A
- Q: Can I use low-fat cream cheese? — A: Low-fat versions can be tangier and a bit runnier; they’ll work but expect a slightly looser cheesecake layer and less richness.
- Q: My top cracked—what happened? — A: Slight cracking can happen if the oven is a touch too hot or the batter sat too long before baking. The swirls usually disguise small cracks, and the inside should still be moist.
- Q: Can I double this recipe? — A: Yes. Use a 9 x 13 pan and increase bake time, checking for doneness with a toothpick; it will take longer than the 24–28 minute window listed here.
Final Thoughts
Oreo Cheesecake Brownies are reliably crowd-pleasing and generous in texture. The recipe’s strengths are its simplicity and forgiving method: melt, whisk, fold, spread, swirl, and bake. Taste-wise, you get the comfort of a brownie and the bright lift of cheesecake in each marbled bite. If you follow the timing and let the key elements cool and set at the right moments, you’ll end up with neat slices and a pan that disappears fast.
Make the recipe exactly as written the first time to understand how the layers behave. Once you’re comfortable, experiment with the small, reversible swaps mentioned above: a spice here, a cookie variation there. Most importantly, enjoy the process. These brownies look like a treat you chased all day, when in reality they’re a simple, dependable bake that rewards minimal fuss with maximum pleasure.
Oreo Cheesecake Brownies
Ingredients
Ingredients
- 1/2 cupunsalted butter
- 3/4 cupgranulated sugar
- 1 8-ouncepackage cream cheese, softened
- 3/4 cuppowdered sugar
- 2 teaspoonsvanilla extract
- 1 cupall-purpose flour
- 1/2 cupunsweetened cocoa powder
- 1/2 teaspoonsalt
- 2 large eggs
- 1 1/3 cupscoarsely chopped Oreo cookies
Instructions
Instructions
- Preheat oven to 350°F. Line an 8 x 8 x 2-inch pan with parchment paper and spray the parchment and pan lightly with cooking spray. Set aside.
- In a small saucepan over medium heat, melt ½ cup unsalted butter. Whisk in ¾ cup granulated sugar and continue whisking while bringing the mixture to a low boil for about 1 minute. Remove from heat and let cool for 5 minutes.
- While the butter cools, make the cream cheese layer: in a mixer bowl beat 1 (8-ounce) package cream cheese (softened) with ¾ cup powdered sugar and 2 teaspoons vanilla extract until smooth and creamy, about 1 minute. Transfer to a separate bowl and set aside.
- In a medium bowl sift together 1 cup all-purpose flour, ½ cup unsweetened cocoa powder, and ½ teaspoon salt. Set aside.
- In a large bowl whisk 2 large eggs until combined. Whisk in the cooled butter-and-sugar mixture until uniform.
- Add the sifted dry ingredients to the egg mixture and stir until just combined. Fold in 1 ⅓ cups coarsely chopped Oreo cookies.
- Spread half of the brownie batter evenly in the prepared pan.
- Spread the cream cheese mixture evenly over the first brownie layer.
- Drop the remaining brownie batter over the cream cheese in spoonfuls (dollops). Use a knife to gently swirl the brownie batter and cream cheese to create a marbled effect.
- Bake for 24–28 minutes, until the top is set and a toothpick inserted in the center comes out clean or with just a few moist crumbs.
- Remove the pan from the oven and place it on a wire rack. Let cool completely in the pan on the rack before lifting out using the parchment and slicing to serve.
Equipment
- 8 x 8 x 2-inch pan
- Parchment Paper
- Cooking Spray
- Small Saucepan
- Whisk
- Mixer
- Medium Bowl
- Large Bowl
- Sifter
- Knife
- Wire Rack
- toothpick