No-Bake Pistachio Pudding Pie
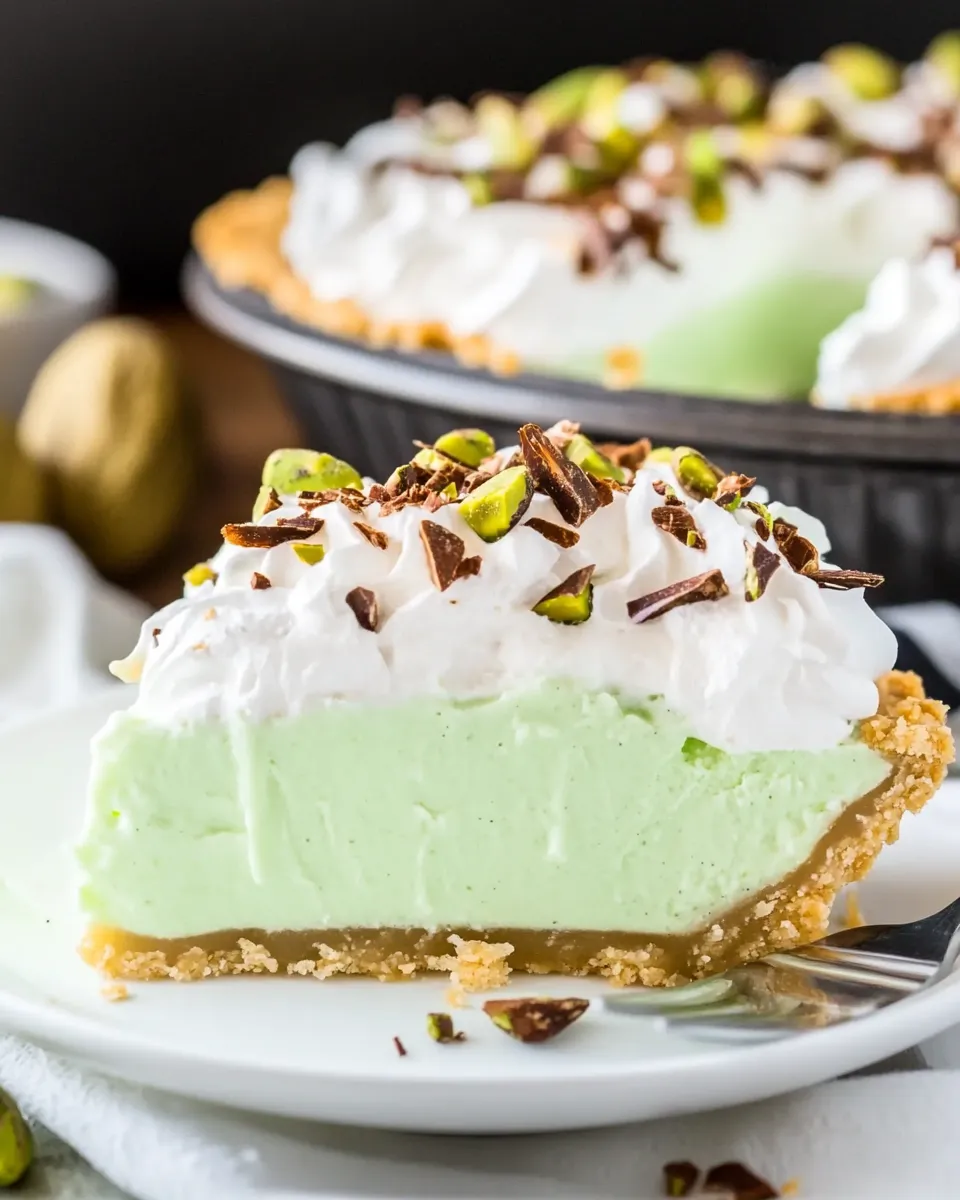
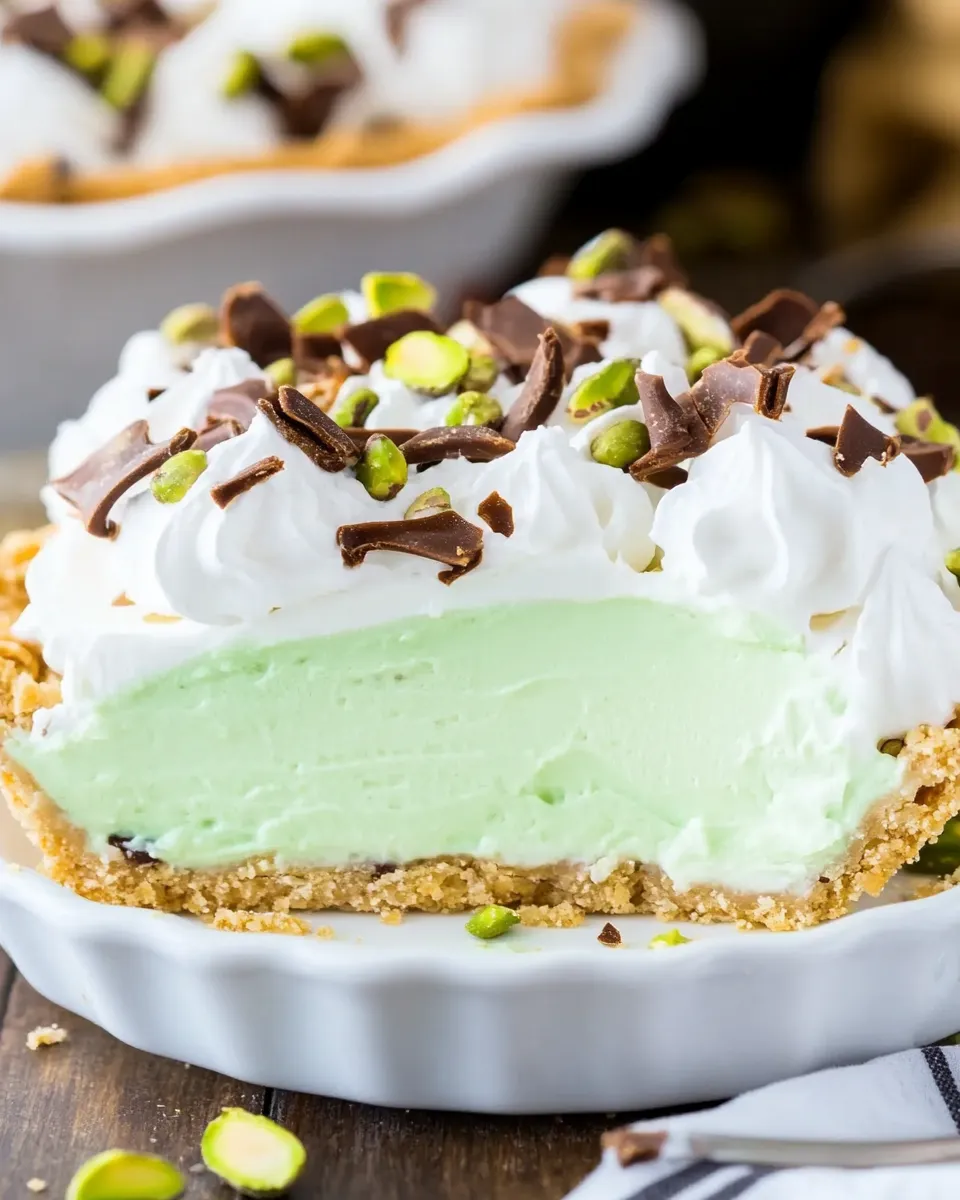
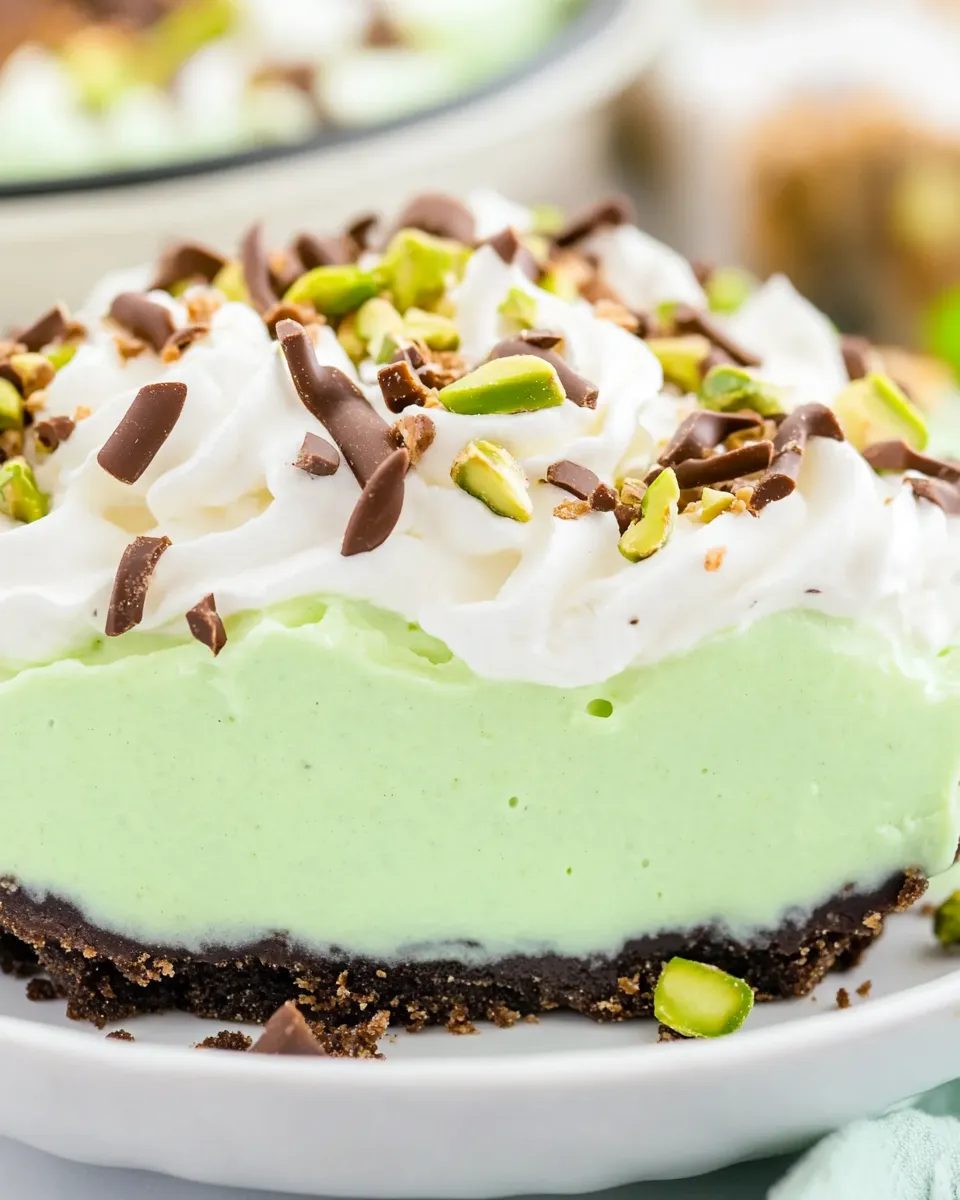
I love recipes that look like they took all day but actually took less than an hour of hands-on time. This No-Bake Pistachio Pudding Pie is one of those shortcuts that still impresses — creamy pistachio filling set in a chocolatey Oreo crust, topped with clouds of whipped cream, a chocolate drizzle, and a sprinkle of pistachios. It’s straightforward to put together, and the refrigeration does the rest.
There’s comfort in a dessert that behaves: no oven, no constant checking, just a few steps and patience while it chills. I make this when guests are coming and when I want something special without overcomplicating the afternoon. It travels well and stays stable in warmer kitchens better than many mousse-style desserts.
I’ll walk you through exactly what to gather, every step in order, and the practical tips that save you time and keep the texture spot on. If you want to tweak it for dietary needs or seasonal flair, I’ll include simple swaps and troubleshooting so you can make it confidently.
What We’re Using

Ingredients
- 8 ounces cream cheese, softened — provides richness and a stable base for the pudding filling; soften to room temperature for a lump-free mix.
- 3/4 cup milk — thins the cream cheese so the pudding mix can hydrate properly; use whole or 2% for best texture.
- 1 1/2 cups heavy cream, divided — adds silkiness and body; part goes into the filling and the rest is whipped for the topping.
- 1 (3.4-ounce) package instant pistachio pudding mix — the flavor driver and thickener for the filling; use the instant kind for no-cook convenience.
- 1/4 cup granulated sugar — sweetens the filling; adjust slightly if you prefer less sweet.
- 1 ready-made Oreo crust — saves time and adds a crisp chocolate contrast; you can use a homemade chocolate crust if you prefer.
- 2 tablespoons powdered sugar — stabilizes and sweetens the whipped cream topping without making it grainy.
- 1/2 cup semi-sweet chocolate chips — melted for a simple drizzle; semi-sweet balances the pistachio and cream flavors.
- 2 tablespoons chopped pistachios — for garnish and a little crunch; chop them finely so they sit neatly on the edge.
No-Bake Pistachio Pudding Pie: How It’s Done
Step-by-step (follow these exactly)
- In a large bowl, use a hand-held mixer (or stand mixer) to beat 8 ounces softened cream cheese with 3/4 cup milk until smooth and lump-free.
- Add 1/2 cup heavy cream and continue beating until fully incorporated and smooth.
- Add 1 (3.4-ounce) package instant pistachio pudding mix and 1/4 cup granulated sugar; beat just until combined and the mixture begins to thicken.
- Transfer the pistachio filling into the ready-made Oreo crust and spread evenly with a spatula. Place the pie in the refrigerator while you prepare the topping.
- In a clean bowl, use a mixer to beat the remaining 1 cup heavy cream until it starts to thicken. Add 2 tablespoons powdered sugar and continue beating until stiff peaks form.
- Spread the whipped cream over the chilled pistachio layer. (Optional: for decoration, spread half of the whipped cream flat and put the other half in a pastry bag fitted with a large star tip to pipe a ring around the outer edge.)
- Place 1/2 cup semi-sweet chocolate chips in a microwave-safe bowl and microwave in 20-second intervals, stirring between intervals, until melted and smooth. Transfer the melted chocolate to a small plastic bag, snip a corner, and drizzle over the pie.
- Sprinkle 2 tablespoons chopped pistachios around the outer edge of the pie.
- Refrigerate the pie for at least 2 hours before serving to allow the filling and topping to set.
Why No-Bake Pistachio Pudding Pie is Worth Your Time
This pie delivers classic dessert satisfaction with minimal fuss. The filling sets reliably because of the instant pudding mix, and the cream cheese gives it structure and a pleasant tang that balances the sweet pistachio. The Oreo crust gives a chocolate counterpoint that many guests will love. Total hands-on time is short, and most of the wait is passive chilling.
It’s versatile. Serve it at potlucks, family dinners, casual gatherings, or as a make-ahead treat for the week. It’s also forgiving — if your whipped cream is slightly over-whipped, small fixes exist. The finished pie holds together well, slices cleanly after proper chilling, and stores neatly in the fridge for several days.
Quick Replacement Ideas
- Ready-made Oreo crust — swap with a homemade chocolate graham crust if you prefer; press crumbs with a little melted butter and chill.
- Pistachio pudding mix — if unavailable, a vanilla instant pudding plus 1/2 teaspoon almond or pistachio extract can approximate the flavor, but measure extracts sparingly.
- Semi-sweet chocolate chips — use dark chocolate chips for a more intense, less sweet drizzle or milk chocolate for a sweeter finish.
- Chopped pistachios — toasted almonds or slivered toasted almonds make a fine crunchy stand-in if nut allergies aren’t an issue for other guests.
Gear Checklist
- Large mixing bowl (or stand mixer bowl)
- Hand-held mixer or stand mixer
- Spatula for spreading
- Measuring cups and spoons
- Microwave-safe bowl for melting chocolate
- Small plastic bag (for drizzling the chocolate)
- Pastry bag and large star tip (optional, for piping whipped cream)
- Refrigerator space for chilling the pie
Troubles You Can Avoid
- Lumpy filling — bring cream cheese to room temperature and beat with the milk until fully smooth before adding anything else.
- Runny whipped cream — use chilled cream and a clean bowl; stop beating when you reach firm peaks.
- Cracked or split topping — overworking the whipped cream or letting it warm will cause weepage; keep chilled until assembling and refrigerate promptly.
- Chocolate drizzle that won’t flow — microwave in short intervals and stir thoroughly; thin slightly with a teaspoon of neutral oil if necessary, but add sparingly.
Seasonal Ingredient Swaps
- Spring — add a handful of fresh raspberries at serving time for brightness; they pair well with pistachio and chocolate.
- Summer — top individual slices with macerated strawberries or a thin berry compote instead of, or alongside, the chocolate drizzle.
- Autumn — sprinkle a pinch of cinnamon into the whipped cream for warm spice, or top with a small handful of candied ginger (if you like a sweet-spicy contrast).
- Winter — use chopped roasted pistachios mixed with a little finely grated orange zest for a festive aroma over the whipped cream.
What Could Go Wrong
Here are common failure points and how to avoid them so you don’t end up with a sad pie.
- Filling doesn’t set: Make sure you used instant pudding mix and followed the mixing order. If too much liquid gets in early (like from very soft cream cheese), the pudding may take longer to thicken — extra chilling helps.
- Oreo crust gets soggy: If your kitchen is humid or the crust was stored improperly, it can soften. Chill the crust briefly before filling to firm it up and serve within a few days.
- Whipped cream turns grainy: That happens if sugar is added too early or the cream is overbeaten. Use powdered sugar (as the recipe calls for) and watch for firm peaks.
- Chocolate clumps when melted: Don’t overheat. Stir between short microwave bursts and ensure the bowl is dry; even a few drops of water can seize chocolate.
Make Ahead Like a Pro
This pie is a make-ahead champion. Assemble the filling and top, then refrigerate for at least 2 hours to set. For best texture, make the pie up to 24 hours in advance. Keep it covered in the refrigerator; plastic wrap or a pie box will protect the whipped cream from absorbing fridge odors.
If you need to prepare further ahead, you can make the base and filling 48 hours in advance, but wait to add the whipped cream topping and the chocolate drizzle until the day of serving. The whipped cream can be prepared and kept in an airtight container for up to 24 hours. If you pipe decorations ahead of time, they’ll soften slightly; for sharp piped edges, add the final piping close to serving.
Handy Q&A
- Q: Can I use low-fat cream cheese or milk? A: Low-fat options change the texture. The pie will still set, but it may be thinner and less creamy. For best texture, follow the recipe as written.
- Q: My whipped cream deflated after a few hours. Why? A: Light whipped cream can collapse over time, especially if the pie sits at room temperature. Keep the pie chilled and try stabilizing the whipped cream with a tablespoon of instant pudding mix or a small amount of gelatin if you need longer hold.
- Q: Can this be frozen? A: I don’t recommend freezing the fully assembled pie; the whipped cream and pistachio filling can change texture. You can freeze the filling separately (without whipped cream) in an airtight container for up to a month and thaw in the fridge before finishing.
- Q: Any tips for slicing clean pieces? A: Use a sharp knife dipped briefly in hot water and wiped dry between cuts for clean slices.
Serve & Enjoy
Chill the pie for at least 2 hours, but for best slicing and flavor meld, aim for 4 hours or overnight. Slice with a hot, dry knife for neat wedges. Serve straight from the fridge so the filling holds its shape and the whipped cream stays firm. A small garnish of extra chopped pistachio or a few whole pistachios on each slice makes for an attractive plate.
Store covered in the refrigerator for up to 3 days. If the whipped cream relaxes a bit overnight, freshen the look by piping a new ring of whipped cream just before serving. This pie is reliably popular: smooth, sweet, and with a satisfying chocolate-pistachio contrast that keeps people coming back for seconds.

No-Bake Pistachio Pudding Pie
Ingredients
Ingredients
- 8 ouncescream cheese ,softened
- 3/4 cupmilk
- 1 1/2 cupsheavy cream ,divided
- 1 3.4-ounce packageinstant pistachio pudding mix
- 1/4 cupgranulated sugar
- 1 ready-made oreo crust
- 2 tablespoonspowdered sugar
- 1/2 cupsemi-sweet chocolate chips
- 2 tablespoonschopped pistachios
Instructions
Instructions
- In a large bowl, use a hand-held mixer (or stand mixer) to beat 8 ounces softened cream cheese with 3/4 cup milk until smooth and lump-free.
- Add 1/2 cup heavy cream and continue beating until fully incorporated and smooth.
- Add 1 (3.4-ounce) package instant pistachio pudding mix and 1/4 cup granulated sugar; beat just until combined and the mixture begins to thicken.
- Transfer the pistachio filling into the ready-made Oreo crust and spread evenly with a spatula. Place the pie in the refrigerator while you prepare the topping.
- In a clean bowl, use a mixer to beat the remaining 1 cup heavy cream until it starts to thicken. Add 2 tablespoons powdered sugar and continue beating until stiff peaks form.
- Spread the whipped cream over the chilled pistachio layer. (Optional: for decoration, spread half of the whipped cream flat and put the other half in a pastry bag fitted with a large star tip to pipe a ring around the outer edge.)
- Place 1/2 cup semi-sweet chocolate chips in a microwave-safe bowl and microwave in 20-second intervals, stirring between intervals, until melted and smooth. Transfer the melted chocolate to a small plastic bag, snip a corner, and drizzle over the pie.
- Sprinkle 2 tablespoons chopped pistachios around the outer edge of the pie.
- Refrigerate the pie for at least 2 hours before serving to allow the filling and topping to set.
Equipment
- Mixing Bowl
- Hand Mixer or Stand Mixer
- Spatula
- Microwave-safe bowl
- pastry bag (optional)