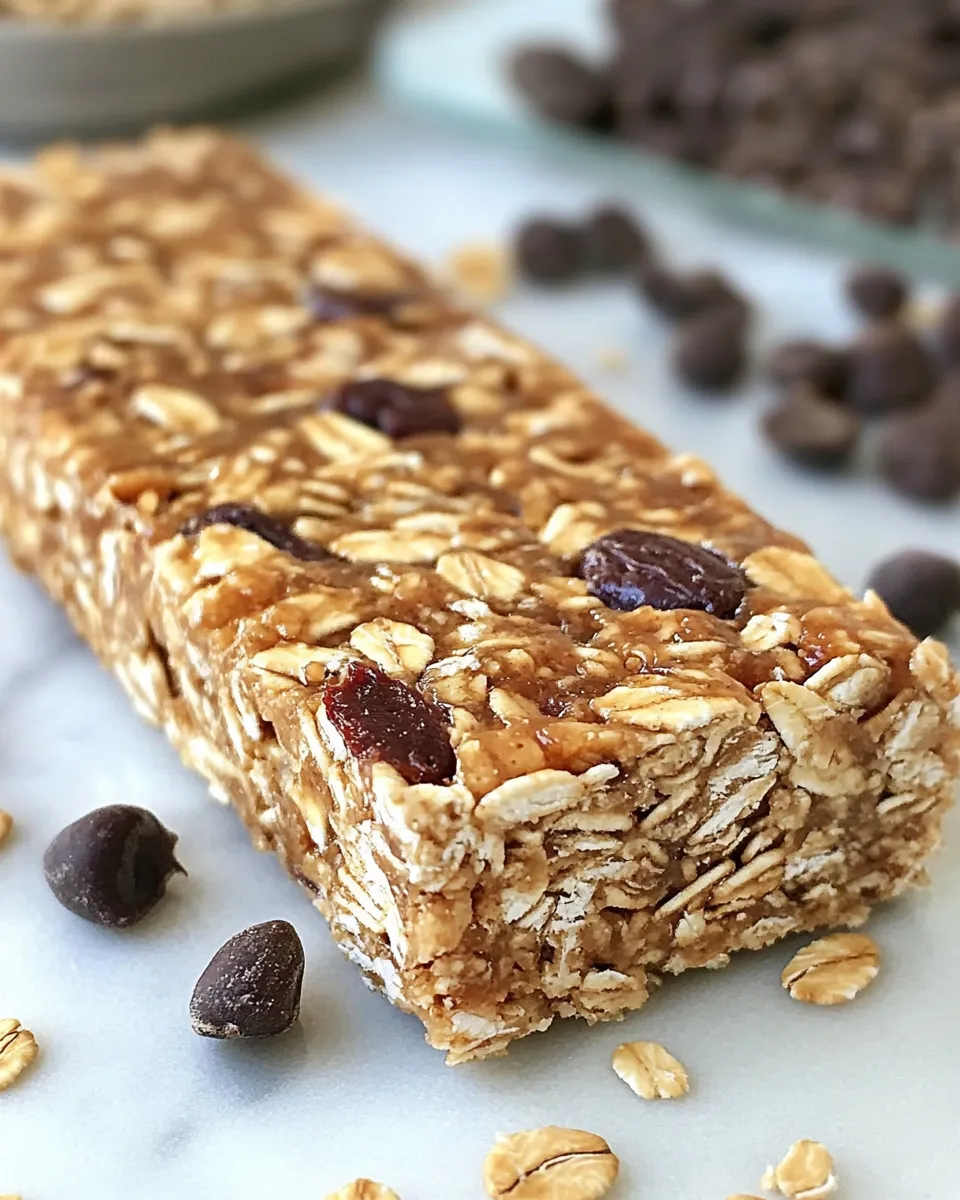
No-Bake Peanut Butter Granola Bars
I make these bars more times than I can count. They are my go-to when I need a quick snack that travels well, keeps the kids satisfied, and doesn’t require firing up the oven. The balance of crunchy oats and crispy rice with that warm, peanut-buttery syrup hits every time.
There’s nothing fussy here: a stovetop melt, a firm press, and a short wait while the chocolate sets. They store at room temperature and stay chewy without getting stale for days, which makes them ideal for packable snacks, post-workout bites, or a simple grab-and-go treat.
Below you’ll find the ingredient list straight from the recipe, exact directions unchanged, and practical notes from my kitchen—what to watch for, how to adapt, and how to store them so they stay at their best.
Ingredients

- 1/4 cup butter — melts into the syrup and adds richness and structure to the bars.
- 1/4 cup smooth peanut butter (not all-natural) — the primary binder and flavor; the recipe relies on stable commercial peanut butter to keep bars cohesive.
- 1/2 cup honey — sweetener and sticky agent that helps everything hold together.
- 2/3 cup packed brown sugar — deep sweetness and helps the syrup set properly when cooled.
- 4 cups quick cooking oats — the bulk of the texture; quick oats absorb the syrup more readily than rolled oats.
- 2 cups crispy rice cereal — light, airy crunch that keeps the bars from becoming too dense.
- 1 teaspoon vanilla — brightens and rounds the flavor of the sweet syrup.
- 2 tablespoons mini chocolate chips — optional garnish that adds small pockets of chocolate flavor.
- 2 tablespoons peanut butter chips — small touches of peanut-butter candy on top for contrast and a finished look.
What’s in the Bowl
At its simplest, this recipe is two parts dry mix and one part sticky syrup. The dry side—quick oats plus crispy rice cereal—gives body and crunch. The wet side—butter, peanut butter, honey, and brown sugar—forms the glue once heated and cooled.
Dry mix
Quick cooking oats absorb syrup faster than old-fashioned rolled oats, which keeps the bars tender instead of chewy. The crispy rice cereal keeps the texture light and prevents the whole thing from collapsing into a dense, hockey-puck bar.
Wet mix
Butter and smooth (not all-natural) peanut butter melt into a uniform, stable syrup with honey and brown sugar. The cooked sugar content and the addition of vanilla help the mixture set properly at room temperature once pressed and cooled.
Directions: No-Bake Peanut Butter Granola Bars
- In a large bowl, stir together 4 cups quick-cooking oats and 2 cups crispy rice cereal; set the bowl aside.
- In a small saucepan, combine 1/4 cup butter, 1/4 cup smooth peanut butter (not all-natural), 1/2 cup honey, and 2/3 cup packed brown sugar.
- Heat the saucepan over medium-high heat, stirring until the mixture melts and comes to a full bubble. Reduce the heat to maintain a gentle simmer and cook, stirring, for 1 1/2 to 2 minutes.
- Remove the pan from the heat and stir in 1 teaspoon vanilla.
- Pour the hot mixture over the oats and rice cereal and mix thoroughly so the dry ingredients are evenly moistened.
- Transfer the mixture to a lightly greased small jelly-roll pan (about 12 x 8 x 1 inches). Press the mixture firmly and evenly to a thickness of about 3/4 inch. If your pan is larger, pack and press the mixture into one side so it stays about 3/4 inch thick.
- Sprinkle 2 tablespoons mini chocolate chips and 2 tablespoons peanut butter chips evenly over the top and press them lightly into the bars.
- Let the pan cool on the countertop at room temperature until firm and the chocolate chips are set, about 2 hours.
- Cut into bars, wrap individual bars in parchment or plastic wrap, and store at room temperature.
Why This No-Bake Peanut Butter Granola Bars Stands Out

They’re straightforward and highly repeatable. The technique—melting the wet ingredients, simmering briefly, and folding into the dry mix—creates a reliable, evenly textured bar every time. No oven, no special equipment, and no tempering of chocolate.
The combination of quick oats and crispy rice cereal is smart: oats give the hearty feel of a granola bar while the rice cereal keeps them light. The short simmer time concentrates the sugars enough to set properly without turning the mixture brittle.
Finally, topping with mini chips and peanut butter chips instead of folding them in maintains a pleasing appearance and keeps the mix from becoming overloaded with pockets of melted chocolate that could change the texture.
Allergy-Friendly Substitutes

- Peanut butter — swap for a sunflower seed butter if you need a nut-free option. Use a commercial-style, stabilized seed butter rather than an oil-separated variety.
- Butter — use a dairy-free stick butter substitute to make the bars dairy-free. Choose one that is solid at room temperature for best structure.
- Honey — for a vegan version, use a similar-weight maple syrup or agave nectar; the texture will be slightly different but still cohesive.
- Quick cooking oats — if you need gluten-free, be sure to use oats labeled gluten-free; do not substitute rolled oats without expecting a different final texture.
- Chocolate/peanut butter chips — use allergy-safe chips (carob or allergy-friendly brands) if needed, or skip the chips and press seeds (like sunflower) on top for texture.
Equipment Breakdown
- Large mixing bowl — for combining the dry ingredients and tossing in the hot syrup.
- Small saucepan — to melt butter and peanut butter and simmer the sugar-honey mix.
- Measuring cups and spoons — accurate measures matter for set and texture.
- Lightly greased jelly-roll pan (about 12 x 8 x 1 inches) — this size yields the intended thickness; if your pan is larger, follow the packing note in the directions.
- Spatula or wooden spoon — for stirring the hot mixture into the dry ingredients.
- Flat-bottomed glass or spatula — for pressing the mixture firmly and evenly into the pan.
- Sharp knife — to cut clean-edged bars after they’ve set.
Avoid These Traps
Use smooth, commercial peanut butter. All-natural peanut butter separates and can make the mixture oily and loose, preventing proper set. The recipe explicitly calls for “not all-natural” for this reason.
Don’t skip the brief simmer after the mixture reaches a full bubble. That minute and a half to two minutes concentrates the sugar and helps the bars set. Too short and they’ll be gooey; too long and they’ll risk becoming hard or grainy.
Press firmly. If you don’t compact the mixture well into the pan, the bars will crumble when cut. Use the bottom of a cup or a flat spatula, and take the extra 30 seconds to make sure the surface is even and dense.
Let them cool fully at room temperature. Trying to speed this by refrigerating can cause condensation or a firmer-than-intended texture. The recipe calls for about two hours; give them that time.
Fit It to Your Goals
Want a higher-protein bar? Fold in a scoop of unflavored whey or plant protein powder to the dry mix, but start with small amounts—too much powder can make the texture dry. For more chew, add 1/2 cup chopped dried fruit (raisins, cherries) and reduce crispy rice slightly.
If you’re packing these for kids or school lunches, slice them into smaller bars and wrap individually. For adult snacks, larger, denser bars work well as a pre- or post-workout bite.
Trying to reduce sugar? You can slightly lower the brown sugar, but note that these bars rely on that sugar for structure. Reductions should be modest and tested, as they can affect drying and set time.
Chef’s Rationale
I keep this formula simple on purpose. Quick oats absorb the syrup faster than rolled oats, which produces a cohesive bar without long resting. Crispy rice cereal introduces airiness—without it, the bar leans toward a heavy, dense chew.
Simmering the wet ingredients briefly concentrates the sugar solution just enough to set at room temperature. The choice of commercial-style smooth peanut butter avoids the unpredictability of oil separation. Butter adds richness and mouthfeel that a straight oil-based recipe would miss.
Topping with chips rather than stirring them in helps preserve those little bursts of chocolate flavor while keeping the bulk texture consistent across the whole pan.
Best Ways to Store
The recipe directs you to store at room temperature, and that’s what I recommend for keeping the bars tender. Individually wrap bars in parchment or plastic wrap to maintain freshness and prevent them from sticking together.
If your kitchen is very warm, you can keep them in an airtight container in the fridge; they’ll firm up and may lose a bit of chew. For longer storage, freeze individually wrapped bars for up to 2 months. Thaw at room temperature before eating.
Troubleshooting Q&A
- Q: My bars are crumbly—what went wrong? — A: Most likely they weren’t pressed firmly enough into the pan or the syrup ratio/heat was insufficient. When assembling, press the mixture tightly and make sure you simmer the wet ingredients for the recommended time.
- Q: The mixture is oily or separated after cooling. — A: Check your peanut butter: all-natural, oil-separated peanut butter can cause oil release. Use a commercial, stabilized peanut butter as specified.
- Q: The bars are too hard after cooling. — A: You may have overcooked the syrup. Reduce simmer time slightly next time and make sure you’re not cooking at too high a heat.
- Q: My chocolate chips melted all the way through. — A: If the chips are melting too much, wait a few minutes after pouring and pressing before adding them so the mixture is not piping hot. Press them lightly once on top.
Serve & Enjoy
Cut into rectangle bars and wrap individually for lunches, hikes, or a quick energy boost. They pair well with plain yogurt or a piece of fruit for a more balanced snack. Keep a batch wrapped in the pantry for the week—these are one of those reliable kitchen staples that I reach for constantly.
If you try them, let me know what small tweak you made and how it turned out. These bars invite small experiments, but the base method is forgiving and fast—exactly what I want on busy days.
No-Bake Peanut Butter Granola Bars
Ingredients
Ingredients
- 1/4 cupbutter
- 1/4 cupsmooth peanut butternot all-natural
- 1/2 cuphoney
- 2/3 cuppacked brown sugar
- 4 cupsquick cooking oatsnot rolled oats!
- 2 cupscrispy rice cereal
- 1 teaspoonvanilla
- 2 tablespoonsmini chocolate chips
- 2 tablespoonspeanut butter chips
Instructions
Instructions
- In a large bowl, stir together 4 cups quick-cooking oats and 2 cups crispy rice cereal; set the bowl aside.
- In a small saucepan, combine 1/4 cup butter, 1/4 cup smooth peanut butter (not all-natural), 1/2 cup honey, and 2/3 cup packed brown sugar.
- Heat the saucepan over medium-high heat, stirring until the mixture melts and comes to a full bubble. Reduce the heat to maintain a gentle simmer and cook, stirring, for 1 1/2 to 2 minutes.
- Remove the pan from the heat and stir in 1 teaspoon vanilla.
- Pour the hot mixture over the oats and rice cereal and mix thoroughly so the dry ingredients are evenly moistened.
- Transfer the mixture to a lightly greased small jelly-roll pan (about 12 x 8 x 1 inches). Press the mixture firmly and evenly to a thickness of about 3/4 inch. If your pan is larger, pack and press the mixture into one side so it stays about 3/4 inch thick.
- Sprinkle 2 tablespoons mini chocolate chips and 2 tablespoons peanut butter chips evenly over the top and press them lightly into the bars.
- Let the pan cool on the countertop at room temperature until firm and the chocolate chips are set, about 2 hours.
- Cut into bars, wrap individual bars in parchment or plastic wrap, and store at room temperature.
Equipment
- Large Bowl
- Small Saucepan
- jelly-roll pan
Notes
If your granola bars don’t seem to be staying together when you cut them, you may have not boiled the mixture long enough…you want it to make it just past the softball stage. OR you made them too thin or you didn’t pack them in tight enough. Stick them in the fridge for 20 minutes and that should help keep them together. {Be sure not to keep them in there too long or else they’ll become super hard!} The next time you make them, try boiling for an extra 15 seconds or so.