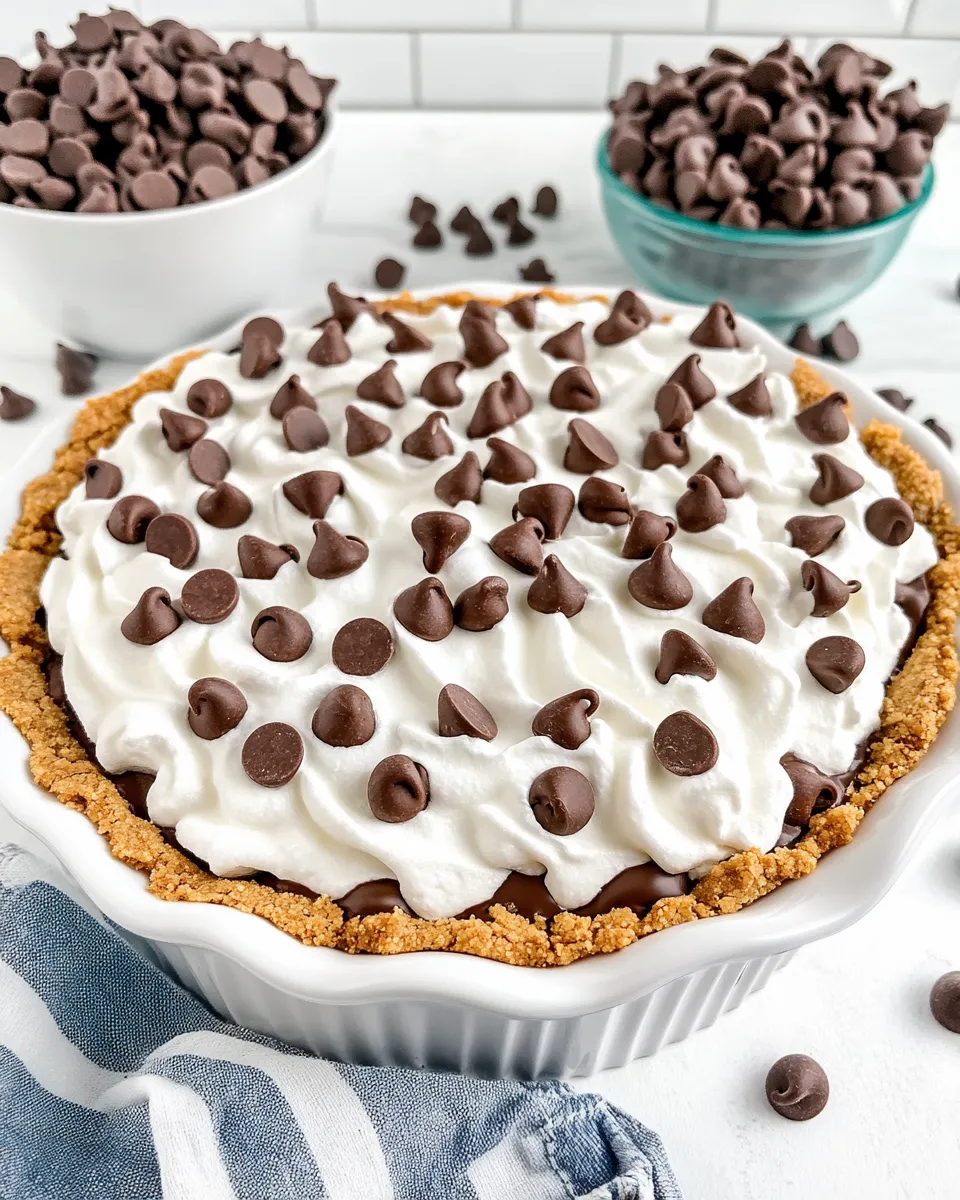
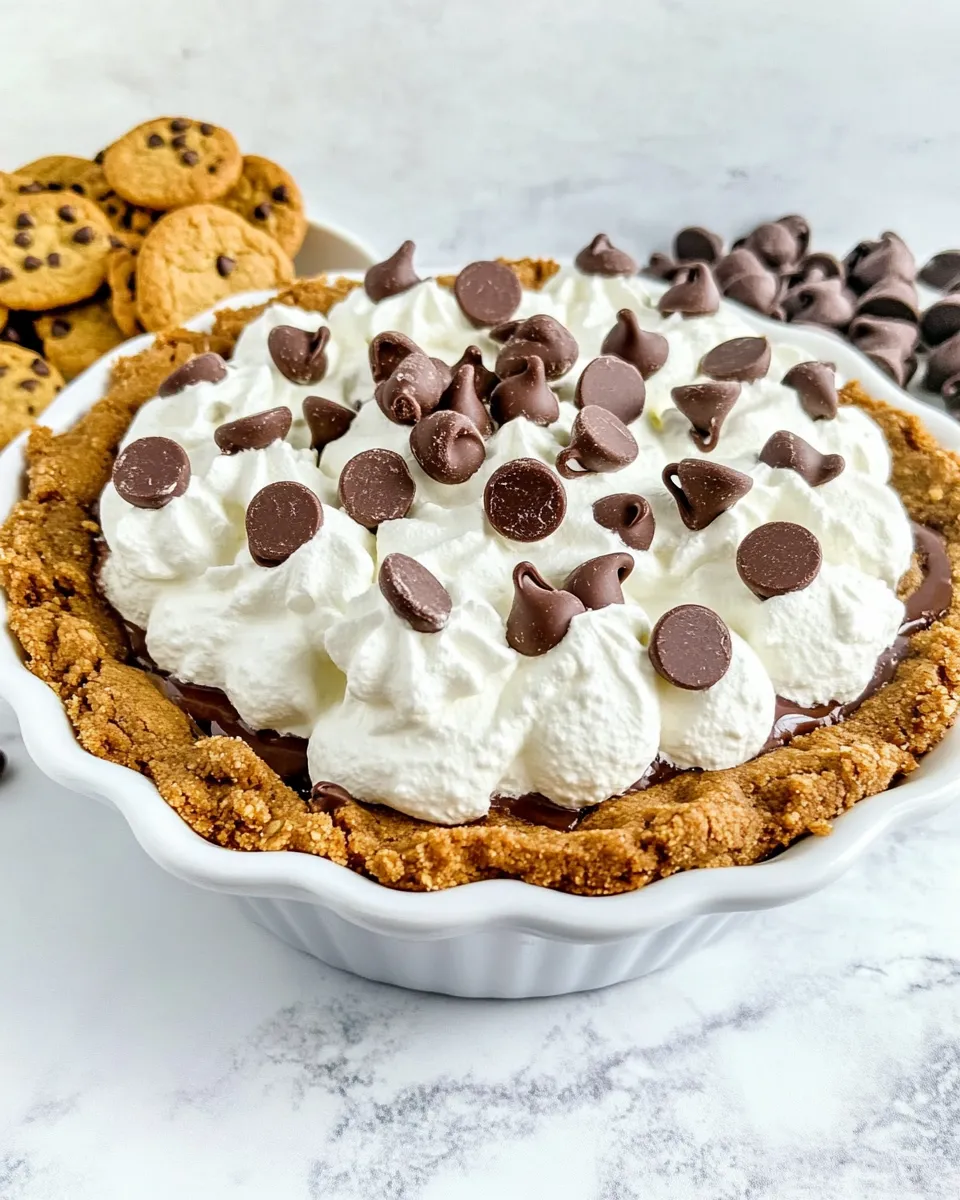
No Bake Chocolate Chip Cookie Pudding Pie
This pie is one of those reliable desserts I reach for when I want full flavor with almost no hands-on baking. It’s layered comfort: a crunchy cookie crust, a silky vanilla pudding flecked with mini chocolate chips and cookie pieces, finished with whipped cream. It comes together quickly and holds up well in the fridge, which makes it perfect for last-minute guests or a stress-free potluck contribution.
I like to prep the crust first and let it chill while the pudding firms up. That simple pause makes a noticeable difference in texture — the crust sets so it doesn’t fall apart when you slice the pie, and the pudding becomes scoopable and smooth. There’s little cleanup and no oven time, which is why this is a weekday winner or an easy summer treat when you want something cool without heating the kitchen.
Below you’ll find a shopping guide, exact ingredient list, the precise step-by-step method, useful troubleshooting tips, and storage notes. Follow the steps as written and you’ll have a dependable, shareable No Bake Chocolate Chip Cookie Pudding Pie every time.
Your Shopping Guide

- Cookies: Buy a pack of chocolate chip sandwich or drop cookies (Chips Ahoy-style works). You need about 20 cookies for the crumbs and a few extra for garnish.
- Butter: Unsalted butter, enough to melt 4 tablespoons (57 g). Buy one stick if you don’t already have it—you’ll use only part of it but it’s standard to have on hand.
- Instant vanilla pudding: A 3.4-ounce box of instant vanilla pudding is required. Check the label to be sure it’s instant and not cook-and-serve.
- Milk: You’ll need 1 1/2 cups (356 ml) milk. Whole milk gives the creamiest result; skim will still work but the filling will be less rich.
- Mini chocolate chips: Pick up a 1/2 cup (170 g) worth. The mini size distributes more evenly through the pudding.
- Whipped cream or whipped topping: For the final garnish, buy your preferred option—stabilized whipped cream or a tub of whipped topping.
- Additional cookies for garnish: Set aside a few whole cookies to decorate the top before serving.
- Pie plate: A 9-inch pie plate is the correct size; if you don’t have one, a similar shallow round dish will do but portions may vary slightly.
Ingredients
- 2 ¼ cups (251 g) Chocolate Chip Cookie crumbs — such as Chips Ahoy, about 20 cookies; these become the crust base when crushed.
- 4 tablespoons (57 g) unsalted butter — melted; binds the crumbs and firms the crust when chilled.
- 1 (3.4 ounce) box instant vanilla pudding — provides the filling structure and vanilla flavor; use instant for no-cook convenience.
- 1 ½ cups (356 ml) milk — hydrates and sets the instant pudding into a creamy filling.
- 1/2 cup (170 g) mini chocolate chips — folded into the pudding for chocolate texture throughout; reserve a few for topping if desired.
- Additional Cookies, for garnish — break or halve for decoration at serving; adds visual appeal and crunch.
- Whipped Cream or whipped topping, for garnish — optional, but recommended for a classic finish and contrast with the cookie crust.
Stepwise Method: No Bake Chocolate Chip Cookie Pudding Pie
- Place about 20 chocolate chip cookies in a zip-top bag and crush with a rolling pin until you have 2 1/4 cups (251 g) of fine crumbs. (Tip: about 9 cookies ≈ 1 cup of crumbs.)
- Transfer the 2 1/4 cups cookie crumbs to a bowl, pour in the 4 tablespoons (57 g) melted unsalted butter, and stir until the crumbs are evenly moistened.
- Press the crumb mixture firmly into the bottom and up the sides of a 9″ pie plate to form an even crust. Chill the crust in the refrigerator for at least 30 minutes to set.
- In a medium bowl, whisk the 1 (3.4 oz) box instant vanilla pudding mix with 1 1/2 cups milk until smooth. Let the pudding sit for 5 minutes to thicken.
- Stir the 1/2 cup mini chocolate chips into the thickened pudding. If you want chips on top for garnish, set a few aside before stirring.
- Crush two of the Additional Cookies (set aside from your garnish supply) and fold the crushed pieces into the pudding mixture.
- Pour the pudding filling into the chilled crust, smooth the top, cover, and refrigerate for at least 4 hours or overnight until fully set.
- Before serving, top the pie with whipped cream or whipped topping, sprinkle any reserved mini chocolate chips if desired, and arrange Additional Cookies for garnish (for example, break cookies in half and place them at equal slice intervals).
- Store covered in the refrigerator: the pie (without whipped cream) will keep up to 2 days; if topped with fresh whipped cream, serve within 24 hours.
Why You’ll Love This Recipe

This pie gives you big, familiar flavors with minimal fuss. The cookie crust delivers crunch and chocolate notes without baking; the instant pudding makes the filling silky and consistent every time. Mini chips and extra cookie pieces add texture so every bite has a little chew and snap.
It’s forgiving. If you need to make it a day ahead, it actually benefits from extra chill time—the flavors meld and the texture firms. No oven, no timing worries, and no complicated technique: that’s why this is a go-to for busy weekdays, casual dinners, or summer potlucks.
Quick Replacement Ideas
- Use any chocolate chip cookies you like for the crumbs and garnish; brands or homemade will work as long as you reach the crumb amount.
- If you prefer larger chocolate pieces, regular chocolate chips can replace mini chocolate chips — stir them in gently so they distribute evenly.
- Whipped topping or stabilized whipped cream are both listed for garnish; choose the one that fits how long the pie will sit before serving.
Prep & Cook Tools
- Zip-top bag — for crushing cookies without a mess.
- Rolling pin or heavy pan — to crush the cookies into fine crumbs.
- Mixing bowls — one medium bowl for the pudding, one for crumbs.
- Measuring cups and spoons — to measure milk and butter accurately.
- Whisk or fork — to mix the instant pudding and milk until smooth.
- 9-inch pie plate — for forming and chilling the crust and holding the pudding filling.
- Spatula — to press crumbs into the pie plate and smooth the filling.
- Refrigerator space — you’ll need room for the pie to chill for at least 4 hours.
Problems & Prevention
Common issues are easy to fix with a small adjustment.
- Soggy crust: Press the crumb mixture firmly and chill the crust for at least 30 minutes before adding the filling. A fully chilled crust forms a better barrier so the pudding won’t soak in.
- Pudding too thin: Make sure you use an instant vanilla pudding box and follow the 5-minute rest after whisking — that pause lets the pudding thicken properly. If your milk-to-pudding ratio was altered, that will affect setting.
- Uneven cookie pieces: If you want more uniform texture, reserve a small handful of cookie crumbs separately and fold them in last. Crushing two cookies into larger chunks gives deliberate crunch rather than tiny bits.
- Topping melts or weeps: If you plan to serve the pie several hours after topping, use a stabilized whipped cream or keep the whipped topping chilled until the last minute.
Spring–Summer–Fall–Winter Ideas
Because this pie is served chilled, it’s especially welcome in warm months. In summer, keep it classic with extra whipped topping and a few reserved mini chips on top. For cooler months, serve slices with coffee or a warm mug on the side to balance the chilled filling. In spring or fall, the pie makes a simple, no-fuss dessert for casual gatherings—prepare ahead and let it rest in the fridge while you handle the main course.
If You’re Curious
Instant pudding sets because it contains modified starches and thickeners that absorb liquid quickly. That’s also why it’s crucial to use the instant variety specified in the ingredient list; a cook-and-serve pudding won’t set the same way without additional heat and time.
The cookie crust behaves like a pressed graham or Oreo crust: melted butter coats the crumbs and, once chilled, holds them into a sliceable shell. Press firmly and evenly to create a stable base that won’t crumble when you cut the pie.
Cooling, Storing & Rewarming
Chill the filled pie for at least 4 hours or overnight to ensure the pudding sets fully. This warming-free dessert should remain in the refrigerator until you’re ready to serve. The source directions state the pie (without whipped cream) will keep up to 2 days in the refrigerator. If you add fresh whipped cream, serve within 24 hours for best texture and appearance.
Do not microwave or rewarm this pie — it’s designed to be served cold. If you need to transport the pie, keep it in a cooler or insulated bag with ice packs to maintain temperature and structure.
Frequently Asked Questions
- Can I make this ahead? Yes. The pie benefits from sitting in the refrigerator and can be made the day before. Without whipped cream, it stores up to 2 days; with whipped cream, serve within 24 hours.
- Can I freeze the pie? Freezing is not recommended for best texture: the pudding and whipped topping can separate or change consistency when thawed.
- Can I use homemade cookie crumbs? Absolutely. The recipe lists about 20 cookies to yield 2 1/4 cups (251 g) of crumbs — measure to match that crumb volume.
- What if I don’t have a 9″ pie plate? A similar shallow round dish will work; portion sizes may vary slightly.
In Closing
No Bake Chocolate Chip Cookie Pudding Pie is straightforward, dependable, and crowd-pleasing. Follow the exact ingredient list and the step-by-step method above for consistent results: crushed cookie crust, an easy instant pudding filling, mini chips for texture, and a simple whipped topping finish. It’s an ideal dessert for easy entertaining or a no-fuss family treat.
If you try it, I’d love to hear how you garnish yours—some people love cookie halves around the edge, others pile on extra chips. Small touches personalize the pie without changing the reliable base that makes this dessert so easy to love.
No Bake Chocolate Chip Cookie Pudding Pie
Ingredients
Ingredients
- 2 1/4 cups 251 g Chocolate Chip Cookie crumbssuch as Chips Ahoy, about 20 cookies
- 4 tablespoons 57 g unsalted buttermelted
- 1 3.4 ouncebox instant vanilla pudding
- 1 1/2 cups 356 ml milk
- 1/2 cup 170 g mini chocolate chips
- Additional Cookies for garnish
- Whipped Cream or whipped topping for garnish
Instructions
Instructions
- Place about 20 chocolate chip cookies in a zip-top bag and crush with a rolling pin until you have 2 1/4 cups (251 g) of fine crumbs. (Tip: about 9 cookies ≈ 1 cup of crumbs.)
- Transfer the 2 1/4 cups cookie crumbs to a bowl, pour in the 4 tablespoons (57 g) melted unsalted butter, and stir until the crumbs are evenly moistened.
- Press the crumb mixture firmly into the bottom and up the sides of a 9" pie plate to form an even crust. Chill the crust in the refrigerator for at least 30 minutes to set.
- In a medium bowl, whisk the 1 (3.4 oz) box instant vanilla pudding mix with 1 1/2 cups milk until smooth. Let the pudding sit for 5 minutes to thicken.
- Stir the 1/2 cup mini chocolate chips into the thickened pudding. If you want chips on top for garnish, set a few aside before stirring.
- Crush two of the Additional Cookies (set aside from your garnish supply) and fold the crushed pieces into the pudding mixture.
- Pour the pudding filling into the chilled crust, smooth the top, cover, and refrigerate for at least 4 hours or overnight until fully set.
- Before serving, top the pie with whipped cream or whipped topping, sprinkle any reserved mini chocolate chips if desired, and arrange Additional Cookies for garnish (for example, break cookies in half and place them at equal slice intervals).
- Store covered in the refrigerator: the pie (without whipped cream) will keep up to 2 days; if topped with fresh whipped cream, serve within 24 hours.
Equipment
- Zip-top Bag
- Rolling Pin
- Mixing Bowl
- 9-inch pie plate
- Whisk
- Refrigerator
Notes
Store covered in the refrigerator: the pie (without whipped cream) will keep up to 2 days; if topped with fresh whipped cream, serve within 24 hours.