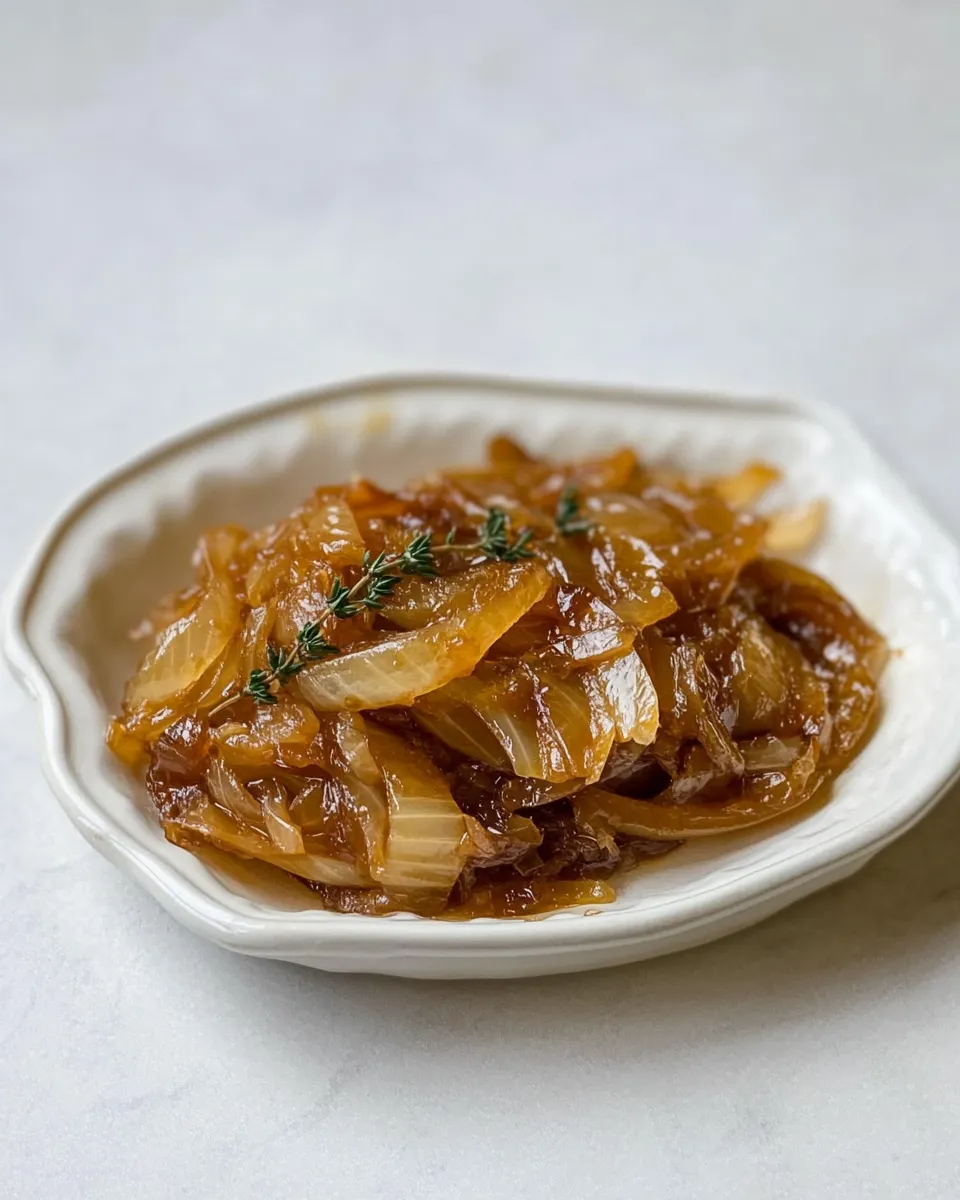
How To Make Caramelized Onions
Caramelized onions are one of those kitchen upgrades that turn ordinary into unforgettable. They add depth, sweetness, and a glossy jam-like finish that lifts everything from burgers to salads to a simple grilled cheese. Once you know the rhythm—heat, patience, attention—you can make a big batch and keep it on hand for the week.
I’ll walk you through a straightforward method I rely on: a heavy pan, a little butter and oil, thyme for brightness, and a touch of white balsamic at the end if you like a hint of tang. There’s no rush and no trickery—just steady, gentle cooking to coax the natural sugars out of the onions until they’re deeply golden and soft.
Practical tips are sprinkled throughout. Use them to avoid the common pitfalls: scorching, undercooking, or ending up with floppy, watery slices. Keep a spoon nearby, a splash of water at the ready, and plan about an hour. The payoff is worth every minute.
Ingredient Rundown

Ingredients
- 2 tablespoons butter — provides flavor and helps with browning.
- 1 tablespoon canola oil — raises smoke point so the butter doesn’t burn.
- 3 large yellow onions, peeled, halved and thinly sliced — the main event; yellow onions caramelize well and become sweet and jammy.
- 1 teaspoon kosher salt — draws moisture and seasons the onions as they cook.
- 3 sprigs fresh thyme (leaves only) — adds a savory, aromatic note; remove woody stems and use just the leaves.
- 1 tablespoon white balsamic vinegar (optional) — brightens and balances the sweetness during the final stage.
Build (Caramelized Onions) Step by Step
- Heat a large cast‑iron or heavy‑bottomed skillet over medium‑high heat. Add 2 tablespoons butter and 1 tablespoon canola oil and melt until the butter is foaming.
- Add 3 large yellow onions (peeled, halved, and thinly sliced), 1 teaspoon kosher salt, and the leaves from 3 sprigs fresh thyme. Toss to coat and cook for about 5 minutes, stirring frequently, until the onions begin to soften and turn translucent but are not browned.
- Reduce the heat to medium‑low and cover the skillet with a lid. Continue to cook, stirring and scraping the bottom of the pan every 10–15 minutes so the onions cook evenly.
- If the onions begin to stick or look like they are burning, add a splash of water and stir to deglaze the pan, then continue cooking.
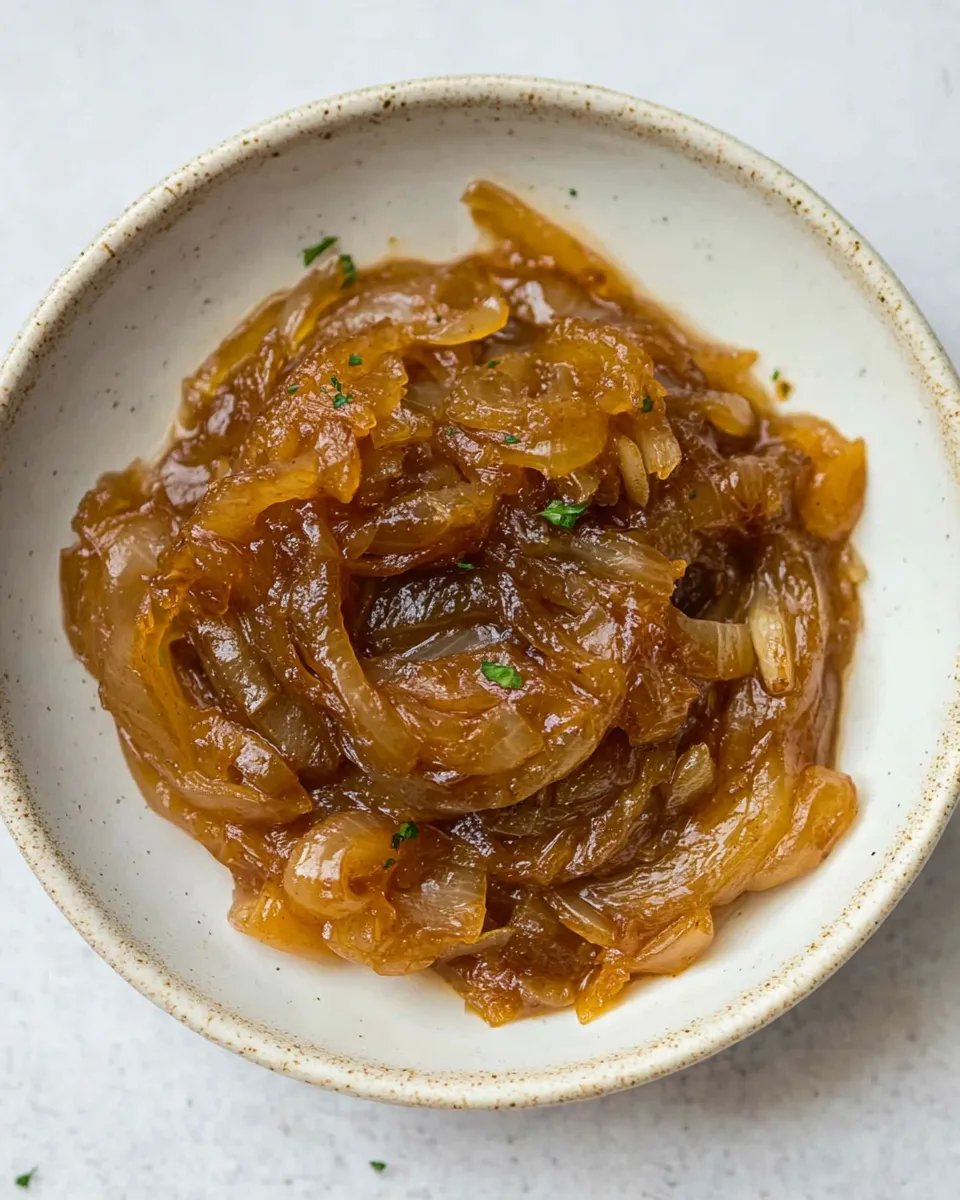
- During the last 10 minutes of cooking, remove the lid and add 1 tablespoon white balsamic vinegar, if using. Cook uncovered, stirring occasionally, until the onions are deep golden brown and jammy. Total cooking time will be up to about 1 hour from the start, depending on your stovetop and pan.
- Remove from heat and serve immediately, or cool and store in an airtight container in the refrigerator for up to one week.
What You’ll Love About This Recipe

This method delivers deep, consistent caramelization with minimal fuss. The combination of butter and oil gives great flavor without burning. The thyme lifts the sweetness with a subtle herbal note. And using a lid for much of the cook time traps steam just long enough to soften the onions evenly before you concentrate the flavor at the end.
Other reasons you’ll reach for this technique: it’s forgiving. If the pan starts to catch, a quick splash of water fixes it. If you want to speed things up a touch, a thicker pan and slightly higher heat will shorten time, although that takes more attention. Mostly, you get concentrated onion flavor that’s versatile—use it hot, warm, or cold.
Quick Replacement Ideas
- Butter — use ghee if you want a nuttier flavor and higher smoke point.
- Canola oil — substitute with a neutral oil like vegetable oil or light olive oil.
- Yellow onions — swap for red or sweet onions; color and final sweetness will vary.
- Fresh thyme — replace with a small pinch of dried thyme (use less) or omit entirely for a straightforward sweet onion flavor.
- White balsamic vinegar — use sherry vinegar or a light splash of red wine vinegar if that’s what you have; add near the end the same way.
Kitchen Gear Checklist
- Large cast‑iron or heavy‑bottomed skillet — essential for even heat and good fond formation.
- Sharp chef’s knife — for consistent, thin slices so the onions cook evenly.
- Cutting board — stable and large enough to halve and slice onions.
- Wooden spoon or silicone spatula — for scraping the pan and stirring without scratching.
- Lid for the skillet — traps steam during the softening stage.
- Heatproof container or jar — for storing cooled caramelized onions in the fridge.
Slip-Ups to Skip
Avoid high heat after the initial step. Flames that are too intense will blacken the onions on the outside while leaving them undercooked and bitter inside. If you see dark bits forming too quickly, lower the heat and add a splash of water to deglaze.
Don’t crowd the pan. If you overload it, the onions steam rather than caramelize, and you’ll end up with limp, pale slices instead of jammy, golden ones. Use a large skillet so the slices have room to release moisture and develop fond.
Resist the urge to stir constantly during the browning phase. Stir every 10–15 minutes while covered, then more often when uncovered toward the end. Constant stirring prevents browning; too little attention risks burning. Find the balance.
Smart Substitutions
If you have dietary needs or different pantry staples, here are reliable swaps that keep the spirit of the dish intact.
- If you’re avoiding dairy: replace the butter with an equal amount of neutral oil plus a tablespoon of olive oil for flavor. The result won’t have the exact richness of butter but will still brown nicely.
- If you don’t have canola oil: any neutral oil with a medium-high smoke point works—vegetable, sunflower, or light olive oil.
- If you’d like a sweeter, less savory profile: use sweet onions (like Vidalia) instead of yellow onions. They’ll caramelize faster and taste sweeter.
- If fresh thyme isn’t available: substitute with a small pinch of dried thyme or a bay leaf during the covered stage; remove the bay leaf before finishing.
- If you don’t want to use white balsamic: a squeeze of lemon or a splash of apple cider vinegar at the end will also brighten the flavor, but add sparingly.
If You’re Curious
Why slow-cook? The sugars in onions break down and concentrate over time. Slow cooking allows moisture to evaporate gradually and the Maillard reaction to develop deep, complex flavors. Think of it as coaxing sweetness out rather than forcing it.
Why use butter and oil together? Butter adds flavor; oil increases the smoke point. Together they give you a flavorful base that won’t burn as quickly. If you skip butter, you’ll still get caramelization, but you’ll miss that rounded, buttery richness.
How do you judge doneness? Look for a deep golden-brown color and a soft, jam-like texture. The onions should melt into sauces or pile into a sandwich without crunch. If they’re still translucent but pale, give them more time.
Best Ways to Store
Cool the caramelized onions to room temperature, then transfer to an airtight container. Stored in the refrigerator, they will keep up to one week.
For longer storage, freeze in portioned containers or ice cube trays. Once frozen, transfer cubes to a freezer bag and keep up to three months. Thaw in the refrigerator or add directly to warm pans and sauces; they thaw quickly in heat.
Reheat gently in a skillet over low heat. If they seem dry, add a splash of water, broth, or a little more butter to reincorporate moisture and flavor.
(Caramelized Onions) Q&A
How long does the process take?
Plan up to about one hour from start to finish. The actual time depends on your stove and pan. A heavier pan retains heat well and can be slightly faster; a thin pan may take a bit longer and needs closer attention.
Can I speed it up?
You can increase the heat slightly, but you must stir more frequently and watch for burning. A hotter pan shortens the caramelization window but risks uneven browning and bitterness. Patience yields the best, jammy texture.
Why did my onions burn?
Burning usually means the heat was too high or the pan was too dry. Lower the heat and add a splash of water to loosen stuck bits. Scrape the fond gently and continue cooking more slowly.
Will different onions change the result?
Yes. Yellow onions are a great all-purpose choice with balanced sweetness and depth. Sweet onions caramelize faster and taste sweeter; red onions will give color and a different flavor profile. All work—expect slight differences in sweetness and color.
Can I make this vegan?
Yes. Replace the butter with a neutral oil or vegan butter alternative. The technique stays the same and you’ll still get great caramelization.
Final Bite
Caramelized onions are one of those small investments that pay off repeatedly. A single hour of patient cooking turns humble onions into something luxurious and versatile. Use them to finish pizzas, lift sandwiches, enrich soups, or stir into mashed potatoes. Make a double batch on the weekend and you’ll find yourself reaching for them all week.
Start with the steps above, keep an eye on the heat, and treat the pan kindly. The rest is simple: time, attention, and the pleasure of a small kitchen victory that shows up in every bite.
How to Make Caramelized Onions
Ingredients
Ingredients
- 2 tablespoonsbutter
- 1 tablespooncanola oil
- 3 largeyellow onions peeled, halved and thinly sliced
- 1 teaspoonkosher salt
- 3 sprigsfresh thyme leaves only
- 1 tablespoonwhite balsamic vinegar optional
Instructions
Instructions
- Heat a large cast‑iron or heavy‑bottomed skillet over medium‑high heat. Add 2 tablespoons butter and 1 tablespoon canola oil and melt until the butter is foaming.
- Add 3 large yellow onions (peeled, halved, and thinly sliced), 1 teaspoon kosher salt, and the leaves from 3 sprigs fresh thyme. Toss to coat and cook for about 5 minutes, stirring frequently, until the onions begin to soften and turn translucent but are not browned.
- Reduce the heat to medium‑low and cover the skillet with a lid. Continue to cook, stirring and scraping the bottom of the pan every 10–15 minutes so the onions cook evenly.
- If the onions begin to stick or look like they are burning, add a splash of water and stir to deglaze the pan, then continue cooking.
- During the last 10 minutes of cooking, remove the lid and add 1 tablespoon white balsamic vinegar, if using. Cook uncovered, stirring occasionally, until the onions are deep golden brown and jammy. Total cooking time will be up to about 1 hour from the start, depending on your stovetop and pan.
- Remove from heat and serve immediately, or cool and store in an airtight container in the refrigerator for up to one week.
Equipment
- large cast-iron or heavy-bottomed skillet
- Lid
- Spatula or Wooden Spoon
Notes
Caramelized onions take time for the flavor to develop but not a whole lot of hand-holding. Allow the onions to cook undisturbed in between stirring times for the caramelization to happen naturally.