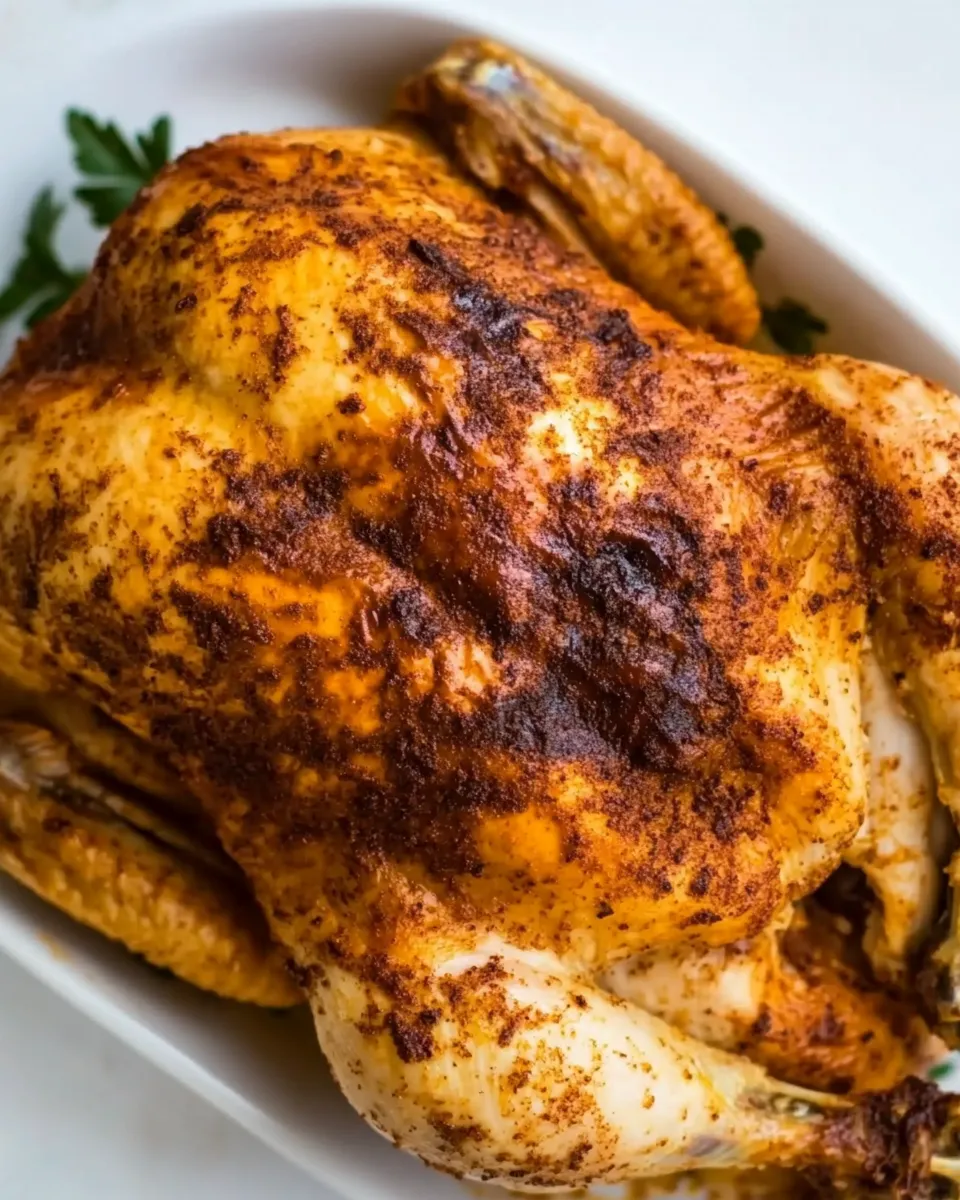
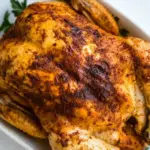
Homemade Rotisserie Chicken
I make a rotisserie-style chicken in my oven nearly every other week. It’s the kind of recipe that feels impressive when you serve it, but honest and simple to execute. No real rotisserie gear needed — just steady heat, a little patience, and the right seasoning blend.
This version roasts low and slow at 300°F, which keeps the meat juicy and gives the skin time to develop color without drying the thighs. The spice mix is straightforward and forgiving: kosher salt, black pepper, garlic and onion powders, paprika, thyme leaves and a whisper of cayenne. It’s a reliable, everyday roast chicken that won’t demand exotic ingredients.
I’m practical about timing and tools. If you have an oven-safe probe thermometer, use it. If not, an instant-read thermometer checked after a set roast time works fine. Resting is non-negotiable — it’s the step that turns a hot roast into a tender, evenly juicy bird.
Below you’ll find a shopping list, the ingredients called for (with quick notes), step-by-step directions exactly as written, and the kind of advice I give friends when they text me a photo of their bird: what to watch for, where people commonly go wrong, and how to get the most from leftovers.
Shopping List

- 3–4 pound chicken, whole — look for one labeled 3 to 4 pounds so timing matches the recipe.
- Canola oil or unsalted butter — 2 tablespoons, either will brown the skin and help spices stick.
- Kosher salt — 1 tablespoon for seasoning the meat through.
- Black pepper — 2 teaspoons, fresh if possible for better aroma.
- Garlic powder — 1 tablespoon for savory depth.
- Onion powder — 1 tablespoon to round out the savory flavor.
- Paprika — 1 tablespoon, for color and mild sweetness.
- Dried thyme leaves (not ground) — 1 teaspoon, small leaves give texture and aroma.
- Cayenne pepper — 1/8 teaspoon, a faint background heat.
- Basic kitchen supplies: roasting pan with rack, foil, paper towels, small bowl and whisk, oven-safe or instant-read thermometer.
Ingredients
- 3-4 pound chicken, gizzards removed — choose a bird in the 3–4 lb range so roast time matches; remove and save gizzards for stock or discard.
- 2 tablespoons canola oil or melted butter — oil for a neutral finish, butter for a richer brown; either helps the rub adhere.
- 1 tablespoon kosher salt — seasons the bird through; use kosher for even distribution.
- 2 teaspoons pepper — black pepper for straightforward spice; freshly ground works best.
- 1 tablespoon garlic powder — adds savory backbone without fresh garlic’s moisture.
- 1 tablespoon onion powder — balances garlic and deepens flavor.
- 1 tablespoon paprika — gives color and a mild, sweet note to the skin.
- 1 teaspoon dried thyme leaves, not ground thyme — small leaves add bursts of herbal flavor; avoid ground thyme as it’s powdery.
- 1/8 teaspoon cayenne pepper — a pinch of heat; adjust only if you prefer milder or hotter.
Mastering Homemade Rotisserie Chicken: How-To
- Preheat the oven to 300°F (150°C). Fit a roasting pan with a baking rack and pour 1–2 cups of tap water into the bottom of the pan so the bottom is just covered.
- In a small bowl, whisk together 1 tablespoon kosher salt, 2 teaspoons pepper, 1 tablespoon garlic powder, 1 tablespoon onion powder, 1 tablespoon paprika, 1 teaspoon dried thyme leaves (not ground thyme), and 1/8 teaspoon cayenne pepper.
- Remove any gizzards from the chicken cavity (if present) and pat the 3–4 pound chicken dry with paper towels.
- Brush the chicken skin all over with 2 tablespoons canola oil or melted butter.
- Sprinkle the prepared seasoning mixture evenly over the chicken on all sides, rubbing the spices into the skin so they adhere.
- Place the whole chicken, breast side down, on the rack in the roasting pan. If using an oven-safe digital thermometer, insert the probe into the thickest part of the thigh, taking care not to touch bone.
- Roast in the preheated oven until the thermometer in the thigh reads 162–165°F (72–74°C). A 3–4 pound chicken will typically take about 2½ to 3 hours. If you do not have an oven-safe thermometer, roast for 2 hours 15 minutes, then check the temperature with an instant-read thermometer and continue checking every 10–15 minutes until the thigh reaches 162–165°F (72–74°C).
- Remove the chicken from the oven, tent it loosely with foil, and let it rest 10–20 minutes. During resting the internal temperature will rise to 165°F (74°C) and the juices will redistribute.
- Carve and serve the whole chicken, or shred, chop, or slice the meat for use in other recipes.
What Sets This Recipe Apart
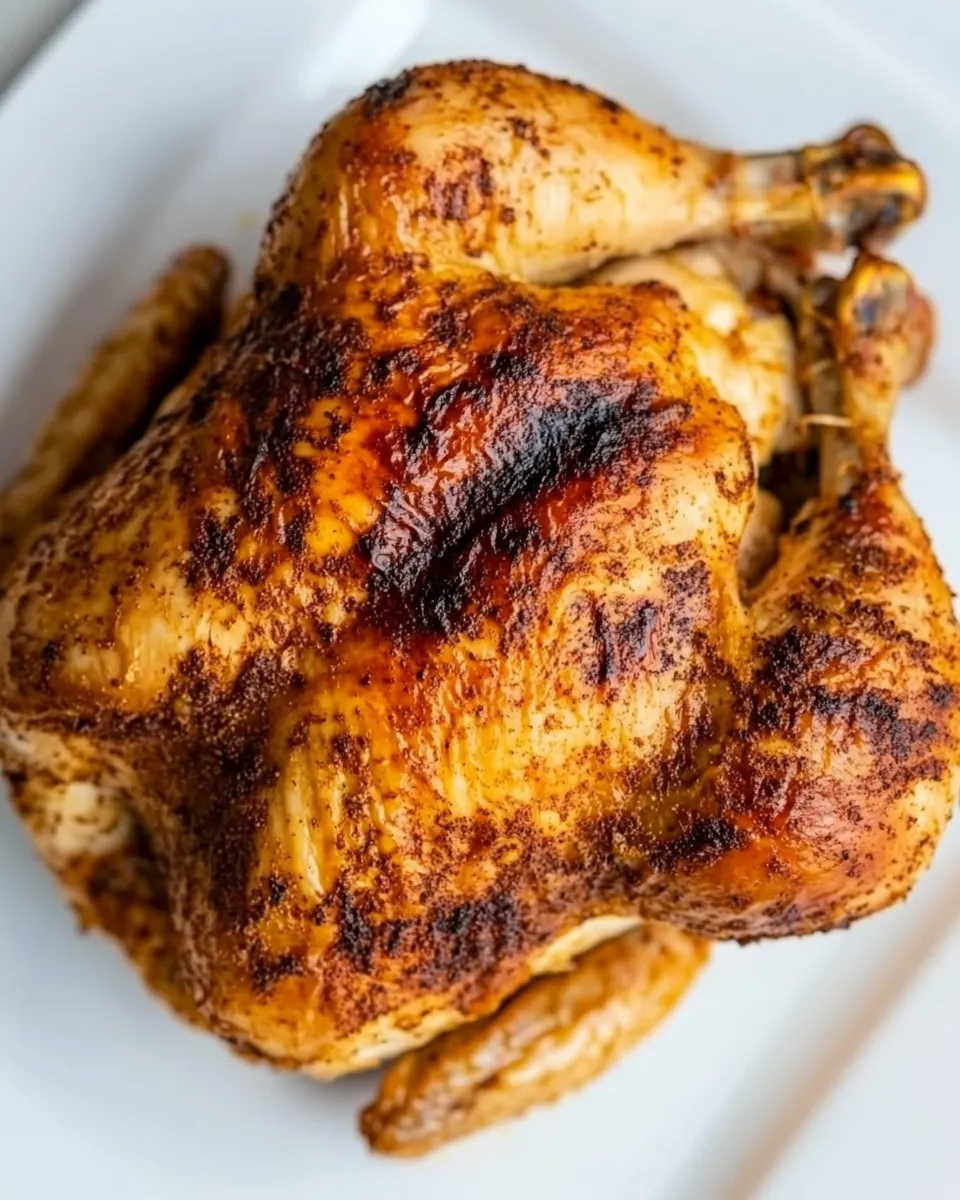
This method deliberately runs the oven at a low, steady 300°F. The result is very even cooking: dark meat stays juicy and white meat finishes without the classic dryness you get from a hot-and-fast roast. The water in the pan is a simple trick to keep the oven environment humid and to catch drippings without smoking. It’s not fancy, but it reliably yields tender meat and nicely colored skin.
The spice blend is straightforward and pantry-driven. There are no fresh aromatics shoved into the cavity, no basting every 15 minutes. Instead, you get a dry rub that clings to the skin and crisps up while the interior cooks gently. That makes this a practical weeknight or Sunday prep roast that still tastes thoughtful and homemade.
Ingredient Flex Options

- Canola oil or melted butter — pick whichever you prefer. Butter gives richer flavor; canola oil is neutral and tolerates heat well.
- Cayenne pepper — leave it out if you want zero heat; the 1/8 teaspoon is subtle, but you can omit it entirely.
- Thyme leaves — the recipe calls for dried thyme leaves (not ground); if you have fresh thyme, use the same volume of leaves stripped from stems, but note fresh herbs can darken faster during roasting.
- Salt and pepper — the recipe specifies kosher salt and 2 teaspoons pepper; if you use a different salt type, adjust by feel (coarser salts measure differently).
Equipment Breakdown
You don’t need a rotisserie spit to get rotisserie-style results. These are the tools I rely on:
- Roasting pan with a baking rack — keeps the chicken elevated so heat circulates under the bird and drippings collect in the pan.
- Oven-safe digital probe thermometer — ideal for hands-off monitoring; insert before roasting if oven-safe.
- Instant-read thermometer — for spot checks if you don’t have a probe.
- Small bowl and whisk — to combine the dry seasonings thoroughly.
- Basting brush or spoon — to apply oil or melted butter evenly.
- Aluminum foil — for loose tenting during the rest phase.
- Paper towels — to dry the chicken thoroughly before oiling the skin.
Mistakes That Ruin Homemade Rotisserie Chicken
People commonly make a few predictable mistakes that turn a promising roast into a disappointment. Watch for these:
- Skipping the dry pat with paper towels — wet skin steams instead of crisping; dry it well before oil and rub.
- Roasting at too high a temperature for this exact timing — if you crank the oven up, the thighs will overcook long before the breast finishes.
- Not using a thermometer — oven times vary; relying on clock time alone risks undercooking or overcooking. The recipe’s target is 162–165°F in the thigh, finishing to 165°F after resting.
- Forgetting to tent during rest — cutting too soon lets juices run out; rest 10–20 minutes so juices redistribute and the bird stays moist.
- Rubbing in the wrong order — apply oil first so the rub adheres to the skin instead of sliding off.
Seasonal Flavor Boosts
Work with the given spices to nudge the bird toward seasonal profiles without adding new, unlisted ingredients.
- Fall/Winter: Increase the paprika slightly for a deeper color and a hint of sweetness. A little extra thyme (still dried leaves) works well with heartier sides.
- Spring: Keep the mix light — maintain the listed amounts but reduce the cayenne to let the chicken feel fresher.
- Summer: Use melted butter if you want a richer, sun-warmed flavor; keep cayenne as listed for a subtle kick that pairs well with salads.
Cook’s Commentary
Before you start
Read the steps through once before you touch the chicken. Preheat the oven fully. Pat the bird dry — I can’t stress that enough. The dry skin is how you get the best surface texture.
While the chicken roasts
Keep the water in the pan at the bottom level so it doesn’t evaporate completely and start smoking. If you’re using a probe thermometer, make sure the probe tip is positioned into the thickest part of the thigh without touching bone; bone reads hotter and will give a false high reading.
After roasting
Tent the bird loosely with foil and wait. The internal temp will rise and the juices will settle. Resist the urge to carve right away — that extra patience rewards you at the table.
Best Ways to Store
Leftover cooked chicken keeps well and is versatile.
- Refrigerate: Cool the carved or shredded meat to room temperature for no more than two hours, then store in an airtight container for up to 4 days.
- Freeze: Spread shredded or sliced meat on a tray to flash-freeze for 30–60 minutes, then transfer to freezer bags. Freeze for up to 3 months. Thaw overnight in the fridge before reheating gently.
- Reheat: Warm in a low oven (about 300°F) for even reheating, or gently in a pan with a splash of water to keep meat moist. Avoid high heat that dries the white meat.
Reader Q&A
- Can I roast a larger chicken? — The recipe is calibrated for a 3–4 pound chicken; larger birds will need more time. Monitor by internal temperature rather than clock time.
- What if the skin isn’t as brown as I like? — If after resting the skin looks pale, you can place the bird under a hot broiler for a minute or two, watching closely so it doesn’t burn. This is optional and fast.
- Do I have to put water in the pan? — The water helps maintain a humid environment and catches drippings; you can skip it, but the pan may smoke more and drippings could burn.
- Is it safe to roast breast-side down? — Yes. The recipe calls for breast side down initially to protect white meat from direct heat and to keep juices toward the breast. After the roast and rest, you can turn the bird when carving.
Bring It Home
This Homemade Rotisserie Chicken is the one I fall back on when I want a roast that’s simple to trust and pleasing to serve. It’s forgiving, uses pantry staples, and gives you meat for sandwiches, salads, tacos, or a clean, classic roast on the table. Follow the steps, be patient with the resting time, and you’ll have a bird that’s juicy through the thighs and nicely flavored all over.
Try it once exactly as written. Once you know it works in your oven, small adjustments are yours to make: swap oil for butter, nudge the cayenne, or tweak thyme. But start with the basics — they were chosen because they work every time.
Homemade Rotisserie Chicken
Ingredients
Ingredients
- 3-4 poundchicken gizzards removed
- 2 tablespoonscanola oil or melted butter
- 1 tablespoonkosher salt
- 2 teaspoonspepper
- 1 tablespoongarlic powder
- 1 tablespoononion powder
- 1 tablespoonpaprika
- 1 teaspoondried thyme leaves not ground thyme
- 1/8 teaspooncayenne pepper
Instructions
Instructions
- Preheat the oven to 300°F (150°C). Fit a roasting pan with a baking rack and pour 1–2 cups of tap water into the bottom of the pan so the bottom is just covered.
- In a small bowl, whisk together 1 tablespoon kosher salt, 2 teaspoons pepper, 1 tablespoon garlic powder, 1 tablespoon onion powder, 1 tablespoon paprika, 1 teaspoon dried thyme leaves (not ground thyme), and 1/8 teaspoon cayenne pepper.
- Remove any gizzards from the chicken cavity (if present) and pat the 3–4 pound chicken dry with paper towels.
- Brush the chicken skin all over with 2 tablespoons canola oil or melted butter.
- Sprinkle the prepared seasoning mixture evenly over the chicken on all sides, rubbing the spices into the skin so they adhere.
- Place the whole chicken, breast side down, on the rack in the roasting pan. If using an oven-safe digital thermometer, insert the probe into the thickest part of the thigh, taking care not to touch bone.
- Roast in the preheated oven until the thermometer in the thigh reads 162–165°F (72–74°C). A 3–4 pound chicken will typically take about 2½ to 3 hours. If you do not have an oven-safe thermometer, roast for 2 hours 15 minutes, then check the temperature with an instant-read thermometer and continue checking every 10–15 minutes until the thigh reaches 162–165°F (72–74°C).
- Remove the chicken from the oven, tent it loosely with foil, and let it rest 10–20 minutes. During resting the internal temperature will rise to 165°F (74°C) and the juices will redistribute.
- Carve and serve the whole chicken, or shred, chop, or slice the meat for use in other recipes.
Equipment
- Oven Safe Digital Thermometer
- Roasting Pan with Rack
Notes
No roasting pan?
You can place seasoned chicken directly in a roasting pan (no rack needed). If this is the case, cook breast side up and do NOT add liquid to pan.
Leftover chicken can be stored in the refrigerator for up to 3 days. Freeze leftover shredded or cubed meat for up to 3 months.
Save the bones to make homemade chicken stock.