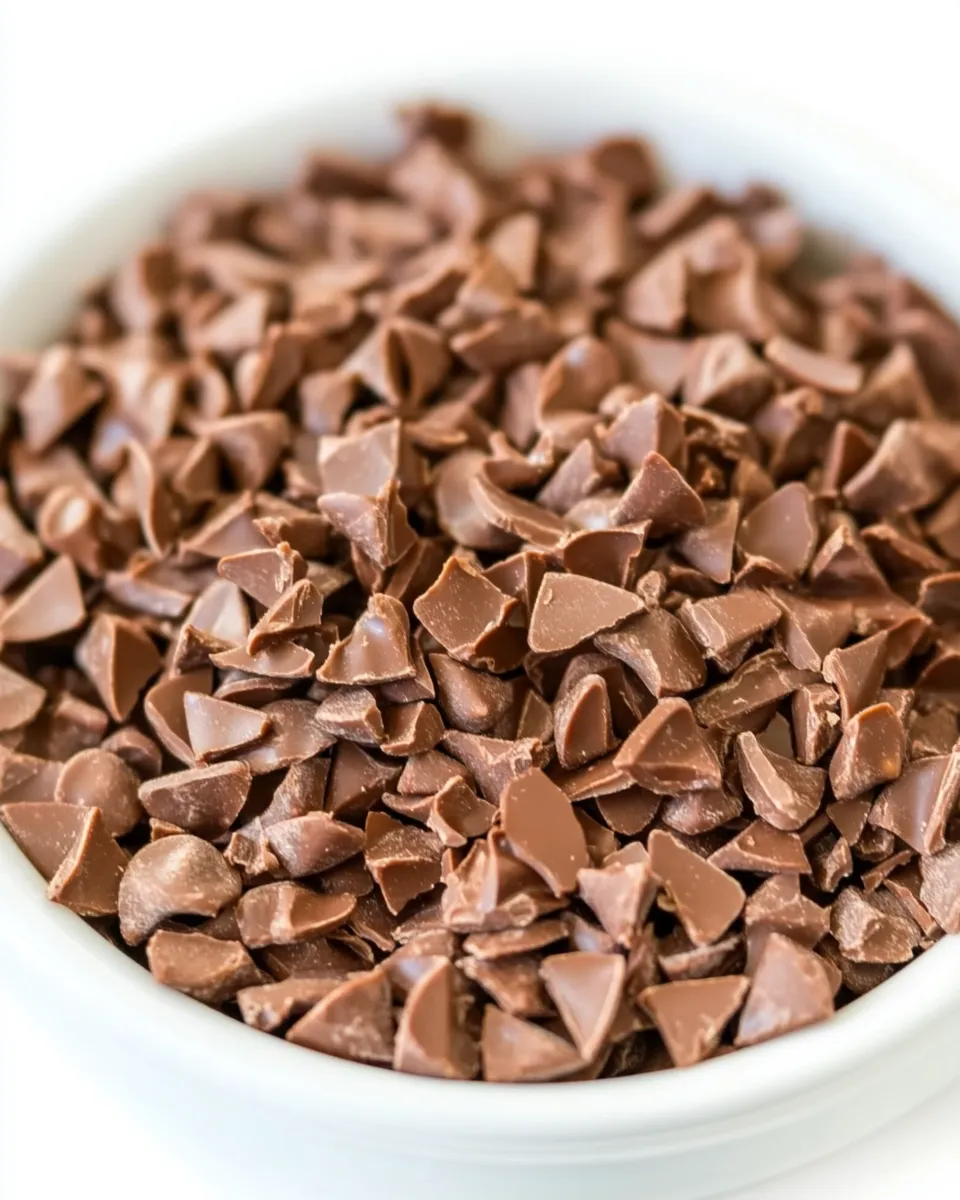
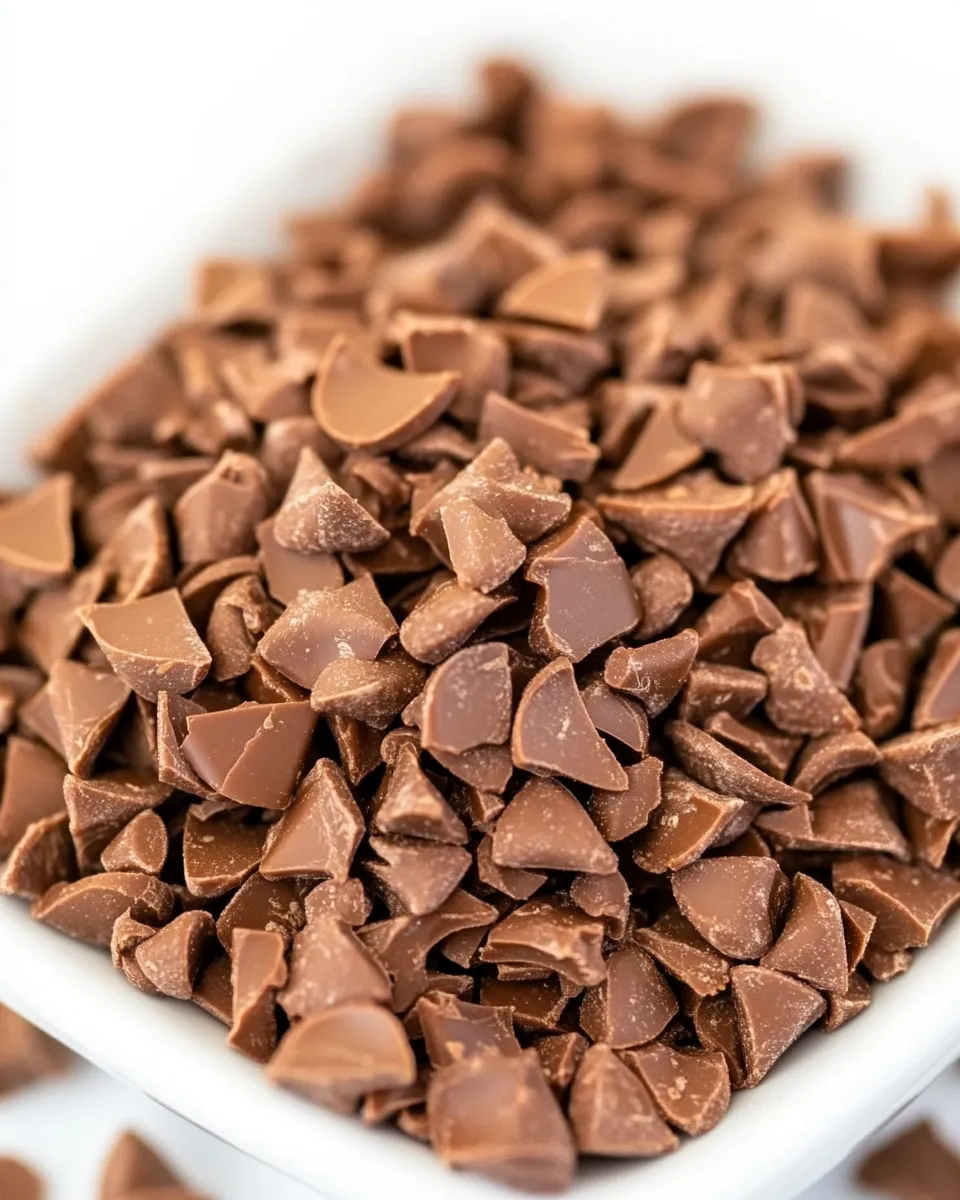
Homemade Nutella Chips for Baking
I make a lot of chocolate chips, but I don’t always want plain chocolate. These homemade Nutella chips are a simple, no-fuss way to add hazelnut-chocolate pockets to cookies, muffins, and quick breads. They’re rich, spreadable before freezing and firm once frozen — exactly what you need when you want dollops of Nutella that survive mixing and baking.
This recipe is short and dependable. There are only two ingredients and a quick freeze step. That makes it ideal when you have a tub of Nutella and want to turn it into baking-friendly pieces without specialty equipment.
Below you’ll find a clear shopping list, step-by-step instructions copied from my test notes, and practical tips for using, storing, and troubleshooting the chips. Read the steps through once and then get your tray ready — the whole process feels fast once you’ve done it twice.
Shopping List

Ingredients
- 9 ounces (just under 1 cup) Nutella — the main flavor and sweetness; use at room temperature for easier mixing into melted butter.
- 6 tablespoons (3 ounces) salted butter — melts to thin the Nutella slightly and helps the chips set firm when frozen; salted is specified to balance sweetness.
Nutella Chips for Baking Made Stepwise
- Line a flat tray or sheet pan that fits in your freezer with parchment paper, leaving a small overhang so you can lift the frozen block later.
- Put 6 tablespoons (3 ounces) salted butter in a medium microwave-safe bowl and microwave in short bursts (10–20 seconds), stirring between bursts, until the butter is fully melted.
- Add 9 ounces Nutella to the melted butter and stir until the mixture is completely smooth and uniformly combined.
- Using a baking spatula, spread the mixture on the parchment into an approximately 5 × 10-inch rectangle about 1/4 inch thick.
- Place the tray in the freezer and freeze for at least 1 hour, or until the block is firm throughout.
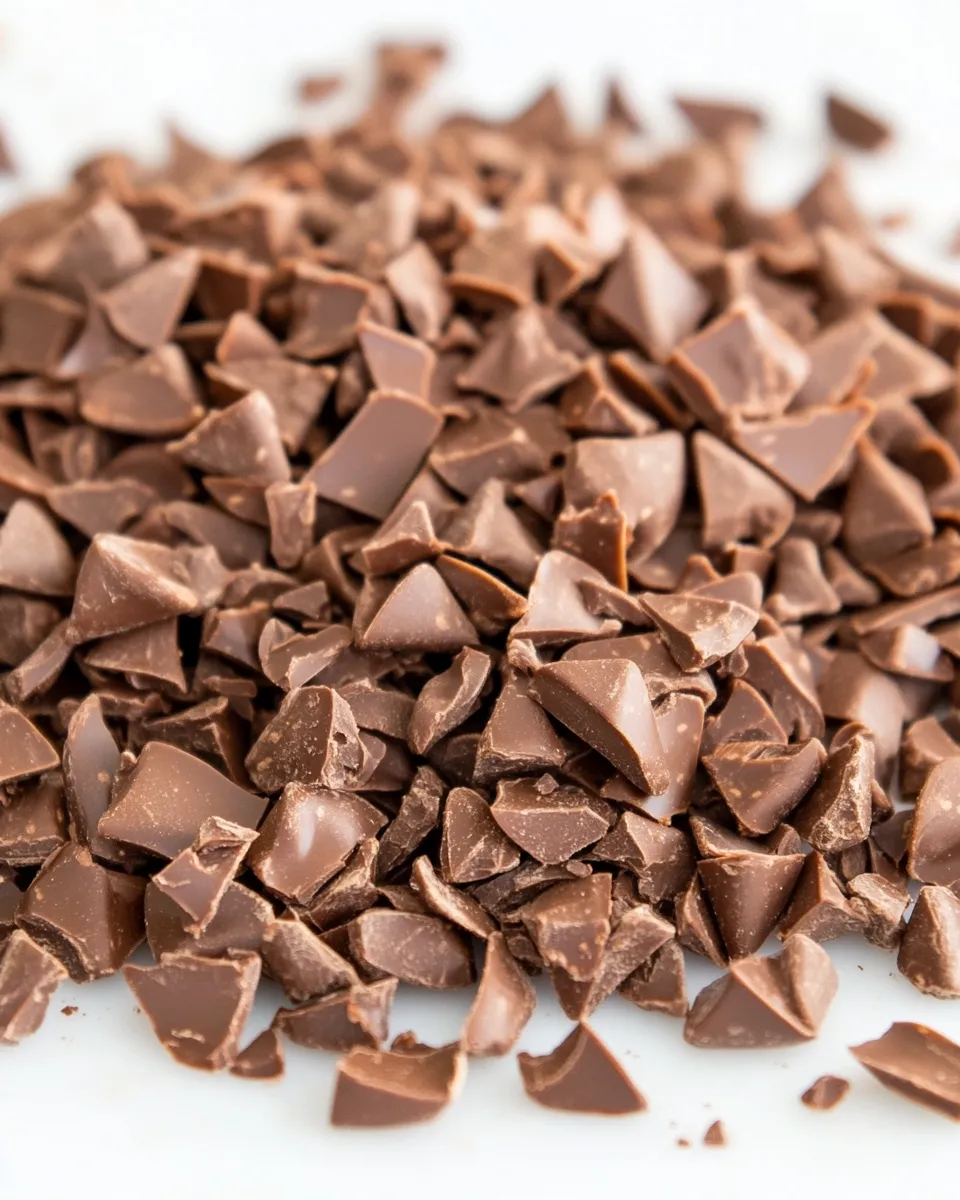
- Transfer the frozen block, still on the parchment, to a cutting board. Using a large chef’s knife, quickly chop the block into small chunks. Work briskly to avoid melting from warm hands or a warm kitchen.
- If pieces begin to stick together or soften, slide the parchment back onto the tray and return everything to the freezer for about 15 minutes to firm up; then break apart any stuck-together pieces.
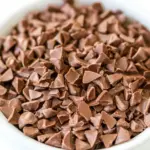
- Lift the parchment and pour the frozen chips into an airtight container, then immediately return the container to the freezer.
- Keep the chips frozen until just before adding to your dessert. Use within two weeks.
Why You’ll Love This Recipe
First, the flavor. Nutella brings hazelnut and chocolate together in a way that ordinary chocolate chips can’t match. When a piece melts inside a cookie, you’ll get a molten, nutty center rather than a uniform chocolate streak.
Second, the control. Store-bought chocolate chips are designed to keep their shape during baking. These frozen Nutella chips give you the best of both worlds: they can hold a shape long enough to be folded into dough, but when baked they create pockets of gooey filling.
Finally, convenience. Two ingredients; one bowl. The method requires no tempering and no special molds. You can turn a jar of Nutella into bake-ready chips in under an hour of active work, with most of that time spent in the freezer.
Easy Ingredient Swaps
This recipe intentionally uses only Nutella and salted butter. If you want to vary things, here are a few controlled options and what to expect.
Butter options
You can use unsalted butter if you prefer to control salt yourself. Add a pinch (1/8 to 1/4 teaspoon) of salt to the melted butter before mixing if you switch. Clarified butter or oil-based swaps will change the texture and may not firm up the same way.
Nut spread alternatives
If you don’t have Nutella, other chocolate-hazelnut spreads will work, but sweetness and viscosity can differ. A peanut butter-chocolate spread will give a different flavor profile and may be firmer or softer; test a thin layer first and adjust thickness if needed.
Do not add cocoa powder or dry ingredients directly to this base; the recipe’s structure relies on the original spread’s balance of fats and sugar.
Setup & Equipment
The equipment list is short and specific. You don’t need a candy thermometer, a mixer, or any special tools. That’s deliberate — fewer tools mean fewer chances to overwork the mixture.
- Flat tray or sheet pan — large enough to hold a 5 × 10-inch rectangle. A rimmed baking sheet works well.
- Parchment paper — leave a small overhang so you can lift the frozen block out easily.
- Medium microwave-safe bowl — for melting the butter and mixing with Nutella.
- Baking spatula — helps spread the mixture into an even rectangle.
- Large chef’s knife and a cutting board — to chop the frozen block into chips quickly.
- Airtight container — for storage in the freezer.
Optional but helpful: a silicone bench scraper to portion the frozen block and a pair of kitchen gloves if your hands run warm while chopping.
Troubles You Can Avoid
These issues come up most often: too-soft chips, stuck-together chips, and melted fingers. Addressing them is mostly about speed and temperature.
Soft chips
If the block isn’t frozen solid, the chunks will smear or flatten instead of keeping little peaks. Freeze for at least the full hour and confirm firmness by pressing a corner. If your freezer runs warm, give it extra time.
Pieces sticking together
Don’t place freshly chopped pieces into a container that still has any warm air or moisture. If pieces clump, return them to the tray and refreeze for 15–20 minutes, then break them apart before transferring.
Melted hands
Chop briskly. If your hands heat the block too much, use a quick knife technique and rest the block back in the freezer if it starts to soften.
Make It Year-Round
This technique works in every season, but your environment affects timing. In summer, kitchens run warmer and the block needs more freezer time. In winter, it may firm faster. The trick is to look for texture, not a clock: you want a uniformly firm block before chopping.
If you live in a very hot climate and your freezer is also frequently opened, double-freeze: freeze the block for at least 1 hour, then after chopping, freeze the chips on a tray in a single layer for another 15–20 minutes before bagging. That extra step keeps them from sticking and holds up better in mixed doughs.
What I Learned Testing
I tested this recipe several times, changing the rectangle thickness and chopping methods. A 1/4-inch thickness gives the best balance: big enough to form decent chips, thin enough to freeze quickly. Thicker slabs take longer in the freezer and are harder to chop without warming.
Spreading the mixture evenly is key. Uneven thickness means uneven freezing, which creates flaky chunks that either crumble or smear. Spend an extra 30 seconds with the spatula to make that rectangle neat.
Chopping is a momentary speed test. A sharp, heavy chef’s knife makes clean cuts. I found that using a quick, decisive rocking motion reduces warming. If you plan to use the chips in cookie dough, slightly larger chunks give a luxurious molten center; for muffins or quick breads, smaller pieces distribute flavor more consistently.
Make Ahead Like a Pro
These chips keep best frozen. Follow these steps for effortless make-ahead prep:
- Freeze the block until fully firm.
- Chop and spread chips in a single, even layer on a tray. Flash-freeze for 10–15 minutes so nothing sticks.
- Transfer to a labeled airtight container or heavy-duty freezer bag. Press out excess air and return to the freezer immediately.
Label with the date and use within two weeks for best flavor and texture. Because these chips are essentially Nutella thinned with butter, they don’t dry out quickly, but long storage can affect the spread’s mouthfeel.
Troubleshooting Q&A
Q: My chips melted while chopping. What now?
A: Return the slab to the tray, freeze for 15–30 minutes, then chop quickly. Work in short bursts and consider chilling the cutting board in the freezer for 10 minutes before chopping.
Q: They’re too hard straight from the freezer and won’t incorporate into dough.
A: Hold them at room temperature for 2–3 minutes or pulse them briefly in a food processor if your recipe allows. Alternatively, fold frozen chips into the dough quickly and expect slightly firmer pockets after baking.
Q: Can I shape these into drops instead of chips?
A: You can, but you’ll need a mold or scooping technique and slightly colder temperatures to keep shapes. The straightforward rectangle-and-chop method is the fastest and most consistent for baking.
Serve & Enjoy
Use the chips straight from the freezer or allow them to warm a minute if you prefer softer pockets. Add them to cookie dough at the end of mixing so you don’t overwork the dough and melt the chips. For muffins and quick breads, fold in gently so the chips aren’t crushed.
Baking tip: drop frozen chips into batter that’s not piping hot; extremely hot batters can melt the chips into streaks rather than pockets. If you want a molten center, place a few larger chips on top of a cookie ball before baking — the top-facing chips will melt attractively.
These chips are small luxury items: easy to make, quick to use, and reliably delicious. Make a batch, freeze them, and pull them out whenever you want that signature Nutella finish in a baked good.
Homemade Nutella Chips for Baking
Ingredients
Ingredients
- 9 ounces just under1 cup Nutella
- 6 tablespoons 3 ounces salted butter
Instructions
Instructions
- Line a flat tray or sheet pan that fits in your freezer with parchment paper, leaving a small overhang so you can lift the frozen block later.
- Put 6 tablespoons (3 ounces) salted butter in a medium microwave-safe bowl and microwave in short bursts (10–20 seconds), stirring between bursts, until the butter is fully melted.
- Add 9 ounces Nutella to the melted butter and stir until the mixture is completely smooth and uniformly combined.
- Using a baking spatula, spread the mixture on the parchment into an approximately 5 × 10-inch rectangle about 1/4 inch thick.
- Place the tray in the freezer and freeze for at least 1 hour, or until the block is firm throughout.
- Transfer the frozen block, still on the parchment, to a cutting board. Using a large chef’s knife, quickly chop the block into small chunks. Work briskly to avoid melting from warm hands or a warm kitchen.
- If pieces begin to stick together or soften, slide the parchment back onto the tray and return everything to the freezer for about 15 minutes to firm up; then break apart any stuck-together pieces.
- Lift the parchment and pour the frozen chips into an airtight container, then immediately return the container to the freezer.
- Keep the chips frozen until just before adding to your dessert. Use within two weeks.
Equipment
- Sheet Pan
- Parchment Paper
- Microwave-safe bowl
- baking spatula
- Chef’s knife
- Cutting Board
- Airtight container
- freezer
Notes
This recipe makes a little over 2 cups, 12 ounces of Nutella chips which is equal to a standard-size bag of chocolate chips. When handling the chips, keep them as cold as possible. They are like butter, completely solid when cold, but quick to become soft and melty at room temperature. These chips release a bit of oil when baked, so they are best used in hearty drop cookies not prone to spreading (they are not going to work with already flat cookies) and other non-finicky baked goods or frozen desserts. I've used them in cookies, muffins, and baked donuts without trouble. I haven't tried them in cupcakes or cakes yet (I'll report back when I do), so take care with more delicate desserts!