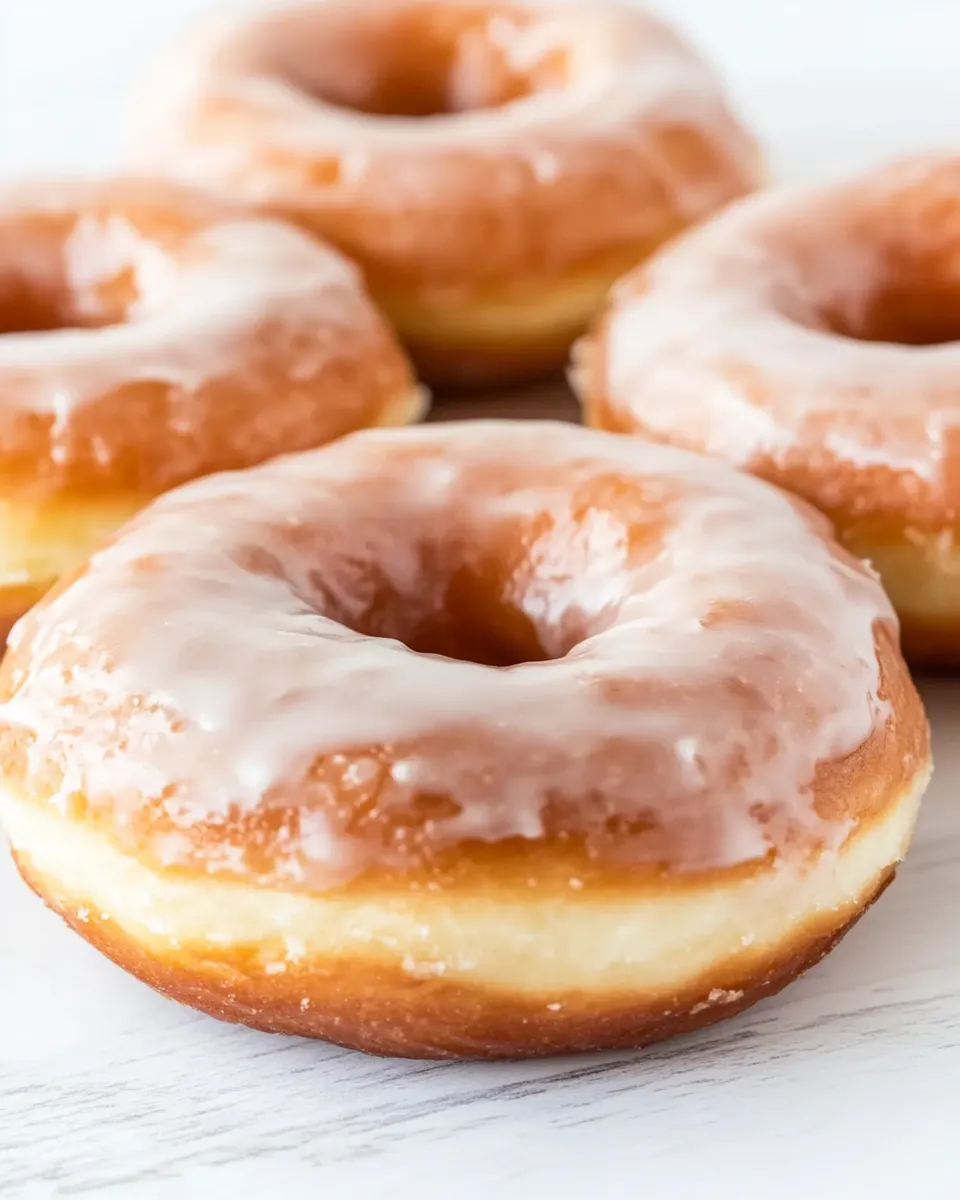
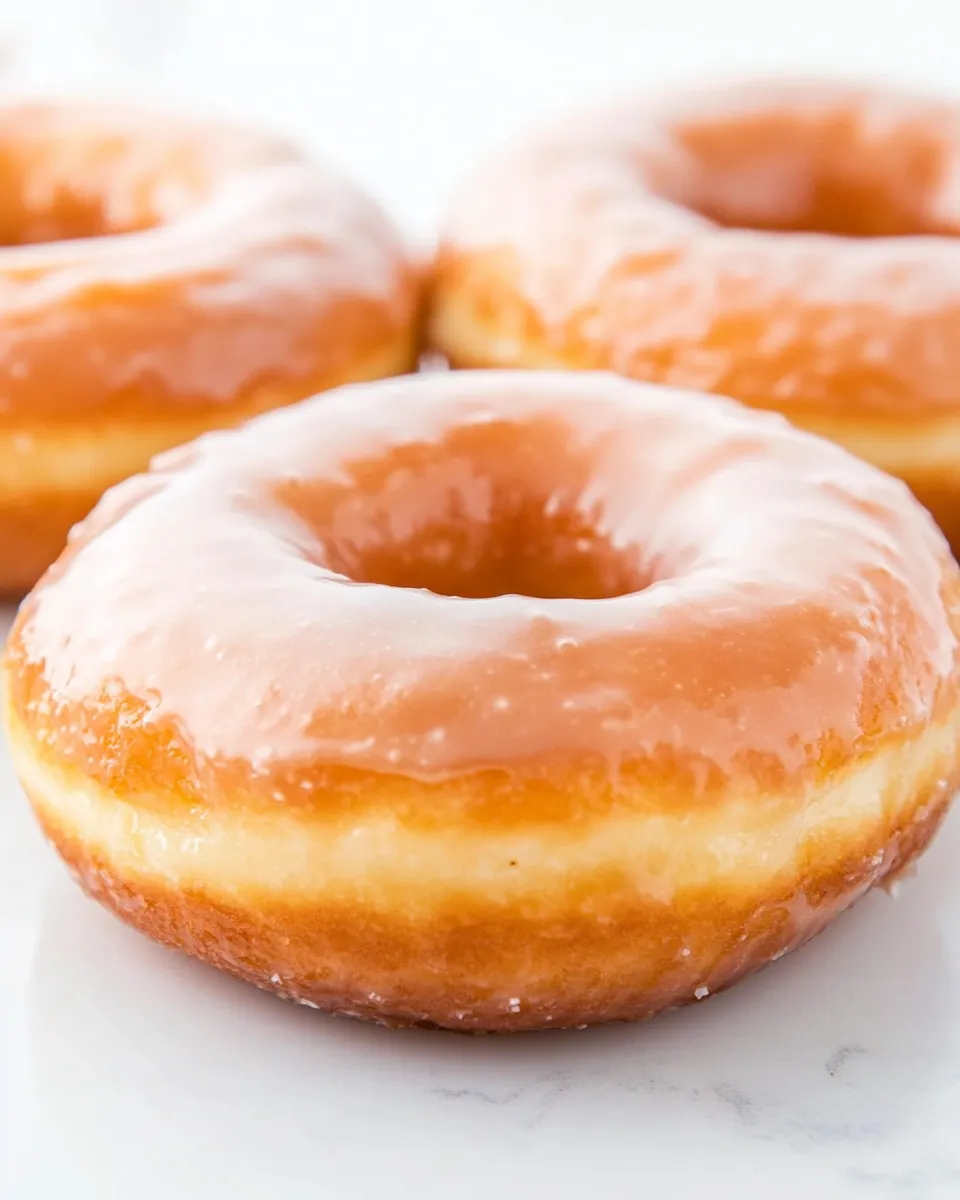
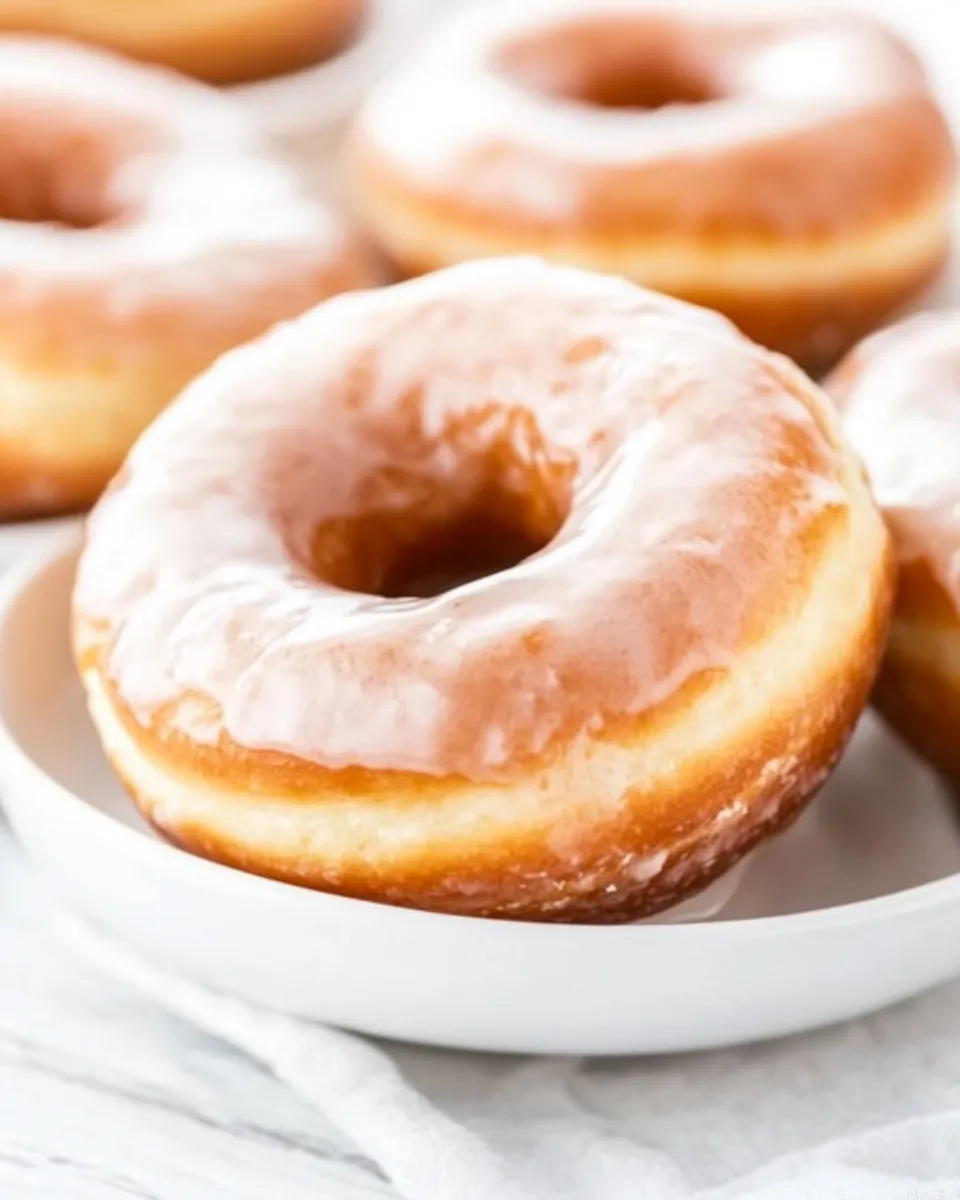
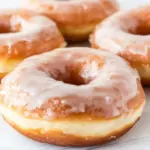
Homemade Glazed Donuts
These are the kind of donuts I make when I want something warm, simple, and a little indulgent without a trip to a shop. The dough is enriched and soft, and the glaze is sweet and forgiving — it sets quickly and gives you that glossy finish that everyone loves. You can make the dough the night before, so the morning of donut day feels relaxed and deliberate.
I’ll walk you through the exact order I use in my kitchen: proof the yeast, mix gently, let the dough rise, chill overnight, cut, rest, fry carefully, and finish with a classic glaze. There are a few small tricks that keep these from being greasy or dense, and they’re all practical and easy to reproduce.
Follow the steps below exactly for reliable results, and read the tips and toolbox sections — they’ll save you time and frustration. These donuts reward patience: a little planning, a good oil thermometer, and a steady hand at the fryer will give you bakery-style results at home.
Ingredient Checklist

Ingredients
- 2¼ teaspoons instant yeast (not active dry yeast) — the dough’s leavener; instant yeast can be mixed straight into warm water for quick activation.
- ¾ cup warm water — activates the yeast; should feel like warm bath temperature, not hot.
- ⅓ cup sugar — sweetens the dough and feeds the yeast for a good rise.
- ½ teaspoon salt — balances the sweetness and strengthens gluten.
- ¼ cup unsalted butter (softened) — enriches the dough for tender, flavorful donuts.
- 1 egg — adds structure and helps with color.
- 1 egg yolk — extra richness for a silkier crumb.
- ½ teaspoon vanilla extract — basic flavor foundation.
- ½ teaspoon almond extract — optional flavor booster; a little goes a long way.
- 2½ to 3 cups all-purpose flour — provides structure; start with 2½ cups and add up to 3 cups as needed for dough consistency.
- Vegetable oil (for frying) — neutral-flavored oil with a high smoke point; fill the pot to 2–3 inches depth.
- 2 cups powdered sugar — base for the glaze; sift if it’s clumpy.
- ¼ cup milk — thins the glaze to a dip-able consistency.
- 1 teaspoon vanilla extract — flavor for the glaze.
- ½ teaspoon butter extract (optional) — adds buttery depth to the glaze if you like.
Mastering Homemade Glazed Donuts: How-To
- In the bowl of a stand mixer, combine the instant yeast and warm water. Let sit about 10 minutes to dissolve the yeast.
- Add the sugar, salt, softened unsalted butter, whole egg, egg yolk, ½ teaspoon vanilla extract, and ½ teaspoon almond extract. Attach the dough hook and mix on low speed until the ingredients are combined.
- With the mixer on low, add 2½ cups of the all-purpose flour. Continue mixing until the dough begins to form.
- If the dough is still very sticky, add additional flour 1 tablespoon at a time, up to a total of 3 cups, until the dough pulls away from the sides of the bowl. The dough should be somewhat tacky but not sticky.
- Knead the dough on low in the mixer until it is smooth and cohesive. Stop the mixer, shape the dough into a ball, and transfer it to a lightly greased bowl.
- Cover the bowl tightly with plastic wrap and place it in a draft-free, warm spot. Allow the dough to rise until roughly doubled in size, about 2 hours.
- Gently press the center of the risen dough to deflate it. Wrap the dough tightly in plastic wrap and refrigerate for 6 to 8 hours or overnight.
- Remove the chilled dough. On a lightly floured surface, roll the dough to about ½ inch thickness. Use a donut cutter (or a large round cutter and a 1-inch cutter for the hole) to cut out donuts and donut holes. Re-roll scraps as needed.
- Place the cut donuts and donut holes on a parchment-lined baking sheet. Lightly cover with plastic wrap, then drape a clean dry towel over the top. Let them rest at room temperature for up to 1 hour (do not exceed 1 hour).
- In a large Dutch oven (or deep heavy pot), pour vegetable oil to a depth of 2 to 3 inches and heat over medium until the oil reaches 350°F. Use a thermometer to monitor temperature; avoid overheating the oil.
- Fry the donuts in batches so the pot is not overcrowded. Carefully lower donuts into the hot oil and fry until golden brown on the first side, then flip and fry until golden brown on the second side. Remove cooked donuts with a slotted spoon and place them on a baking sheet fitted with paper towels and a cooling rack. Repeat until all donuts are fried.
- In a separate mixing bowl, whisk together the powdered sugar, milk, 1 teaspoon vanilla extract, and ½ teaspoon butter extract (optional) until smooth and lump-free.
- When the donuts are slightly cooled but still warm to the touch, dip each donut into the glaze, flip to coat both sides, and return to the cooling rack set over the baking sheet to catch drips. Allow the glaze to set for about 10 minutes before serving.
Why Cooks Rave About It
These donuts hit a sweet spot: enriched dough that’s tender and not heavy, a short overnight rest that deepens flavor, and a simple glaze that looks and tastes like something from a bakery case. The formula gives you consistent texture — light inside with a delicate chew — which is what most home cooks want.
The process divides the work across stages so it never feels rushed. Proofing and then chilling the dough is practical: it makes dough easier to handle and improves flavor. The glaze, made from pantry staples, adds the familiar glossy finish without fuss.
Ingredient Flex Options
- Almond extract — optional; omit if you have nut sensitivities or prefer a pure vanilla profile.
- All-purpose flour 2½–3 cups — use the lower end for softer, slightly tackier dough; add up to 3 cups only if the dough is too sticky to handle.
- Butter extract (in glaze) — optional; if you want a richer-tasting glaze, include the ½ teaspoon as written.
- Instant yeast — recipe calls specifically for instant yeast; do not substitute with active dry yeast without adjusting proofing and method.
Toolbox for This Recipe
- Stand mixer with dough hook — speeds and evens kneading.
- Mixing bowls — for dough and separate glaze mixing.
- Plastic wrap and a towel — for proofing and resting.
- Rolling pin and donut cutter (or two round cutters) — for shaping.
- Parchment-lined baking sheet and cooling rack — keep fried donuts from sitting in oil.
- Large Dutch oven or deep heavy pot — for frying to even temperature.
- Accurate instant-read or deep-fry thermometer — critical to maintain 350°F.
- Slotted spoon or spider skimmer — for safe frying and draining.
Errors to Dodge
Don’t overcrowd the fryer. Too many donuts in the oil drops the temperature and causes greasy, soggy results. Work in small batches.
Keep an eye on oil temperature. 350°F is the sweet spot; hotter will brown the outside before the inside cooks, cooler will make them absorb oil. Use a thermometer and adjust the heat as needed.
Don’t skip the chill. Refrigerating the dough after the first rise firms it up and makes cutting clean rounds easier. Skipping that step usually leads to misshapen donuts and a fight with the rolling pin.
Be careful with flour additions. Add only up to the specified total — too much flour yields dense donuts. The dough should be tacky but manageable.
Spring to Winter: Ideas
Spring: keep the glaze simple and light — let the fresh dough shine. Serve with a pot of coffee and lemon-scented tea.
Summer: double the glaze to give a thicker coating and chill briefly so the glaze sets with a firmer shell for picnic travel.
Fall: warm the donuts slightly before glazing; the heat brings out the buttery notes. Pair with spiced coffee or chai.
Winter: these feel cozy and indulgent — serve warm by the fire with hot chocolate. If you use the optional butter extract, they taste even more luxe on a frosty morning.
Pro Perspective
Temperature control is the professional trick here. From the warm water for proofing to the chill in the fridge to the 350°F frying temperature, each stage relies on consistent heat. Use a reliable thermometer and trust it.
Texture comes from fat and eggs. The butter and extra yolk make the crumb tender and keep the interior soft after frying. Don’t skimp on those ingredients — they’re why these feel elevated.
Work cleanly. Oil and flour splatter easily during rolling and cutting; keep your workspace tidy and transfer shaped donuts to the parchment-sheet in a single layer so they proof evenly. Resting them up to an hour at room temperature helps them relax and finish proofing before frying.
Save It for Later
To store: keep glazed donuts at room temperature in an airtight container for up to 2 days. The glaze will soften slightly but still taste fresh.
For longer storage: freeze unglazed donuts in a single layer on a baking sheet until solid, then transfer to a freezer bag for up to 1 month. Thaw at room temperature and reheat briefly in a warm oven before glazing.
Popular Questions
Do I have to refrigerate the dough? Yes. Chilling for 6–8 hours or overnight firms the dough, improves flavor, and makes cutting much easier.
Can I use active dry yeast instead of instant? The recipe specifies instant yeast. If you must use active dry yeast, it requires different handling — typically proofing in warm water with sugar first and possibly slightly different quantities — so follow a tested conversion rather than swapping directly.
How do I know the oil is ready? Use a thermometer; it should read 350°F. If you don’t have one, test with a small piece of dough: it should sizzle and begin to brown steadily but not instantly blacken.
What if my glaze is too thick or thin? Add milk a teaspoon at a time to thin a glaze that’s too stiff. If it’s too thin, add a little more powdered sugar until you reach a dip-able consistency.
Before You Go
Donut-making pays off in the first bite: warm, glazed, and a little sticky. The structure of this recipe is forgiving — keep a steady oil temperature, don’t over-flour, respect the chill, and you’ll be rewarded. If you make a batch, take a moment to note what you changed and how the texture turned out; small adjustments to flour and frying time help you dial it in for your kitchen.
Enjoy the process, and don’t be afraid to make these on a weekend when you have the time to savor the steps. Share with friends — they’ll appreciate the effort, and you’ll get the honest feedback that makes each batch better than the last.
Homemade Glazed Donuts
Ingredients
Ingredients
- 2 1/4 teaspoonsinstant yeast not active dry yeast
- 3/4 cupwarm water
- 1/3 cupsugar
- 1/2 teaspoonsalt
- 1/4 cupunsalted butter softened
- 1 egg
- 1 egg yolk
- 1/2 teaspoonvanilla extract
- 1/2 teaspoonalmond extract
- 2 1/2 to 3 cupsall-purpose flour
- Vegetable oil for frying
- 2 cupspowdered sugar
- 1/4 cupmilk
- 1 teaspoonvanilla extract
- 1/2 teaspoonbutter extract optional
Instructions
Instructions
- In the bowl of a stand mixer, combine the instant yeast and warm water. Let sit about 10 minutes to dissolve the yeast.
- Add the sugar, salt, softened unsalted butter, whole egg, egg yolk, ½ teaspoon vanilla extract, and ½ teaspoon almond extract. Attach the dough hook and mix on low speed until the ingredients are combined.
- With the mixer on low, add 2½ cups of the all-purpose flour. Continue mixing until the dough begins to form.
- If the dough is still very sticky, add additional flour 1 tablespoon at a time, up to a total of 3 cups, until the dough pulls away from the sides of the bowl. The dough should be somewhat tacky but not sticky.
- Knead the dough on low in the mixer until it is smooth and cohesive. Stop the mixer, shape the dough into a ball, and transfer it to a lightly greased bowl.
- Cover the bowl tightly with plastic wrap and place it in a draft-free, warm spot. Allow the dough to rise until roughly doubled in size, about 2 hours.
- Gently press the center of the risen dough to deflate it. Wrap the dough tightly in plastic wrap and refrigerate for 6 to 8 hours or overnight.
- Remove the chilled dough. On a lightly floured surface, roll the dough to about ½ inch thickness. Use a donut cutter (or a large round cutter and a 1-inch cutter for the hole) to cut out donuts and donut holes. Re-roll scraps as needed.
- Place the cut donuts and donut holes on a parchment-lined baking sheet. Lightly cover with plastic wrap, then drape a clean dry towel over the top. Let them rest at room temperature for up to 1 hour (do not exceed 1 hour).
- In a large Dutch oven (or deep heavy pot), pour vegetable oil to a depth of 2 to 3 inches and heat over medium until the oil reaches 350°F. Use a thermometer to monitor temperature; avoid overheating the oil.
- Fry the donuts in batches so the pot is not overcrowded. Carefully lower donuts into the hot oil and fry until golden brown on the first side, then flip and fry until golden brown on the second side. Remove cooked donuts with a slotted spoon and place them on a baking sheet fitted with paper towels and a cooling rack. Repeat until all donuts are fried.
- In a separate mixing bowl, whisk together the powdered sugar, milk, 1 teaspoon vanilla extract, and ½ teaspoon butter extract (optional) until smooth and lump-free.
- When the donuts are slightly cooled but still warm to the touch, dip each donut into the glaze, flip to coat both sides, and return to the cooling rack set over the baking sheet to catch drips. Allow the glaze to set for about 10 minutes before serving.
Equipment
- Stand mixer
- dough hook
- Mixing Bowl
- Plastic Wrap
- Donut Cutter
- Rolling Pin
- Parchment-lined baking sheet
- Dutch oven or deep heavy pot
- Slotted Spoon
- Baking Sheet
- Paper Towels
- Cooling Rack