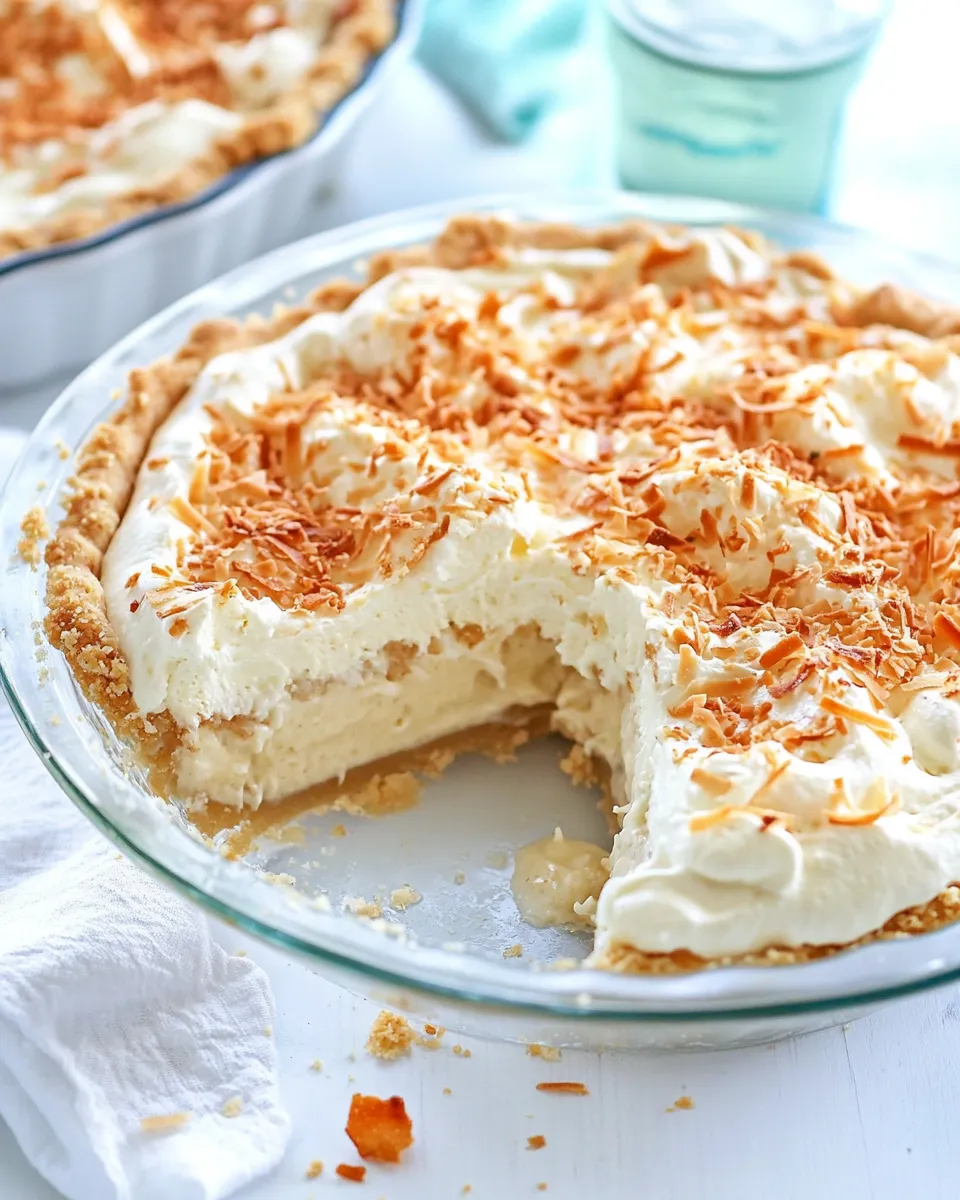
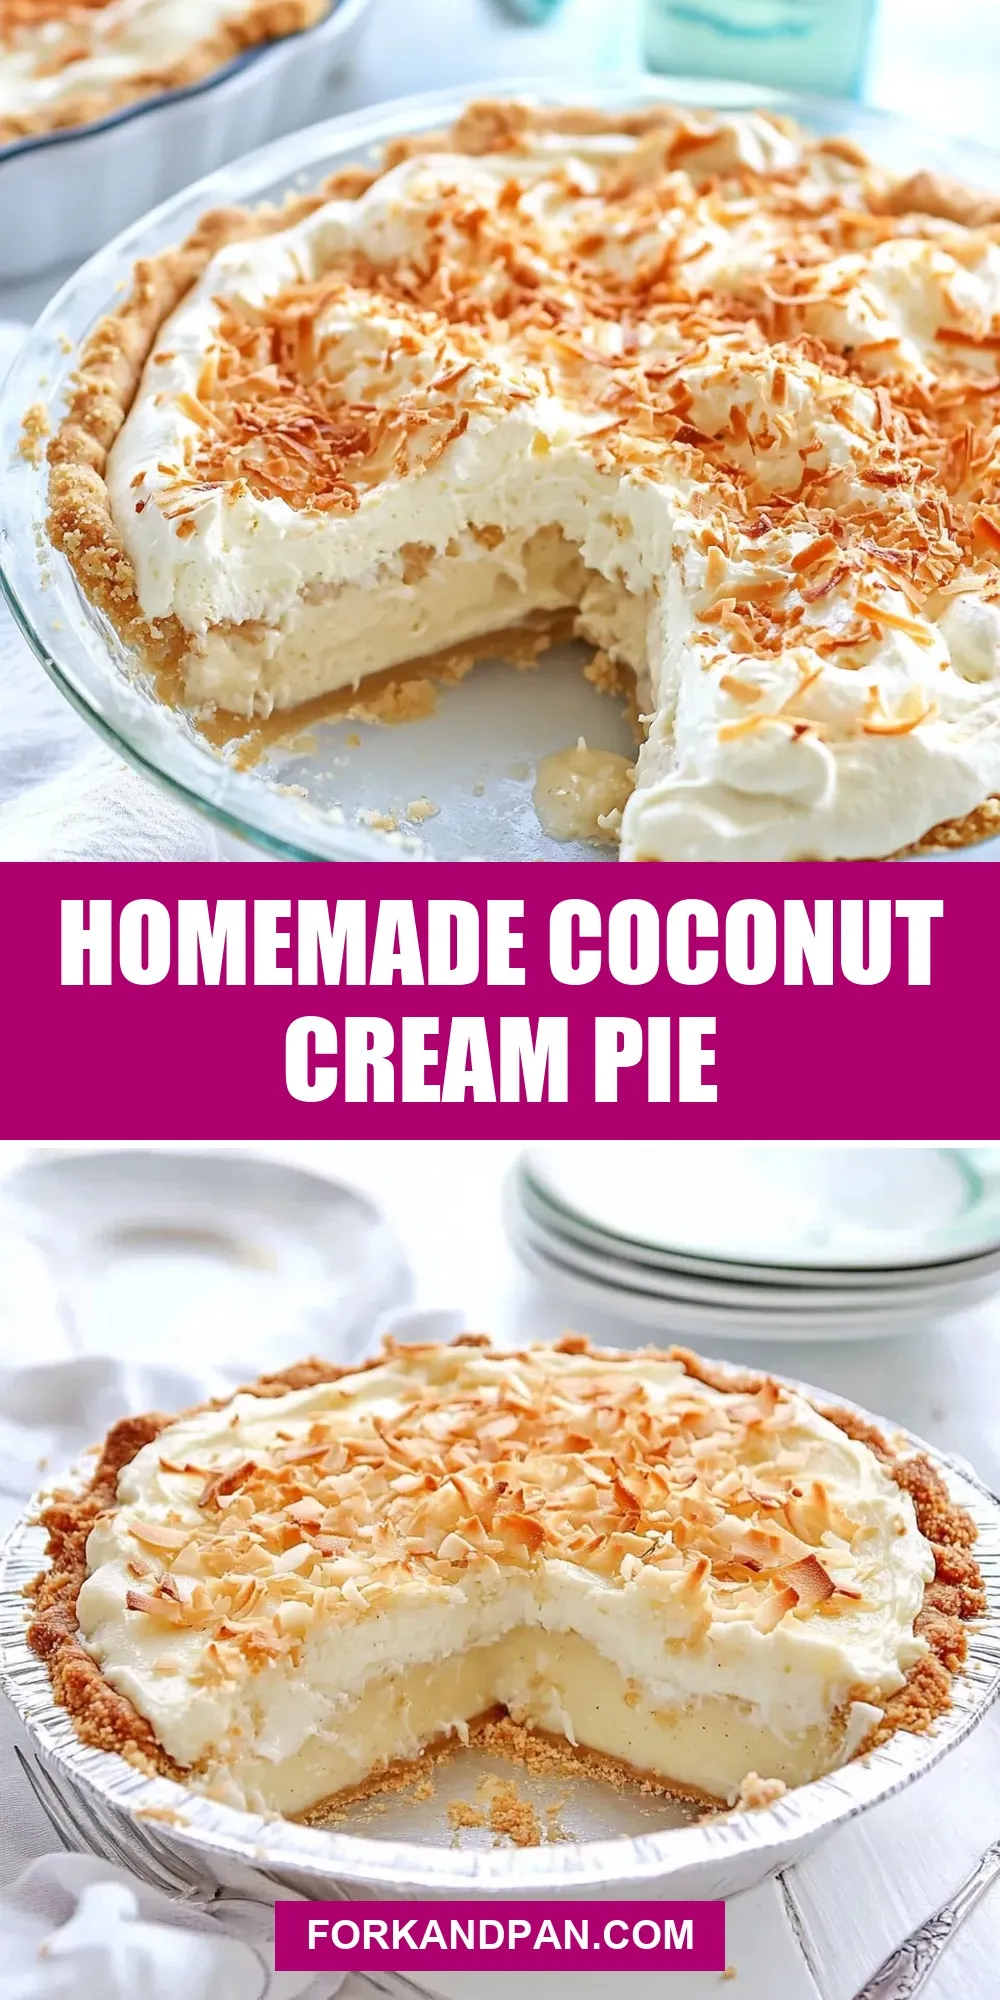
Homemade Coconut Cream Pie
I love the way a well-made coconut cream pie announces itself: the scent of warm coconut, the custard that holds its shape yet melts on the tongue, and the cool whipped cream cap that keeps every bite balanced. This version is straightforward, solid in technique, and forgiving in timing. You don’t need fancy tools, just attention to a few key moments—prebaking the crust, tempering the yolks, and chilling the pie so it sets properly.
I’ll walk you through every step exactly as I make it in my kitchen, including small tactics that keep the filling silky and the toasted coconut crisp. If you’ve been nervous about custard pies, this one is a good confidence booster: the method is repeatable and the results are reliably impressive. Keep an eye on the temperatures and the order of steps and you’ll have a showstopper that looks like it took longer than it did.
Ingredients at a Glance

- 1 pie dough for 9-inch pie dish — Use a chilled dough for a flakier crust; blind-bake as directed for a crisp base.
- ¾ cup sugar — Sweetens the coconut custard; measured for the filling’s balance.
- 3 tablespoons cornstarch — Thickener that gives the filling its pudding-like body without graininess.
- 2½ cups half and half — Provides richness and a creamy texture without being too heavy.
- 4 egg yolks — The main thickening agent for the custard; temper them to avoid scrambled bits.
- 1⅓ cup toasted sweetened coconut flakes, divided — Adds coconut flavor and texture; toast for depth and divide as directed for filling and garnish.
- 1 tablespoon unsalted butter — Finishes the filling with gloss and a round, buttery mouthfeel.
- 1½ teaspoon vanilla extract — Layered warmth in the custard filling.
- 1½ cup heavy cream — For the whipped topping; chill the bowl so it whips up faster and holds peaks.
- 3 tablespoons sugar — Sweetens the whipped cream; add to taste if you prefer less or more.
- 1 teaspoon vanilla extract — Flavor for the whipped cream to tie it to the custard.
Homemade Coconut Cream Pie: Step-by-Step Guide
- Preheat the oven to 450°F. On a lightly floured surface, roll the pie dough to about a 12-inch circle and fit it into a 9-inch pie dish. Trim the excess dough and flute the edges. Use a fork to gently dock the bottom and sides of the crust.
- Line the crust with parchment paper or foil and fill with pie weights, dried beans, or rice. Bake at 450°F for 6 minutes. Carefully remove the weights and parchment/foil, then return the crust to the oven and bake for an additional 8 minutes, or until the crust is lightly browned. Transfer the crust to a rack and let cool while you make the filling.
- In a medium saucepan (2–3 quart), whisk together 3/4 cup sugar and 3 tablespoons cornstarch until evenly combined.
- Gradually whisk in 2 1/2 cups half-and-half until smooth. Place the saucepan over medium-high heat and cook, stirring constantly, until the mixture thickens to the consistency of fairly thick gravy and begins to lightly bubble. Reduce the heat slightly and continue cooking, stirring constantly, for 2 more minutes. Turn off the heat.
- Place the 4 egg yolks in a medium bowl. Slowly pour about 1 cup of the hot cream mixture into the yolks while whisking constantly to temper them. Then pour the tempered egg yolk mixture back into the saucepan with the remaining hot cream mixture.
- Return the saucepan to medium heat and bring to a gentle simmer, stirring frequently, and cook for about 2 minutes until thickened. Turn off the heat.
- Stir in 1 cup of the toasted sweetened coconut flakes, 1 tablespoon unsalted butter, and 1 1/2 teaspoons vanilla extract until fully combined. Pour the filling into the cooled prebaked crust.
- Press a piece of plastic wrap directly onto the surface of the filling to prevent a skin from forming. Chill the pie in the refrigerator for 4–6 hours, or overnight, until set.
- About 15 minutes before you remove the pie from the refrigerator, chill a mixing bowl in the freezer. Add 1 1/2 cups heavy cream, 3 tablespoons sugar, and 1 teaspoon vanilla extract to the chilled bowl.
- Using a hand mixer on HIGH, beat the cream mixture until soft peaks form, about 4 minutes.
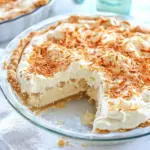
- Remove the plastic wrap from the chilled pie. Spread the whipped cream evenly over the top of the pie. Sprinkle the remaining 1/3 cup toasted sweetened coconut flakes over the whipped cream.
- Serve immediately or keep the pie chilled in the refrigerator until ready to serve.
Why This Recipe Works
This recipe balances structure and softness. Cornstarch gives the filling stability without the starchy bite that sometimes comes from flour, so you get a custard that’s smooth and scoopable. Tempering the egg yolks prevents curdling and produces a glossy, satiny texture. Toasting the sweetened coconut first deepens its flavor and keeps the garnish crisp instead of soggy.
The prebaked crust matters. Blind-baking at a high temperature sets the edges and prevents a soggy bottom from the custard’s moisture. Chilling the pie for several hours lets the cornstarch fully hydrate and set the filling, so slices come out clean instead of slumping on the plate.
Flavor-Forward Alternatives

- Swap part of the half-and-half for coconut milk (no added sugar) to amplify coconut notes. Do this selectively; too much coconut milk can thin the custard.
- Add a splash of dark rum or rum extract to the filling for a classic tropical depth. A little goes a long way—start small and taste.
- Mix in some finely chopped toasted macadamias or pecans into the crust for a nutty contrast to the sweet coconut topping.
- For a chocolate-coconut version, grate a small amount of bittersweet chocolate over the whipped cream or fold cocoa into the crust before blind-baking.
Recommended Tools
- 9-inch pie dish — standard size for the provided dough and filling volumes.
- Rolling pin — for rolling the dough to a 12-inch circle.
- Parchment paper or foil and pie weights (or dried beans/rice) — essential for blind-baking the crust.
- 2–3 quart saucepan — roomy enough to whisk and heat without boiling over.
- Medium bowl — for tempering egg yolks safely.
- Hand mixer and a chilled mixing bowl — makes whipping the cream quick and reliable.
- Spatula and whisk — for folding and smoothing the filling and whipped cream.
Frequent Missteps to Avoid
- Skipping tempering: adding hot liquid directly to yolks will scramble them. Temper slowly and whisk constantly.
- Under-toasting the coconut: raw flakes taste flat. Toast until golden and fragrant, watching closely to avoid burning.
- Rushing the chill time: the filling needs 4–6 hours to set. Cutting too soon makes a runny pie.
- Overwhipping the cream: whip to soft peaks. Overwhipped cream can become grainy and separate when spread.
- Not blind-baking the crust: pouring hot filling into an unbaked crust will yield a soggy bottom.
Spring–Summer–Fall–Winter Ideas
- Spring: Brighten the pie by grating a touch of lemon zest into the whipped cream or serving with a few macerated berries on the side.
- Summer: Serve chilled slices with fresh pineapple or mango salsa for a tropical contrast and a refreshing finish.
- Fall: Fold a small pinch of warm spices (cinnamon or a whisper of nutmeg) into the whipped cream for an autumnal note without masking the coconut.
- Winter: Add a light drizzle of salted caramel over the whipped cream for richness that pairs well with toasted coconut.
If You’re Curious
If you wonder whether you can use pre-toasted coconut or unsweetened flakes: yes, but adjust expectations. Pre-toasted sweetened flakes are convenient and add the exact sweetness profile this recipe expects. Unsweetened flakes will reduce the candy-like coconut flavor; you may prefer them if you want less sweetness. When toasting at home, spread flakes in a single layer on a baking sheet and toast at 350°F for 5–8 minutes, stirring once, until fragrant and golden.
If you want a sturdier, sliceable pie for a party, let it chill overnight. The flavor settles and the texture firms, making neat slices easier to achieve. If you must transport the pie, keep it in a cooler or insulated box to protect the whipped cream and prevent sweating.
Freezer-Friendly Notes
You can freeze the pie, but I recommend freezing components rather than the finished, whipped-topped pie. Freeze the prebaked crust and the set custard (without whipped cream) separately. Wrap the crust tightly and freeze up to one month. For the custard, chill until set, then wrap the whole pie or transfer slices to an airtight container and freeze for up to one month. Thaw in the refrigerator overnight, then whip fresh cream to top just before serving. Whipped cream does not freeze well and will weep and separate on thawing.
Troubleshooting Q&A
- Q: My filling looks a bit lumpy after adding the yolks. A: If lumps appear, strain the hot filling through a fine-mesh sieve into a bowl and then cool as directed; that removes cooked bits and restores silkiness.
- Q: The crust got too brown during blind-baking. A: Tent the edges with foil after the first few minutes to prevent overbrowning while the bottom finishes baking.
- Q: The custard didn’t thicken enough. A: Return it to medium heat and cook, stirring, until it reaches a gentle simmer; cornstarch needs to reach near-boiling to fully activate. Keep stirring to avoid sticking.
- Q: Whipped cream is watery after spreading. A: It was likely under-whipped or warm. Chill the bowl and beat to soft peaks; coat the beaters with cream and test peaks before spreading.
- Q: How do I avoid a soggy bottom? A: Blind-bake the crust fully as instructed and let it cool before filling. You can also brush a thin layer of melted chocolate or an egg wash lightly baked on the crust to create a moisture barrier, but it’s optional.
Wrap-Up
Homemade Coconut Cream Pie rewards patience with a texture and flavor that feel celebratory without being fussy. Follow the steps in order, pay attention to the tempering and chilling, and you’ll get clean slices that taste like sunshine. I keep toasted coconut on hand and a cold mixing bowl in the freezer because those small routines make the day-of work smooth.
Make it a few hours ahead, top with freshly whipped cream and the extra toasted flakes just before serving, and enjoy the way people smile at the first bite. This pie is worth the wait, and once you get the technique down, it becomes a go-to for birthdays, potlucks, or a special weekend dessert.
Homemade Coconut Cream Pie
Ingredients
Ingredients
- 1 pie doughfor 9-inch pie dish
- 3/4 cupsugar
- 3 tablespooncornstarch
- 2 1/2 cupshalf and half
- 4 egg yolks
- 1 1/3 cuptoasted sweetened coconut flakesdivided
- 1 tablespoonunsalted butter
- 1 1/2 teaspoonvanilla extract
- 1 1/2 cupheavy cream
- 3 tablespoonsugar
- 1 teaspoonvanilla extract
Instructions
Instructions
- Preheat the oven to 450°F. On a lightly floured surface, roll the pie dough to about a 12-inch circle and fit it into a 9-inch pie dish. Trim the excess dough and flute the edges. Use a fork to gently dock the bottom and sides of the crust.
- Line the crust with parchment paper or foil and fill with pie weights, dried beans, or rice. Bake at 450°F for 6 minutes. Carefully remove the weights and parchment/foil, then return the crust to the oven and bake for an additional 8 minutes, or until the crust is lightly browned. Transfer the crust to a rack and let cool while you make the filling.
- In a medium saucepan (2–3 quart), whisk together 3/4 cup sugar and 3 tablespoons cornstarch until evenly combined.
- Gradually whisk in 2 1/2 cups half-and-half until smooth. Place the saucepan over medium-high heat and cook, stirring constantly, until the mixture thickens to the consistency of fairly thick gravy and begins to lightly bubble. Reduce the heat slightly and continue cooking, stirring constantly, for 2 more minutes. Turn off the heat.
- Place the 4 egg yolks in a medium bowl. Slowly pour about 1 cup of the hot cream mixture into the yolks while whisking constantly to temper them. Then pour the tempered egg yolk mixture back into the saucepan with the remaining hot cream mixture.
- Return the saucepan to medium heat and bring to a gentle simmer, stirring frequently, and cook for about 2 minutes until thickened. Turn off the heat.
- Stir in 1 cup of the toasted sweetened coconut flakes, 1 tablespoon unsalted butter, and 1 1/2 teaspoons vanilla extract until fully combined. Pour the filling into the cooled prebaked crust.
- Press a piece of plastic wrap directly onto the surface of the filling to prevent a skin from forming. Chill the pie in the refrigerator for 4–6 hours, or overnight, until set.
- About 15 minutes before you remove the pie from the refrigerator, chill a mixing bowl in the freezer. Add 1 1/2 cups heavy cream, 3 tablespoons sugar, and 1 teaspoon vanilla extract to the chilled bowl.
- Using a hand mixer on HIGH, beat the cream mixture until soft peaks form, about 4 minutes.
- Remove the plastic wrap from the chilled pie. Spread the whipped cream evenly over the top of the pie. Sprinkle the remaining 1/3 cup toasted sweetened coconut flakes over the whipped cream.
- Serve immediately or keep the pie chilled in the refrigerator until ready to serve.
Equipment
- ▢9-inch pie dish
- ▢Electric hand-mixer
Notes
NOTE:
Watch the video near the top of the recipe for visual guidance.
Be sure to stir the cream/sugar/cornstarch mixture long enough until it is thickened. It should be near the consistency of gravy (not a thin gravy). Keep the heat at medium to medium-high. Stir constantly, especially along the bottom edge of the pan, so it won’t burn. If you get a few brown spots from the sugar crystallizing, don’t worry about it. Just don’t let it burn.
See the blog post for how to make a meringue topping, if you prefer. Just remember the meringue topping must go onto the filling while the filling is still hot.
The pie will keep in the fridge for up to 5 to 7 days.