Grilled BBQ Chicken
There are a few weeknight dinners that feel like a celebration. Grilled BBQ chicken is one of them: simple to make, full of smoky char, and saucy enough to please picky eaters and barbecue lovers alike. I lean on this recipe when I want something reliably delicious without spending all evening fussing over the stove.
This version keeps the technique straightforward—dry the chicken, oil and season, sear over direct heat, finish indirectly, then glaze. It’s a method that controls flare-ups and gives you that classic caramelized barbecue crust without burning the sugar in the sauce. Timing matters, but so does patience when the chicken rests.
If you’re cooking for a crowd or just a family of two, the steps scale. You can use a whole chicken cut into pieces or individual skin-on, bone-in parts. Read through the notes and the hardware section before you fire up your grill; a couple of setup habits make the difference between sticky success and scorched sauce.
The Essentials

Grilled BBQ chicken is all about balancing heat and time. Searing over direct heat creates flavor and texture; moving the pieces to indirect heat finishes them through without charring the exterior. The final sear after glazing gives you that shiny, slightly blackened finish barbecue restaurants aim for.
Key principles: dry the chicken so the skin crisps, oil and season simply so the sauce can shine, and use an instant-read thermometer to avoid overcooking. Watch the grill during the sear—sudden flare-ups can blacken skin before the meat is done.
This post includes exact step-by-step instructions, a clear ingredient list taken from the recipe source, practical gadget recommendations, common problems with fixes, and storage guidance. Read the full instructions once, then set up the grill and follow the steps in order for best results.
Ingredients
- 1 3-4 pound whole chicken, cut into 8 pieces or skin-on bone-in chicken parts — the recipe allows a whole chicken broken down or separate parts; skin-on and bone-in give more flavor and handle grilling better.
- 2 tablespoons olive oil — helps the seasonings adhere and promotes browning during the initial sear.
- 1 teaspoon salt — basic seasoning to bring the chicken’s flavor forward; adjust to taste for packaged parts.
- ½ teaspoon ground black pepper — adds a mild bite and complements the barbecue sauce.
- 1 cup barbecue sauce, store-bought or homemade — the glaze and finishing flavor; choose a sauce you like since it dominates the taste.
Grilled BBQ Chicken: How It’s Done

- Pat the chicken pieces dry with paper towels.
- In a large bowl or on a tray, rub 2 tablespoons olive oil over all the chicken pieces, then sprinkle evenly with 1 teaspoon salt and ½ teaspoon ground black pepper. Ensure each piece is coated.
- Preheat your grill to medium heat and set up two cooking zones: one side on high heat (direct) and the other side kept cooler for indirect cooking. Clean and oil the grill grates.
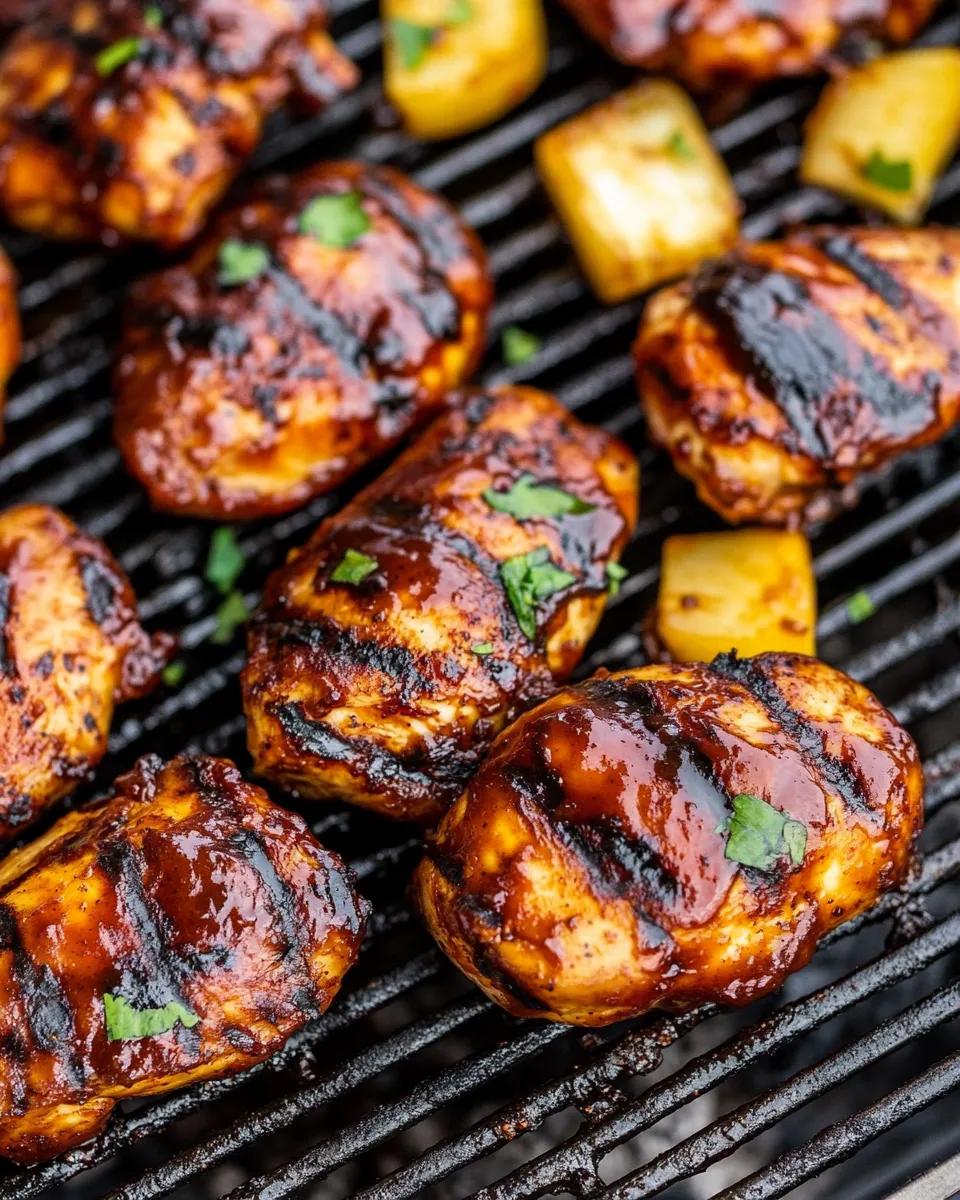
- Place the chicken pieces skin-side down on the hot (direct) side of the grill, uncovered. Sear for 6–8 minutes until you see good grill marks and the skin releases easily from the grates. Watch closely so the skin does not burn.
- Flip each piece and move them to the cooler (indirect) side of the grill. Reduce the grill temperature to about 300°F and cover the grill. Cook for 15 minutes.
- Brush the chicken on both sides with 1 cup barbecue sauce. Cover and continue grilling on the indirect side for an additional 20–25 minutes (note: wings will cook faster than thighs or breasts).
- Before removing the chicken, check doneness with an instant-read thermometer inserted into the thickest part without touching bone: breasts should reach 165°F (74°C) and thighs 175°F (80°C). If not yet at temperature, continue cooking as needed.
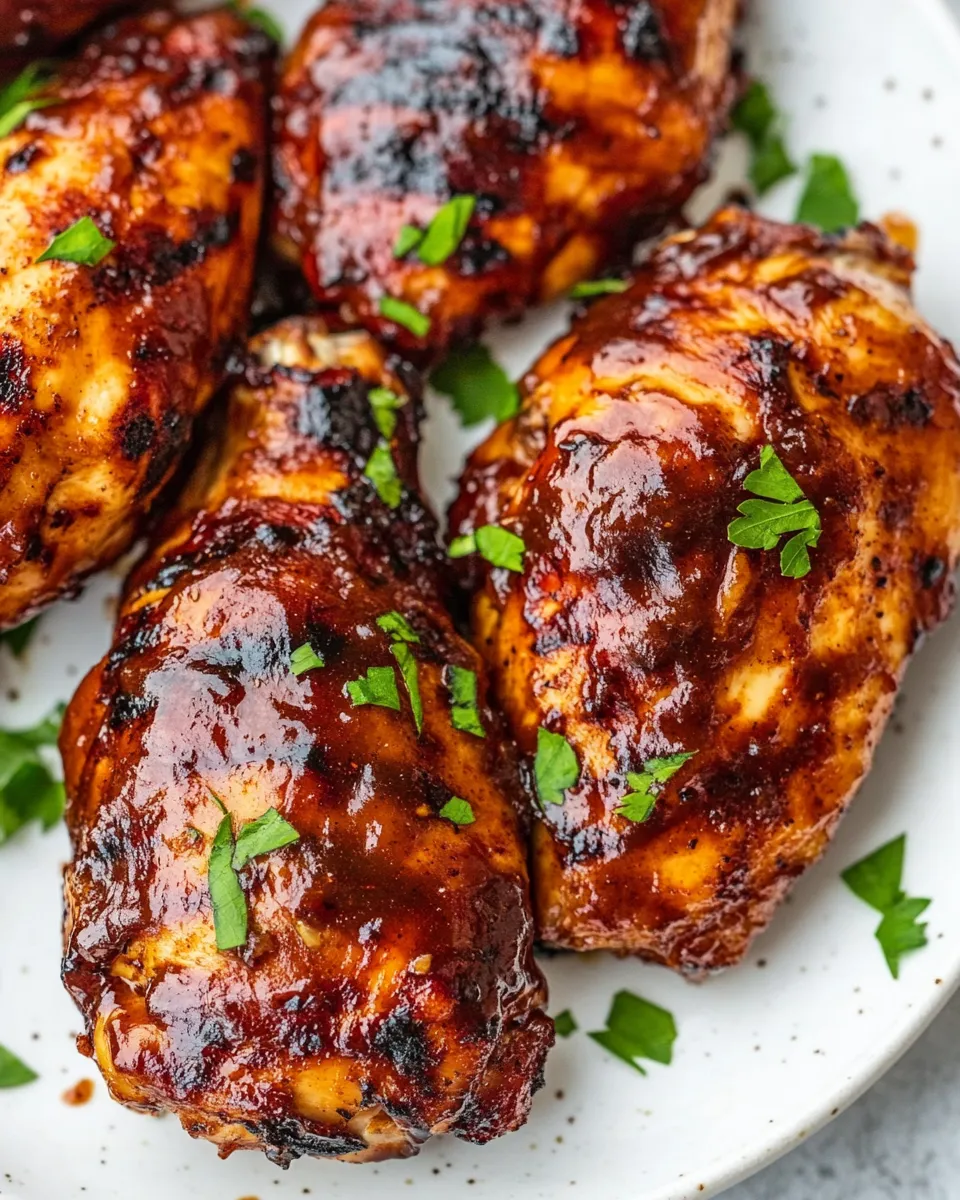
- For a final sear and glaze, move the chicken back to the hot side of the grill and cook uncovered for a couple of minutes per side to blacken the sauce, then remove from the grill.
- Let the chicken rest a few minutes before serving.
Reasons to Love Grilled BBQ Chicken
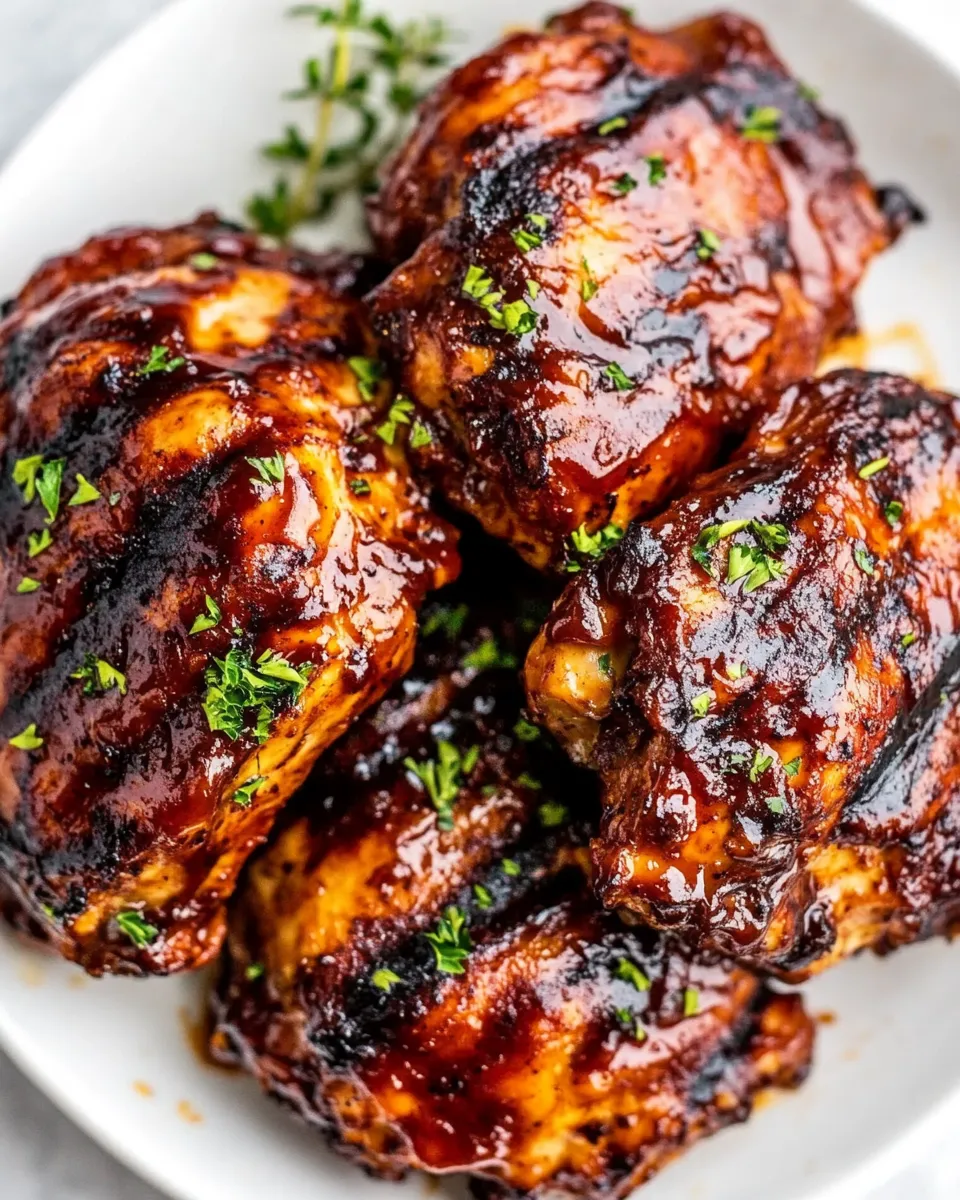
This dish hits a lot of useful notes. It’s flexible: use a whole bird or mixed parts, adjust the sauce, and serve it fancy or casual. The skin crisps and the sauce caramelizes, producing contrasts in texture and flavor—smoky, sweet, tangy, and slightly charred.
Another reason is consistency. The two-zone grilling method gives you control. Sear first for flavor, then move to indirect heat so the meat cooks through without burning. That approach reduces stress during busy cookouts and delivers predictability every time.
Finally, it’s crowd-pleasing. Kids and adults alike respond well to familiar barbecue sauce flavors. Pair with simple sides—coleslaw, grilled corn, potato salad—and you have a complete meal with very little last-minute effort.
Healthier Substitutions
You can lighten this recipe without losing the core experience. Use skinless chicken parts if you want to cut fat; keep in mind the skin contributes to crisping and flavor, so expect a different texture. A lower-sugar barbecue sauce or one labeled “reduced sugar” will reduce added sugars in the finished chicken.
Swap olive oil for a light spray of avocado oil if you prefer a neutral oil with a high smoke point. When reducing salt, season to taste and rely on the sauce for additional flavor.
Hardware & Gadgets
A few tools make the job safer and the results better:
- Instant-read thermometer — indispensable. Check the thickest part of a thigh or breast and avoid guessing.
- Long-handled tongs — for flipping without piercing the meat and losing juices.
- Grill brush and oil-soaked cloth or paper towel — to clean and oil the grates before cooking so skin doesn’t stick.
- Two-zone grill setup — you can create this on a charcoal grill by banking coals to one side or on a gas grill by turning burners to different settings.
Optional but helpful: a spray bottle with water to control flare-ups, and a small brush for applying sauce if you want even coverage.
Missteps & Fixes
Skin sticks to the grates
Why it happens: the chicken wasn’t dry or the grates weren’t clean and oiled. Fix: remove stuck bits gently with tongs, re-oil the grate, and position the piece to finish on indirect heat so the skin relaxes and releases more easily.
Sauce burning during sear
Why it happens: sugars in the barbecue sauce char quickly over high heat. Fix: wait to apply the sauce until after the initial indirect cook, then do quick high-heat passes to caramelize. If you must baste earlier, keep pieces over indirect heat and watch closely.
Dry chicken, especially breasts
Why it happens: overcooking and too high direct heat. Fix: use the thermometer and pull breasts at 165°F (74°C). If breasts finish before thighs, tent them with foil to rest while the darker meat reaches temperature.
Allergy-Friendly Swaps
If you’re cooking for someone with food allergies, focus on the barbecue sauce and any cross-contamination risks. Many commercial barbecue sauces contain soy, gluten, or mustard.
- If gluten is a concern, choose a labeled gluten-free barbecue sauce or make a simple sauce at home using tomato paste, vinegar, honey, and spices.
- For soy or wheat allergies, check ingredient labels carefully; use sauces labeled free of those allergens.
- If serving to someone with a sesame or nut allergy, ensure your sauce and any pre-made rubs are free from those ingredients and avoid cross-contact on shared utensils.
Behind the Recipe
This approach is rooted in a simple grilling principle: sear for flavor, finish for doneness. The recipe balances an early high-heat contact to develop color and Maillard reactions with a controlled indirect phase that lets the heat permeate the meat without burning the exterior. The glaze is applied mid-to-late so sugar in the sauce has time to brown rather than scorch.
I developed this sequence after testing variations—some where the sauce was applied early and charred, others where the chicken dried out because it never hit a hot enough sear. The two-zone method and the final hot sear for glazing consistently delivered the best texture and flavor without overcooking.
Make-Ahead & Storage
Make-ahead: You can season and oil the chicken up to 24 hours in advance. Keep the chicken covered in the refrigerator on a tray or in a shallow container. If you apply sauce ahead of time, the sugar will darken during refrigeration; I prefer to glaze during the cook for freshness.
Storage: Refrigerate leftover cooked chicken in an airtight container for up to 3–4 days. Reheat gently in a 325°F oven until warmed through or warm on indirect grill heat to preserve texture. For longer storage, freeze portions in airtight containers for up to 2 months; thaw overnight in the fridge before reheating.
Ask & Learn
Q: Can I use boneless chicken breasts? A: Yes, but watch cook time closely. Boneless breasts will cook faster and dry out more easily. Use the thermometer and consider butterflying thicker breasts for even cooking.
Q: What if my grill temperature fluctuates? A: Accept some variability. Keep an eye on internal temps rather than grill temps alone. Move pieces between zones to avoid flare-ups and use the lid to stabilize the cooking environment.
Q: Is indirect time different for charcoal vs gas? A: The principle is the same. With charcoal, bank coals to one side for a low-heat area. With gas, turn off burners on one side. Aim for about 300°F over the indirect zone as a guideline.
The Takeaway
Follow the simple order: dry, oil and season, sear over direct heat, finish over indirect heat, glaze, then give it a final hot kiss of heat to caramelize the sauce. Use an instant-read thermometer and patience during the indirect phase to avoid overcooking. The result is sticky, smoky, and reliably satisfying grilled BBQ chicken that works for weeknights and weekend cookouts alike.
Keep a favorite bottle of barbecue sauce on hand, clean and oil your grates, and remember that a few minutes of rest after grilling makes a big difference. Fire up the grill, follow the steps, and enjoy.
Grilled BBQ Chicken
Ingredients
Ingredients
- ?13-4 poundwhole chickencut into 8 pieces or skin-on bone-in chicken parts
- ?2 tablespoonsolive oil
- ?1 teaspoonsalt
- ?1/2 teaspoonground black pepper
- ?1 cupbarbecue saucestore bought or homemade
Instructions
Instructions
- Pat the chicken pieces dry with paper towels.
- In a large bowl or on a tray, rub 2 tablespoons olive oil over all the chicken pieces, then sprinkle evenly with 1 teaspoon salt and ½ teaspoon ground black pepper. Ensure each piece is coated.
- Preheat your grill to medium heat and set up two cooking zones: one side on high heat (direct) and the other side kept cooler for indirect cooking. Clean and oil the grill grates.
- Place the chicken pieces skin-side down on the hot (direct) side of the grill, uncovered. Sear for 6–8 minutes until you see good grill marks and the skin releases easily from the grates. Watch closely so the skin does not burn.
- Flip each piece and move them to the cooler (indirect) side of the grill. Reduce the grill temperature to about 300°F and cover the grill. Cook for 15 minutes.
- Brush the chicken on both sides with 1 cup barbecue sauce. Cover and continue grilling on the indirect side for an additional 20–25 minutes (note: wings will cook faster than thighs or breasts).
- Before removing the chicken, check doneness with an instant-read thermometer inserted into the thickest part without touching bone: breasts should reach 165°F (74°C) and thighs 175°F (80°C). If not yet at temperature, continue cooking as needed.
- For a final sear and glaze, move the chicken back to the hot side of the grill and cook uncovered for a couple of minutes per side to blacken the sauce, then remove from the grill.
- Let the chicken rest a few minutes before serving.
Equipment
- Grill
- Tongs
- Basting Brush
- Instant-read thermometer
- Paper Towels
- large bowl or tray
Notes
You always want to grill on perfectly cleaned grates to avoid that burnt flavor. I always oil my grates, too, to keep the skin from sticking and ripping when I flip the chicken.