Greek Fava (Split Pea Dip)
Fava is one of those deceptively simple dishes that becomes a weeknight staple once you make it. It’s humble — yellow split peas, an onion, garlic, water — but the result is a smooth, savory dip that tastes like time well spent. There’s no cream, no dairy required; richness comes from olive oil and the natural sweetness of the peas.
I lean on this recipe whenever I want something forgiving and fast that still feels thoughtful. It’s forgiving because the technique is straightforward: simmer, blend, season. It’s fast because the peas soften in under an hour and the active work is minimal. The final dish works as an everyday spread, an appetizer for guests, or a quiet, comforting lunch with warm bread.
Below you’ll find notes on ingredients and equipment, the exact method I use in the test kitchen, troubleshooting tips, and ideas for serving. Follow the method closely for best texture, then tweak the garnishes and salt to your taste.
Ingredient Notes

Yellow split peas are the heart of Greek fava. They’re not the same as chickpeas or regular green split peas — they cook down softly and break apart into a naturally silky base. Rinsing removes surface dust and helps them cook evenly. Onion and garlic cook with the peas to build a gentle savory backbone; they become mild and meld into the blend.
Olive oil is added after blending to finish the texture and carry flavor. Lemon juice brightens the whole thing and prevents the dip from tasting flat. Seasoning last is important: cooked split peas need salt after blending to reveal their full flavor.
Ingredients
- 1 cup yellow split peas — rinsed; the base of the dip, gives the creamy texture when cooked and blended.
- 1 large onion — chopped; cooks with the peas to build savory depth.
- 2 cloves garlic — minced; adds aromatic bite.
- 4 cups water — the cooking liquid; controls thickness as peas soften.
- 1/4 cup olive oil — stirred in after blending for silkiness and flavor.
- Juice of 1 lemon — brightens and balances the richness.
- Salt — to taste; essential for seasoning after blending.
- Black pepper — to taste; freshly ground if possible.
- Chopped onions, capers, olive oil drizzle — optional, as garnish; add texture and punch.
Method: Greek Fava (Split Pea Dip)
- Place the rinsed yellow split peas, chopped onion, minced garlic, and 4 cups water in a large pot.
- Bring the pot to a boil over medium-high heat, then immediately reduce the heat to low so the liquid maintains a gentle simmer.
- Partially cover the pot and simmer about 45 minutes, stirring every 10–15 minutes, until the split peas are very soft and the mixture has thickened and starts to break apart when stirred.
- Remove the pot from the heat and let it sit 3–5 minutes to cool slightly (this reduces splattering when blending).
- Using an immersion blender, blend the mixture in the pot until smooth. If you do not have an immersion blender, carefully transfer the hot mixture to a countertop blender in batches and blend until smooth, venting the lid slightly and holding it with a towel to prevent pressure build-up.
- Stir in the 1/4 cup olive oil and the juice of 1 lemon until fully incorporated.
- Taste and season with salt and black pepper to your preference.
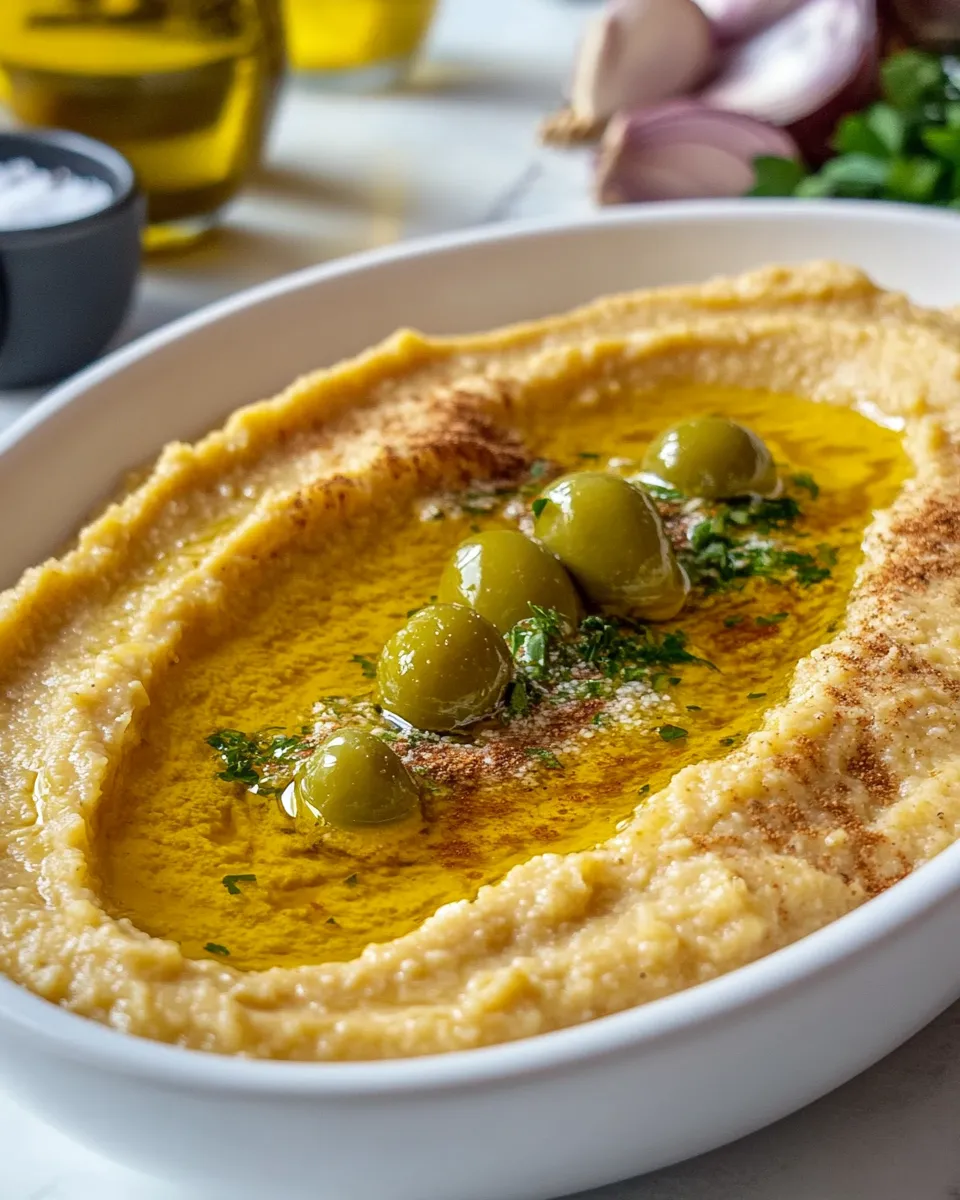
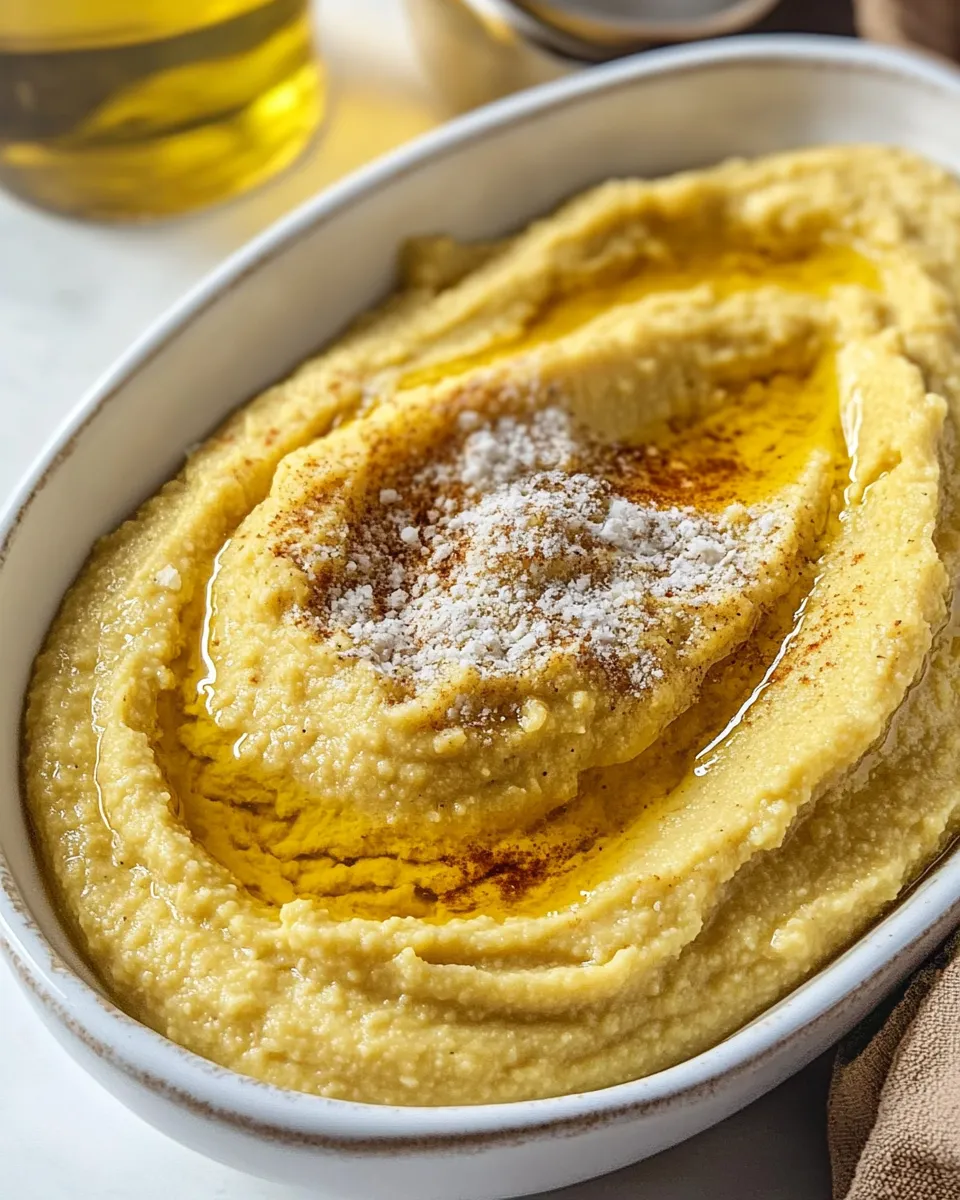
- Transfer to a serving dish and serve warm or at room temperature. Garnish, if desired, with chopped onions, capers, and a drizzle of olive oil.
Top Reasons to Make Greek Fava (Split Pea Dip)
- Minimal ingredients, maximum flavor — pantry staples transform into a refined dip.
- Comforting and quick: about an hour from start to finish with very little hands-on time.
- Versatile — serve it as a dip, spread, or simple side alongside roasted vegetables or grilled fish.
- Vegan and naturally gluten-free, so it fits many diets without changes.
- Scales easily: double or halve the recipe without stress.
If You’re Out Of…
If you discover you’re missing something, here are small, practical workarounds that keep you cooking without a trip to the store.
- If you don’t have extra-virgin olive oil, use any good-quality olive oil you have on hand; it still adds richness.
- If you’re short on fresh lemon, bottled lemon juice works in a pinch — add gradually and taste as you go.
- If you don’t have garnish ingredients on the list, the dip stands well on its own; a drizzle of olive oil and a grind of black pepper is enough.
Equipment at a Glance
- Large pot — wide enough to stir comfortably and accommodate expansion while simmering.
- Immersion blender — makes blending in the pot safe and fast.
- Countertop blender — optional, if you don’t have an immersion blender; blend in batches and vent the lid carefully.
- Measuring cups and a lemon juicer or reamer — for accuracy and ease.
- Spoon or spatula — to stir while cooking and when finishing with oil.
Troubles You Can Avoid
Fava is forgiving, but a few common issues can change the final texture or flavor. Here’s how to avoid them.
- Grainy texture: Make sure the peas are very soft before blending. The prescribed 45 minutes is a guideline; cook until the mixture breaks apart easily when stirred.
- Too thin: If the mixture is watery after blending, simmer a bit longer with the lid off to reduce. If it’s after adding olive oil, chill briefly — it firms slightly as it cools.
- Splattering when blending hot peas: Let the pot rest 3–5 minutes after removing from heat. Use an immersion blender in the pot, or for countertop blenders vent the lid and cover with a towel while holding it down.
- Flat flavor: Always taste and season after you blend. Lemon and salt are the final clarifying agents; add them cautiously and adjust to preference.
Make It Fit Your Plan
Planning to serve this for a crowd, make ahead, or eat over several days? A few practical adjustments will keep the dish useful and fresh.
- Make-ahead: You can prepare fava fully and refrigerate it for up to 4 days. Bring to room temperature before serving and stir in a splash of olive oil to revive creaminess.
- Batch cooking: Double the recipe and store in airtight containers. Reheat gently on the stovetop with a splash of water or olive oil if needed.
- Diet-friendly: The recipe as written is vegan and gluten-free. For a richer, non-vegan version, a little butter could be stirred in at the end (not required).
Notes from the Test Kitchen
Texture and Timing
We tested this recipe multiple times, adjusting simmer time and blending methods. The key finding: give the peas the full 45 minutes and watch for softness rather than relying on the clock alone. Different brands or ages of split peas cook at slightly different rates. Stirring every 10–15 minutes prevents sticking and helps the peas break down evenly.
Blending Options
An immersion blender creates the creamiest result with the least fuss. If using a countertop blender, work in batches and vent the lid a fraction to allow steam to escape — hot liquids trap pressure and can pop the lid if you’re not careful.
Finishing Touches
Finish with good olive oil and fresh lemon. Texture benefits from the oil stirred in after blending; flavor benefits from lemon added at the end. Taste before adding salt — lemon will change how much salt you need.
How to Store & Reheat
Cool the fava to room temperature, then transfer it to an airtight container. Store in the refrigerator for up to 4 days. For longer storage, freeze in freezer-safe containers for up to 3 months; thaw overnight in the fridge before using.
Reheat gently on the stovetop over low heat with a tablespoon or two of water or olive oil to loosen the texture if it’s become firm. Stir frequently. You can also serve it cold or at room temperature if that suits your menu.
Top Questions & Answers
Q: Can I make this in a pressure cooker or Instant Pot?
A: This recipe is written for stovetop simmering. If you use a pressure cooker, reduce the water slightly and follow manufacturer guidelines for legumes. I recommend the stovetop method for control over texture.
Q: Is fava the same as fava beans?
A: No — Greek fava is traditionally made with yellow split peas, not broad fava beans. The result is smoother and more spread-like than dishes made from whole beans.
Q: How smooth should the final texture be?
A: Smooth enough to spread easily but still with a bit of body. If you prefer ultra-silky, blend longer; for a chunkier feel, pulse less.
Bring It to the Table
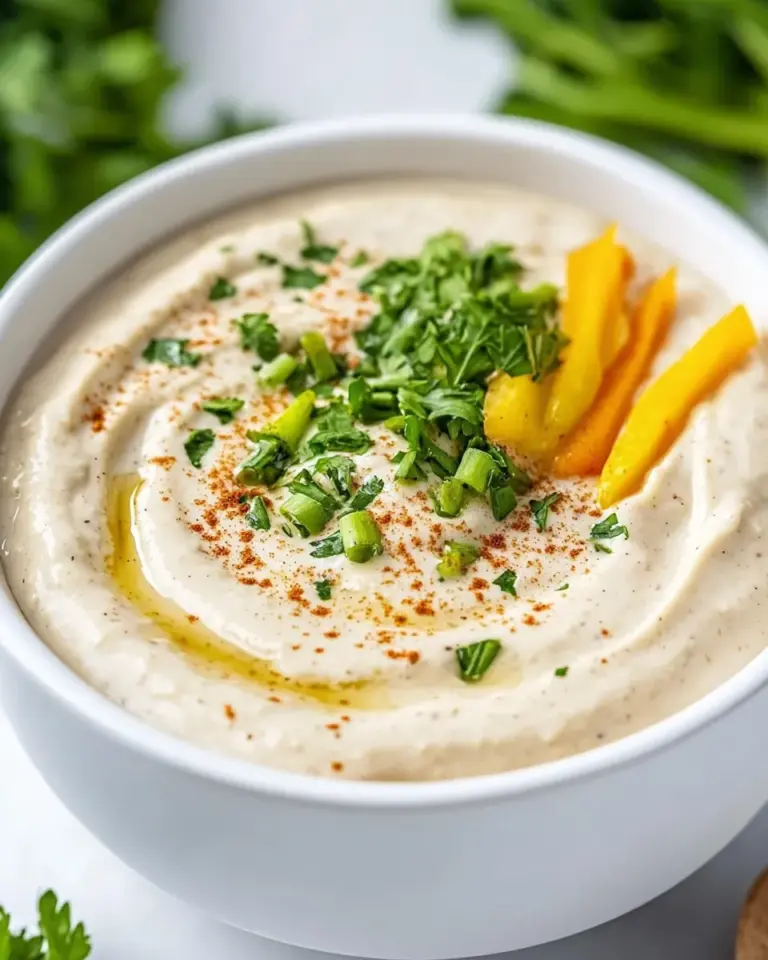
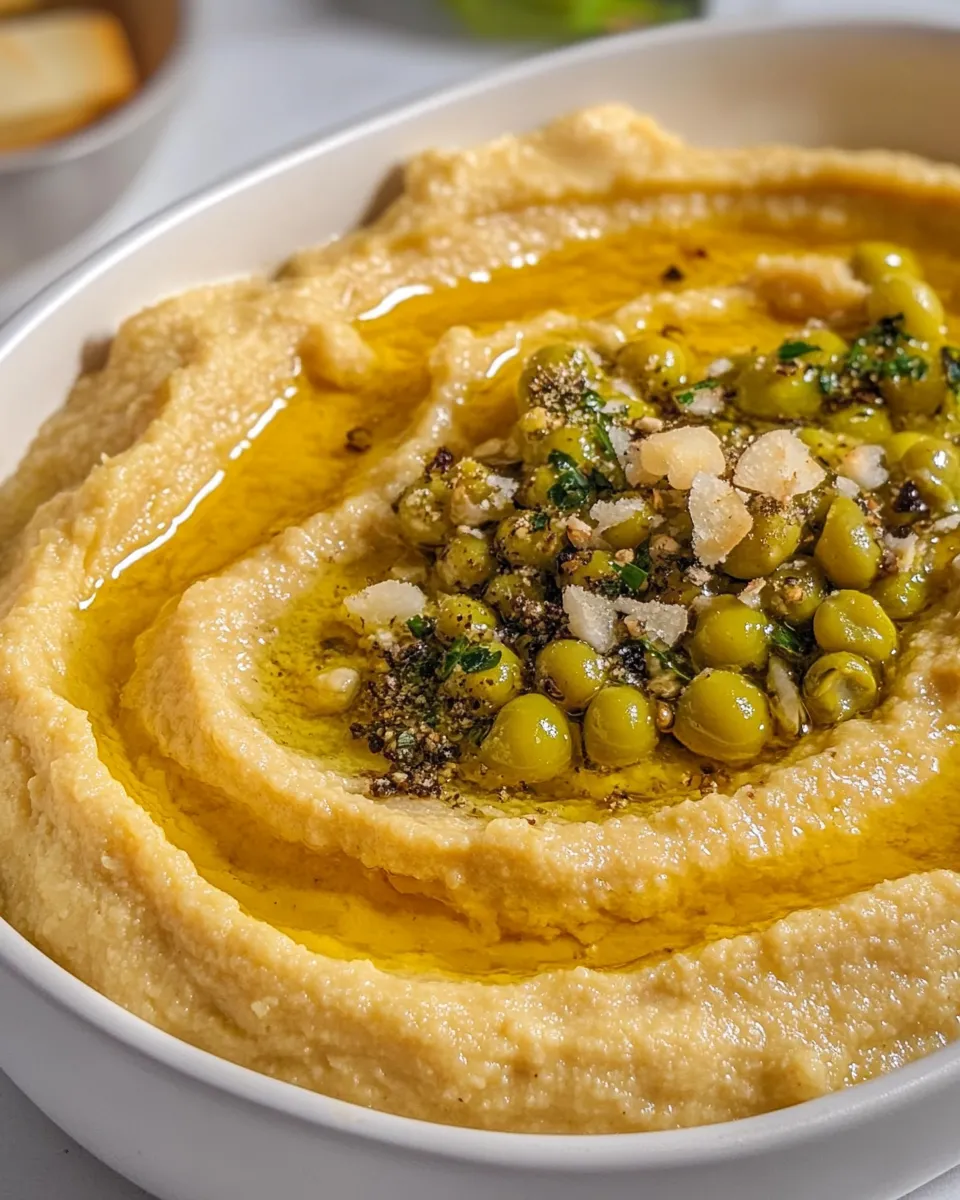
Serve Greek fava warm or at room temperature with a generous drizzle of olive oil and a scattering of chopped onions and capers if you like tang. It pairs beautifully with toasted bread, warm pita, or raw vegetables. For a simple first course, set it alongside olives, fresh tomatoes, and crusty bread.
Make a bowl, set it in the center of the table, and let people help themselves. It’s one of those dishes that feels generous no matter how modest the ingredients. Enjoy.

Greek Fava (Split Pea Dip)
Ingredients
Ingredients
- 1 cupyellow split peasrinsed
- 1 large onionchopped
- 2 clovesgarlicminced
- 4 cupswater
- 1/4 cupolive oil
- Juice of 1 lemon
- Saltto taste
- Black pepperto taste
- Chopped onions capers, olive oil drizzleoptional, as garnish
Instructions
Instructions
- Place the rinsed yellow split peas, chopped onion, minced garlic, and 4 cups water in a large pot.
- Bring the pot to a boil over medium-high heat, then immediately reduce the heat to low so the liquid maintains a gentle simmer.
- Partially cover the pot and simmer about 45 minutes, stirring every 10–15 minutes, until the split peas are very soft and the mixture has thickened and starts to break apart when stirred.
- Remove the pot from the heat and let it sit 3–5 minutes to cool slightly (this reduces splattering when blending).
- Using an immersion blender, blend the mixture in the pot until smooth. If you do not have an immersion blender, carefully transfer the hot mixture to a countertop blender in batches and blend until smooth, venting the lid slightly and holding it with a towel to prevent pressure build-up.
- Stir in the 1/4 cup olive oil and the juice of 1 lemon until fully incorporated.
- Taste and season with salt and black pepper to your preference.
- Transfer to a serving dish and serve warm or at room temperature. Garnish, if desired, with chopped onions, capers, and a drizzle of olive oil.
Equipment
- Large Pot
- Immersion Blender
- Countertop blender
- towel