Disneyland Peanut Butter Bars Recipe
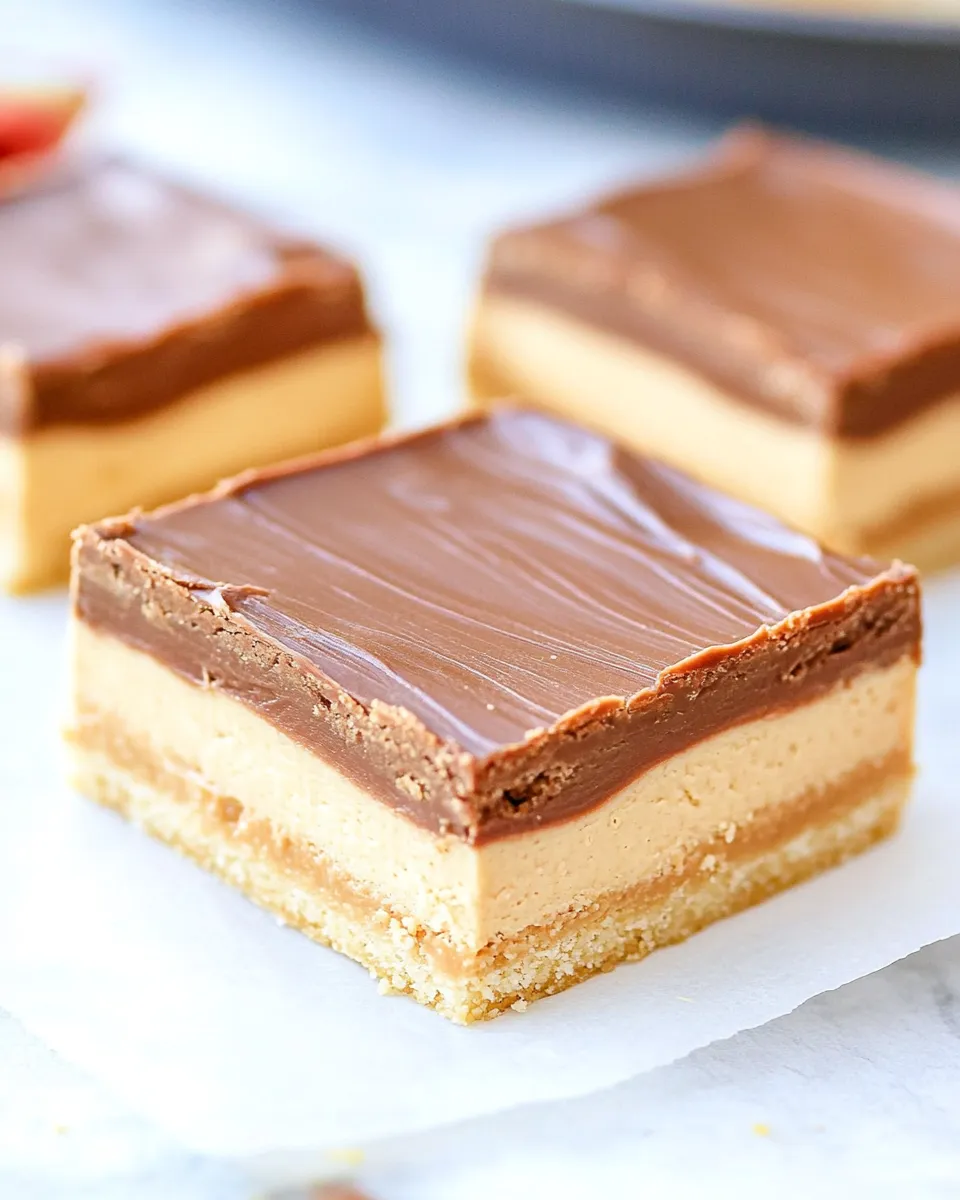
These peanut butter bars are comfort in a square — layers of buttery graham crackers, smooth, sweet peanut butter filling, and a glossy chocolate cap. I first tried something like this on a trip to the parks, and the memory of that crunchy-chewy-chocolatey bite stuck with me. I adapted the simple assembly into a recipe that’s dependable and quick enough for a weekend bake session.
I keep this recipe in my regular rotation because it requires no baking, minimal tools, and the components come together fast. The texture is what makes it special: a firm chocolate shell, a pliable peanut butter center that holds together, and graham crackers that give a toasty, slightly sandy bite. You can make it exactly as written or fold in small tweaks to match your pantry.
Below I’ll walk you through the ingredients, exact step-by-step directions, sensible swaps, gear you’ll want on hand, and trouble-shooting tips that save time and keep the bars looking neat. Let’s get to it.
Ingredient Rundown

Ingredients
- 1 1/2cupcreamy peanut butter — Provides the creamy, salty-sweet body of the filling; smooth peanut butter presses and spreads easiest.
- 1/4cupunsalted buttersoftened — Adds richness and helps the peanut butter mixture set up without being rock-hard.
- 1/4teaspoonsalt — Balances sweetness and enhances the peanut flavor; important even if your peanut butter is salted.
- 2 – 2 1/2cupspowdered sugar — Sweetens and firms the filling; start with the lower amount and add up to 2 1/2 cups only if needed for consistency.
- 1teaspoonvanilla extract — Rounds the flavor and prevents the filling from tasting flat.
- 10-12graham cracker sheetsfull sheet of 4 — The crunchy layers; break to fit the pan. Use full sheets for uniform layers.
- 2cupschocolate chips — Forms the chocolate layers; semisweet or milk both work depending on how sweet you want the bars.
- 3tablespoonsshortening — Keeps the melted chocolate glossy and spreadable at room temperature; you can use an all-vegetable shortening.
Disneyland Peanut Butter Bars Recipe: How It’s Done
- Line a 9×9-inch square pan with foil or parchment, leaving an overhang for easy removal; spray the lining lightly with nonstick cooking spray.
- In a large bowl, using a hand or stand mixer, beat together 1 1/2 cups creamy peanut butter, 1/4 cup softened unsalted butter, 1 teaspoon vanilla extract, and 1/4 teaspoon salt until combined.
- Add 2 cups powdered sugar to the peanut butter mixture and beat until the mixture is smooth and a bit crumbly.
- Pinch a small amount of the peanut butter mixture between your fingers — it should form a ball without falling apart. If it is too sticky, add up to the remaining 1/2 cup powdered sugar (for a total of 2 1/2 cups) and mix until the proper consistency is achieved.
- Place 2 cups chocolate chips and 3 tablespoons shortening in a microwave-safe bowl. Microwave in 30-second increments, stirring after each increment, until the chocolate and shortening are fully melted and smooth. Set aside briefly to make spreading easier (do not let it harden).
- Arrange half of the graham cracker sheets (half of the 10–12 sheets from the ingredient list) in a single layer on the bottom of the prepared pan, breaking crackers as needed to fit and fill the pan evenly.
- Spoon about one-third of the melted chocolate over the bottom layer of graham crackers and spread into an even layer.
- Evenly spread or press the prepared peanut butter mixture over the chocolate layer, smoothing it into one uniform layer that reaches the edges of the pan.
- Spoon and spread another one-third of the melted chocolate over the peanut butter layer in an even layer.
- Arrange the remaining graham cracker sheets in a single layer on top of the chocolate (breaking to fit as needed).
- Spread the remaining melted chocolate evenly over the top layer of graham crackers.
- Chill the pan in the refrigerator for at least 1 hour, or until the layers are set.
- Use the foil or parchment overhang to lift the bars from the pan, place on a cutting board, slice into bars, and serve.
Why It Deserves a Spot
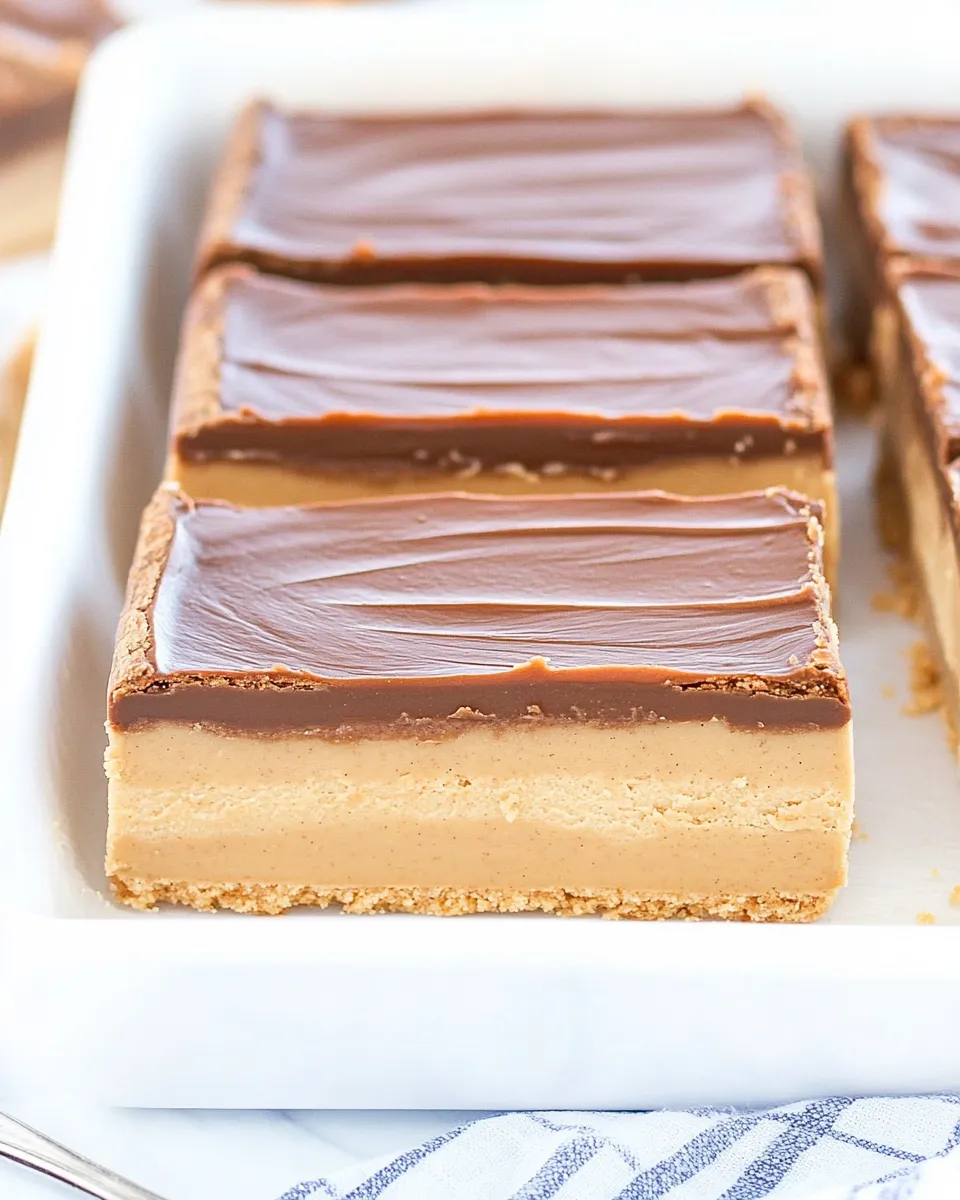
These bars are the kind of retro, nostalgic dessert that still feels fresh because of the texture contrast. They are no-bake, so you can make them year-round without heating up the kitchen. Each element pulls its weight: the graham crackers add structure and toasty flavor; the peanut butter layer is sweet and creamy but firm enough to hold a clean slice; the chocolate binds everything together and gives you that satisfying snap.
They’re also an excellent recipe for sharing. The ingredients are pantry staples, and the recipe scales well. If you’re hosting a potluck or packing school treats, these travel without melting if kept cool, and they can be portioned into small bars for bite-sized indulgence.
Dairy-Free/Gluten-Free Swaps
If you need substitutions for dietary needs, you can make practical swaps that keep the structure and taste close to the original.
- Swap the unsalted butter for a dairy-free softened butter or margarine to remove dairy from the filling.
- Choose dairy-free chocolate chips (labeled vegan or dairy-free) in place of the chocolate chips listed.
- Use certified gluten-free graham crackers to make the bars gluten-free — the assembly and texture remain the same.
- Shortening is already vegetable-based; if you need a specifically labeled product (e.g., palm-free), select one that fits your requirements.
Gear Checklist
- 9×9-inch square pan — the recipe is sized for this exact pan for consistent layer thickness.
- Foil or parchment — an overhang makes removal foolproof.
- Nonstick cooking spray — prevents sticking to the liner.
- Hand mixer or stand mixer — speeds up mixing until smooth; you can mix by hand but it’s more work.
- Microwave-safe bowl — for melting chocolate and shortening.
- Offset spatula or butter knife — for spreading the chocolate and peanut butter layers evenly.
- Sharp chef’s knife and cutting board — for slicing tidy bars after chilling.
Avoid These Mistakes
- Skipping the overhang liner — without it, lifting the set bars cleanly is messy. Use foil or parchment and leave enough to grab.
- Not testing peanut butter mixture texture — the pinch test in the recipe is important. If the filling is too sticky, the bars won’t slice cleanly.
- Overheating the chocolate — microwaving too long without stirring can seize chocolate. Heat in short bursts and stir until smooth.
- Rushing the chill time — at least 1 hour is needed. Cutting too soon yields squashed layers and messy edges.
- Using crunchy peanut butter — it’s fine, but the filling is less smooth and may not press evenly. The recipe calls for creamy for a reason.
Nutrition-Minded Tweaks
If you’re watching sugar or calories, here are gentle adjustments that keep the essence of the bars while nudging them toward lighter territory without reconstructing the recipe.
- Reduce how much you eat per serving: cut smaller bars. Portion control is the simplest way to lower per-serving calories without changing the chemistry of the recipe.
- Serve alongside fresh fruit instead of more sweets. A few slices of apple or a handful of berries provides contrast and reduces overall sugar load in the meal.
- Choose darker chocolate chips with a higher cacao percentage to lower relative sugar in the chocolate layers; flavor will be more intense, and the bars feel less cloying.
Pro Tips & Notes
Setting the layers
Work quickly when spreading melted chocolate so it remains fluid and glossy. If it cools and thickens while you’re working, give it short 5–10 second bursts in the microwave and stir to bring it back to spreading consistency.
Smoothing the peanut butter layer
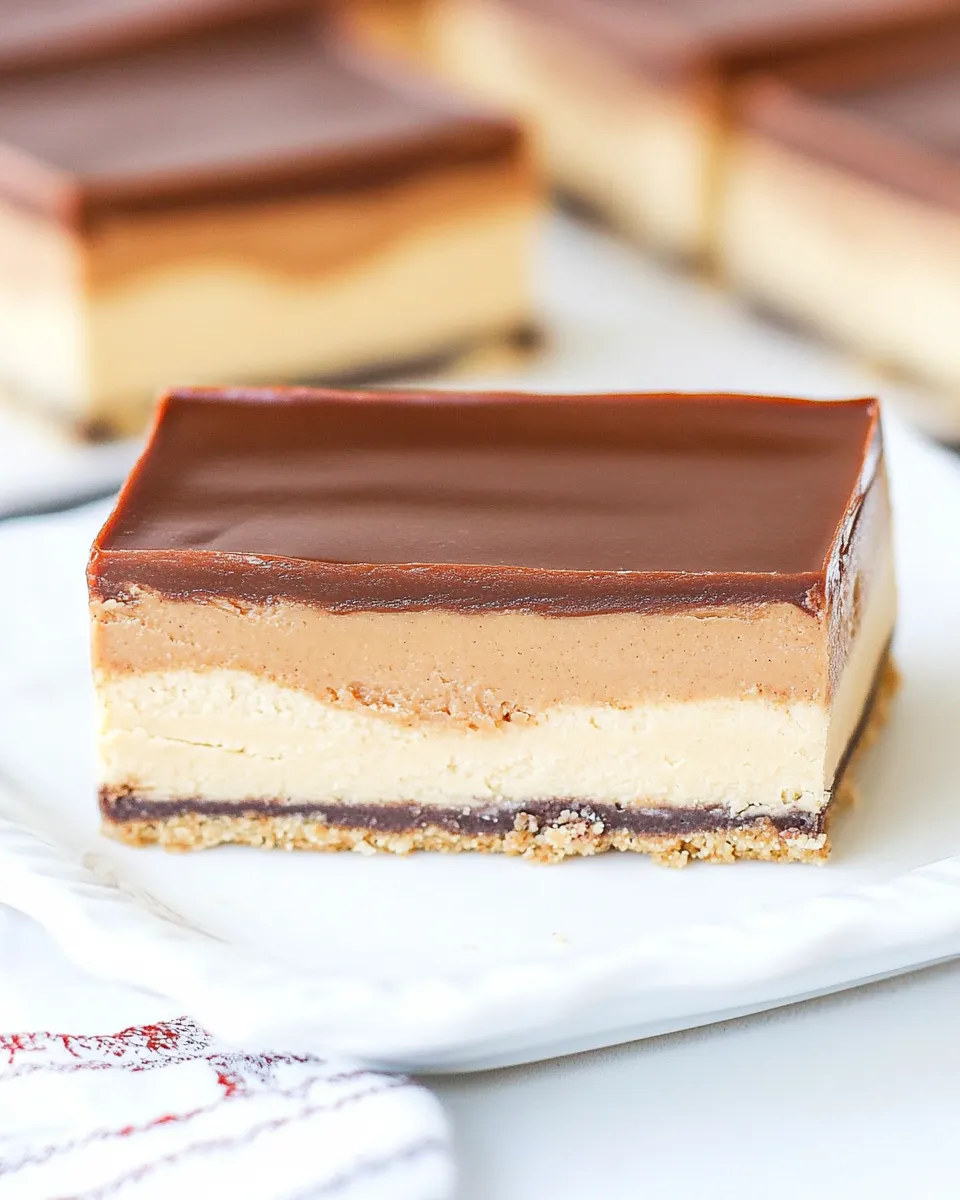
After pressing the peanut butter mixture into the pan, use an offset spatula or the back of a spoon to press firmly and smooth. A thin layer of chocolate beneath helps the filling adhere to the cracker base so the bars slice cleanly.
Cutting neat bars
Run a sharp knife under hot water, wipe it dry, then slice in one firm motion. Repeat warming and wiping between cuts for the tidyest edges. Chilled bars slice best after a full hour in the fridge.
Meal Prep & Storage Notes
These bars are excellent for make-ahead planning. After chilling and slicing, store in an airtight container lined with parchment. Keep them in the refrigerator for up to one week. If you need longer storage, freeze the whole slab (wrapped tightly) for up to 2 months; thaw in the fridge before slicing.
When transporting, pack them in a single layer or separate layers with parchment to prevent the chocolate from sticking. If serving at room temperature, remove from the fridge about 15–20 minutes before you want to eat so the chocolate softens slightly and flavors shine.
Frequently Asked Questions
- Can I use crunchy peanut butter instead of creamy? Yes, but the filling will be less smooth and might not press as evenly. If texture isn’t a worry, go ahead.
- Can I melt the chocolate on the stovetop? Yes—use a double boiler (a heatproof bowl over simmering water) and stir frequently until smooth. Avoid direct heat that could scorch the chocolate.
- How do I get perfectly even graham cracker layers? Use full sheets when possible and break only to fill gaps. Arrange them flat and press gently after laying the chocolate so they bed into the layer evenly.
- Is shortening necessary? Shortening helps the melted chocolate stay spreadable and sets with a nice sheen at room temperature. If you prefer, you can use a neutral-flavored vegetable oil in small amounts, but results may vary.
- Can I double the recipe? Yes—use a larger pan and keep the same layer ratios, or make two pans to bake at once. Scaling up keeps the process straightforward.
Next Steps
Make a batch and bring it to a casual gathering or pack a few in lunchboxes — they’re crowd-pleasers. If you enjoy this texture combination, experiment with a thin layer of jam beneath the peanut filling for a subtle PB&J vibe, or sprinkle chopped nuts on top of the final chocolate layer just before chilling for a little crunch. Keep notes on any tweaks you make so you can recreate your favorite variation next time.
Happy baking — and if you try these, tell me how you served them. I love hearing about tweaks that make a recipe your own.
Disneyland Peanut Butter Bars Recipe
Ingredients
Ingredients
- 1 1/2 cupcreamy peanut butter
- 1/4 cupunsalted buttersoftened
- 1/4 teaspoonsalt
- 2 - 2 1/2 cupspowdered sugar
- 1 teaspoonvanilla extract
- 10-12 graham cracker sheetsfull sheet of 4
- 2 cupschocolate chips
- 3 tablespoonsshortening
Instructions
Instructions
- Line a 9x9-inch square pan with foil or parchment, leaving an overhang for easy removal; spray the lining lightly with nonstick cooking spray.
- In a large bowl, using a hand or stand mixer, beat together 1 1/2 cups creamy peanut butter, 1/4 cup softened unsalted butter, 1 teaspoon vanilla extract, and 1/4 teaspoon salt until combined.
- Add 2 cups powdered sugar to the peanut butter mixture and beat until the mixture is smooth and a bit crumbly.
- Pinch a small amount of the peanut butter mixture between your fingers — it should form a ball without falling apart. If it is too sticky, add up to the remaining 1/2 cup powdered sugar (for a total of 2 1/2 cups) and mix until the proper consistency is achieved.
- Place 2 cups chocolate chips and 3 tablespoons shortening in a microwave-safe bowl. Microwave in 30-second increments, stirring after each increment, until the chocolate and shortening are fully melted and smooth. Set aside briefly to make spreading easier (do not let it harden).
- Arrange half of the graham cracker sheets (half of the 10–12 sheets from the ingredient list) in a single layer on the bottom of the prepared pan, breaking crackers as needed to fit and fill the pan evenly.
- Spoon about one-third of the melted chocolate over the bottom layer of graham crackers and spread into an even layer.
- Evenly spread or press the prepared peanut butter mixture over the chocolate layer, smoothing it into one uniform layer that reaches the edges of the pan.
- Spoon and spread another one-third of the melted chocolate over the peanut butter layer in an even layer.
- Arrange the remaining graham cracker sheets in a single layer on top of the chocolate (breaking to fit as needed).
- Spread the remaining melted chocolate evenly over the top layer of graham crackers.
- Chill the pan in the refrigerator for at least 1 hour, or until the layers are set.
- Use the foil or parchment overhang to lift the bars from the pan, place on a cutting board, slice into bars, and serve.
Equipment
- 9x9 inch square pan
- foil or parchment
- nonstick cooking spray
- Hand Mixer or Stand Mixer
- Microwave-safe bowl
- Spatula