Crispy Oven Baked Chicken Tenders
I love recipes that feel like a small, reliable miracle: crunchy on the outside, juicy on the inside, and easy enough to make any night of the week. These Crispy Oven Baked Chicken Tenders do exactly that. They deliver the satisfying crunch of fried tenders without standing over a pan of oil, and the mayo–Dijon–honey sauce is a quick, bright finish that’s practically irresistible.
I test these in my kitchen with a busy schedule in mind: modest prep, predictable timing, and techniques that make cleanup simple. There’s a little extra step—toast the panko first—but it’s worth it. The crumbs get nuttier and crisper, so the final coating keeps its texture longer after baking.
Below you’ll find the ingredients, the exact step-by-step method I used, swaps, troubleshooting, equipment notes, storage tips, and answers to common questions. Read through, then get the oven going. These are great for family dinners, packable lunches, or a crowd-friendly appetizer.
What’s in the Bowl

Ingredients
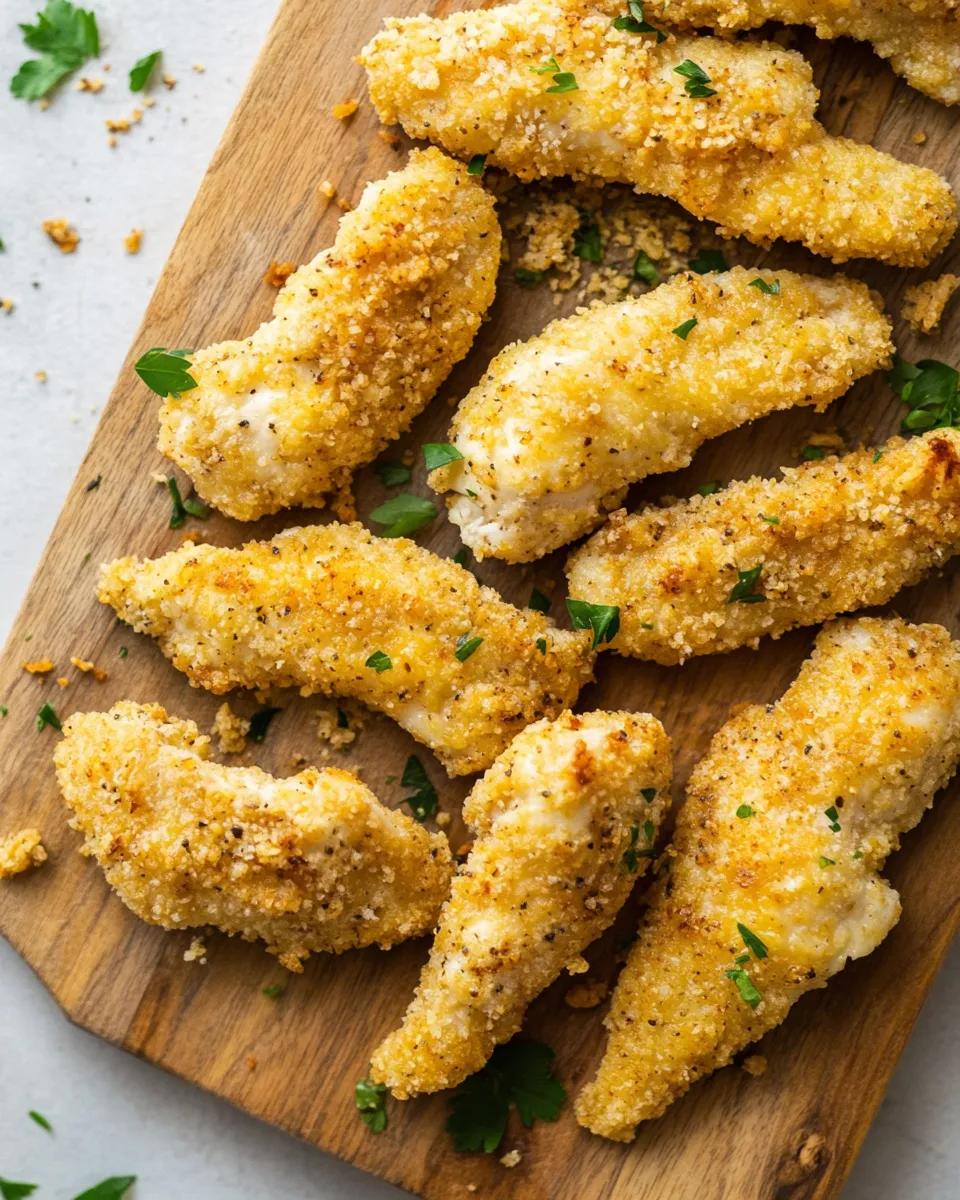
- 2 cups panko breadcrumbs — the crunchy coating; toasting them first adds extra color and texture.
- 1½ pounds chicken tenders — They’re called mini chicken fillets in the UK. Or boneless skinless chicken breasts cut into ¾-inch strips (about 12 strips total); use evenly sized pieces for even cooking.
- 1 egg — binds the panko to the chicken.
- 1 tablespoon mayonnaise — adds fat and helps the coating stick; also contributes flavor.
- 1 tablespoon Dijon mustard — brightens the egg wash and adds tang.
- 1 tablespoon all-purpose flour — lightens and thickens the egg mixture so crumbs adhere better.
- 1 teaspoon smoked paprika — adds a warm, smoky note to the coating.
- 1 teaspoon garlic powder — foundation seasoning for savory depth.
- ½ teaspoon salt — seasons the egg wash for even flavor.
- ¼ teaspoon ground black pepper — balances and seasons.
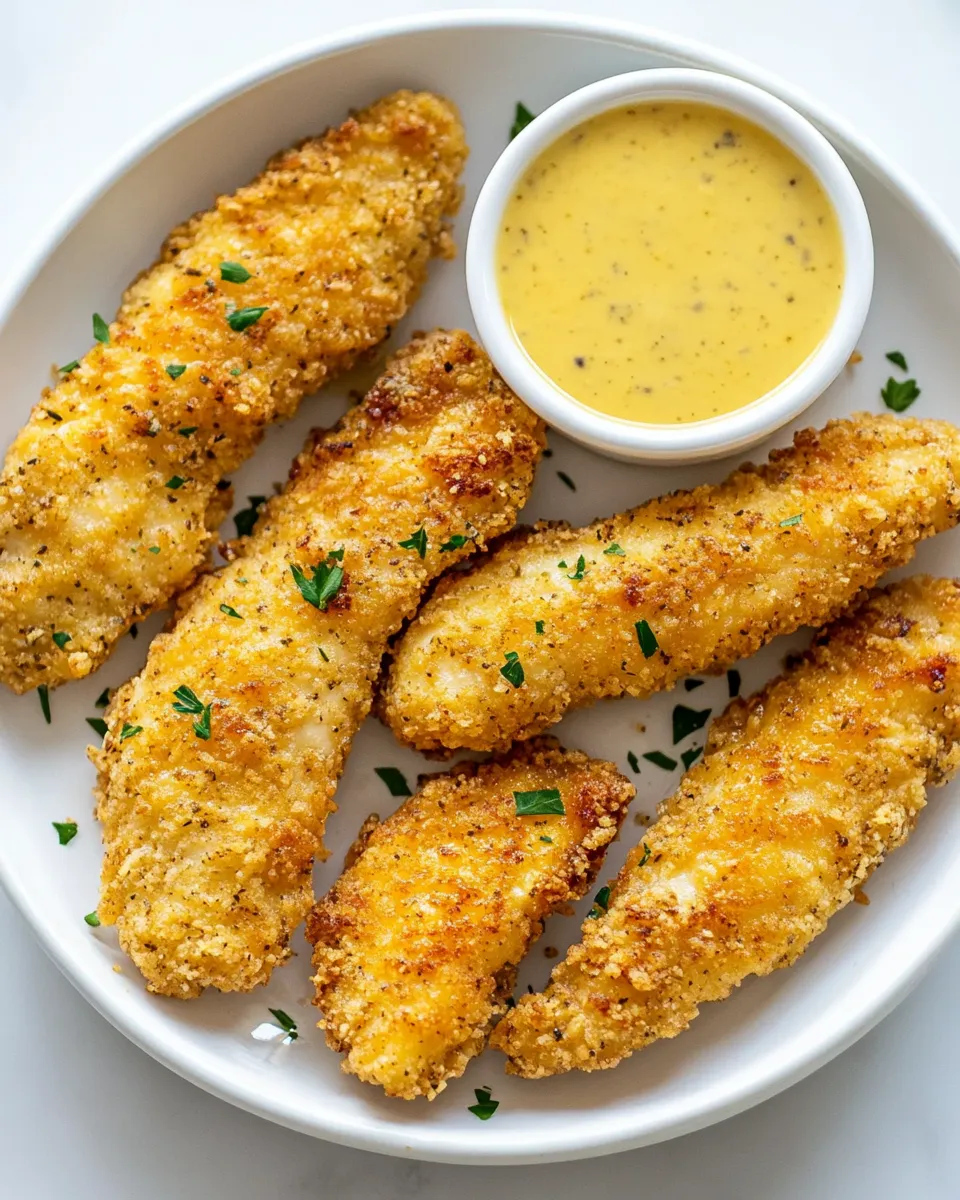
- ½ cup mayonnaise — base of the dipping sauce; rich and smooth.
- 2 tablespoons Dijon mustard — gives the sauce a tangy backbone.
- 1 tablespoon honey — balances the mustard with sweetness.
- ½ teaspoon salt — seasons the sauce to taste.
From Start to Finish: Crispy Oven Baked Chicken Tenders

- Preheat the oven to 375°F (190°C). Lightly spray the panko breadcrumbs onto a sheet pan in an even layer.
- Toast the panko in the oven at 375°F (190°C) for 7–8 minutes, stirring or shaking the pan once halfway through, until the crumbs are golden. Remove from the oven and set the toasted panko aside to cool slightly.
- Increase the oven temperature to 400°F (200°C). Line a second sheet pan with parchment paper or foil; optionally place a wire rack on the sheet pan.
- In a shallow bowl, whisk together the egg, 1 tablespoon mayonnaise, 1 tablespoon Dijon mustard, 1 tablespoon all-purpose flour, 1 teaspoon smoked paprika, 1 teaspoon garlic powder, 1/2 teaspoon salt, and 1/4 teaspoon ground black pepper until smooth and well combined.
- Put the toasted panko into a shallow dish for dredging.
- Working one piece at a time, dip each chicken tender into the egg mixture to coat completely, let excess drip off, then press the tender into the toasted panko so the crumbs adhere. Transfer the breaded tenders to the prepared sheet pan or rack, spacing them so they do not touch.
- Bake the breaded tenders in the 400°F (200°C) oven for 15–17 minutes, depending on size, until the coating is golden and the chicken is cooked through. If not using a rack, flip the tenders once about halfway through baking for more even browning.
- While the tenders bake, whisk together 1/2 cup mayonnaise, 2 tablespoons Dijon mustard, 1 tablespoon honey, and 1/2 teaspoon salt in a small bowl until smooth.
- Remove the tenders from the oven and let them rest a couple of minutes, then serve with the prepared mayo–Dijon–honey sauce.
Reasons to Love Crispy Oven Baked Chicken Tenders
They’re crispy without deep frying. Toasting panko and baking on a rack gives great texture while avoiding extra oil and splatter. That means fewer dishes and less cleanup.
They’re fast. From toasted panko to finished tenders in under 40 minutes if you’re efficient. The method is straightforward and repeats well.
The sauce is effortless and versatile. A simple mayo–Dijon–honey mix does a lot of heavy lifting—sweet, tangy, and creamy. It pairs with kids’ palettes and grown-up tastes alike.
They scale. Make a small batch for a weeknight dinner or double up for a party. The technique stays the same.
Swap Guide
- Chicken: use boneless skinless chicken breasts cut into ¾-inch strips if tenders aren’t available (this option is already noted in the ingredients).
- Crust: if you don’t have panko, plain breadcrumbs will work; expect slightly different texture and a less airy crisp.
- Egg binder: if you need an egg-free binder, extra mayonnaise can help coat the chicken, though texture will shift—press crumbs on well.
- Sauce sweetener: if honey isn’t on hand, a mild maple syrup or light agave can replace it at a 1:1 ratio.
Equipment Breakdown
- Oven — steady temperature and airflow matter for even toasting and baking.
- Two sheet pans — one to toast panko, one to bake the tenders; this keeps flavors and oils separate.
- Parchment paper or foil — prevents sticking and speeds cleanup.
- Wire rack (optional) — elevates tenders so air circulates underneath for crisper bottoms.
- Shallow bowls or dishes — one for the egg mix, one for the panko for easy dredging.
- Whisk and tongs or fork — for mixing and handling the tenders.
Watch Outs & How to Fix
Problem: Coating falls off during baking. Fix: Make sure the egg mixture is well mixed and slightly thick (the flour helps). Press the panko onto the chicken firmly and let the coated pieces sit a minute before transferring to the sheet pan so the crumbs adhere better.
Problem: Tenders are dry. Fix: Don’t overbake. Check at 15 minutes; smaller strips finish faster. Let them rest a couple of minutes after the oven—carryover heat finishes the cooking.
Problem: Bottoms soggy when baked on foil. Fix: Use a wire rack so hot air gets under the tenders, or flip once halfway through baking as the recipe suggests.
Problem: Panko burns while toasting. Fix: Stir or shake the pan at the halfway point and watch closely in the last couple of minutes. Oven temperatures can vary; remove them when golden, not brown.
How to Make It Lighter
Swap half the mayonnaise in the sauce with Greek yogurt to reduce fat while keeping creaminess. Use low-fat mayonnaise in both the egg mixture and the sauce. Bake on a rack to avoid needing additional oil. Trim any visible fat from chicken if present, and stick to the prescribed baking time to avoid overcooking, which makes meat seem heavier and drier.
Author’s Commentary
I started to toast panko because straight-out-of-the-bag crumbs sometimes lack depth; a quick 7–8 minutes at a moderate temperature changes everything. The toasted crumbs behave differently in the oven: they brown more evenly and hold crispness longer after baking. Also, the tiny addition of flour in the egg wash is a small trick I picked up to help the coating cling — it’s subtle but effective.
This recipe is forgiving. When I test it for the blog, I make small changes—using a rack one day, flipping halfway the next—and both approaches worked. The rack gives slightly better browning; flipping gives more uniform color when a rack isn’t handy. Either way, the end result is dependable and crowd-pleasing.
Cooling, Storing & Rewarming
Cool completely before storing to avoid sogginess from trapped steam. Refrigerate in an airtight container for up to 3 days. For longer storage, freeze on a sheet pan until solid, then transfer to a freezer bag for up to 2 months.
Reheat from refrigerated: place on a sheet pan (use a rack if you have one) and warm in a moderate oven until heated through and re-crisped. From frozen: bake on a sheet pan from frozen, checking earlier than you think; you may need additional time to cook through. Avoid microwaving for best texture—microwaves make the coating soft.
Questions People Ask
- Can I use chicken thighs? You can, but cut them into uniform strips and adjust baking time; thighs have a different fat content and may need more time to reach an even temperature.
- Can I make the sauce ahead? Yes. The mayo–Dijon–honey sauce keeps in the fridge for several days; give it a quick whisk before serving.
- Are these safe for kids? Yes. The flavors are mild but tasty; serve the sauce on the side for dipping so children can control how much they want.
- How do I know when chicken is done? Look for a golden coating and no pink inside; the tender size here usually finishes in 15–17 minutes. If you prefer, check with an instant-read thermometer—165°F (74°C) is the safe internal temperature for chicken.
Before You Go
These Crispy Oven Baked Chicken Tenders are the kind of recipe you’ll come back to: straightforward technique, flexible timing, and reliable flavor. Toast the panko if you can; it makes the texture sing. Keep the sauce simple and fresh, and don’t overbake. If you try this, let me know how you served them—I’m always collecting favorite dips and sides.

Crispy Oven Baked Chicken Tenders
Ingredients
Ingredients
- ?2 cupspanko breadcrumbs
- ?1 pound and 1/2 chicken tendersThey're called mini chicken fillets in the UK. Or boneless skinless chicken breasts cut into 3/4-inch strips about 12 strips total
- ?1 egg
- ?1 tablespoonmayonnaise
- ?1 tablespoonDijon mustard
- ?1 tablespoonall-purpose flour
- ?1 teaspoonsmoked paprika
- ?1 teaspoongarlic powder
- ?1/2 teaspoonsalt
- ?1/4 teaspoonground black pepper
- ?1/2 cupmayonnaise
- ?2 tablespoonsDijon mustard
- ?1 tablespoonhoney
- ?1/2 teaspoonsalt
Instructions
Instructions
- Preheat the oven to 375°F (190°C). Lightly spray the panko breadcrumbs onto a sheet pan in an even layer.
- Toast the panko in the oven at 375°F (190°C) for 7–8 minutes, stirring or shaking the pan once halfway through, until the crumbs are golden. Remove from the oven and set the toasted panko aside to cool slightly.
- Increase the oven temperature to 400°F (200°C). Line a second sheet pan with parchment paper or foil; optionally place a wire rack on the sheet pan.
- In a shallow bowl, whisk together the egg, 1 tablespoon mayonnaise, 1 tablespoon Dijon mustard, 1 tablespoon all-purpose flour, 1 teaspoon smoked paprika, 1 teaspoon garlic powder, 1/2 teaspoon salt, and 1/4 teaspoon ground black pepper until smooth and well combined.
- Put the toasted panko into a shallow dish for dredging.
- Working one piece at a time, dip each chicken tender into the egg mixture to coat completely, let excess drip off, then press the tender into the toasted panko so the crumbs adhere. Transfer the breaded tenders to the prepared sheet pan or rack, spacing them so they do not touch.
- Bake the breaded tenders in the 400°F (200°C) oven for 15–17 minutes, depending on size, until the coating is golden and the chicken is cooked through. If not using a rack, flip the tenders once about halfway through baking for more even browning.
- While the tenders bake, whisk together 1/2 cup mayonnaise, 2 tablespoons Dijon mustard, 1 tablespoon honey, and 1/2 teaspoon salt in a small bowl until smooth.
- Remove the tenders from the oven and let them rest a couple of minutes, then serve with the prepared mayo–Dijon–honey sauce.
Equipment
- Oven
- Sheet Pan
- Parchment Paper or Foil
- Wire Rack
- Shallow Bowl
- Shallow Dish
- Whisk
Notes
If you make these chicken tenders, but don’t want to serve them right away. Just spread them on a sheet pan, and leave them in the oven at a low temperature around 250°F (120°C) until you’re ready to serve.